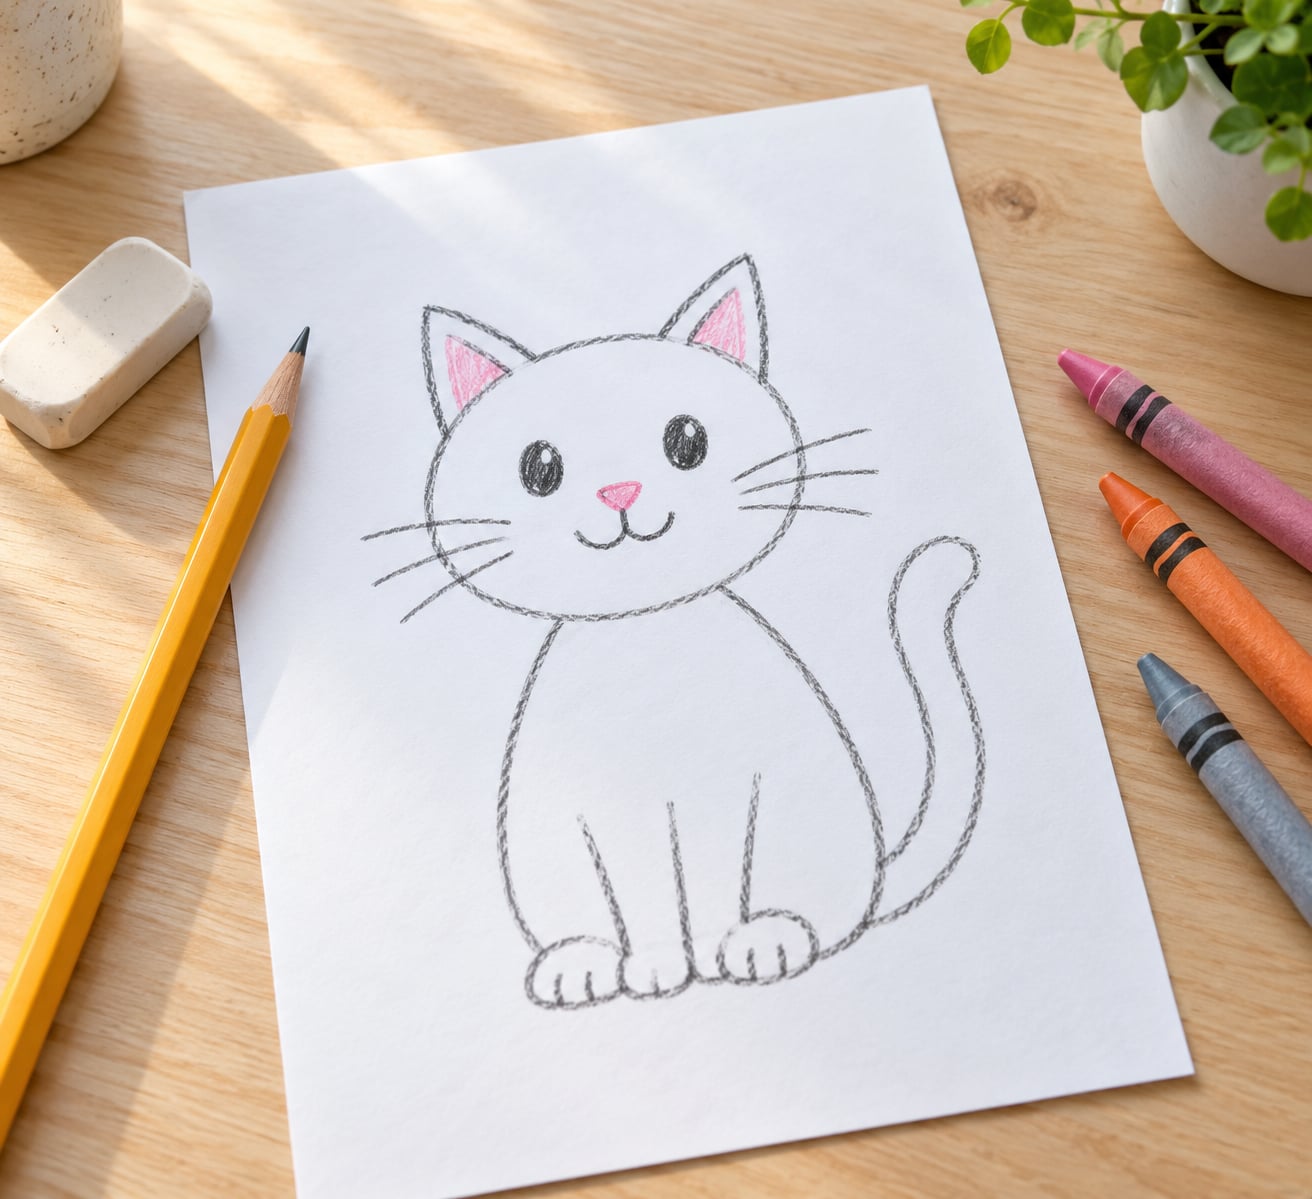
A cat drawing for kids is built from five shapes: a circle for the head, two triangles for the ears, an oval for the body, four small legs, and one long curved line for the tail. Draw them in that order and a child can finish a friendly cat in about ten minutes with nothing more than a pencil and some crayons.
It is genuinely one of the easiest animals to draw because nothing needs to be perfect. Every line is either straight or a gentle curve, and nothing is hidden behind anything else. The trick is going slowly, one shape per step, so nobody ends up erasing the whole page.
Table of Contents
- 1What You Need
- 2How to Draw a Cat Easy for Kids: Step-by-Step
- 3How to Draw a Cat Easy for Kids: Start With the Head
- 4Add the Body, Legs, and Tail
- 5Draw the Face and Fur Details
- 6Color the Cat and Add Finishing Details
- 7Common Mistakes
- 8Frequently Asked Questions
- 9How can I draw a cat easily?
- 10How do I teach drawing to a 4 year old?
- 11Why does my cat drawing look like a dog?
- 12What shapes do you need to draw a cat?
- 13Do kids need an eraser to draw a cat?
- 14Conclusion: Start With a Circle
What You Need
Nothing here needs buying. This is a lesson built from whatever is already in a kitchen drawer.
- White paper. Plain printer paper works. A cat drawn on a lined notebook page is fine too.
- A pencil. A regular #2 is best because the lines stay light and easy to change.
- An eraser. A white vinyl eraser beats a pink one because it rubs out without tearing the paper.
- Crayons or colored pencils. Orange, brown, grey, black and pink cover almost every cat a child will want.
- A fine marker, optional. Useful for outlining the finished drawing in a darker color, and for the whiskers.
- A reference photo, optional. A picture of a real cat on a phone makes the ear and tail shapes easier to copy.
Parents who worry about lost erasers or shreds of rubber ending up on the floor can skip the eraser entirely. The same cat works drawn with one crayon, and mistakes become part of the pattern instead of a problem. I tell kids to go around any line they do not like rather than scrub it out.
How to Draw a Cat Easy for Kids: Step-by-Step
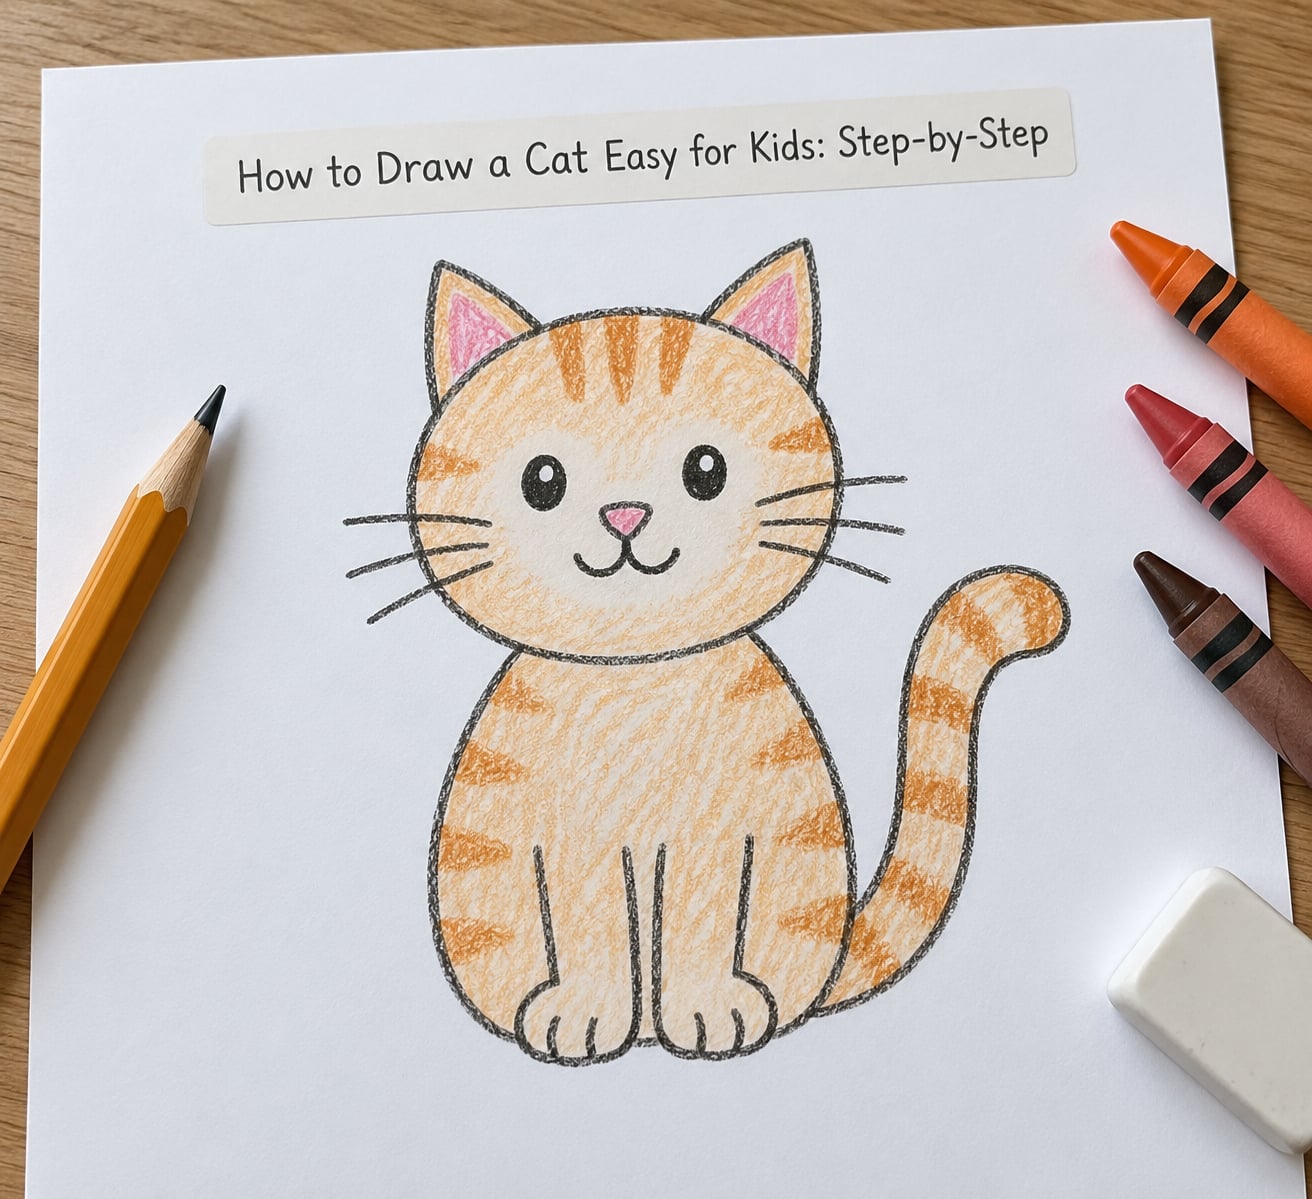
Start in the middle of the page and work outward from the head. The order matters: the head goes first because it sets the size of everything else, and a cat with a big head looks friendly while a cat with a small head looks like a mouse.
How to Draw a Cat Easy for Kids: Start With the Head
- Draw a circle near the top of the page. Make it light and about the size of a plum. A circle works because a cat’s head is round when it is facing you, and children already know how to draw one.
- Mark the middle of the circle. Lightly. One short line down the center gives a child a guide for putting eyes the same distance apart.
- Add two triangles on top. Sit each triangle on the circle’s edge with its point leaning slightly outward. Cats have tall pointed ears, and this one detail is what stops the drawing reading as a bear.
- Check the ears match. Hold the page up and look at it from across the table. If one ear is bigger or lower, erase it now while the circle is still clean. Symmetry is what makes a face look calm.
Add the Body, Legs, and Tail
- Draw an oval below the head. It should be a little wider than the head and touch it slightly, so the two shapes overlap instead of leaving a gap. A sitting cat gets a pear-shaped oval, wider at the bottom.
- Sketch a short line across the middle of the oval. This divides the body into a chest and a haunch. It looks like a stray pencil mark now and becomes the front leg line later.
- Add the front legs. Two narrow shapes running straight down from the chest, ending in little rounded paws. Keep them short. Long legs make a cat look like a table.
- Add the back legs. A wide curve on each side of the bottom of the oval, tucked in like a loaf. Curved haunches read as fur bulk.
- Draw the tail. Start at the lower side of the body and sweep it out in one long curve, then curl the tip back up. This is the single most important line in the whole drawing.
Draw the Face and Fur Details
- Add the eyes. Two dots inside the circle, the same distance from the middle line. For a cuter cartoon cat, make them closed happy curves instead, like two small arches.
- Draw the nose. A tiny triangle or a small V, centered on the middle line, about halfway between the eyes and the bottom of the head.
- Add the mouth and whiskers. Two small curves under the nose make an upside-down Y for a smiling cat. Then three short lines out from each side of the muzzle.
- Add fur marks. Two or three curved stripes across the head and body for a tabby, or a handful of round spots. Keep the spacing even and stop before the drawing turns muddy.
A quick read-aloud while the picture dries: a cat’s nose prints and a cat’s whiskers help it find its way in the dark, which is why cats can navigate a room at night without bumping into anything.
Color the Cat and Add Finishing Details
- Pick the colors. Orange tabby, grey with white paws, black with a pink nose, cream with brown ears. Two or three colors is plenty.
- Color inside the lines. Crayons first, markers over the top if the child wants them bold. Turning the paper slightly while shading keeps the hand moving away from the outline.
- Go back over the outlines. A black fine liner on the head circle, ears and tail makes the whole drawing pop.
- Add a background and a name. A cushion, a window, a patch of grass, then the cat’s name in the corner. Naming it is the moment most kids remember.
If your child is around four years old, stop after step 9 and skip the fur marks. That shorter version takes five to seven shapes and finishes faster than most attention spans last. Older children can add a second cat, a ball of yarn, or a pattern on the cushion once the first one works.
Common Mistakes
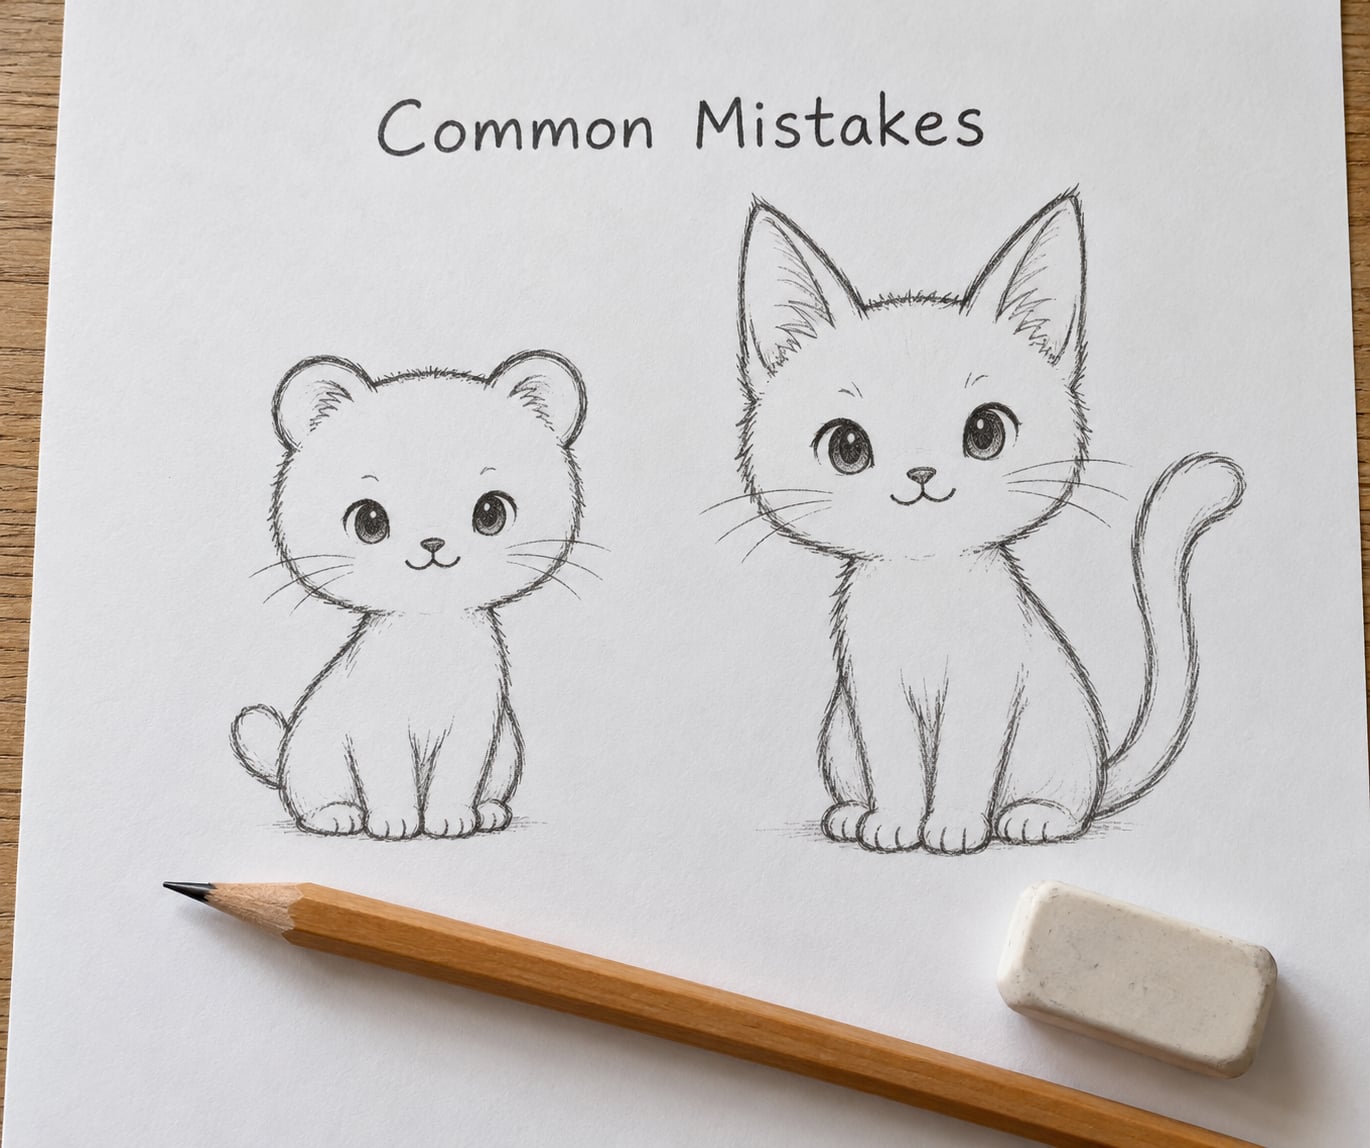
Almost every bad cat drawing is one of six fixable problems. Here is what went wrong and which line to change.
- It looks like a dog. Round floppy ears and a short fat tail are the giveaway. Erase the ears and rebuild them as tall triangles, then add a long thin curved tail. Whiskers help more than you would expect.
- The ears are uneven. One sits higher or points outward more than the other. Redraw them together in one light stroke and check from arm’s length. Symmetrical ears fix most “off” faces.
- The head is too small. Enlarge the head circle until it is about two-thirds the width of the body. Cartoon cats with big heads always read as cuter.
- The face is crowded in the middle. Move the eyes apart to the edges of the circle and drop the nose lower. Features need empty paper between them.
- The tail disappeared. It got drawn behind the body or stopped at the hip. Redraw it starting outside the body outline so it is visible from the first stroke.
- Coloring spills over the lines. Crayons pull toward the outline. Have the child rest the crayon tip on the line and turn the page slowly, coloring the middle of the shape last.
One practice tip beats all the others: draw the cat yourself first, badly, on scrap paper. Children relax the moment they see an adult making mistakes, and the finished drawing stops feeling like a test.
Frequently Asked Questions
How can I draw a cat easily?
Draw five shapes in this order: a circle for the head, two triangles for the ears, an oval for the body, four small legs, and one long curved line for the tail. Add the eyes, a small nose, a smiling mouth and whiskers last. Every line is straight or a gentle curve, so there is nothing difficult to get wrong, and the whole thing takes about ten minutes.
How do I teach drawing to a 4 year old?
Sit on the floor beside them and draw the circle first on your own paper so they can copy it. Say one shape at a time, then pause and let them draw that shape before naming the next one. Stop at five or six shapes, which usually lands around the tail. Avoid correcting their lines; describe what you see instead, and finish by naming the cat together.
Why does my cat drawing look like a dog?
Three things cause it. Rounded ears instead of tall pointed triangles, a short thick tail instead of one long curve, and no whiskers. Change those three lines and the same drawing reads as a cat without starting over. Cats also have a smaller, rounder muzzle and shorter front legs than dogs, so shortening the legs helps too.
What shapes do you need to draw a cat?
A circle for the head, two triangles for the ears, an oval or pear shape for the body, four small rounded shapes for the legs and paws, and one long curved line for the tail. The face uses a small triangle for the nose, two dots or arches for the eyes, and short straight lines for whiskers. Twelve to fifteen lines in total.
Do kids need an eraser to draw a cat?
No. Draw the entire cat with one crayon and mistakes simply become stripes or spots. Kids who lose the eraser or erase too much can finish without it. If you do have one, a white vinyl eraser is gentler on paper than a pink pencil eraser, which tends to smudge the pencil lines you still need.
Conclusion: Start With a Circle
That is the whole method. One light circle for the head, two triangles on top, an oval below, four short legs, one long curved tail, then a face and whiskers. Learning how to draw a cat easy for kids comes down to adding one shape at a time and resisting the urge to fix anything that is not perfectly straight.
Give the drawing a name, hang it up, and let the next one be different. Most children who finish a cat go on to draw a dog within a week, because they now trust the shapes.