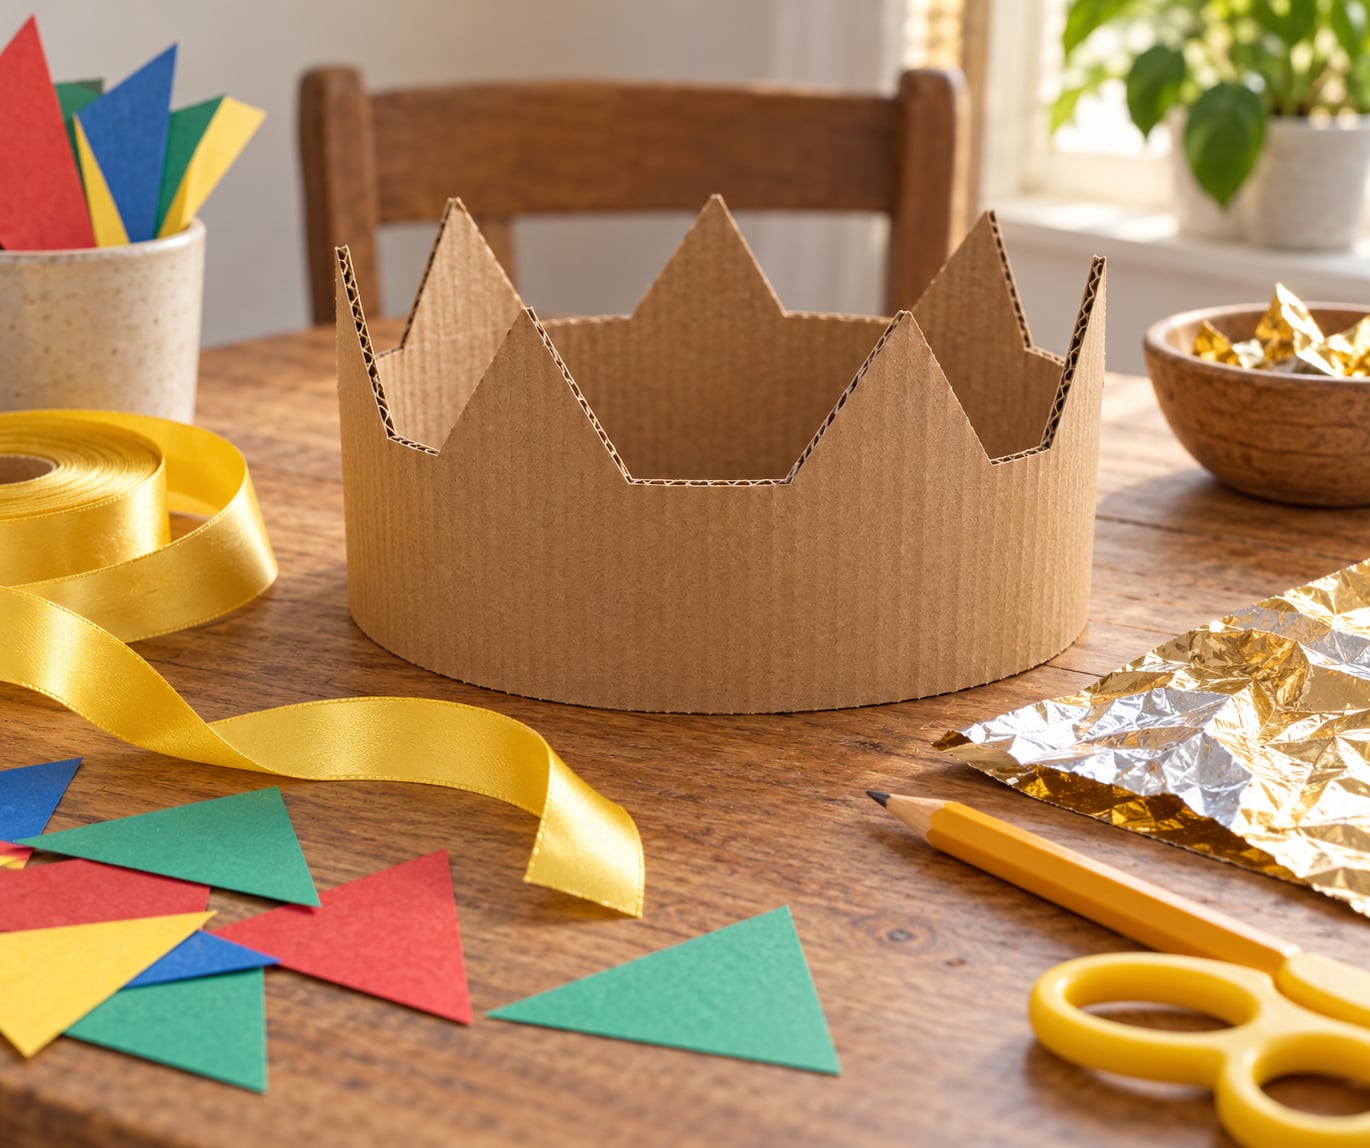
If you want to know how to make a crown from cardboard, the short answer is: measure the wearer’s head, trace a band with points onto corrugated cardboard, cut it out, glue the ends together, and decorate. The whole thing takes roughly 20 minutes once the cardboard is on the table, and the trick that makes it look like a real crown rather than a paper hat is scoring the fold line at the base of each point before you fold it.
I’ve made these with my kids more times than I can count, and the version below is the one that survives actual play. It uses the same steps whether you are making a crown from a cereal box, a packing envelope, or a sheet of corrugated board.
Table of Contents
- 1What You Need
- 2How to Make a Crown from Cardboard, Step by Step
- 3Measure and Cut the Base of a Cardboard Crown
- 4Make the Crown Points
- 5Fit and Secure the Crown
- 6Decorate the Cardboard Crown
- 7Let the Decorations Dry and Enjoy the Crown
- 8Common Mistakes
- 9Frequently Asked Questions
- 10What type of cardboard is best for making a crown?
- 11Do I need a cardboard crown template?
- 12How do I make the crown fit a child’s head?
- 13What decorations can children use on a cardboard crown?
- 14How can I make a cardboard crown stronger?
- 15Make a Crown Your Child Can Play In
What You Need
You can make a crown from cardboard with very little, and most families already have the essentials lying around.
- Corrugated cardboard from a shipping box, cereal box, or packing envelope. This is the sturdier choice because it holds a point upright instead of folding flat.
- A pencil and ruler for marking the band and spacing the points evenly.
- Scissors or a craft knife plus a cutting mat or scrap cardboard to protect the table.
- Glue – a glue stick for young children, white PVA glue or tape for anything sturdier.
- A measuring tape or a strip of paper to size the band to the head.
- Decorating supplies – crayons, markers, paint, glitter, stickers, ribbon, foil, or paper shapes.
Corrugated board is my default because it holds shape, but a cereal box works fine for a lighter crown. If the wearer is under about eight, keep the craft knife out of it and use blunt-tip scissors, with an adult nearby.
How to Make a Crown from Cardboard, Step by Step
Before you start, lay down a sheet of craft paper or a couple of old magazines to protect your work surface. Cardboard dust and glitter end up everywhere otherwise, and a cutting mat under the board stops the scissors from marking the table. Set out all your decorating supplies first too, because glue dries faster than most children can finish colouring.
Measure and Cut the Base of a Cardboard Crown
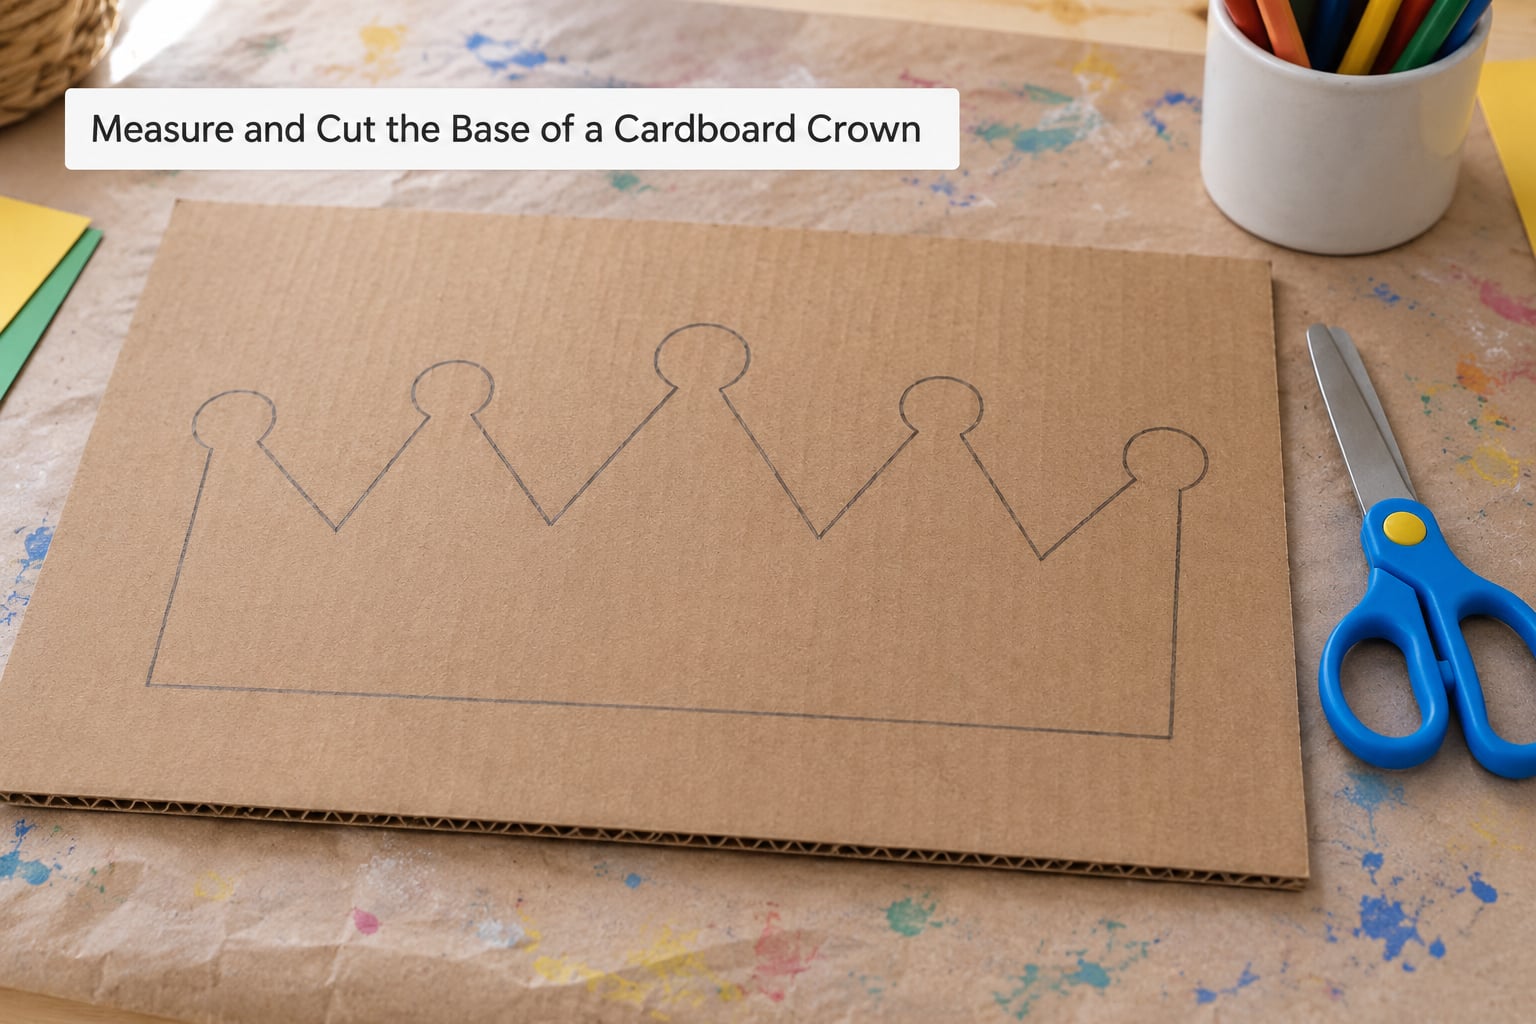
First, measure the head. Wrap a strip of paper around the widest part of the head, just above the eyebrows and ears, and mark where the two ends meet. Add about 2 cm of extra length for the overlap that gets glued.
Now draw the band on the cardboard. Lay a long straight edge along the bottom of the board, mark the measured length, then draw a row of five points above it. Keeping the bottom edge perfectly straight is what stops the finished crown from sitting crooked.
Cut along the outline with an adult handling the scissors. You’ll end up with a long strip with a zigzag or pointed top and a flat bottom. If you drew it on a shipping envelope, cut through both folded layers at once and you’ll have two matching bands in a single cut.
Make the Crown Points
Mark the points at even intervals before you cut them, because uneven spacing is the reason a homemade crown looks lopsided. A ruler helps; eyeballing doesn’t.
The next bit is the part most tutorials skip. Before you fold anything, score a line across the base of each point by running the blunt back edge of a knife or scissors along the line. Corrugated cardboard does not crease properly with your fingers, it just crushes, and points that have not been scored flop over the moment a child puts the crown on.
Fold each point back slightly along its scored line, then check that they are similar in height and that the cardboard is still intact. If one point tears a little, patch it from underneath with a small square of tape.
Fit and Secure the Crown
Hold the band up to the wearer’s head before gluing anything. It should sit just above the eyebrows and stay on with a slight wiggle, not a squeeze. Too tight and it leaves a mark and gets taken off within a minute.
Mark the overlap, apply glue along that section, and press the ends together. For a small child, a glue stick is enough. For an adult or an older child who wears it hard, run tape along the inside of the joint instead.
Reinforce the join from the inside with a strip of tape and let it set while you decorate. A crown whose seam fails after twenty minutes of pretend play is the single most disappointing outcome.
Decorate the Cardboard Crown
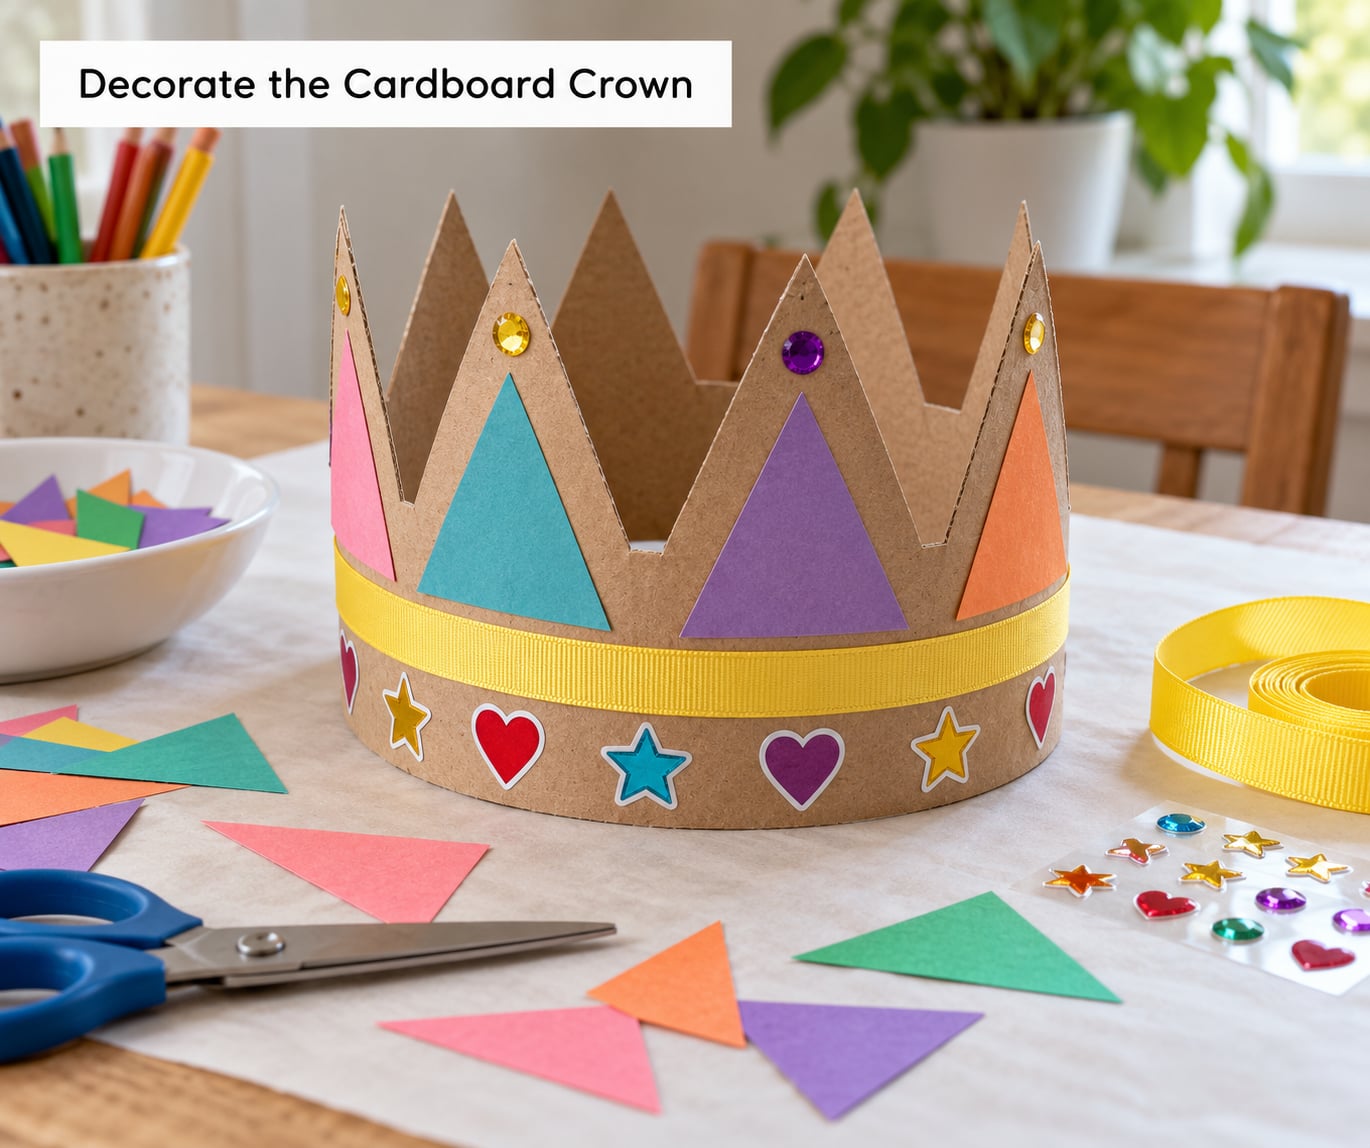
Crayons and markers are the easiest option and the least mess, and metallic or glitter markers make plain brown board look gold in seconds. Paint works well too, though it needs longer to dry and will feel slightly tacky if you rush it.
Stickers, foam shapes, and paper triangles glued along the bottom edge give the crown texture. For a gold look, cut squares of kitchen foil, crumple them lightly, and press them onto the band. Ribbon threaded through small holes at each side makes a closing tie and adds a little adjustability for different head sizes.
Skip tiny rhinestones and loose beads if the wearer is under three. They come off easily in a drawer and are a genuine choking hazard, so either use large wooden shapes or press the embellishments on with extra-strong glue.
Let the Decorations Dry and Enjoy the Crown
Glue needs a few minutes to grab, paint usually wants 15 to 30 minutes, and glitter or foam adhesive longer still. Press the decorations down and leave the crown flat on the table rather than standing it up, which stops the points from drooping while the glue sets.
To check it’s ready, tap the band gently at the seam. If it’s firm with no give, it will hold. Store the finished crown flat inside a book, in a dress-up box, or wrapped around a piece of card so the points don’t get knocked out of shape in a cupboard.
Common Mistakes
Most cardboard crown problems have a simple cause, and every one of them is fixable in a couple of minutes.
The crown is too tight. You measured too small or forgot the overlap. Add a centimetre of cardboard to the band before gluing rather than trying to stretch a finished crown.
The points flop over. You creased them with your fingers instead of scoring. Flatten the band, run a blunt blade along the base of each point, and fold again. A strip of tape behind each point fixes the stubborn ones.
The points are different heights. Mark the top of every point with a ruler and pencil first, before any cutting. Measure down from that line each time.
The seam comes apart. Common with glue stick on corrugated board, because the glue sits on the flutes rather than the surface. Wipe the join with a dry cloth, then use white PVA glue or tape on the inside.
Decorations slide off. Cardboard dust and grease on the surface stop glue from gripping. Wipe the band with a damp cloth, let it dry, and then decorate. Use tape on the back of larger pieces as extra insurance.
The board bends in the middle. It’s too thin for the span. Double it by gluing two strips together, or move to a thicker box panel.
A few habits make the rest easier. Choose thicker cardboard and simple, wide points over a complicated eight-point design. Let your child pick the colours and the decoration while you handle every cutting and gluing step, and you’ll get a crown they are actually proud of wearing rather than one they take off after five minutes.
Frequently Asked Questions
What type of cardboard is best for making a crown?
Corrugated cardboard from a shipping box is the best choice because it holds a fold without snapping and keeps the points upright. A cereal box works well for a lighter, smaller crown, and thick cardstock is fine if you want something delicate. Avoid single-sheet printer paper, which creases easily and goes floppy once it is on a child’s head.
Do I need a cardboard crown template?
You do not need one. Most people draw the band freehand with a ruler along the bottom edge, then mark five evenly spaced points. A printable template is useful if you want a specific style such as a zigzag band or a tiara, but the freehand version takes about the same time and fits any head size exactly.
How do I make the crown fit a child’s head?
Wrap a strip of paper around the widest part of the head, just above the eyebrows and ears, and mark where the ends meet. Add about 2 cm for the glued overlap. Hold the cut band up before gluing, since a crown should stay on with a slight wiggle rather than a squeeze.
What decorations can children use on a cardboard crown?
Crayons, markers, glitter and metallic paint pens, stickers, foam or paper shapes, and pieces of kitchen foil all work, and all of them are easy for small hands. Ribbon threaded through holes at the sides gives a tie closure. Leave off tiny rhinestones and loose beads for children under three, since they detach easily and are a choking hazard.
How can I make a cardboard crown stronger?
Score the fold line at the base of each point with a blunt blade so the points hinge instead of snapping, and add a small tape tab behind each one. Double the band by gluing two cardboard strips together, reinforce the seam inside with tape, and use white PVA glue rather than a glue stick, which grips poorly on corrugated board.
Make a Crown Your Child Can Play In
Start with the cardboard and the head measurement, then trace the band before anyone reaches for the scissors. That first ten minutes decides whether the finished crown actually stays on, and the scored fold lines decide whether the points stand up or flop.
Let your child choose the colours and the details, keep the cutting and gluing to yourself, and you will end up with something that survives a whole afternoon of pretend play. Once you’ve got the technique, the offcut from the first crown makes a perfect template for the next one.