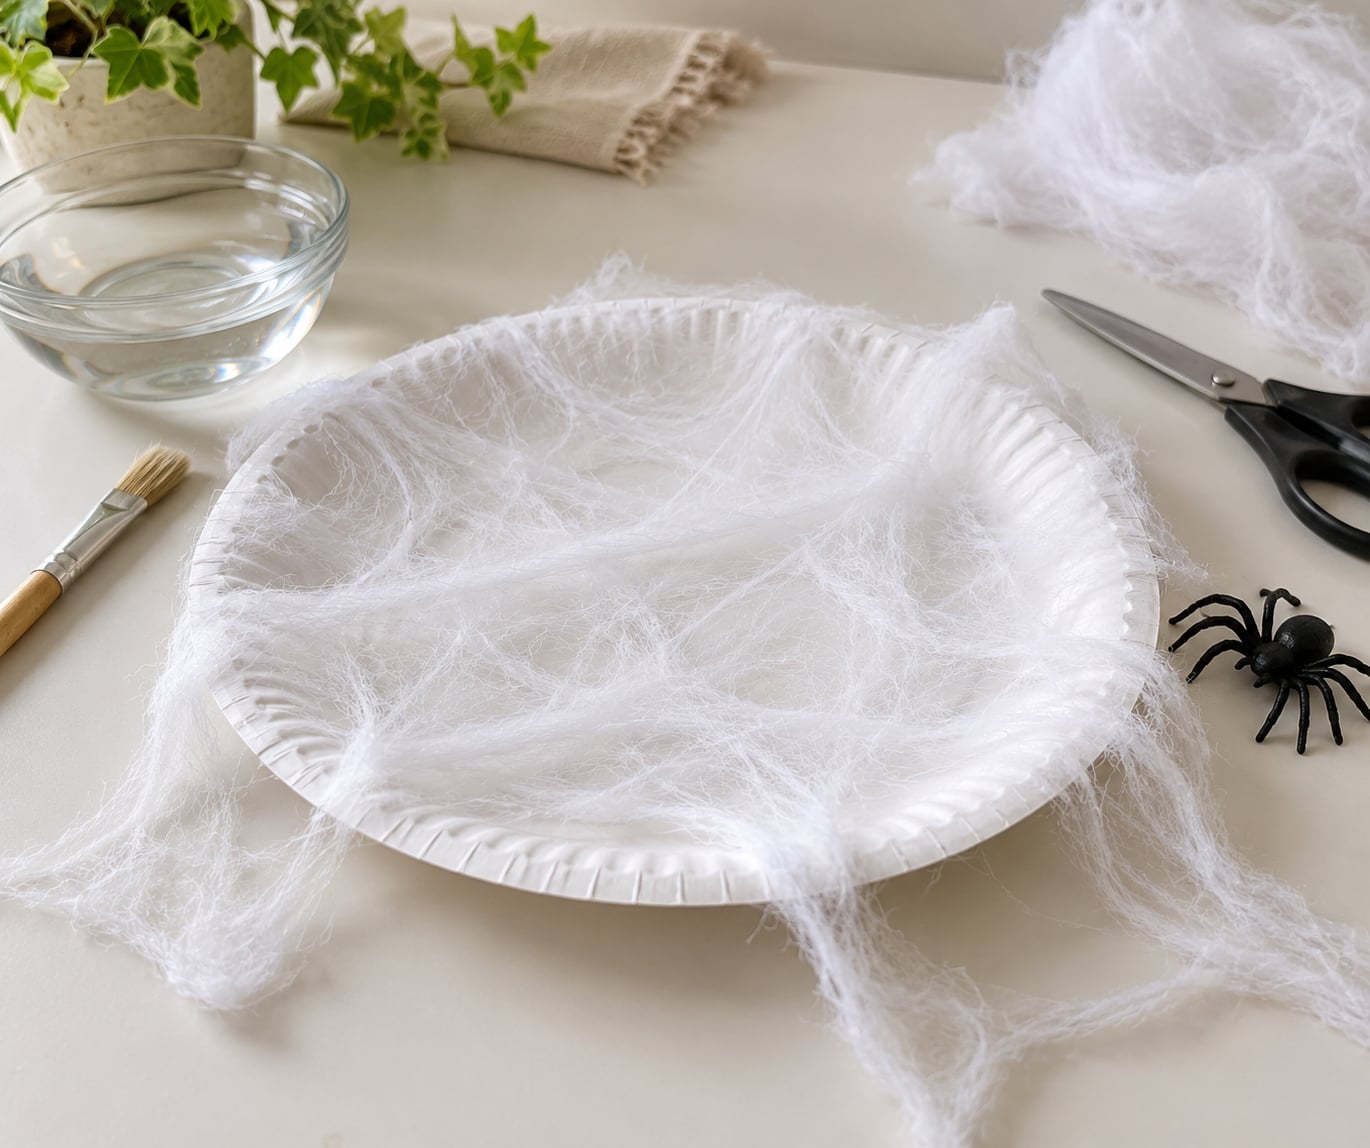
The quickest way to make fake spider webs for decorating is to stretch a few fibers of gauze or cotton batting over a paper plate and glue them down in curved lines. Twenty minutes, a handful of craft supplies, and you get a web that bends, flops and hangs like a real one.
The trick nobody tells you at the craft store is that real cobwebs are never stiff. They sag in the middle, catch light unevenly and look slightly grubby. Flat white string glued in neat spokes is the fastest way to make a room look cheap, and that is what I used to do for years before I switched to diluted glue and pulled fibers.
There are four decisions that decide whether your web looks good: what you stretch, how thin you spread it, whether you draw it curved or straight, and how you attach it to the wall. Get those right and the rest is just adding a few plastic spiders at the end.
Table of Contents
- 1What You Need to Make Fake Spider Webs
- 2Step-by-Step: How to Make Fake Spider Webs
- 3Step 1: Choose a Base and Plan the Web Shape
- 4Step 2: Mix the Fake Spider Web Material
- 5Step 3: Draw the Fake Spider Web Strands
- 6Step 4: Add and Secure Decorative Details
- 7Common Mistakes When Making Fake Spider Webs
- 8Frequently Asked Questions
- 9What can I use to make fake spider webs?
- 10How long does a fake spider web take to dry?
- 11How do I hang fake spider webs without damaging walls?
- 12Can I reuse fake spider webs the next year?
- 13Are fake spider webs dangerous to birds and bats?
What You Need to Make Fake Spider Webs
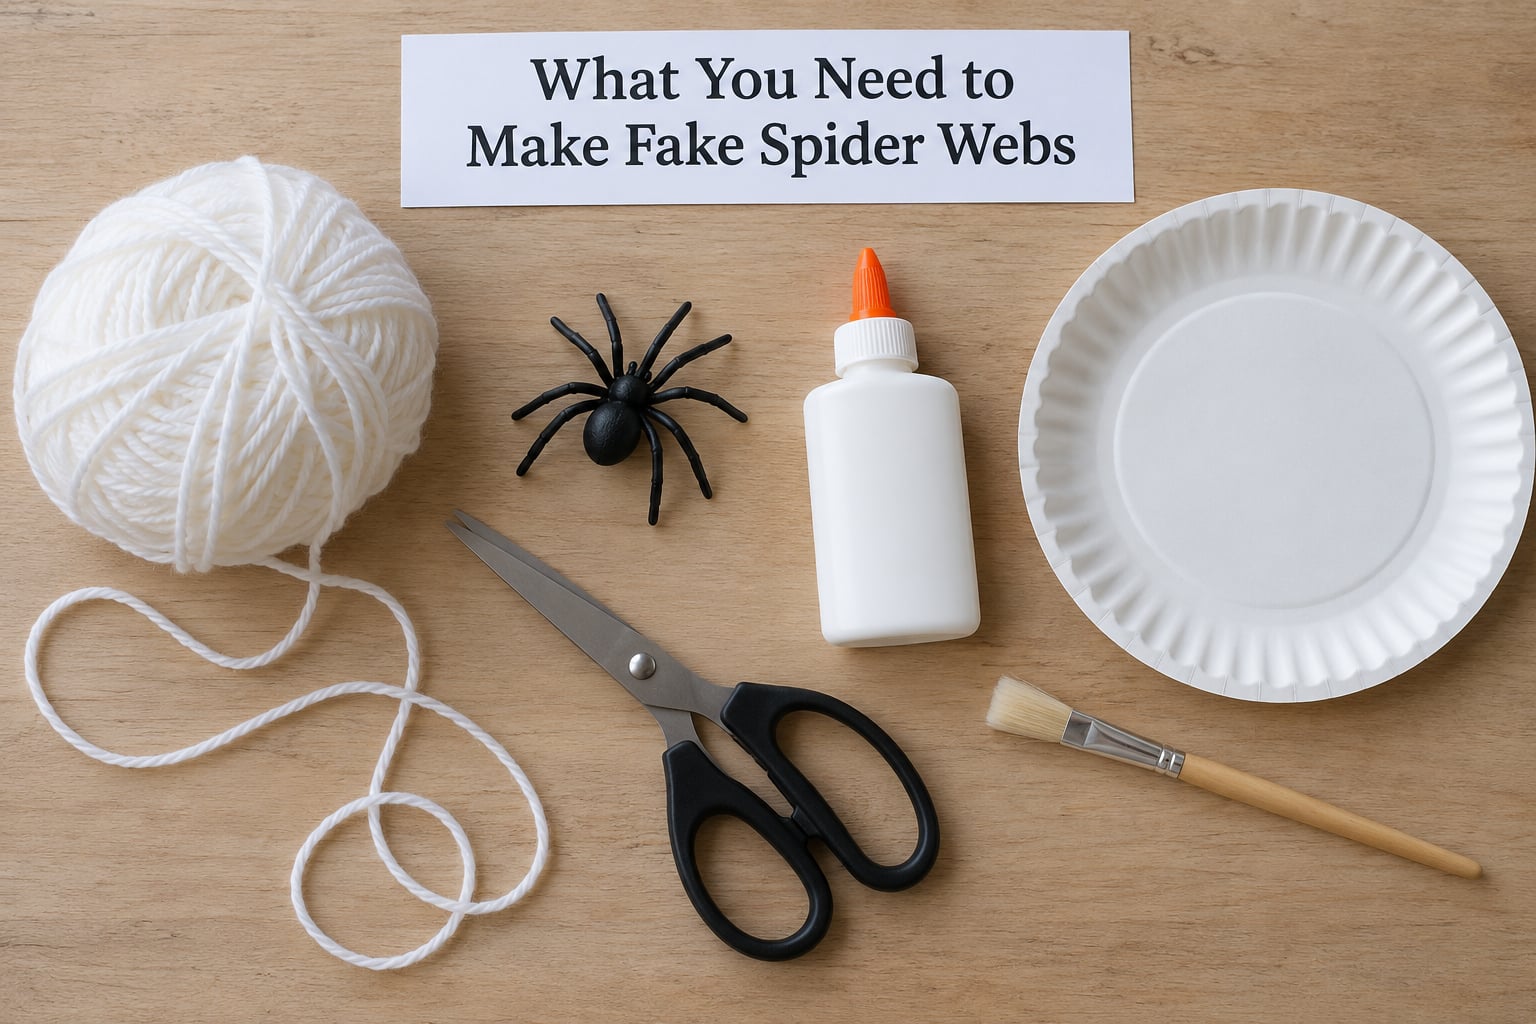
Almost everything on this list costs a few cents and most of it is already in a kitchen drawer. You need a base to build on, something stretchy to become the strands, thin craft glue, and a brush fine enough to control the lines.
- Base: a paper plate, a cardboard circle cut from a box, a window pane, a wall section, or an embroidery hoop or hanging frame.
- Web material: gauze or cheesecloth, polyester batting, cotton balls, white yarn, string or twine.
- Adhesive: white craft glue, plus water for thinning it. Mod Podge works well on paper, hot glue works on yarn and rope.
- Tools: scissors, a small craft brush or the cap of a glue bottle for drawing lines, and pencil for sketching.
- Optional: plastic spiders, glow-in-the-dark paint, glitter, tissue paper for a cocoon, and a battery tealight for backlighting.
A few substitutions work well. Beef netting from a butcher supply case is the most realistic large-scale material there is, and it holds up outdoors far better than cotton. For a kid-safe version, skip hot glue entirely and use white glue with craft putty or removable tape to hang the finished web.
Step-by-Step: How to Make Fake Spider Webs
Step 1: Choose a Base and Plan the Web Shape
Pick your base based on where the web will live. A paper plate works for a mantel or a party table, cardboard gives you sturdier strands for a doorway, and a window or wall section lets you draw directly in place with no lifting at the end.
Sketch the web with a pencil before any glue goes on. Most convincing spider webs are not perfectly even. Mark six or eight anchor points around the edge of a circle, add a center point, and sketch one ring of gentle arcs connecting the anchors at about half the radius. That single ring of arcs is what separates a web that looks real from one that looks like a bicycle wheel.
How do you know the layout worked? The arcs should bow outward slightly, and the spaces between them should be uneven. If every gap measures the same, nudge one or two anchors closer together.
Step 2: Mix the Fake Spider Web Material
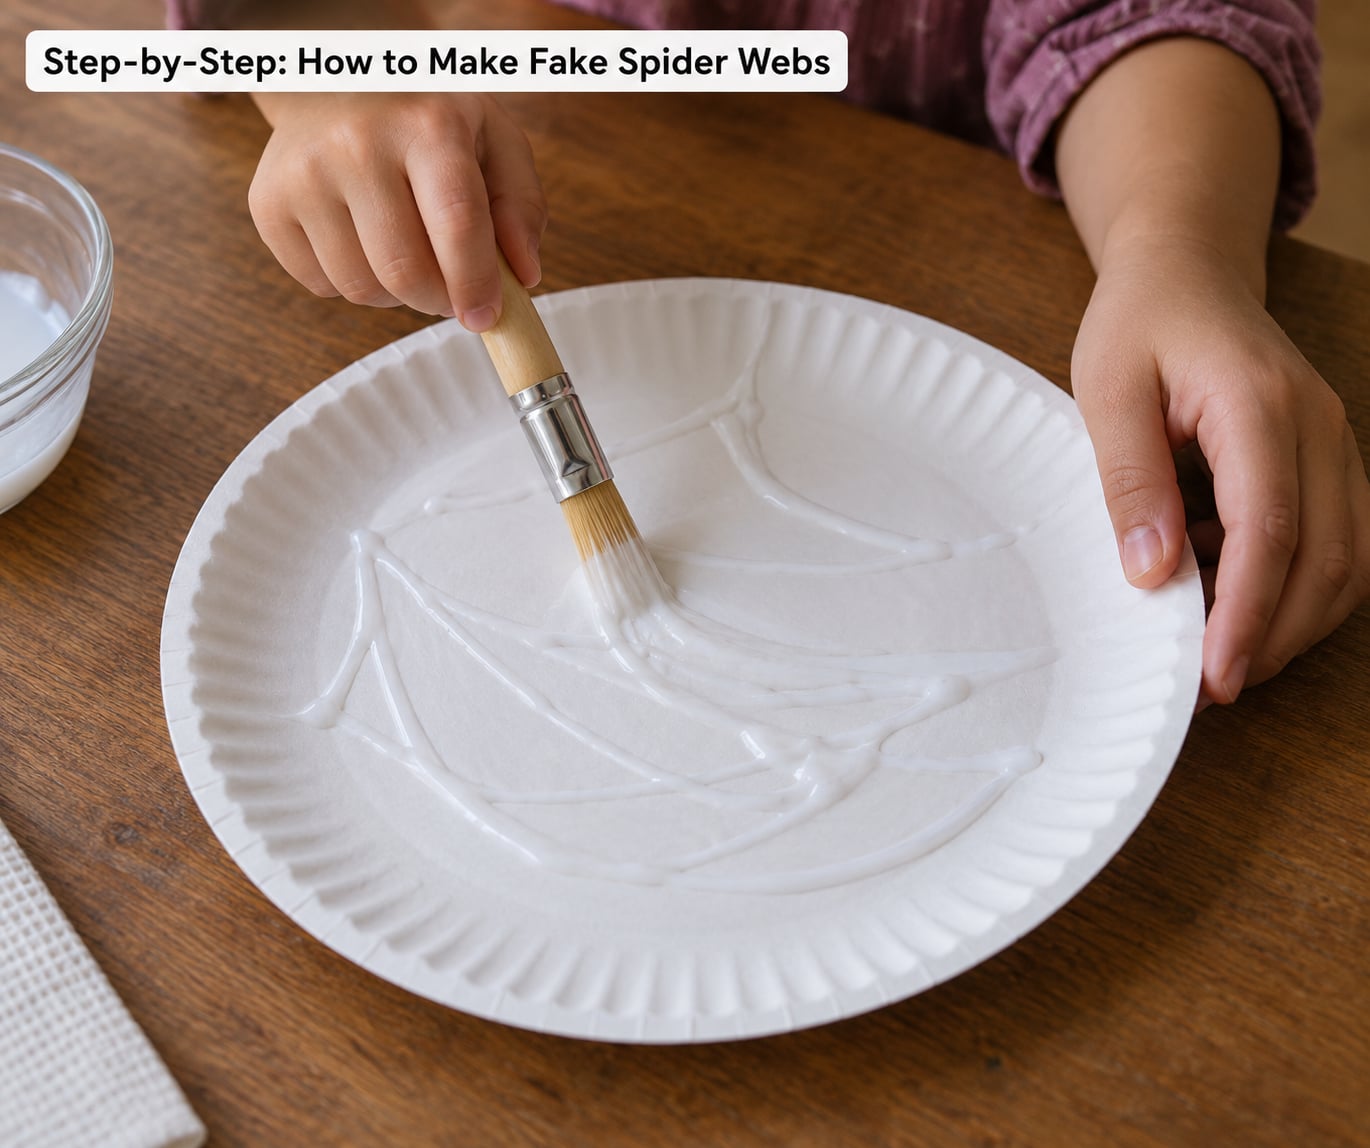
Thin white craft glue with water until it runs like thin cream, roughly two parts glue to one part water. Stir it slowly and let it sit a minute so the bubbles clear. That slightly sticky mixture is what holds the fibers to the base and gives the finished web a faint sheen instead of a hard gloss.
For young children, skip the glue mixture entirely and use the fiber dry. Tease apart polyester batting or a cotton ball with your fingertips until it separates into a wide, gauzy cloud, then press the wisps onto a plate with a dot of washable glue in the middle only. The result is softer, safer and still convincing at small sizes.
You can tell the mixture is right when a brush dipped in it leaves a thin trail rather than a fat bead. A bead takes an hour to dry and stays stiff, which is exactly the problem you are trying to avoid.
Step 3: Draw the Fake Spider Web Strands
Start at the center point and pull the web material outward toward your first anchor. Stretch gauze or batting as you go, since tension is what creates the gauzy, uneven look of a real web. Push the end down into the wet glue and hold it a few seconds.
Then connect the anchors with curved strands. Work from the center ring outward, one ring at a time, letting each ring set briefly before adding the next. Bend every line gently inward as you draw it, which creates the sagging arcs that make the web look weighty rather than drawn.
Add a few loose strands that stop short and trail off. Real webs always have broken threads hanging down, and those trailing ends are what kill the store-bought look. Keep the whole web sparse: six to ten strands looks convincing, thirty looks like glue.
Step 4: Add and Secure Decorative Details
Let the web dry completely before you move it, which takes two to four hours indoors on a plate or cardboard base. Paper dries faster than fabric, so plan around the slower option if you are making cheesecloth webs.
Glue plastic spiders into the strand intersections rather than on top of them, so they look caught instead of placed. For a giant spider nest, wrap glue-soaked yarn around a water balloon in overlapping loops, pop and peel the balloon out once it dries, and glue on a few spiders and a tissue-paper egg sac.
Hang the finished web with removable tape, craft putty or adhesive hooks rather than push pins into paint. For outdoor display, glue the anchor points to wood or masonry instead of siding, and check it after the first gust of wind.
Common Mistakes When Making Fake Spider Webs
The glue is watery and the strands slide around. Your mix is too thin, or you are moving the web before it sets. Thicken it with more glue and hold each strand down for a few seconds instead of one.
The web dries stiff like cardboard. Undiluted glue is the culprit. Real cobwebs move in air, so aim for a thin coat and stretch the fibers before you lay them down.
Strands keep snapping. You pulled the gauze or batting too hard, or the fibers were compressed in the package. Open up the fiber mass first and use gentler tension on the outer ring.
The web looks too dense or too perfect. Even spacing is the giveaway. Skip two or three strands, vary the gap sizes, and add short broken strands that dangle loose.
The web will not stay attached to the wall. A cardboard or plate web carries weight, and drywall or paint will not hold it for long. Mount the web on a frame first, then hang the frame, or use a hot glue dot at each anchor point pressed firmly for ten seconds.
An outdoor web sags or collapses in wind. Cotton batting and gauze are not built for weather. For anything larger than a few feet outdoors, switch to string, twine or beef netting stretched tight, and anchor every corner.
Worried about birds and bats outdoors. This is worth taking seriously. Loose fiber and string outdoors can entangle wildlife, so never stretch fiber webs across open air. Keep large outdoor webs as tight, thin lines rather than fuzzy strands, and check them before dark.
Frequently Asked Questions
What can I use to make fake spider webs?
Gauze or cheesecloth gives the most realistic result because it stretches into uneven, gauzy strands. Polyester batting separates into fine fibers and is easier for small hands, while white yarn, twine or string works best for large outdoor webs. For large outdoor displays, beef netting from a butcher supply case is the most durable option and stays up through rain and wind.
How long does a fake spider web take to dry?
A paper plate web dries in about two hours indoors, while a gauze or cheesecloth web usually needs three to four hours. The glue mixture should feel completely dry to a light touch with no tackiness before you hang it. If you are in a hurry, set the web near a fan or a hair dryer on the cool setting for a few minutes.
How do I hang fake spider webs without damaging walls?
Use removable tape, craft putty or adhesive hooks rather than push pins, which leave holes and can chip paint. For anything with real weight, mount the web on a cardboard circle or a wooden hoop first, then hang the frame with two hooks. Clean any residue with warm water and a little dish soap while it is still fresh.
Can I reuse fake spider webs the next year?
Yes, as long as you store them properly. Paper and cardboard webs can be flattened between two sheets of parchment paper and kept in a box or drawer away from humidity. Fiber and yarn webs should be rolled loosely rather than folded, since a sharp crease will snap the strands. Airtight containers prevent dust and moths from getting into any natural fiber.
Are fake spider webs dangerous to birds and bats?
Loose fiber stretched outdoors can entangle birds and bats, which is a real risk in areas where these animals roost or forage at dusk. Keep outdoor webs as tight, thin lines of string, twine or netting rather than fuzzy strands, attach every anchor point firmly, and take the decoration down before nightfall. Nothing should be left where an animal could fly into it.
Start with the paper plate web tonight. Mix glue and water two to one, pull a small cloud of batting apart, draw six curved strands between uneven anchor points, and let it dry on the table. Once you have one that hangs and flops properly, scale the same pattern up to a doorway or switch to gauze for the realistic look.