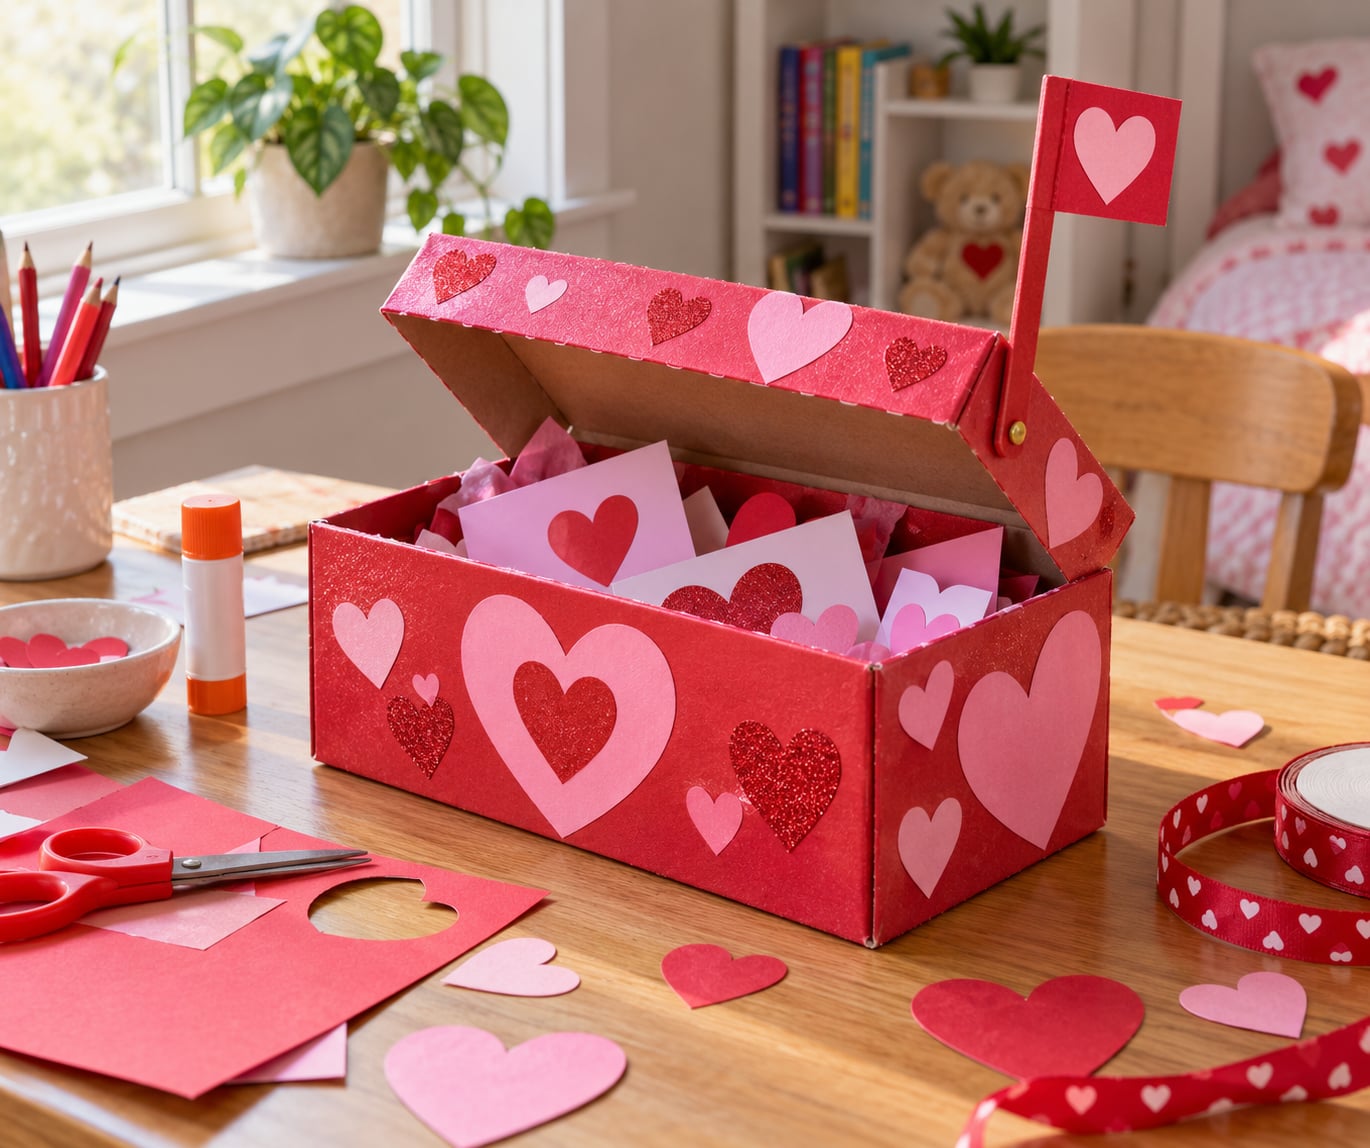
A Valentine mailbox is a shoebox with a mail slot cut in its lid, covered in Valentine-colored paper and decorated so a child can drop cards, notes and small treats inside. To build one, mark and cut a level slot, reinforce the cut edges, cover or paint the box, add the child’s name, and set the mailbox out for the exchange. Budget about 30 to 45 minutes.
The version that survives the trip home from school is the one with a reinforced hinge and a wide slot. This guide covers both, plus a tape-only route for classrooms that ban glue, and a no-cutting version for kids too small to be near a utility knife.
Table of Contents
- 1What You Need
- 2Step-by-Step: How to Make a Valentine Mailbox from a Shoebox
- 31. Prepare and Cover the Shoebox
- 42. Mark and Cut the Mail Slot
- 53. Add the Mailbox Flag
- 64. Decorate the Front
- 75. Check the Mailbox and Add a Label
- 86. Add Finishing Details
- 97. Use the Finished Mailbox
- 10Common Mistakes
- 11Tips for a Sturdy Valentine Mailbox
- 12Frequently Asked Questions
- 13What size shoebox works best for a Valentine mailbox?
- 14Can toddlers make a Valentine mailbox from a shoebox?
- 15How can I make the mail slot without cutting through the lid?
- 16What materials can I use instead of construction paper?
- 17How can I use the shoebox mailbox for a classroom Valentine exchange?
- 18Conclusion
What You Need
Lay everything out before the first cut, because a half-finished shoebox with wet glue is a sticky mess you will be cleaning up for weeks. Most families already own every item on this list.
- One empty shoebox with a working lid. A standard adult shoe box holds a full class set of cards; a child’s shoe box or a hat box is easier for small hands.
- Three or four sheets of cardstock or heavy construction paper for covering the base and the lid.
- Craft glue or double-sided tape. Masking tape works in a pinch, and patterned duct tape gives the mailbox a different look entirely.
- Scissors, a ruler, a pencil and an adult-sized utility knife for the slot.
- Decorations: crayons, markers, stickers, paper hearts, ribbon, pom poms, googly eyes.
- Optional extras: paint and a small brush, tissue paper, a printed name label, felt shapes.
Covering paper is not decoration, it is structure. Without it, glue soaks into the corrugation and marker lines bleed through to the other side.
If you have no shoebox, the same method works on a cereal box, a hat box, a tissue box or a plastic wet-wipe container with a flip top. Finding an empty box with a lid that still swings open is the part that trips people up, so check before you decorate anything.
Safety note: an adult makes the slot cut. Set the box on a cutting mat or a flattened piece of cardboard, cut away from your body with a fresh blade, and put the knife in a drawer before anyone starts decorating.
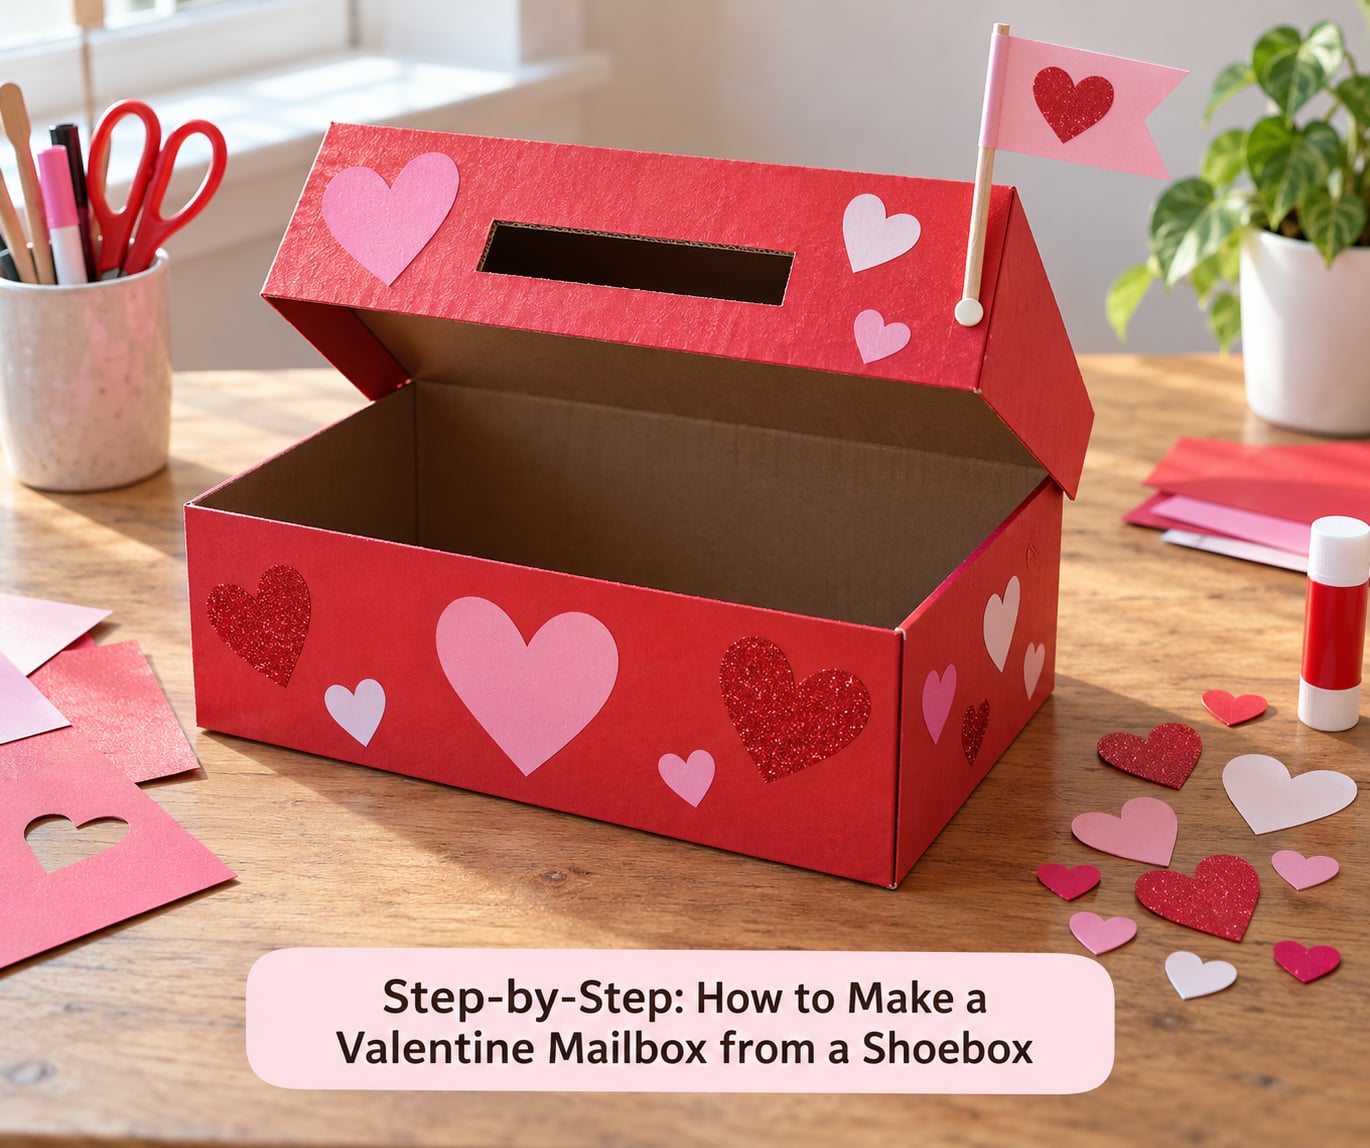
Step-by-Step: How to Make a Valentine Mailbox from a Shoebox
1. Prepare and Cover the Shoebox
Wipe the dust off the box and decide which panel faces front. I use the long side, because it leaves room for a name and decoration without crowding anything.
Cover the base and the lid separately. Lay the paper face down, set the box in the center, fold the sides up, mitre the corners, and trim the overhang with scissors. Repeat for the lid, trimming a half inch wider so the lid looks deliberate rather than pinched.
Paint works too. Use tempera or thin acrylic, two coats, and a hairdryer on low to speed up a thick coat.
2. Mark and Cut the Mail Slot
A good mail slot is about half an inch tall and four to five inches long, centered on the lid with an inch of cardboard to spare on every side. Cards slide through at that size. Make it much smaller and the mailbox feels blocked before a single Valentine arrives.
Measure and mark the line with a pencil and ruler, then have an adult score it: press the tip of the utility knife along the pencil line to compress the corrugation without cutting through. Scoring first is what keeps the cardboard from tearing. Then cut the slot with the blade on a firm flat surface.
Run a strip of tape along each long edge of the cut, inside the lid. That single step is why the hinge survives a week of card deliveries.
Prefer no cutting at all? Fold two flaps inward on the top so they meet in the middle, score the folds, and tape them down. Children can make the whole version themselves.
3. Add the Mailbox Flag
Cut a small rectangle for the post and a triangle or square for the flag itself from scrap card. Glue both onto a thicker card strip so the flag does not flop over.
Attach it near the back edge of the lid on one long side, leaving a finger’s width of clearance from the hinge so the lid still swings all the way open. Test that it moves up and down before you set it down.
4. Decorate the Front
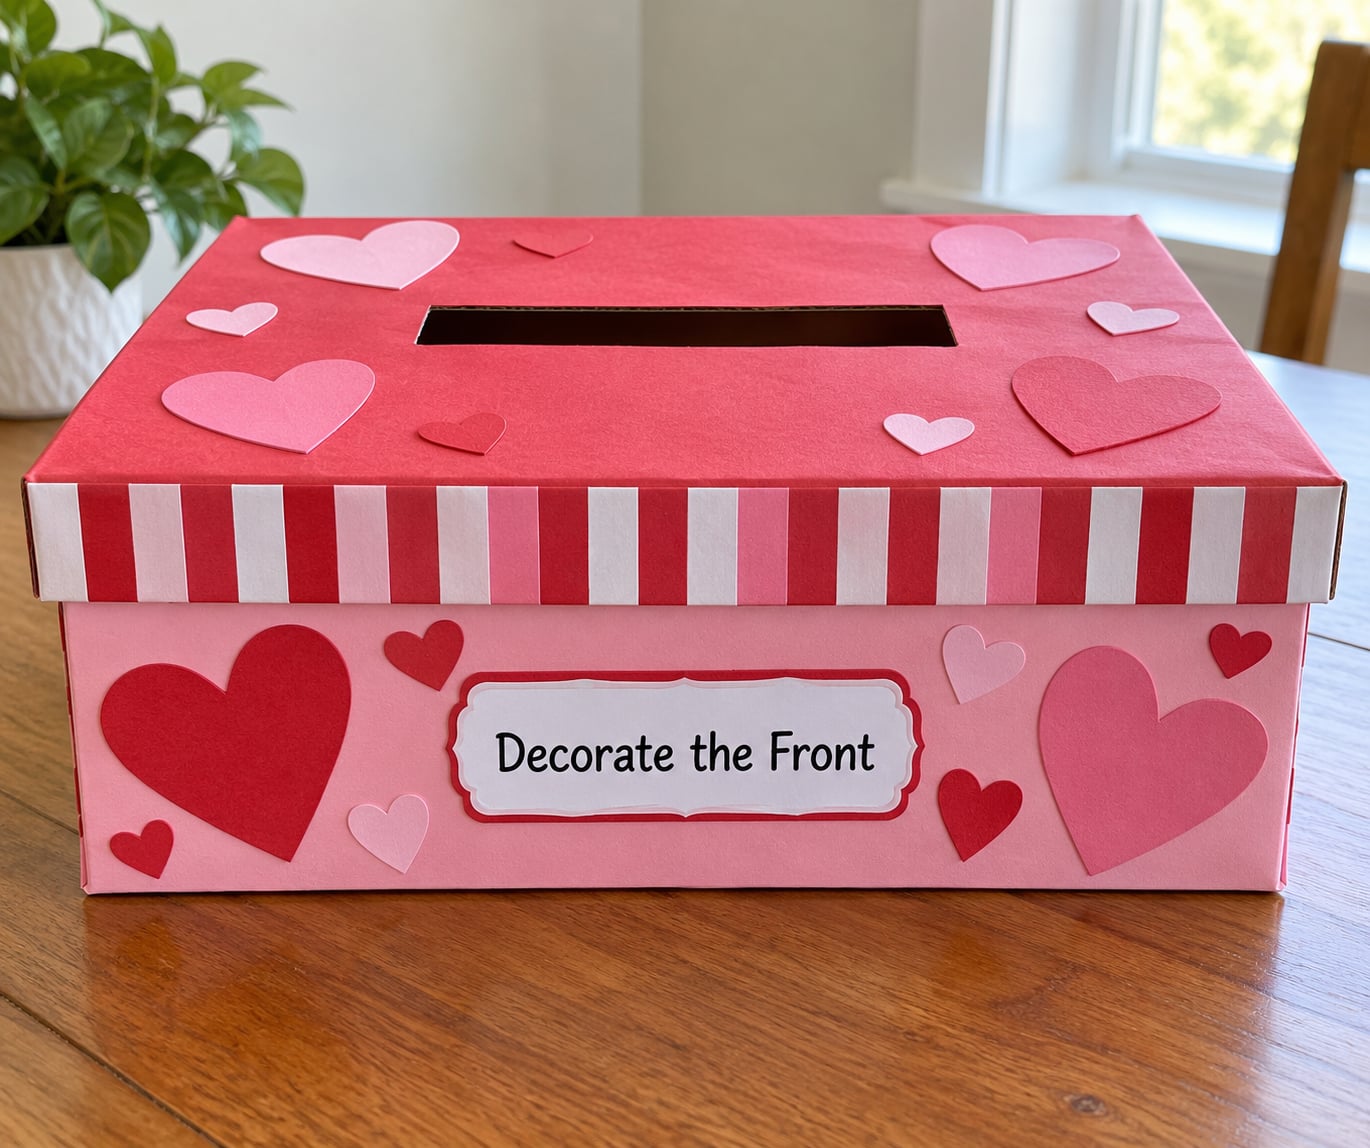
Now for the fun part. Cut hearts from paper and layer them from largest to smallest, add a striped border along the bottom edge, or tape a strip of tissue paper across the front and let children collage on top. Fingerprint hearts and handprints work well here, and so do drawn monsters if that is the theme.
Give each child one direction so the box stays readable instead of turning into a wall of stickers. Printable labels work when hand-lettering is not an option.
5. Check the Mailbox and Add a Label
Test it before the cards do. Push a folded card through the slot, open and close the lid twice, and move the flag up and down. If the card catches at a corner, widen the slot an eighth of an inch rather than forcing it.
Add the name where everyone can read it: on the front panel, on a strip across the top, or on the mailbox lid if the teacher collects boxes at the end of the day. Names matter more than decoration in a classroom of twenty-seven.
6. Add Finishing Details
Reinforce the corners and the hinge with another piece of tape, then add a ribbon handle if the box will travel. A square of tissue paper inside the base hides the corrugation and gives the cards somewhere soft to land.
Keep heavy objects off the top, or the box tips when a classmate drops something in. Skip loose glitter and small parts if younger siblings will handle it. When the holiday is over, flatten the box for recycling or keep it as a storage box for cards and craft scraps.
7. Use the Finished Mailbox
A chair backer is the setup most teachers ask for: tape or tie the mailbox to the back of the child’s chair so classmates drop cards in while everyone is seated. A desktop mailbox works for a small group, and a doorstep version is fine at home.
The exchange itself becomes the activity. One good first use is a delivery round where each child walks the room and hands one card to every mailbox but their own.
Common Mistakes
The slot tears as you cut it. The cut line has no structure left in the corrugation. Score the pencil line with a blunt blade first, cut with a fresh one, and keep the box flat on the table rather than holding it in your lap.
The lid flops or splits at the hinge. Corrugated cardboard tears along the fold once you cut through the top. Reinforce both long edges of the slot and the hinge itself with tape before the box is decorated, not after.
Cards do not fit through the slot. They need a slot at least half an inch tall and as wide as the card with a little slack on each side. Test with a folded card and widen rather than bending the cardboard.
Paper wrinkles and seams show. Iron the sheets flat first, use a light even coat of glue instead of dots, and leave a quarter inch of overlap at each fold so the corners have somewhere to go.
The box gets over-decorated and stops looking like a mailbox. Keep the flag, slot and name visible, and decorate one face at a time. A recognizable mailbox with two colors on it works better than a collage with everything on it.
Tips for a Sturdy Valentine Mailbox
Two coats of tape on the hinge cost you thirty seconds and prevent the most common failure.
Doubling up the paper on the lid before the slot is cut makes the top noticeably stiffer. Tape the paper on and wrap it around the edges of the lid.
Preschoolers: skip the knife and build the folding-flap version. They can cut shapes and do all the decorating.
Upper elementary: let them mark and score their own slot while an adult handles the blade and keeps a finger on the paper.
Schools that ban hot glue: double-sided tape on every flat surface and masking tape on the paper wrap holds a decorated box together for the whole week.
Frequently Asked Questions
What size shoebox works best for a Valentine mailbox?
A standard adult shoebox works well and holds a whole classroom set of cards. A child-size shoebox or a hat box is easier for small hands and lighter for a preschooler to carry. Whichever you pick, check the lid still opens after the slot is cut and that the box sits flat, since a warped base makes a mailbox tip over on a desk.
Can toddlers make a Valentine mailbox from a shoebox?
Yes, with the no-cutting version. Fold two flaps inward on the lid to form a mail opening, tape them down, and let your toddler cover, decorate and label the box while an adult handles any adhesive. Keep scissors blunt and skip small loose embellishments. The finished box gives them a clear place to hand out and collect Valentine cards.
How can I make the mail slot without cutting through the lid?
Score the line first. Press a blunt utility knife along the pencil mark to crush the corrugation, then cut only along the top layer so the flap can fold inward and act as the opening. Alternatively, build the slot from two folded flaps taped down on the lid, which needs no blade at all and takes about two minutes.
What materials can I use instead of construction paper?
Wrapping paper works and looks festive, though it creases easily. Tissue paper suits a monster or collage theme, gift wrap suits a classic mailbox, and patterned duct tape gives a shinier result with no wet steps at all. For coverage you can also paint the box, or tape plain white paper on and let the child draw directly on the lid.
How can I use the shoebox mailbox for a classroom Valentine exchange?
Tape or tie the mailbox to the back of the child’s chair so classmates can drop cards in while seated, and put the name on the front so nobody guesses. Agree on rules first: one card per mailbox, no loose candy with nuts, and a helper to collect boxes at the end. Stagger the delivery rounds by row so twenty children are not lining up at once.
Conclusion
Start by covering and wrapping the shoebox while the cardboard is clean and flat, then mark the mail slot before any decorating happens. Once the slot is cut and taped, the rest is just paper, glue and a name on the front.
Make it your child’s box rather than a house project, and leave the slot and flag visible so it still reads as a mailbox. Fill it with homemade cards, kind notes or small treats, and let the exchange itself be the fun part. For 2026, that is one shoebox, half an hour, and a mailbox that gets used all day.