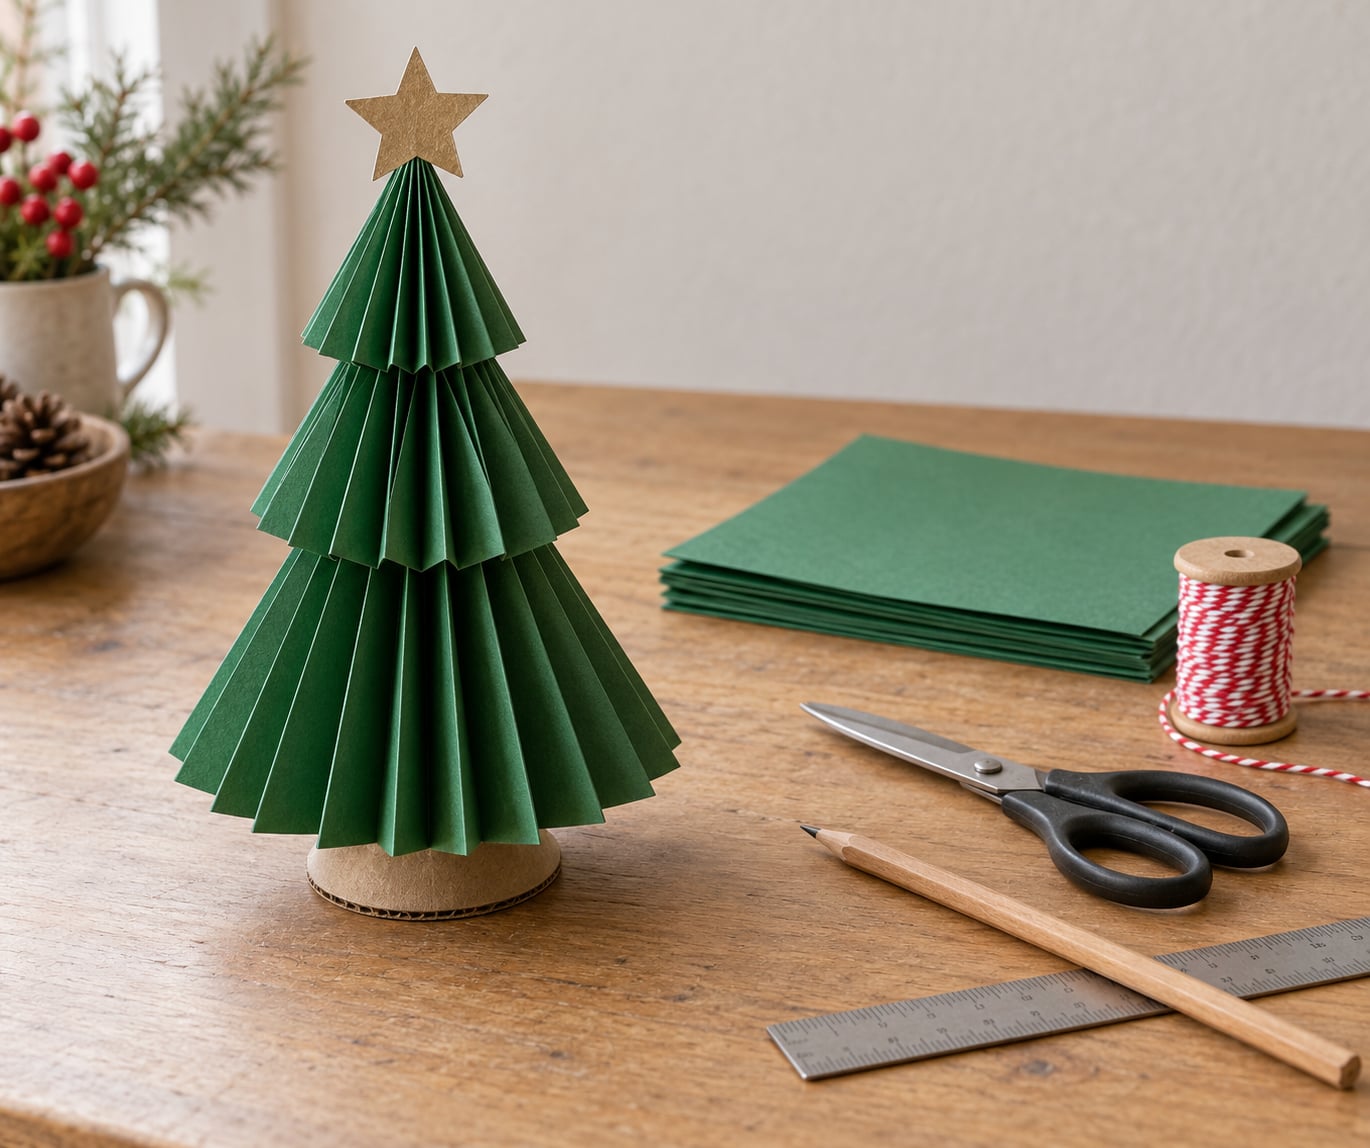
To make a paper Christmas tree, you cut or fold tree shapes from cardstock or plain copy paper, glue or interlock the pieces along the centre fold, then open and fluff the layers so the branches spread out. The 3D version below takes about 25 minutes and needs nothing more than paper, scissors, a ruler and quick-dry glue.
It is one of those crafts where the finished result looks expensive and the process is almost too simple. You already have everything you need in a kitchen drawer, which is why I come back to it every December.
Updated for 2026. If you are here for the school-project version, jump to the last step first: the trick that keeps a paper tree standing is a flat cardboard base, and it takes ten seconds.
Table of Contents
- 1What You Need
- 2Which paper to avoid
- 3Step-by-Step: How to Make a Paper Christmas Tree
- 4Prepare the Paper Christmas Tree Shape
- 5Fold and Build the Tree
- 6Make a Flat Folded Tree With No Glue
- 7Decorate the Paper Christmas Tree
- 8Display or Gift the Finished Tree
- 9Common Mistakes
- 10Frequently Asked Questions
- 11What kind of paper is best for a paper Christmas tree?
- 12Can toddlers make a paper Christmas tree?
- 13How do I make a paper tree stand up?
- 14What decorations can I use on a paper Christmas tree?
- 15How long does it take to make a paper Christmas tree?
- 16Conclusion
What You Need
Paper is the only real decision here, and most people get it wrong the first time because they use whatever is on the printer tray.
- Paper: 120 gsm cardstock (about 80 lb text weight) is the sweet spot for a 3D tree. 175 gsm (about 65 lb cover weight) holds its shape better and is worth it for trees you plan to keep.
- Cheaper option: ordinary copy paper works fine for the flat folded version and for kids. It just needs a cardboard base so it does not flop over.
- Scissors or a craft knife for the adult steps. A craft knife gives cleaner straight cuts through cardstock.
- Ruler and pencil for marking even fold lines.
- Quick-dry craft glue, the thick non-runny kind. Skip the watery school glue, which warps paper and takes forever to set.
- A small piece of cardboard for the base.
- Optional: glitter, Mod Podge, baker’s twine, a glue pen, paper dots, ribbon, and a needle with thick thread if you want a garland.
Which paper to avoid
Most cheap coloured paper has a white core inside, so every cut edge shows a thin white line. On a small tree it reads as a snowy outline and nobody minds. On a large one it looks like a mistake.
If you care about the edges, buy paper that is coloured all the way through, or print your own green sheet on a home printer and use 120 gsm card in the printer tray.
Skip hot glue for the tree itself. It burns fingers, glues too fast to reposition a fold, and makes the paper brittle exactly where the folds need to flex.
Step-by-Step: How to Make a Paper Christmas Tree
Prepare the Paper Christmas Tree Shape
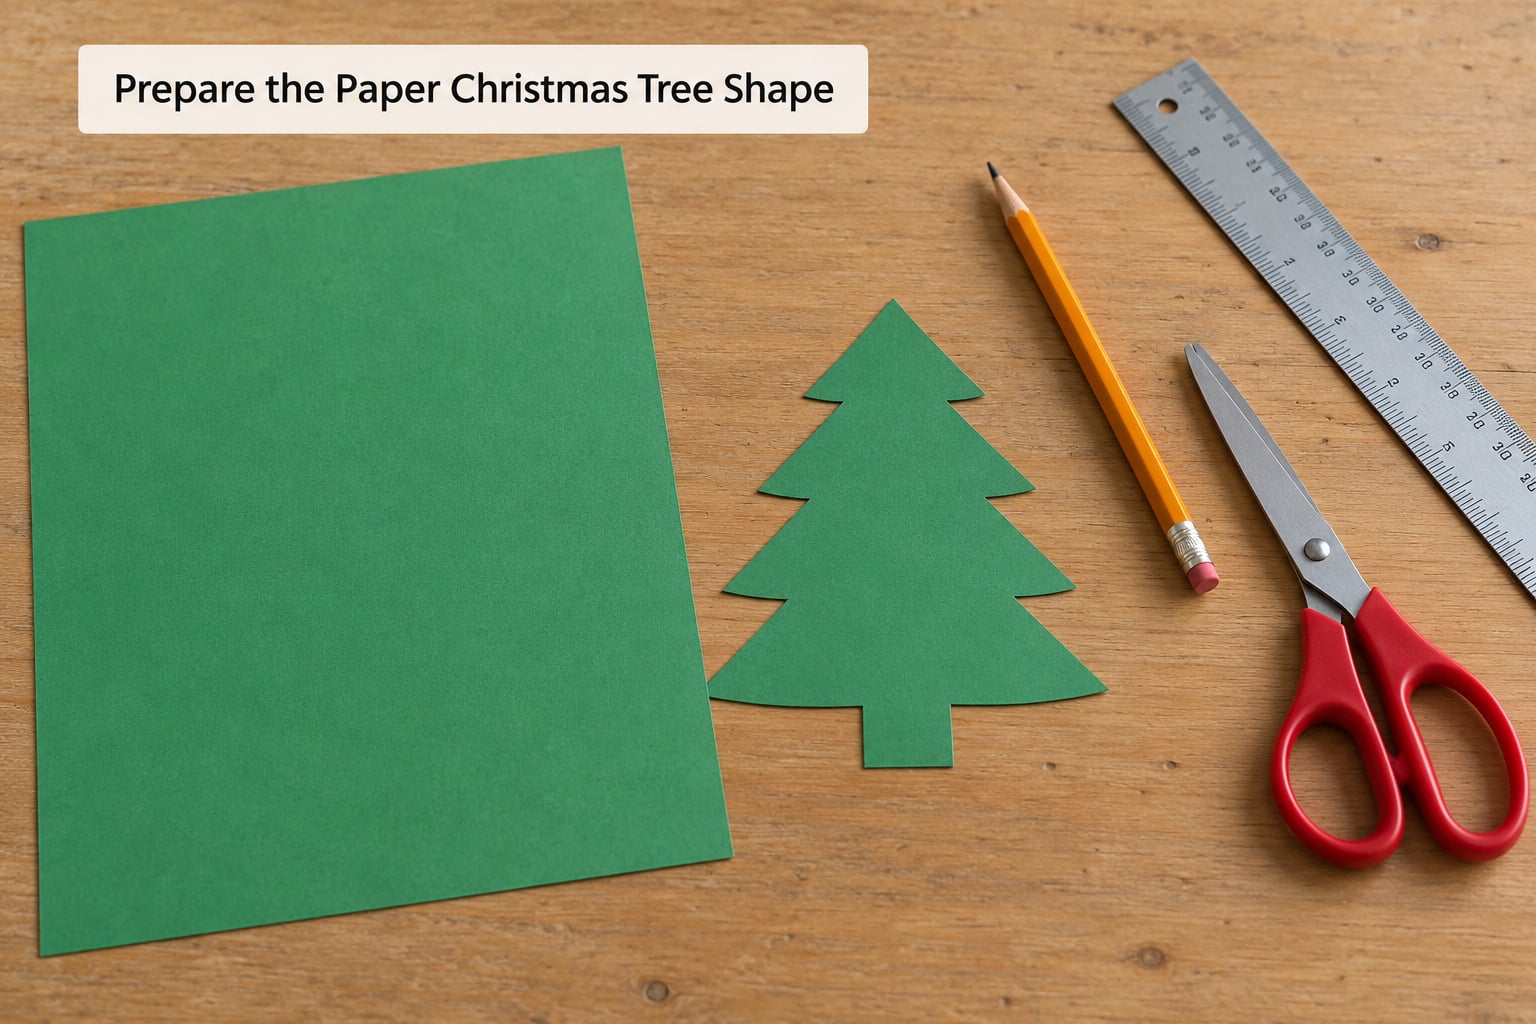
Lay a sheet of paper landscape and fold it in half the short way, so the crease runs down the middle. Draw a triangle on the folded paper with the base along the open edge and the peak at the top, then draw a small rectangle below the base for the trunk.
Cut along the outer line while the paper is still folded, and you get a symmetrical pair of trees from one cut. That symmetry is the whole trick: a lopsided half-tree is the reason most paper trees look sad.
Keep the rectangle if you want a trunk. Skip it if the tree is going into a garland, where a clean triangle hangs better.
For younger children, tear the shape instead of cutting it. Tear a green rectangle, fold it in half, and let them pull the top point down into a triangle with their fingers. It takes five minutes and nobody ends up with a paper cut.
Fold and Build the Tree
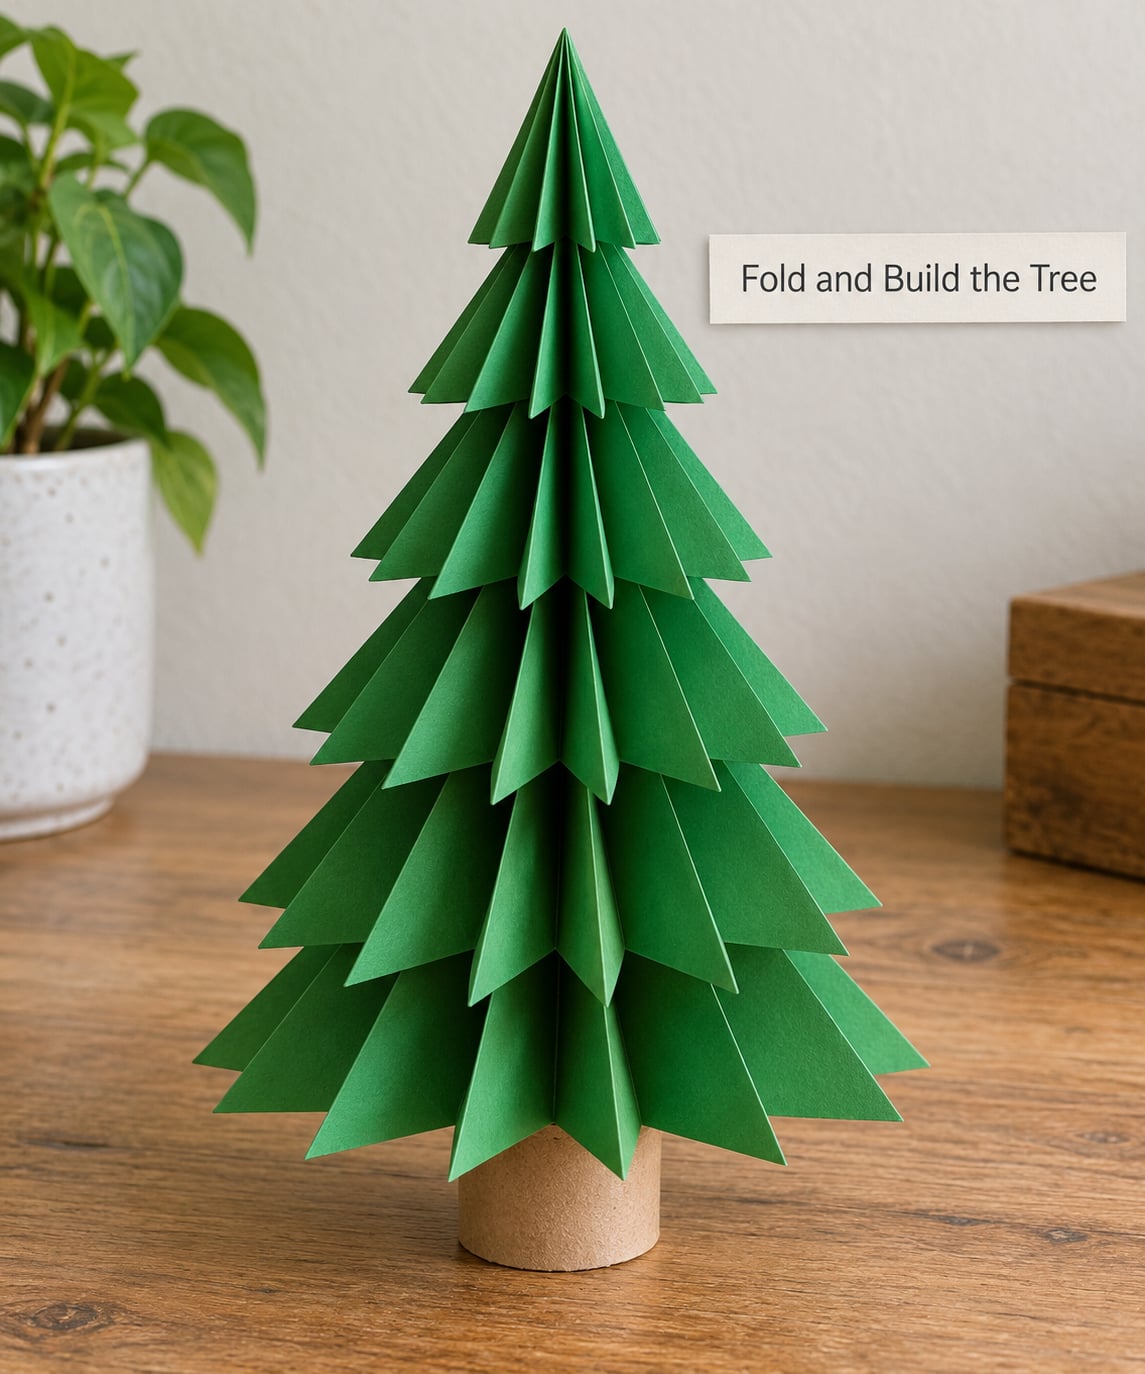
This is the step where a 2D shape becomes a 3D paper christmas tree, and it is where most people give up.
- Open the tree flat and turn it upside down. You now have a wide triangle at the top and a point at the bottom, which is what you want.
- Mark fold lines in diagonal strokes. With a pencil, draw evenly spaced lines from the bottom left edge to the top right edge, then repeat in the other direction, the way you make a criss-cross pattern. Each square you draw is one folded panel.
- Fold along every line. Use a ruler to press each crease firmly. Creases are what make the tree open evenly; soft, guessy folds are why accordion trees collapse.
- Flatten it, then fluff the layers. Pinch the top point, open the panels outwards one at a time, alternating direction. A fluffy tree has roughly equal gaps between every layer.
- Glue the tree back together half at a time. Work from the bottom row of panels upward. Press each join for a few seconds rather than flooding it with glue.
- Glue on the base. Run a thin line of glue along the bottom edge of the folded tree and press it onto a small rectangle of cardboard, roughly the width of the tree’s base.
Count your panels before you start. Twelve to sixteen panels gives a tree that looks full without turning into a glue-soaked lump, and the number is easier to change before cutting than after.
If your paper is only copy-weight, double the sheet first. Two thin sheets glued back to back behave like one sheet of cardstock and cost nothing extra.
Make a Flat Folded Tree With No Glue
The accordion tree needs steady hands and glue. This one needs neither, takes under five minutes, and is the version to hand to a child or a classroom of them.
Fold a sheet of paper in half, then in half again. Open it once so you have a centre crease, and lay the sheet flat with the crease running away from you. Now fold the bottom left corner to the centre line, bottom right corner to the centre line, and repeat with the two top corners, working in pairs so you always have a fresh flap to fold.
Each fold is a triangle flap laid over the last, and the sheet shrinks into a narrow zig-zag strip as you go. Keep pulling the next corner across, alternating left and right, until there is nothing left but a small triangle at the top. That point is the treetop and the folds are the branches.
Fan the folded layers apart gently, alternating direction, until the strip opens into a flat tree shape with a zigzag edge down each side. Stand it in the pinch between your fingers, or slot the point into a split straw.
If the strip keeps springing shut, run it between your thumb and forefinger from the bottom up to set each crease. Paper gets a grip on itself after that and holds its shape well enough to hang from a mantelpiece.
This method folds flat enough to fit inside a card, which makes it my pick for a garland. Punch a hole near the top point, string several onto baker’s twine with a blunt needle, and space them 8 to 10 cm apart.
Decorate the Paper Christmas Tree
Decoration is where a paper tree goes from craft to decor, and the best-looking results come from restraint.
- Glittered edges: brush a thin line of Mod Podge along the outer edges, sprinkle glitter over it, tap the loose glitter back into the jar, and let it dry flat for an hour. Do it over a sheet of paper you can fold and shake.
- Dots and baubles: paper dots, sequins or old buttons glued straight onto the front panels. Punch holes with a hole punch for a lighter, lacy look.
- Twine garland: wrap baker’s twine loosely around the tree in a spiral, no more than three turns, and tie a bow at the front.
- A star: cut a small star from gold card or aluminium foil and slot it onto the top point.
- Seal it: one coat of Mod Podge over the finished tree stops curling and gives it a slight sheen.
For under-fives, the fastest option is a glue pen or a glue stick for dots and a sticker for the star. No glitter, no drying time, no shaking glitter across the table.
Display or Gift the Finished Tree
A paper tree looks best at small scale. Mine sit on a bookshelf, a window sill or a mantelpiece rather than pretending to be a floor tree, and a 10 cm tree reads as a designed object where a 40 cm one reads as homework.
Paper versions flatten nicely, so roll them loosely between two sheets of tissue for storage and they will open again.
Sourcing free paper is easier than people expect. Last year’s wrapping paper is usually still stiff enough to fold, the back of a worksheet works fine for a child’s tree, and kraft paper from a delivery box gives you a whole roll in one colour. Old magazines are trickier because the gloss fights the glue.
As a gift, glue a mini tree into the lid of a small cardboard box. It works for teachers, grandparents or a child’s own stocking, and it survives being carried home in a bag.
For a school project, stand the tree on a wider cardboard base and write two or three sentences about how you made it. That tiny paragraph is usually what lifts the grade, not the tree.
Common Mistakes
Why won’t my paper tree stand up? Almost always the base. A glued cardboard rectangle wider than the tree’s footprint fixes it in one step. The other cause is too few panels, which means the layers cannot spread wide enough to balance.
Why are my accordion folds uneven? The lines were drawn freehand or the creases were too soft. Remeasure with a ruler, and press every crease twice with the edge of a ruler before you glue anything.
Why does the paper tear at the folds? The cardstock is too heavy for the fold, or the crease was forced through too much at once. Score the fold first with a blunt knife and paper, then fold along that line instead of forcing it.
Why is my paper warped and wavy? Too much water-based glue soaked into the sheet. Use a thin line, not a blob, and squeeze the panels together for ten seconds before moving on.
Why do my cut edges look white? White-core paper. Nothing fixes it after cutting, so either accept the snowy edge or use paper coloured all the way through for the next one.
Why are the branches lopsided? The two halves were not cut on the fold, so they were never identical. Always trace and cut while the sheet is folded, then unfold.
Frequently Asked Questions
What kind of paper is best for a paper Christmas tree?
Cardstock around 120 gsm (about 80 lb text weight) works best for a 3D tree because it holds a crease without splitting. Go up to 175 gsm (about 65 lb cover weight) for a tree you plan to keep. Ordinary copy paper is fine for the flat folded version or for a quick kids craft, especially if you double the sheet or glue it to a cardboard base.
Can toddlers make a paper Christmas tree?
Yes, with a different method. Skip the accordion version, which needs steady folds. Give your child a folded sheet, have them pull the top corners down into a triangle, and decorate it with a glue stick or stickers. Tearing the shape instead of cutting removes the risk entirely, and it still looks like a tree once it is standing up.
How do I make a paper tree stand up?
Glue it to a flat cardboard base that is wider than the tree’s bottom edge, using a thin line of quick-dry glue along the whole seam. Stand the tree while the glue sets, holding the layers square for about ten seconds. A tree with twelve or more folded panels also balances better than one with only a few.
What decorations can I use on a paper Christmas tree?
Glitter sealed along the cut edges with Mod Podge, paper dots, sequins, buttons or punched holes all work well. Baker’s twine wrapped loosely in a spiral makes a quick garland, and a star cut from gold card slots onto the top point. Keep glitter for older children and use a glue stick or stickers for under-fives.
How long does it take to make a paper Christmas tree?
The 3D accordion version takes about 25 minutes if you already know the folding pattern, and closer to 45 minutes the first time. The flat folded tree takes under five minutes with no glue at all. Add another hour if you are glittering edges, since Mod Podge needs time to dry clear before the tree is handled.
Conclusion
Start by folding one sheet in half and cutting a symmetric triangle. Get that right and everything after it is just folding, gluing and fluffing.
Once you have one tree, the fun part begins: change the paper colour, use last year’s wrapping paper or the back of an old worksheet, add different ornaments each year. Make one big, a few small for a garland, and one torn-and-glued version for the youngest child in the house.