A handprint ornament that lasts comes down to four things: an even 1/4 inch sheet, a low slow bake at 250 degrees Fahrenheit for about two hours, a full cool-down before any paint goes on, and two or three coats of clear sealer. Skip any one of those and the thinnest edges, usually the fingertips, split first.
Most people use salt dough, a stiff paste of flour, salt and water, because it costs almost nothing and holds a small handprint beautifully. It is also hygroscopic, which means it drinks moisture back out of the air and swells unevenly when nothing seals it. That is the whole reason a plain baked handprint falls apart in a year.
I make these with my own kids every December, and the ones from their second year are still on the tree. The difference is boring consistency: same thickness, same low oven, same patience on the cooling rack.
Table of Contents
- 1What You Need
- 2Tools worth having on hand
- 3Step-by-Step: How to Make a Handprint Ornament That Lasts
- 4Step 1: Prepare the Clay and Work Surface
- 5Step 2: Press the Handprint Carefully
- 6Step 3: Dry or Bake the Ornament
- 7Step 4: Add Color and Small Details
- 8Step 5: Seal It and Add the Hanging Loop
- 9Common Mistakes
- 10Frequently Asked Questions
- 11How long will a salt dough handprint ornament last?
- 12Is it better to bake or air dry salt dough ornaments?
- 13How long does salt dough last after baking?
- 14Do I have to seal a salt dough ornament?
- 15What paint works best on salt dough ornaments?
- 16Can I use kosher salt or store unbaked salt dough for later?
- 17Conclusion
What You Need
The base recipe is three ingredients and nothing else. Adjust the ratios a little if you want a stiffer dough that holds finer baby detail.
| Ingredient | Amount | Why it matters |
|---|---|---|
| All-purpose flour | 2 cups | The structure of the plaque |
| Fine salt | 1 cup | Sets the dough and slows mould |
| Warm water | 1 to 1.25 cups | Add slowly, a little at a time |
Fine table salt is the safe pick. Kosher salt works, but the crystals are coarse and uneven, so grind it in a blender or spice mill first or the dough will read gritty. A pinch of baking soda swapped in for part of the salt makes a lighter, whiter dough, at the cost of a little hardness.
Tools worth having on hand
- A parchment-lined baking sheet, or a silicone mat
- A rolling pin and a ruler or straight edge
- A plastic cup for the straw hole, or a drill bit for a finished hole
- A small sharp knife or cookie cutter for trimming
- Washable acrylic or tempera paint, thin, not goopy
- A clear acrylic sealer, a water-based decoupage medium, or a water-based varnish
- Ribbon or twine for the loop
- A fine-tip black paint pen for the name and year on the back
- A pencil for tracing around the print before you cut it out
A plate of newspaper under the tray saves cleanup. Keep a damp cloth nearby to wipe the hand before pressing, and hand sanitizer if the child has been eating sticky things, because grease is the fastest route to a smeared print.
Step-by-Step: How to Make a Handprint Ornament That Lasts
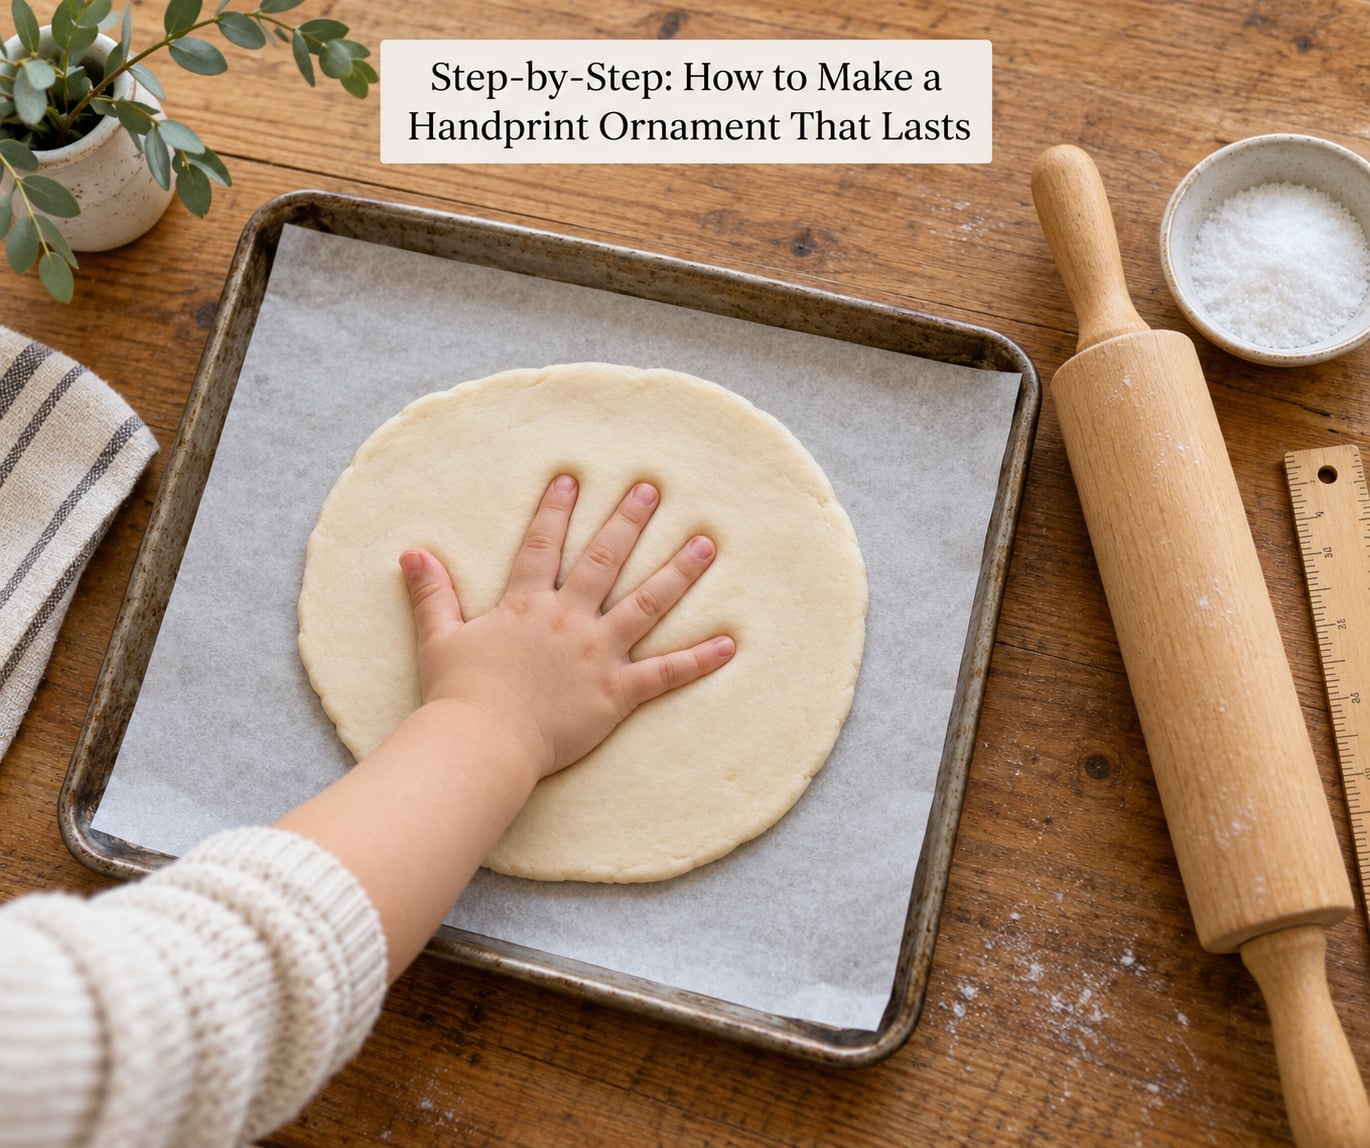
Step 1: Prepare the Clay and Work Surface
Mix the flour and salt first, dry, then add warm water a tablespoon at a time until the dough holds together when squeezed but still crumbles when you rub it between your fingers. Too wet and it spreads and loses the fingers; too dry and it cracks at the edges before you even press.
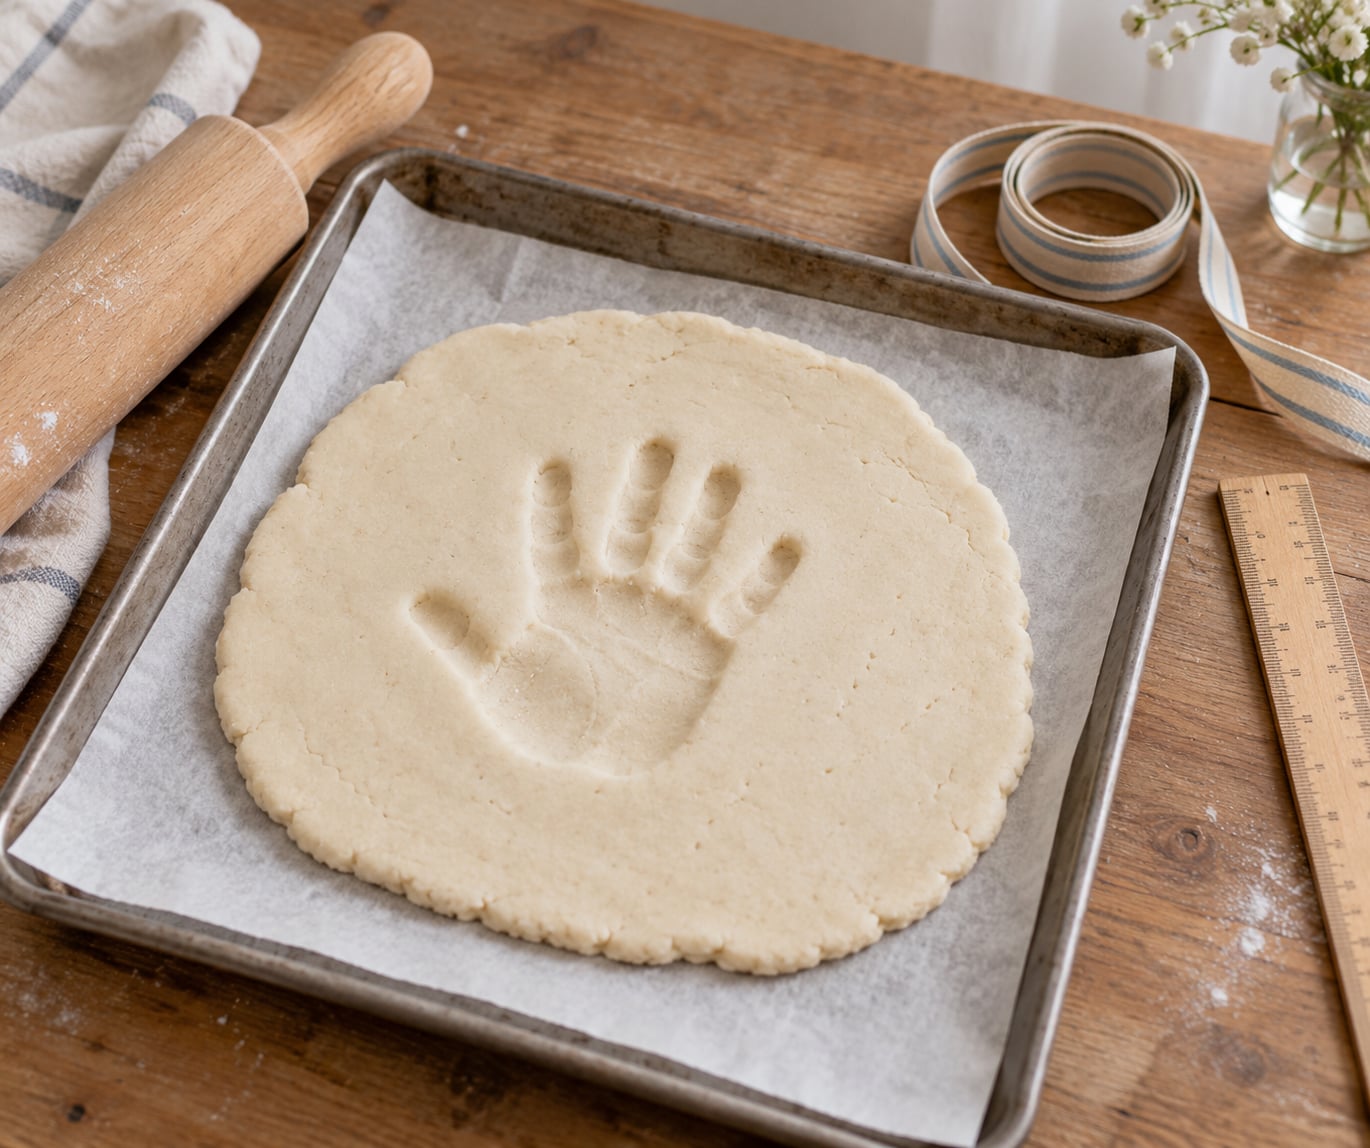
Line the baking sheet with parchment. Flour the work surface lightly and roll the dough to an even 1/4 inch, checking the thickness with your fingertips rather than a ruler, which is faster and more honest.
Thin edges are where every crack starts. If you can see daylight through the dough anywhere, patch it with a small extra rolled bit before you press anything into it.
Step 2: Press the Handprint Carefully
Have the child spread their fingers wide and rest the heel of the palm first, then press the fingertips down one at a time, then the middle of the palm. Pressing in that order traps less air and keeps the finger lines open.
Hold each fingertip down for a couple of seconds rather than one quick press. When you lift, go straight up in one smooth motion, no twisting, no dragging sideways. A wiggle is what smears the print into a grey blur.
Children squirm. The realistic approach is three or four tries on the same sheet, choosing the best one and trimming around it later. A parent pressing the hand for a child under three is usually the difference between a clean print and a smudge.
Trace around the pressed shape with a pencil, leaving a small border, and cut it out with a knife or cookie cutter. If the dough clings to the hand, the child was too warm or too wet; dry it properly and try again on fresh dough.
Step 3: Dry or Bake the Ornament
Bake on the parchment-lined sheet at 250 degrees Fahrenheit for about two hours, turning the sheet once at the one-hour mark so the underside dries evenly. If the edges darken, your oven runs hot, so drop to 225 and give it another half hour.
The no-bake route works too. Air-dry the ornament on a wire rack for 24 to 48 hours until it stops feeling cool anywhere. Baking makes a firmer, lighter plaque and locks the detail faster; air-drying is gentler and safer around small hands but takes two days.
Never use the microwave. The dough steam-boils and expands in a sealed cavity, so you get a puffed, ballooned shape with the handprint gone completely. There is no way to rescue one; start again in a conventional oven.
Cool the ornament on the rack for 45 to 60 minutes before touching it. Warm salt dough is fragile and will snap if you move it, and warm dough will not take paint evenly.
Step 4: Add Color and Small Details
Wait until the ornament is stone dry and room temperature first. Paint on a warm ornament blisters and peels within weeks, which is the single most common paint failure people report.
Apply thin coats of acrylic or tempera paint with a fine brush and let each coat dry fully before the next. A heavy coat sits on top of the dough like a film, and film flakes.
For the palm lines, use a damp brush tip to pull a little color into the creases, then dry it with a hairdryer on cool from about 8 inches away. Names and dates on the front go on with a paint pen or a fine brush before the sealer, never after.
Step 5: Seal It and Add the Hanging Loop
Sealing is what turns a one-season craft into a keepsake. Put on two or three thin coats of a water-based clear sealer, letting each one dry to the touch before the next. Three light coats beat one thick coat every time, because a thick coat cracks exactly where you were trying to prevent cracks.
A water-based decoupage medium works well as a topcoat over acrylic paint, and a clear acrylic sealer gives the hardest, most water-resistant finish. A water-based varnish adds more sheen and a slight yellow cast. Skip oil-based polyurethane around children; the water-based versions do nearly as well with far less fuss.
For the loop, press a straw straight down near the top of the ornament before it dries so the hole is round and clean. On a finished ornament, drill the hole with a small bit and work over scrap dough so the bit does not skid or tear the edge.
Thread the ribbon, tie it, then hold the ornament by the loop for a full minute and check that nothing shifts. If the hole is close to the edge, move it inward. A loop that works in January rarely works after ten years of undecorating.
Finally, write the name and the year on the back with a fine-tip paint pen. That tiny line is what turns an ornament into a document.
Common Mistakes
Most broken ornaments trace back to one of five things. Here is what went wrong and what to do about it.
A smeared or grey handprint. The hand was damp, greasy, or lifted too slowly. Dry the hand with a cloth, roll the edges of the fingers inward slightly, and lift straight up in one motion. Warm the clay dough between your palms for a minute first, since cold stiff dough grabs skin and drags the print.
Cracks radiating from the fingertips and outer edge. The dough was rolled unevenly, baked too hot, or dried too fast. Patch thin spots before pressing, keep the oven at 250 or below, and never rush the sealer. Cracks months later usually mean too few sealer coats, not a bad bake.
A puffed shape with no detail. That was the microwave. The dough steam-boiled and expanded. There is no fix; start over, this time in a conventional oven.
Paint peeling off in sheets. Painting happened while the ornament was warm, or in one thick coat. Paint only when the piece is completely cool and dry, and use thin layers.
The loop tears out on the tree. The hole was too close to the edge or too small. Redrill inward, and if the hole has torn, fill it with a two-part epoxy or strong craft glue, let it cure fully, then redrill.
Two more problems show up only after time has passed. White powdery salt bloom appears on the surface in humid storage; a light wipe and one extra coat of sealer fixes it. Storage matters as much as the bake, so keep finished ornaments in their own tissue-wrapped box rather than loose in a plastic tub, where a damp piece picks up dents and stains from whatever it sits against.
If an ornament has already cracked, it is usually rescuable. Warm it in a low oven for 20 minutes to drive out trapped moisture, fill small fissures with a fine-tip craft glue, let it cure, then re-seal with one more coat.
Frequently Asked Questions
How long will a salt dough handprint ornament last?
A salt dough ornament kept indoors in a dry room usually stays intact for 10 to 20 years once it is fully dry and sealed. Baking at 250 degrees Fahrenheit for two hours and finishing with two or three coats of clear sealer outlasts an air-dried one, because the moisture is gone before it hardens. Store it wrapped in tissue in an archival box rather than loose in a plastic tub.
Is it better to bake or air dry salt dough ornaments?
Bake for a firmer, lighter plaque that locks in fine detail, at 250 degrees Fahrenheit for roughly two hours with a flip at the halfway mark. Air-dry for 24 to 48 hours when you want no oven at all, which is better around very young children or in a classroom. Baking wins on durability; air-drying wins on gentleness. Never microwave the dough, because it puffs up and the imprint disappears.
How long does salt dough last after baking?
Baked and unsealed, a salt dough ornament stays workable but begins absorbing moisture from the air and can crack within a year or two. Baked and sealed with at least two coats of clear sealer, it stays stable far longer, commonly 10 to 20 years indoors. The sealer is not optional decoration here, it is the barrier that stops the dough re-expanding.
Do I have to seal a salt dough ornament?
You do not have to, and some families skip it entirely. Unsealed ornaments will fade, pick up grime and eventually crack, so they are a seasonal decoration rather than a keepsake. If you want the craft look and nothing else, paint it and leave it. If you want it to survive a decade of being undecorated and re-hung, seal it.
What paint works best on salt dough ornaments?
Acrylic or tempera paint in thin coats works best on a cool, fully dried ornament. Tempera is the safer pick for small children and gives a matte finish, while acrylic holds colour and sheen better and takes a water-based sealer cleanly. Let every coat dry fully before the next, and add colour before the sealer, never after.
Can I use kosher salt or store unbaked salt dough for later?
Kosher salt works if you grind it first, since coarse crystals make the dough gritty. For unbaked dough, press it flat, wrap it tightly, and freeze it in portions for up to about three months; let it come back to room temperature while still wrapped before you roll it. Unbaked dough at room temperature goes sour within a day.
Conclusion
Start with the thickness, not the paint. Roll the dough to an even quarter inch, press the hand in one clean pass, bake low and slow until the piece stops feeling cool, then give it three thin coats of sealer before it ever touches a tree.
That is the whole job. Do it once per year, write the name and the year on the back, and the ornament you make this December will still be holding that handprint when your child is old enough to hang it themselves.