A crepe paper rose is made by folding, twisting and rolling a single long strip of crepe paper around a stem, then adding shaped petals on the outside until it looks full. Learning how to make crepe paper roses takes about an hour for your first flower and roughly fifteen minutes once your hands know the moves. No template, no sewing, no special equipment.
Crepe paper is the whole trick. It stretches along its grain and holds whatever shape you pull it into, so a flat scrap becomes a cupped petal with a curled edge. Most beginners get a floppy, flat result because they skip the shaping and go straight to gluing.
Start with one rose in a single colour before you plan a bouquet. Once you know how the paper behaves, colours and sizes take no time at all.
Table of Contents
- 1What You Need
- 2Step-by-Step: How to Make Crepe Paper Roses
- 3Prepare the Crepe Paper
- 4Shape and Fold the Inner Petals
- 5Build the Outer Petals
- 6Curl and Separate the Petal Edges
- 7Attach the Stem and Leaves
- 8Common Mistakes and How to Fix Them
- 9How long crepe paper roses last, and how to store them
- 10Frequently Asked Questions
- 11What kind of crepe paper is best for making roses?
- 12How do you make crepe paper rose petals look more realistic?
- 13Can I make crepe paper roses without a hot glue gun?
- 14How do you keep the center of a crepe paper rose tight?
- 15How long does it take to make one crepe paper rose?
- 16Can finished crepe paper roses be stored or displayed?
- 17Conclusion
What You Need
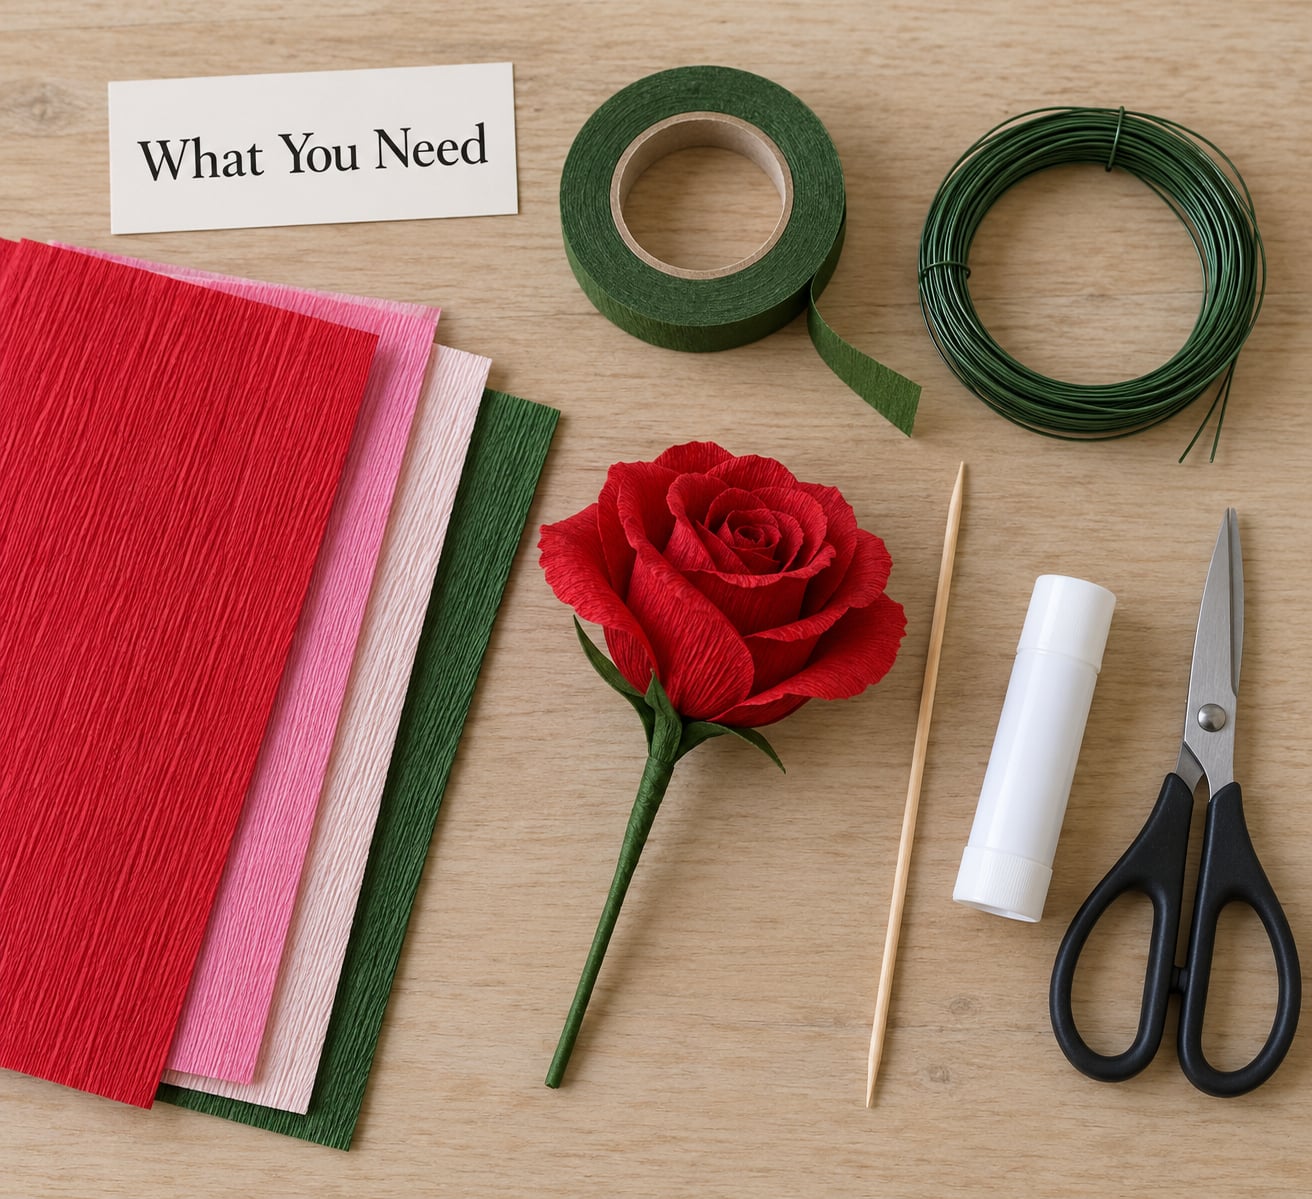
You need about five things, and two of them are optional. Everything else is cupboard material.
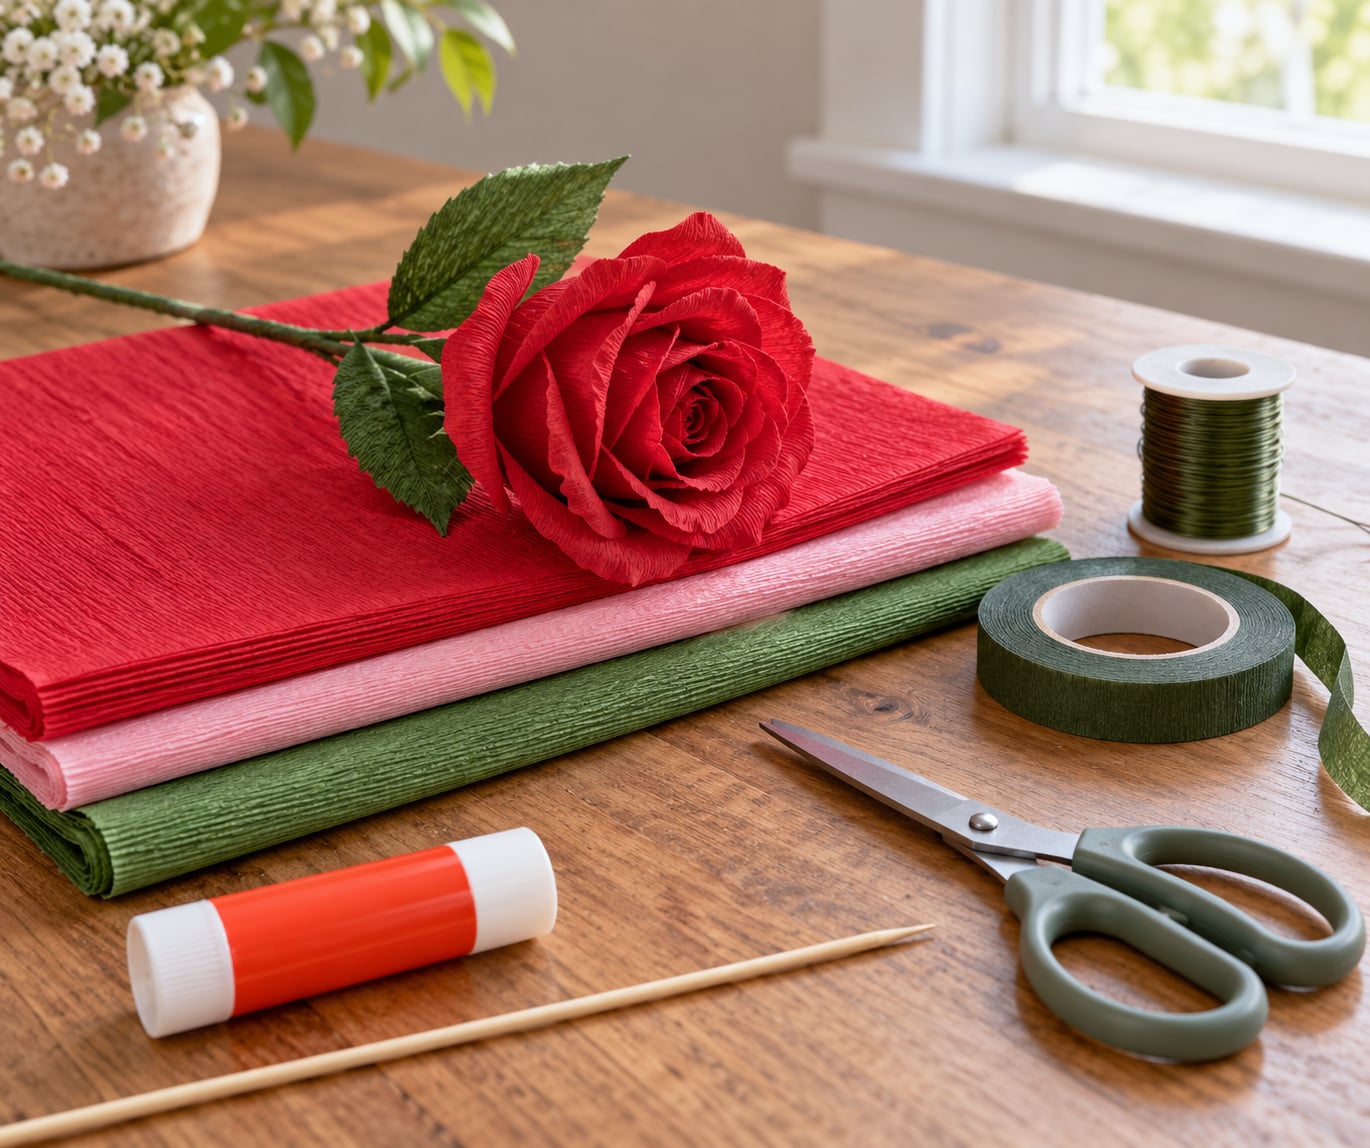
- Crepe paper in your petal colour, plus green for the calyx and leaves. One sheet about 12 x 24 inches (30 x 60 cm) makes two or three tabletop roses.
- Florist wire or a wooden skewer for the stem. Wire is 20 gauge (0.8 mm) for a standard rose, 18 gauge (1 mm) for a large one. A bamboo skewer works for anything under 3 inches (7.5 cm) across.
- Floral tape, the stretchy green tape florists use. Pull it as you wrap and it goes tacky, which is what grips the petals.
- Craft scissors and a pencil or the blunt end of a skewer for curling edges.
- Glue is optional if you tape everything. A hot glue gun is faster, and tacky craft glue works if you tape first and add a dab at the end.
- Optional: 0.3 mm craft wire for leaf veins, a cutting mat, and a hairdryer or a barely damp cloth for conditioning stubborn paper.
Double-sided crepe gives you a coloured petal on both faces, which is what makes the bloom look deep from every angle. Single-sided is fine, and plenty of readers have built lovely roses from heavy single-sided sheets. If you only have thin single-sided paper, glue two sheets together face to back before cutting.
Tissue paper is not a substitute. It has no grain to stretch along, so the petals stay flat and tear at the curl. Butcher paper and kraft paper work if you wadding the petals with your hands instead, which is how a reader made an entire shower of Queen of Hearts roses.
Step-by-Step: How to Make Crepe Paper Roses
Prepare the Crepe Paper
Cut a strip of crepe paper about 3 inches wide and 20 to 24 inches long (7 cm x 50 to 60 cm). That single strip is your entire inner rose. This is the measurement the method depends on, and it is the one most tutorials skip.
Condition the paper before anything else. Pull the strip gently along its length until it widens by roughly a fifth, then let it relax. If it is stubborn, run it lightly over the edge of a table or iron it flat on the cool setting first. Paper that stretches easily holds a curl for years.
You will know it worked when the strip feels slightly narrower, softer and more open than it did out of the pack.
Shape and Fold the Inner Petals
Fold the long strip in half lengthwise, crease it with your thumb, then open it out again. Start at one end and roll the strip loosely toward you, turning it a quarter turn every two or three wraps. A tight roll looks like a cinnamon bun and never opens into a rose, so keep it loose enough that you can still see the spiral.
Wrap the loose end of the wire or skewer around the base of the roll and bring it up the middle like a core. Two or three wraps of floral tape hold it. Now squeeze the top of the roll downward while pressing the sides inward, which pushes the paper up into a small pointed bud.
Tape each wrap down onto the wire as you go rather than at the end. This is what stops the petals spinning when the flower stands up in a vase, which is the single most reported failure in reader comment threads.
Build the Outer Petals
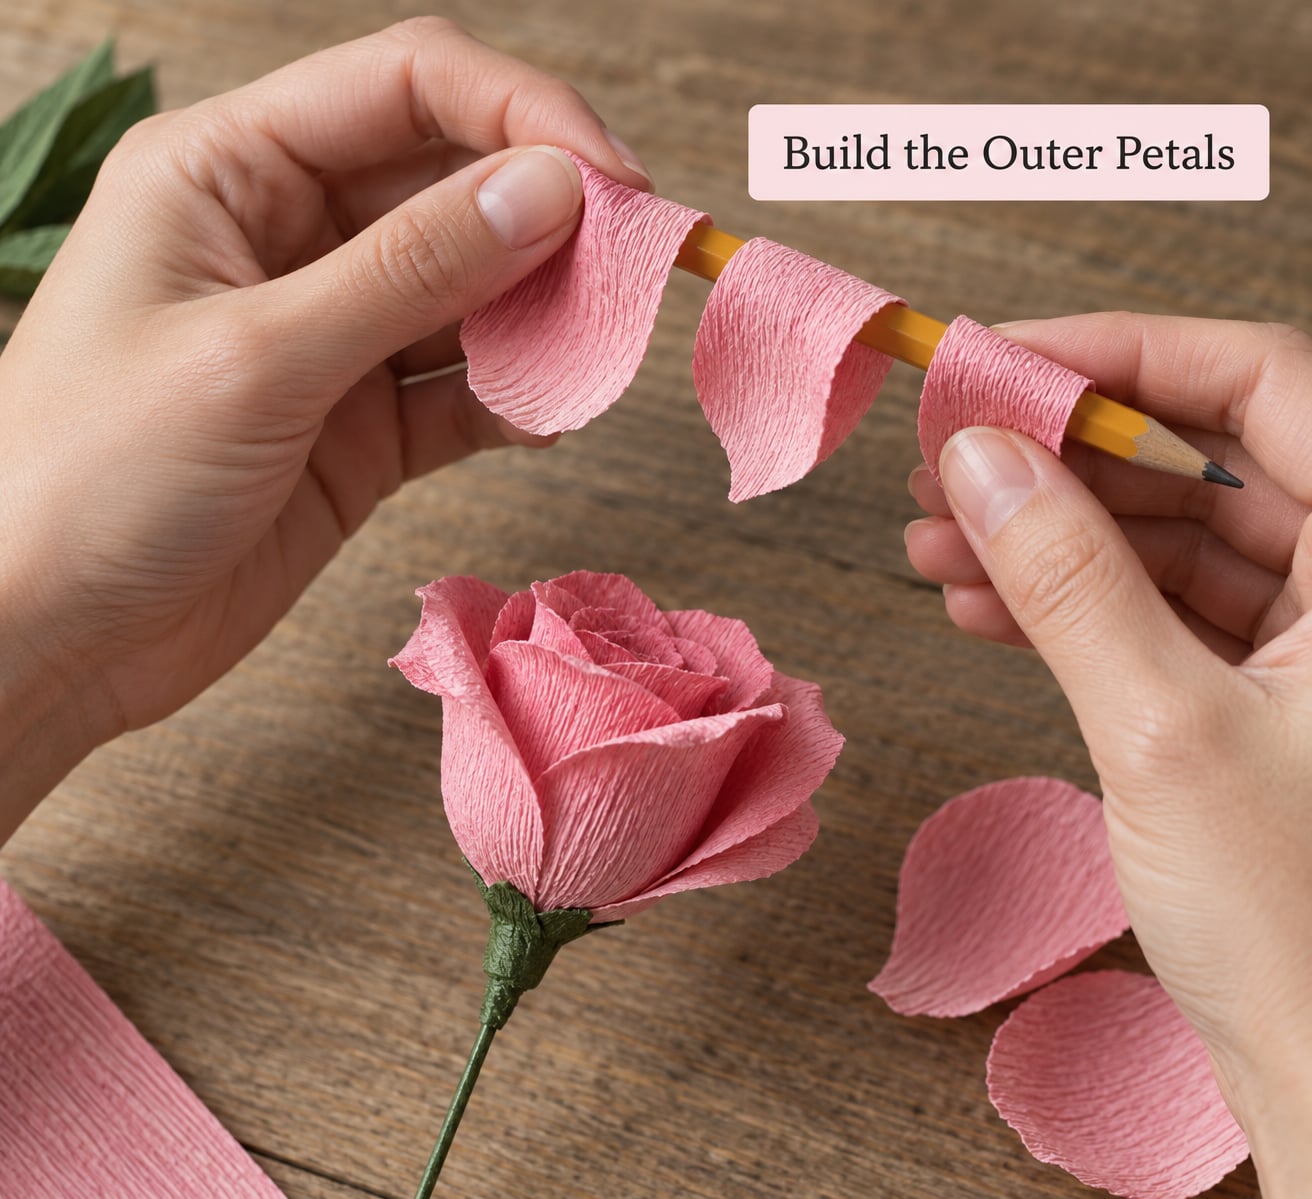
Cut 10 to 15 heart-shaped petals from a fresh sheet. For a rose about 3 inches (7.5 cm) across, each petal is roughly 2 inches (5 cm) tall and 1.5 inches (4 cm) wide at the top. Make three sizes: five small ones for the ring around the bud, five medium, then the widest for the outside.
Cup each petal by holding it at the base and pulling the centre of the top edge outward with your thumb, so the paper bows forward. Then curl the top edge around the pencil by rolling it downward two or three times. Two or three wraps, no more, or the edge turns into a tube.
Add a layer at a time. Slide each petal under the one before it at roughly a 45 degree angle, cup facing out, and anchor the base with a short piece of tape onto the stem. Turn the flower a quarter turn between petals so the spacing stays even all the way around.
Vary the height. The middle layers sit level with the top of the bud and the outer ones angle down about 30 degrees. Equal heights across all layers is exactly what makes a homemade rose look like a flat dahlia.
Curl and Separate the Petal Edges
Push your thumb down into the centre of the bloom and gently pull the layers apart until you can see the spiral core. Separate them with your fingers, a few millimetres at a time, from the inside out. This single step does more for realism than anything else in the process.
Peel two or three outer petals forward and down so they frame the bloom instead of standing straight up. Curl any edge that has gone flat again around the pencil, and add a hidden dab of glue inside the bloom for petals that will not hold a position.
Attach the Stem and Leaves
Wrap green crepe or floral tape down the wire from the bloom to about 8 inches (20 cm), spiralling rather than wrapping straight around, so the seam sits on the back. Cover the petal bases with a small paper circle and wrap green tape over it to form a calyx, the sepal cup that hides where every petal is glued in.
Leaves come from a folded strip of green crepe about 5 inches long (12 cm). Cup it the same way as a petal, pull the ends into a point, and add a short length of 0.3 mm wire along the centre for a vein. Tape it to the stem a third of the way down, with one leaf low and one high.
A beginner version skips all of it. Skewer instead of wire, glue instead of tape, no leaves, and you still have a rose in about ten minutes. That is the version worth making first.
Common Mistakes and How to Fix Them
Almost every failed paper rose comes down to the same handful of fixable problems.
Petals that slip, spin or fall off. You probably anchored the base loosely, or skipped it on the outer layers. Wrap the tape past the petal base and onto the stem itself, on every single petal. Some readers lay three petals at a time onto a strip of double-sided tape, then wrap the whole group on. It is slower and it works.
Edges that spring back flat. You did not wrap the pencil far enough. Two or three full wraps and a slow release, with the paper edge held against the pencil as you unwind. Curl a petal, then leave it alone for ten minutes before touching the flower again.
A loose or hollow centre. The core strip was rolled too loosely, or you used a strip that is too short. Re-roll tighter and make the strip 24 inches (60 cm) rather than 20. Squeeze the bud from the top while the base stays wrapped, and the centre tightens up.
Tears at the petal bases. You stretched the paper across its grain instead of along it, or pulled too hard. The grain runs the long way down the sheet. Over-stretched paper also loses its curl, so stretch once, gently, and shape from there.
Visible glue and a lopsided flower. Hide glue inside the bloom, never on the outside edge. For symmetry, build all the way around before adding the final petal in each layer, and check the flower from above every few petals.
Wrinkled bases you are worried about. Nobody sees them. Every petal base ends up buried inside the bloom or under the calyx, so the parts that look worst are the parts nobody looks at. Perfection here is wasted effort.
How long crepe paper roses last, and how to store them
A finished crepe paper rose keeps its shape for years in a dry room. Paper is not food for moths, and the colour does not fade the way cut flowers do. That longevity is the reason they are standard decor for weddings and showers: you can make them a month ahead.
Keep them away from damp, heat and direct sun, and dust them with a soft brush or a cool hairdryer on low. For storage, lay them flat in a shoebox lined with tissue rather than piling them in a bag. If a bloom gets crushed, separate the petals gently with your fingers, cup each one again, and reshape the spiral around the pencil. They spring back surprisingly well.
Frequently Asked Questions
What kind of crepe paper is best for making roses?
Double-sided crepe paper gives the best result, because every petal shows colour on both faces and the bloom looks deep from any angle. Heavy single-sided crepe works too, especially for the inner bud where the wrong side is hidden. Buy the roll labelled flower or florist crepe, which is thinner than craft crepe and stretches further. Avoid tissue paper: with no grain to stretch along, the petals stay flat and tear at the curl.
How do you make crepe paper rose petals look more realistic?
Three things do most of the work. Cup the petal by pulling the centre of the top edge outward with your thumb, curl that edge around a pencil two or three times, then push your thumb into the finished bloom and pull the layers apart. Varying petal heights also matters: middle layers level with the bud, outer ones angled down about 30 degrees. Even heights make the flower look flat and daisy-like.
Can I make crepe paper roses without a hot glue gun?
Yes. Floral tape alone holds a rose together if you stretch it as you wrap, because the adhesive only activates under tension. Wrap each petal base onto the wire and spiral green tape down the stem. Craft glue works as well, but give it a few minutes to set before you shape the flower. Some readers combine both, taping everything and adding a hidden dab of glue inside the bloom.
How do you keep the center of a crepe paper rose tight?
Roll the core strip loosely rather than tightly, leave the long edge overhanging so you can see the spiral, then squeeze the top down while the base stays wrapped. Re-roll if the centre looks hollow. A short strip is the usual culprit, so use the full 24 inches (60 cm). Anchor each wrap onto the wire as you go, not at the end, or the whole spiral twists apart when the flower stands up.
How long does it take to make one crepe paper rose?
Budget about an hour for the first one, and roughly fifteen minutes for each rose after that. Most of that first hour is learning how hard to stretch the paper and how tightly to roll the core, not cutting petals. If you are making fifty flowers for an event, do two slow ones first and then work in batches: cut all the petals together, cup them all, then assemble. A twisted single-strip rose takes about ten minutes with no shaping at all.
Can finished crepe paper roses be stored or displayed?
They can, and they hold their shape for years in a dry room, which is why they are popular for wedding and shower decor made weeks in advance. Keep them out of damp, heat and direct sunlight. Dust with a soft brush or a hairdryer on cool. For longer storage, lay them flat in a tissue-lined box rather than piling them, and reshape any crushed petals by separating the layers with your fingers.
Conclusion
Cut one strip 3 inches wide and 20 to 24 inches long (7 cm x 50 to 60 cm), roll it loosely around a wire core, and tape each wrap down as you go. That single rose teaches you everything: stretching, cupping, curling and taping.
Make it in one plain colour first. Once your hands know how the paper behaves, add the outer petal layers, then scale up to a giant rose by doubling every measurement and using two or three wires twisted together for the stem. As of 2026, a bouquet of your own roses costs less than a bunch of cut flowers and never wilts.