A paper crane is one of those crafts that looks like magic right up until you make the first one yourself. The good news: it is not magic, it is a square base, a bird base, and two reverse folds at the end. If you can fold a square in half and press a crease with your thumbnail, you can learn how to fold an origami crane step by step in about fifteen minutes of folding time.
The finished bird is roughly four inches across from wingtip to wingtip when you start with a six-inch square. Below I walk through twelve stages, and every one of them ends with a checkpoint so you can see whether the fold worked before you move on. That matters more than it sounds: most beginners who abandon the crane quit at the petal fold because they were pulling instead of opening.
Table of Contents
- 1What You Need
- 2Paper size and finished crane size
- 3How to Fold an Origami Crane Step by Step
- 4Step 1: Make a Square and Find the Open Corners
- 5Step 2: Collapse the Paper Into the Preliminary (Square) Base
- 6Step 3: Fold the Side Edges to the Center Line
- 7Step 4: Fold the Top Triangle Down to Set Up the Petal Fold
- 8Step 5: Open the Pocket for the Petal Fold
- 9Step 6: Complete the First Petal Fold
- 10Step 7: Repeat on the Back to Make the Bird Base
- 11Step 8: Narrow the Legs to Form the Body
- 12Step 9: Fold the Wings Down
- 13Step 10: Reverse Fold the Neck and Tail
- 14Step 11: Shape the Head, Wings and Body
- 15Step 12: Make the Crane Stand
- 16Common Mistakes
- 17Fix Uneven or Misaligned Edges
- 18Fix a Stuck or Torn Petal Fold
- 19Fix a Head That Is Folded Flat
- 20Tips for Beginner Origami
- 21Frequently Asked Questions
- 22What size paper should I use for an origami crane?
- 23How do I make a square piece of paper?
- 24Why is my origami crane falling apart?
- 25How do I fold the crane’s head correctly?
- 26Can I decorate my finished origami crane?
- 27Conclusion
What You Need
You need one square sheet of paper and about ten minutes. Everything else is optional but helpful.
- A square sheet of paper. A six-inch (15 cm) square is the classic beginner size. Printer paper, copy paper, gift wrap, or a single sheet trimmed from a larger craft paper pack all work.
- A bone folder or the edge of a ruler. Anything flat and firm that sharpens a crease without tearing the paper.
- A clean, flat surface. A table top works better than a desk with a lip, because you need to fold down to flat.
- Optional: a small ruler, a pencil for marking the centre line, and a shallow tray so your finished cranes do not get crushed.
Fold with the plain or printed side facing up, and finish with the printed side out. Nobody will hand you detention for it, but it means you are not hunting for a hidden white side at step five.
Paper size and finished crane size
| Starting square | Finished crane, wingspan | Good for |
|---|---|---|
| 4 in (10 cm) | about 2.5 in (6 cm) | Senbazuru strings, tiny gifts |
| 6 in (15 cm) | about 4 in (10 cm) | Standard beginner fold |
| 8 in (20 cm) | about 5.5 in (14 cm) | Display pieces, easy to see |
| A4 sheet, trimmed to a square | about 4 in (10 cm) | Office paper, no craft store |
Thin paper folds more cleanly, so paper is a better first choice than cardstock. Cardstock works, but it fights you at the reverse fold and needs a sharper crease. If you only have printer paper, that is genuinely fine. Experienced folders say the same thing: thin, workable paper and a firm crease beat expensive stock every time.
How to Fold an Origami Crane Step by Step
The crane is built in four stages: creasing the square, collapsing it into a preliminary base, folding that into a bird base, then narrowing the legs and finishing the neck, tail and wings. Most of the work happens in the first three stages. Get those clean and the rest takes a couple of minutes.
Step 1: Make a Square and Find the Open Corners
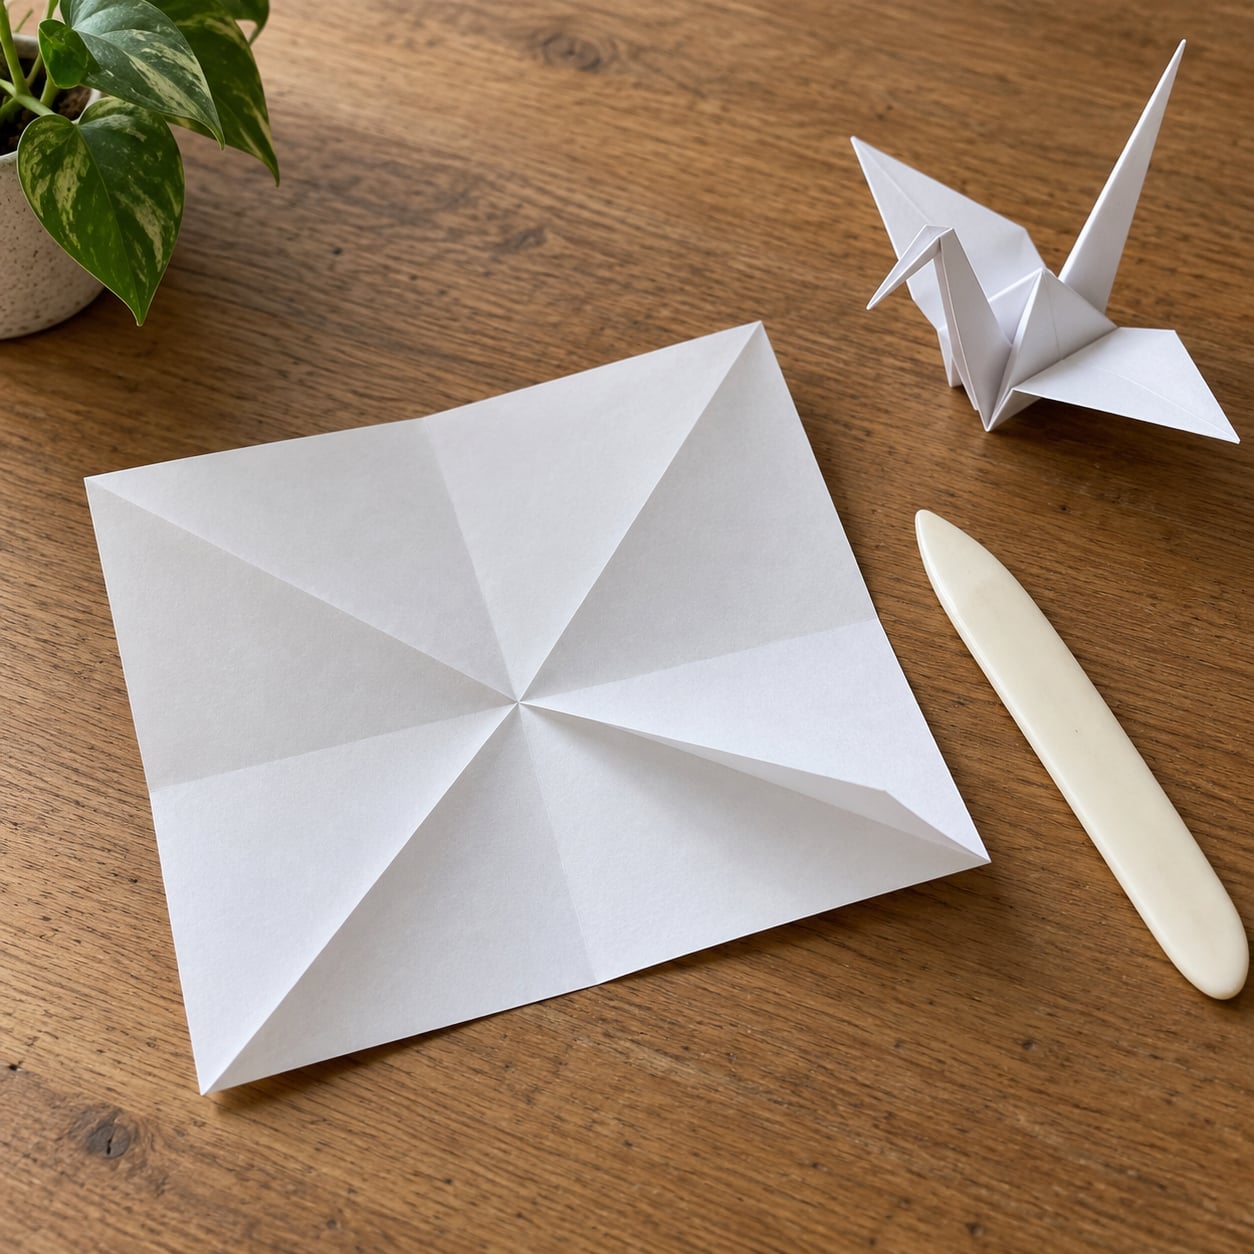
Start with the paper coloured side up. Fold it in half corner to corner, press the crease flat with your thumbnail, then unfold. Turn the paper a quarter turn and repeat the diagonal crease the other way, then unfold again.
Now fold the sheet in half vertically and horizontally, creasing and unfolding each time. Those four creases are your reference lines for everything that follows.
Checkpoint: you should see a square crossed by two diagonals and two straight centre lines, with one corner pointing at you and the opposite corner pointing away. Bring the near corner up to the far corner, matching the side edges, crease, and unfold. The crease you just made is your closed point. Turn the paper so that closed point sits at the bottom and the loose, open corners sit at the top.
Step 2: Collapse the Paper Into the Preliminary (Square) Base
With the closed point at the bottom, fold the bottom corner up to the top corner and crease well. The shape you now have is a triangle with the fold running down the middle.
Fold the left corner and the right corner in to the top corner, one at a time, creasing each edge. You should now have a narrow diamond with one flap on top of the other. Fold the top layer down to the bottom point and crease, then unfold that crease. This is your open edge.
Now collapse the whole thing into a square base. Open the top layer of the diamond, bring it down, and let the left and right corners swing inward at the same time. Flatten it into a small square with the closed point at the bottom and the loose corners at the top.
Checkpoint: a neat little square, closed point down, four loose corners up. Lift it and it holds together without unfolding. If it springs open, your diagonal creases were not firm enough. Crease them again and redo the collapse.
Step 3: Fold the Side Edges to the Center Line
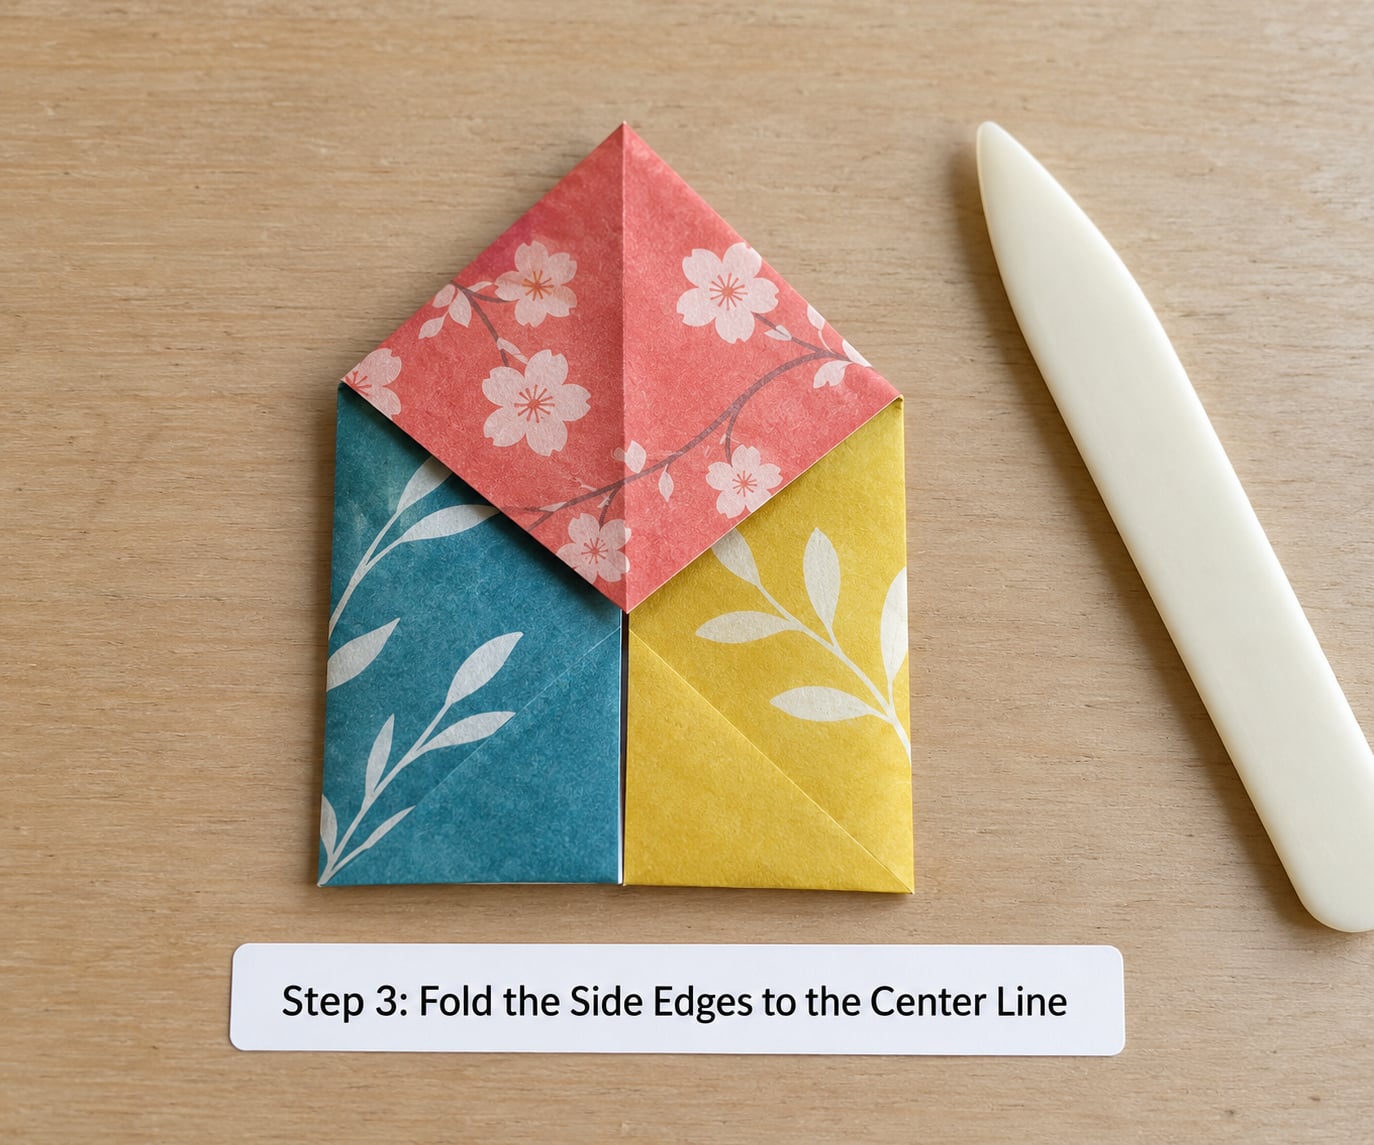
Turn the square base so the closed point is still at the bottom and one open flap faces you. Fold the bottom-left edge into the centre line running straight up the middle. Crease sharply from the tip to the top, then unfold. Repeat on the right side.
Fold that same edge in to the centre line again, this time keeping it folded. Do the identical fold on the right edge so both edges meet along the centre. Press the top edge flat.
Fold the top triangle down over the two flaps, crease, and unfold. That little horizontal crease is what makes the next stage work.
Checkpoint: a tall kite shape, symmetrical on both sides, with the folded-down top triangle sitting above the flaps and the long point still at the bottom. If one side sticks out further than the other, unfold that side and redo it. This is the single most common source of a lopsided crane.
Step 4: Fold the Top Triangle Down to Set Up the Petal Fold
That top triangle you just creased is the handle for the petal fold. Folding it down and back up tells the paper where to open. Press it down, run your thumbnail along the crease, then unfold it again and leave the flap standing.
Checkpoint: the model looks exactly as it did before, except you now know exactly where the horizontal line runs.
Step 5: Open the Pocket for the Petal Fold
This is where most people get stuck, and the fix is simple: do not pull. Take the top layer of the front flap and lift it gently upward from the very top, opening the pocket underneath like you are opening a book cover. As the pocket opens, the two side edges swing inward on their own.
The model should now look like an open flower bud with a long point at the bottom. Pinch the left and right sides inward so the flaps meet along the centre line and the shape becomes a long narrow diamond.
Checkpoint: the top of the model has opened into a tall point and the sides look thin and symmetrical. Nothing should be forced here. If the paper resists, stop lifting and press the sides in with your thumbs instead.
Step 6: Complete the First Petal Fold
With the sides pinched in, flatten the front layer down so the raised point lies along the centre. Fold the top triangle flap down over the front, crease it, and fold it back up. Then flatten the whole front petal down over it.
Press the left and right edges together all the way down to the bottom point so the crease stays crisp. Repeat the same press along the other side.
Checkpoint: one long, slim diamond with a sharp point at the bottom and a small triangle at the top. It looks lopsided at this stage, and that is correct. The second petal has not been made yet.
Step 7: Repeat on the Back to Make the Bird Base
Turn the model over and repeat steps 5 and 6 exactly: open the pocket, pinch the sides to the centre, flatten the petal, fold the top triangle down and back, and press the edges. This is your second petal.
When both petals are done, the model should have four long points hanging down: two inside and two outside. Fold the model in half lengthwise, squeezing all four points together, then open it back out.
Checkpoint: a slim diamond with four tails at the bottom and a small neck at the top. This is called the bird base, and it is the last hard part. Everything after this is shaping.
Step 8: Narrow the Legs to Form the Body
Hold the model so the four points hang down. Fold the outer left point in toward the centre, creasing from the neck down to the tip. Fold the outer right point in the same way. You are forming two slim legs and leaving two wider ones.
Turn the model over and repeat on the back so both sides match. When you are done, one point on each side is narrow and one is wide, and you have four points total: two narrow in the middle and two wide outside.
Checkpoint: four points, none of them thicker than a folded strip of paper, and the model looks like a very narrow diamond with a fringe at the bottom.
Step 9: Fold the Wings Down
Lift the top layer on both sides and fold the wide points upward so they lie along the sides of the body. These are the wings. Fold each wing down at about the neck joint, crease firmly, and repeat on the back.
Then fold the two outer points up so they sit above the body. These are the neck and the tail.
Checkpoint: the model stands on its own with two wings spread out to the sides, a thin neck angled forward and a straight tail behind.
Step 10: Reverse Fold the Neck and Tail
This is the last technique you need to learn, and it is the one that gives a flat fold its angle. A reverse fold turns a point around and changes its direction, and it is used for the head, the tail and the neck.
Work on the tail first because it is the easiest. Pinch the point and pull the tip back inside itself, creasing as you go, until the whole tail flips from straight out to angled up. On the neck, lift the tip and push it down into itself so it angles upward and forward.
For the head, take a small section of the neck tip, fold it down inside itself, and set the angle so the beak points slightly downward.
Checkpoint: you should hear a soft creaking sound as the point flips inside out. If the paper tears or the point will not move, stop pulling and use the pinched-crease method from the fixes section below.
Step 11: Shape the Head, Wings and Body
Gently curve the head down and adjust its angle so the neck narrows towards the beak. You are aiming for a slim neck, not a thick stub.
Pull the wings out to the sides until they sit at roughly a right angle to the body. Do not force them past the crease. The body should sit level between the wings when you look at the crane from the front.
Adjust the tail so it points straight back and slightly up. A well-shaped crane has a long straight tail, a raised head and wings that look like they could lift it.
Checkpoint: the model holds its own shape without a crease collapsing when you let go. Set it down gently on a flat surface.
Step 12: Make the Crane Stand
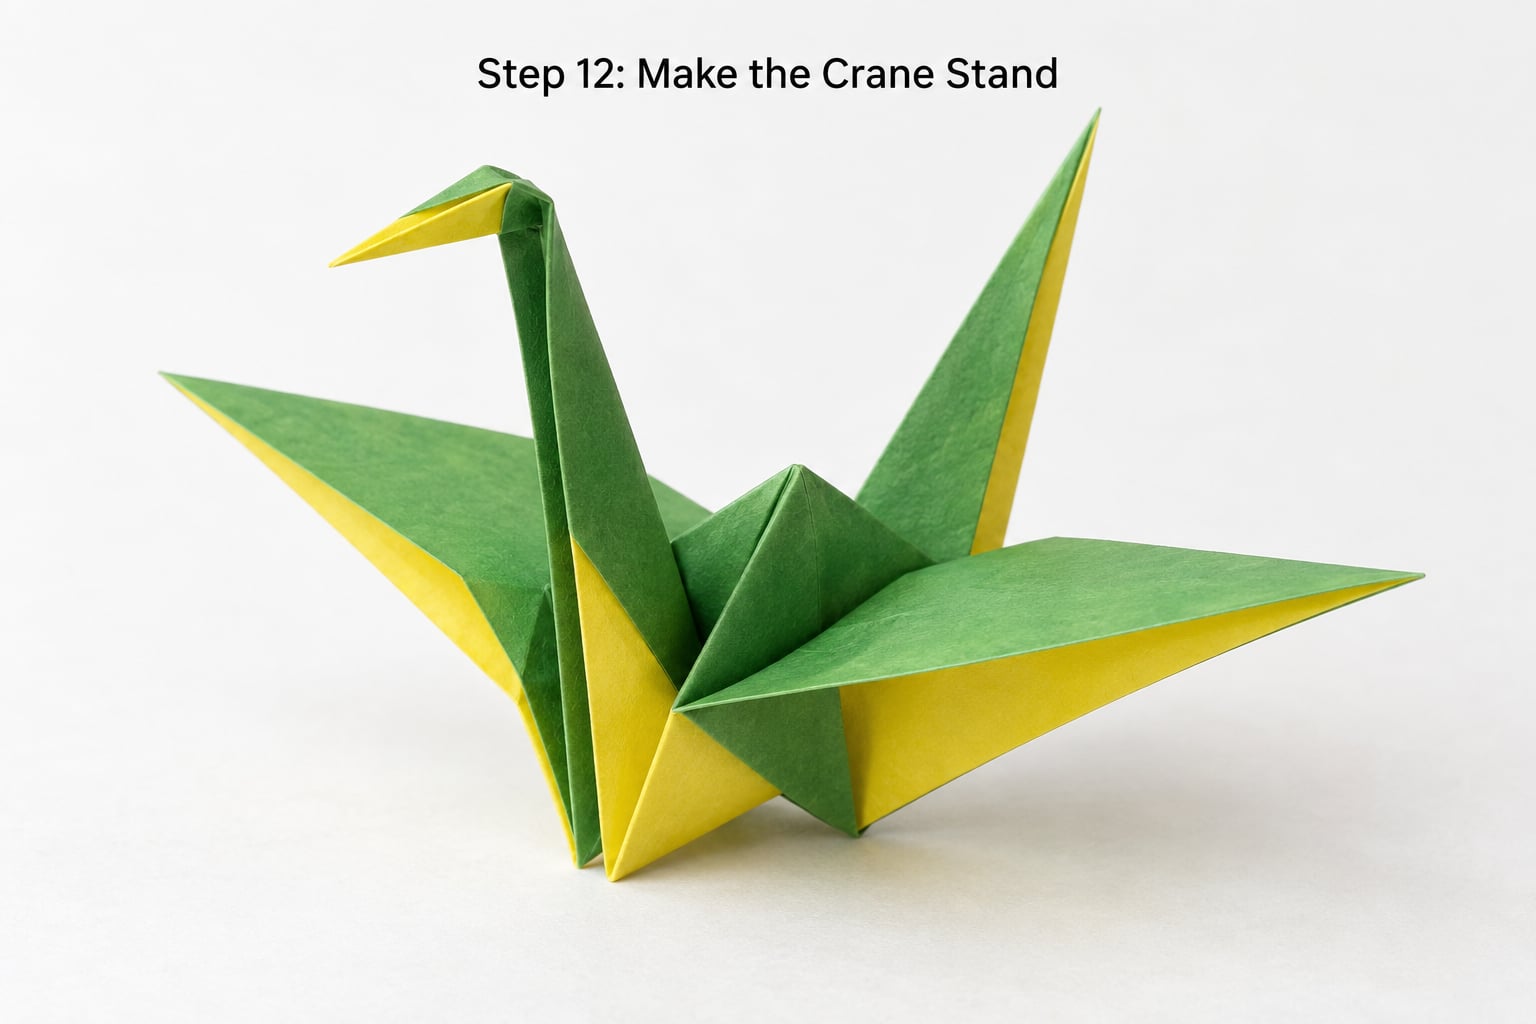
To make the crane stand upright, spread the two bottom flaps apart and set the model down so those flaps form a base. Push the wings down a few millimetres so they sit lower than the top of the body, which lowers the centre of gravity.
Nudge the head up a fraction so the neck carries forward. Test the balance by flicking the tabletop very lightly. If it rocks, move one foot outward or pull the head down slightly. Beginners often find the balance improves once the wings are spread a little wider.
Checkpoint: the crane stands upright without support, wings spread, head raised and tail extended behind.
Common Mistakes
Almost every failed crane comes down to one of three problems. Each has a clear symptom, so you can diagnose it fast instead of starting over.
Fix Uneven or Misaligned Edges
Symptom: after step 3, the model is wider on one side, or the finished crane leans and looks lopsided.
Cause: a crease was made with the paper slightly rotated, so the two side edges do not meet cleanly on the centre line.
Fix: unfold just that section, line the edge up with the centre crease with your fingertips, and re-crease from the bottom tip to the top. Use your thumbnail to press the crease rather than dragging it, and hold the paper still while you crease. Experienced folders treat unfolding and redoing as a normal part of the craft, not a failure.
Fix a Stuck or Torn Petal Fold
Symptom: the pocket will not open, the paper resists at step 5, or a small rip appears along the side.
Cause: pulling the flap upward instead of opening the pocket underneath it, and forcing too much paper at once.
Fix: stop pulling and put the model down. Unfold back to the end of step 3, then start the petal fold again from the flap tip with a much lighter touch. Open the pocket in small increments and let the side edges swing inward on their own. If a small tear has already happened, flatten it, tape the back with clear tape, and continue. If you folded the wrong layer, the symptom is that the long bottom point disappears into the middle of the model. Unfold and confirm you are lifting the top flap, not the layer beneath it.
Fix a Head That Is Folded Flat
Symptom: the head folds over neatly but stays flat and wide, and the crane looks like it has a paddle instead of a beak.
Cause: you folded the tip straight down as a simple fold, which flattens the neck.
Fix: undo the flat fold and use an inside reverse fold instead. Pinch the neck so the crease runs at an angle rather than straight across, push the tip in between the layers, and fold it back on itself. The neck gets narrower and the head lifts up. Repinch until the angle feels right, then press the crease with your thumbnail so it holds.
Tips for Beginner Origami
Three words show up in every origami instruction set. A valley fold folds the paper toward you, creating a V shape you can see. A mountain fold folds the paper away from you, creating a ridge that bumps up in the middle. A reverse fold flips a point around so it points in the opposite direction, which is how the head and tail get their angle.
- Crease with your thumbnail, not the flat of your hand. Run the thumbnail firmly along each line. A crease that springs back is the root of most frustration.
- Work from a diagram or a video alongside these words. Folders consistently say a visual reference removes the guesswork at the bird base.
- Turn the paper so the open corners are always facing away from you. The closed point should point down, and you should never be able to poke a finger into the closed end.
- Open pockets, never pull points. When a fold feels stuck, find the layer you can lift and open it gently. Pulling is what tears paper.
- Use the flat side of the paper facing you for the first square folds. Decorative patterns on the outside mean you can hide your early creases.
- Fold with kids slowly, and stop before frustration. Ages six and up usually manage the square base with help. A torn sheet costs more patience than a short session does.
- Keep the creases sharp at the end, not the start. Redo the bird base creases once the model is finished and every fold will tighten noticeably.
- Practice the reverse fold on scrap paper. It is the only technique here that takes repetition, and a failed attempt ruins the model.
The crane also has a cultural history worth knowing. It is called the orizuru in Japanese, and it belongs to a tradition of senbazuru, or thousand cranes, in which a person folds one thousand of them as an act of healing and good wishes. One folder reported that a thousand small cranes took roughly forty hours, which tells you something about the smallest useful size.
Frequently Asked Questions
What size paper should I use for an origami crane?
A six-inch (15 cm) square is the standard beginner size. It gives a finished crane about four inches across the wings, large enough to shape comfortably and small enough to make in a few minutes. A four-inch square works well for senbazuru strings and small gifts. An eight-inch square is easier for children to see and handle. Whatever size you choose, the paper must be square.
How do I make a square piece of paper?
Lay a rectangular sheet with the short edge at the top, then fold the top corner down to the bottom edge so the crease runs parallel to the bottom. The folded flap will extend past one side. Trim off the excess strip, and you are left with a square. A standard sheet of printer paper trimmed this way makes a crane about four inches wide.
Why is my origami crane falling apart?
Most collapses come from three causes: creases that were not pressed firmly, a preliminary base that did not collapse cleanly, or a petal fold forced instead of opened. Unfold back to the last good stage, re-crease every line with your thumbnail, and redo that stage slowly. If the model is still loose, the diagonal creases from step one were too soft.
How do I fold the crane’s head correctly?
Use an inside reverse fold rather than a simple downward fold. Pinch the neck tip so the crease runs at an angle, push the tip down between the layers, then fold it back on itself. The neck narrows and the head lifts to an angle. If the paper will not flip, pinch the crease first, then open the layers gently instead of pulling the tip.
Can I decorate my finished origami crane?
Yes, and the timing matters. Draw or write on the flat square before the first fold and the pattern spreads across the wings and body as the model collapses. Marker bleeds through thin paper, so use one with a light touch on the outside layer. Glitter glue and glue sticks add weight that makes the wings droop, so stick to paint pens or coloured pencil.
Conclusion
Start with a precise square base and make each crease deliberately, checking the shape against the checkpoint before you go on. The bird base is the only stage that feels difficult, and it goes smoothly once you open the pocket instead of pulling the flap. Once you have folded one, the same three moves will turn a stack of squares into a flock.