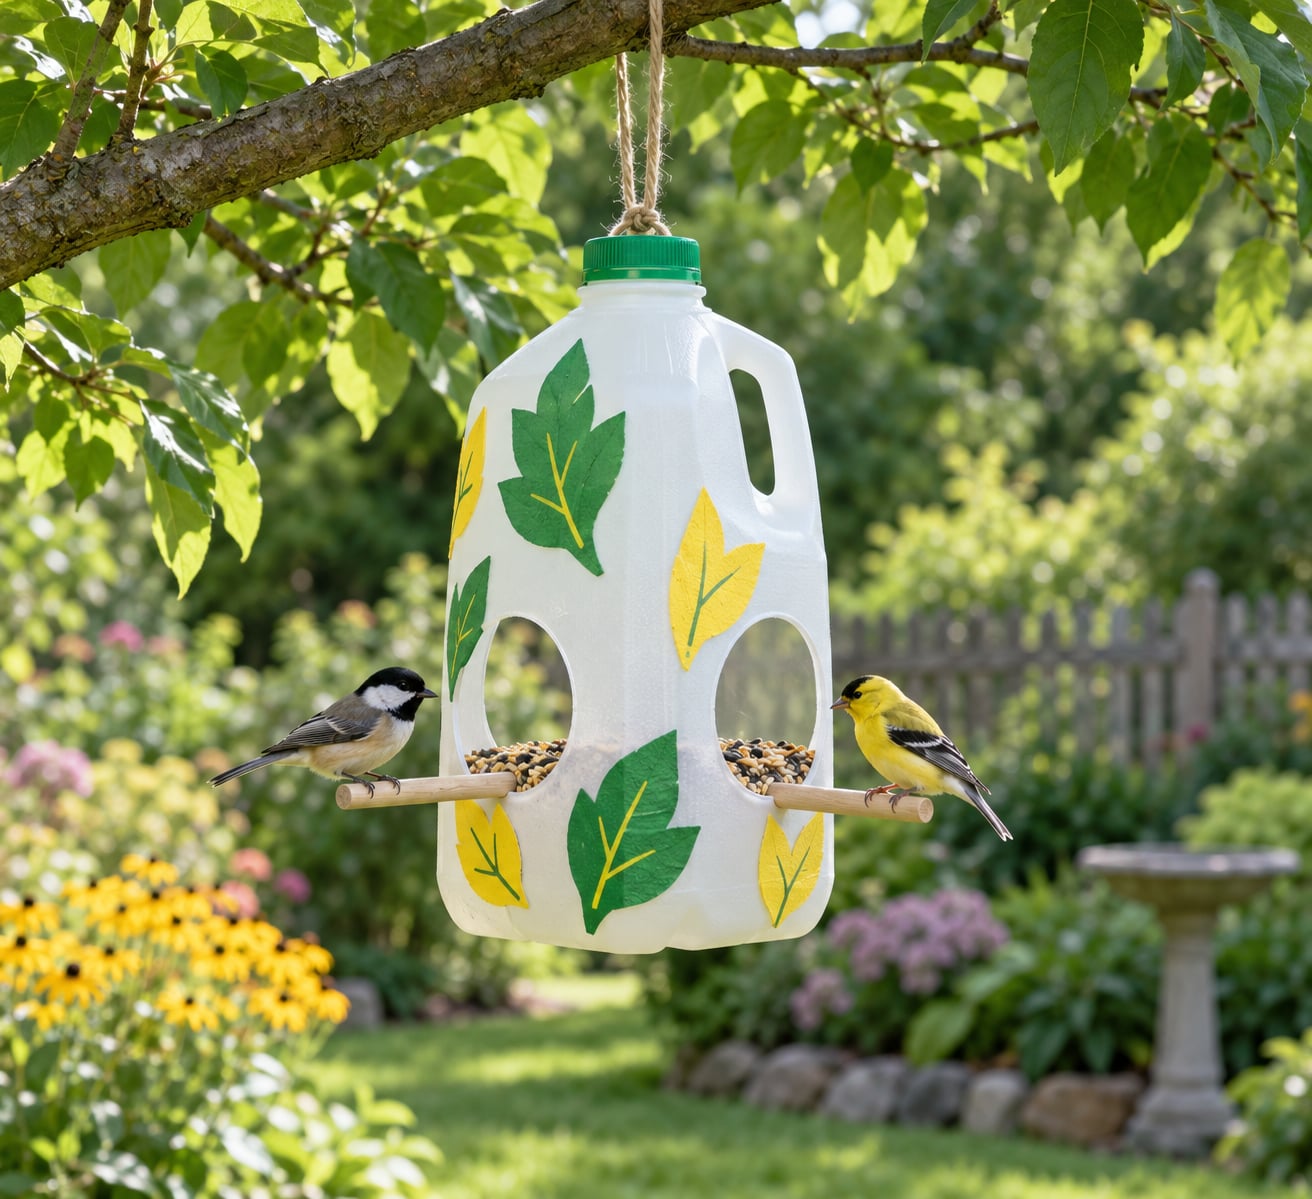
To make a bird feeder from a milk jug, rinse out an empty plastic gallon jug, cut two round access holes low on opposite sides, slide a wooden dowel through for a perch, poke a few small drainage holes in the base, then fill it with bird seed and hang it from a branch. It takes about 30 minutes, costs nothing, and works well enough for sparrows, chickadees and goldfinches.
This is the craft I keep coming back to in spring. My kids decorate it, my daughter counts birds on the perch, and I end up with a jug I would otherwise have thrown away. If you want the full project, start with the material list below and work through the steps in order.
Table of Contents
- 1What You Need
- 2Step-by-Step: Make a Bird Feeder from a Milk Jug
- 3Step 1: Prepare and Clean the Milk Jug
- 4Step 2: Mark the Feeder Opening and Perch
- 5Step 3: Cut the Holes Safely
- 6Step 4: Add Drainage and Cleaning Holes
- 7Step 5: Add a Hanger and Decorate
- 8Step 6: Fill and Hang the Feeder
- 9Common Mistakes and Helpful Tips
- 10Frequently Asked Questions
- 11What birds will actually use a milk jug bird feeder?
- 12What seed should I put in a homemade bird feeder?
- 13How do I stop squirrels emptying my milk jug feeder?
- 14Can children make this project on their own?
- 15Can I paint a milk jug bird feeder?
- 16Why is my homemade feeder empty every morning?
- 17Conclusion
What You Need
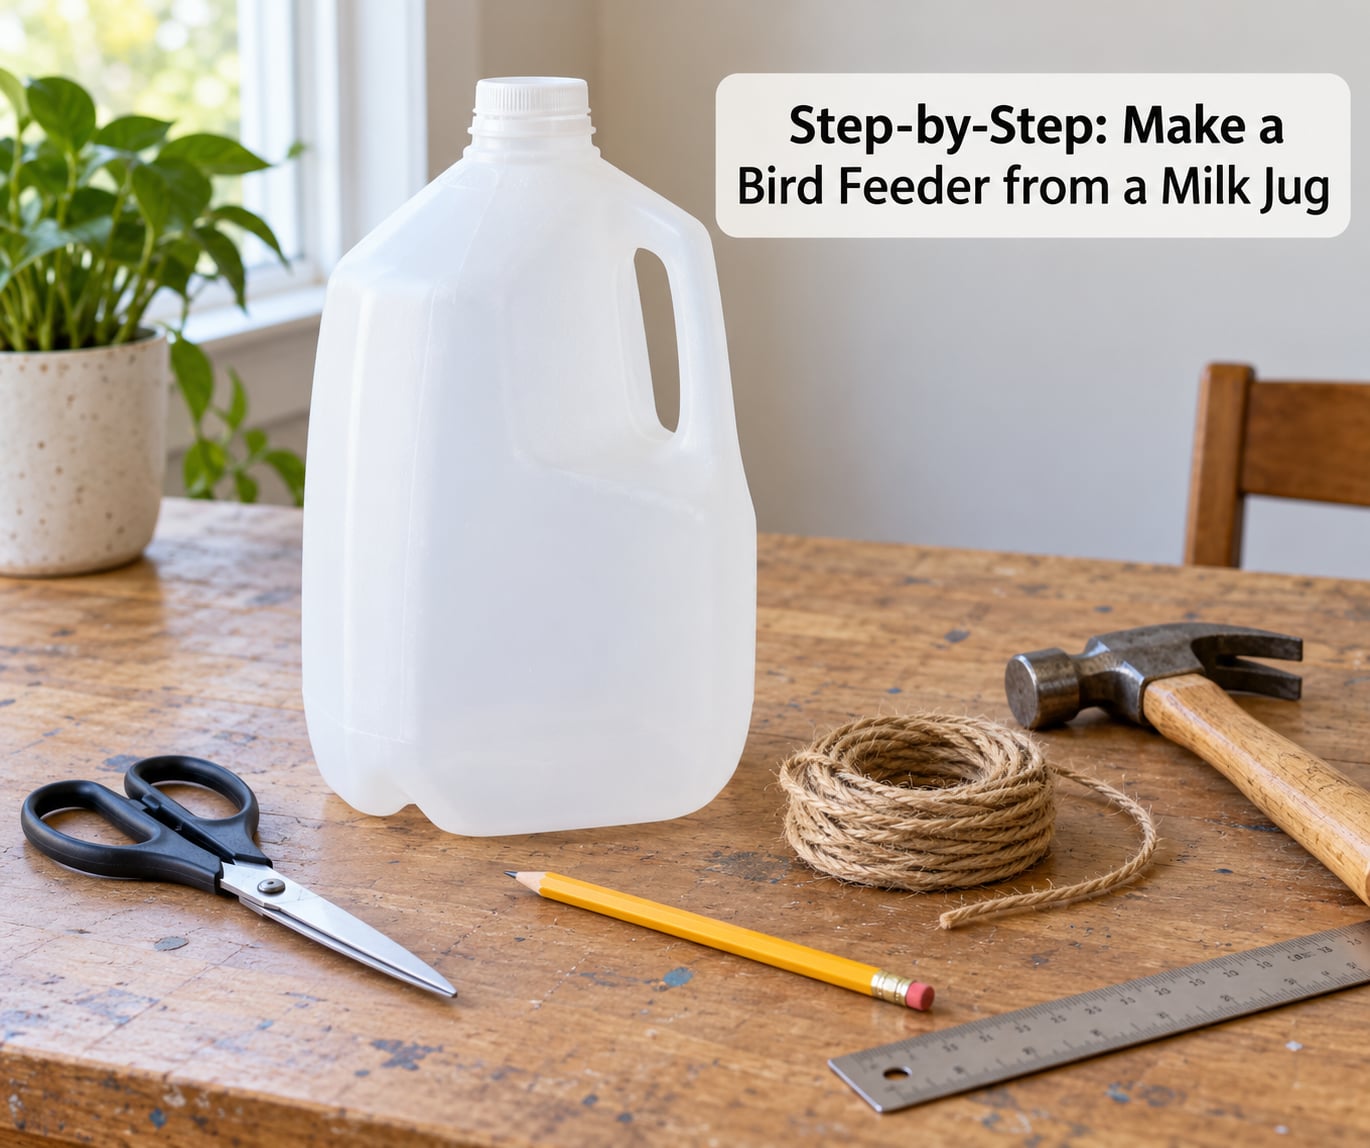
A clean plastic milk jug is the whole project. Everything else is something most households already own.
- One empty plastic milk jug — gallon size works best. Half-gallon jugs are fine too, they just hold less seed. Skip any jug with cracks, splits or a warped handle.
- Scissors or a craft knife — both work. A craft knife gives cleaner circles on plastic, but only an adult should hold it.
- Wooden dowel, chopstick or pencil — roughly 4 inches long, for the perch.
- Strong cord, twine or wire — about 3 feet. The jug handle doubles as a hanger if you prefer to skip this.
- Old towel or newspaper — for your work surface.
- Bird seed — a plain sunflower or mixed wildbird seed. Skip the colored bits with candy and glitter in the blend.
- Optional for decorating — acrylic craft paint, a paintbrush, stickers, and a glue stick. Tissue paper works too.
Before you cut anything, check the plastic itself. A jug that held motor oil, bleach or an unknown chemical is not a bird feeder, even rinsed.
Step-by-Step: Make a Bird Feeder from a Milk Jug
Step 1: Prepare and Clean the Milk Jug
Take the cap off, fill the jug with warm water and a drop of dish soap, and swish it hard. Rinse it twice and let it air dry completely.
The soak matters more than it sounds. Milk residue keeps smelling in warm weather, and that smell will push birds away before they ever land. If the jug still smells after one wash, repeat it.
If your child is helping, this is their step. Washing, drying and handling the jug need no sharp tools at all.
Step 2: Mark the Feeder Opening and Perch
Trace a circle about 1.5 to 2 inches wide low on each side of the jug, roughly level with the handle but 3 inches or so above the base. Make two of them on opposite sides.
A jar lid, a bowl or a roll of masking tape makes a clean template. Mark with a permanent marker or pencil, then trace around it.
Keep the seed level below the openings. That is the single trick that stops the whole thing from emptying onto the ground in a day.
Step 3: Cut the Holes Safely
An adult cuts the circles out with a craft knife or heavy scissors, working on the towel so the jug does not slide.
Pierce the middle of the circle first, then cut outward to the traced line and around. Small notches around the edge work fine since birds hop in.
Mark the perch line just below each opening and push the dowel through the plastic from one side. It should sit snug with no wobble. If it is loose, wrap the ends in tape to pad them, since loose dowels are a foot and beak hazard.
Safety note: a craft knife stays with an adult. Children can trace circles, press the dowel in, decorate and fill, which is most of the fun anyway.
Step 4: Add Drainage and Cleaning Holes
Poke five or six small holes in the base with an awl, a nail heated over a flame, or the tip of a screwdriver pushed with a hammer.
Keep them small, about the width of a match, and aim for the holes to sit under the seed drop zone so you catch the leftovers instead of spraying the ground. Anything larger and seed pours straight out all day.
Leave the cap off or loosen it so the top stays vented, and check that no hole makes the jug wobble when you set it down.
Step 5: Add a Hanger and Decorate
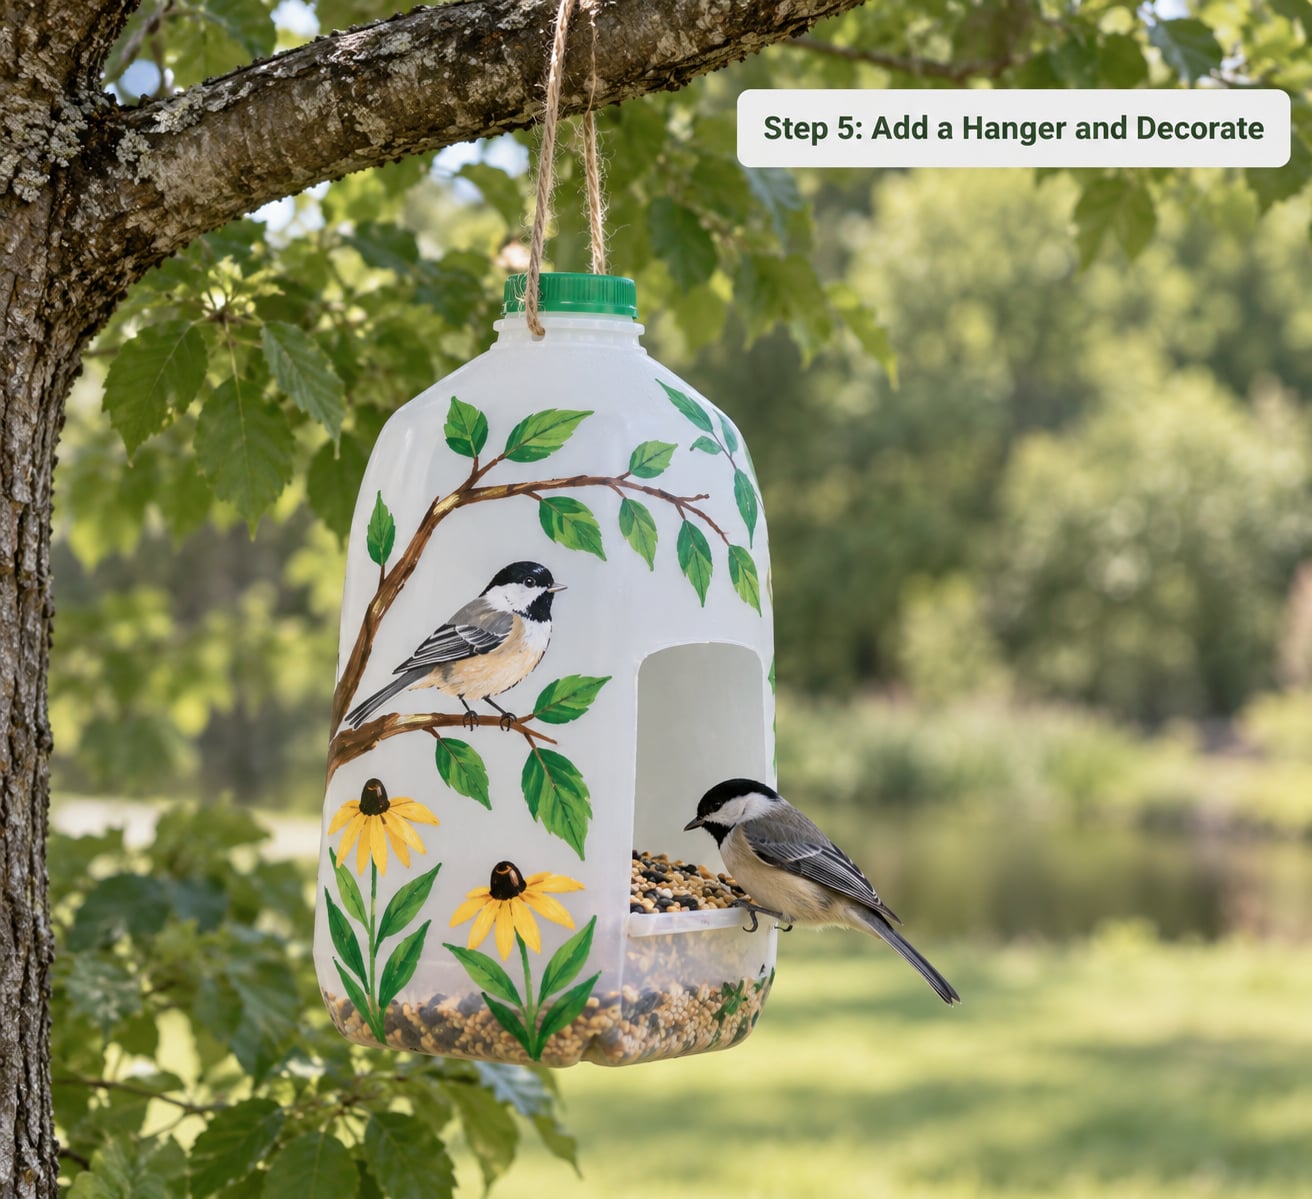
Thread the cord through the opening in the cap, or tie it around the handle, then knot enough slack to loop over a branch.
Paint or decorate the outside only. Keep everything bird-safe: acrylic paint rather than washable paint that rinses off in the rain, glue on the exterior rather than inside where birds peck, and no loose glitter, string or feathers that a bird could swallow or snag a toe on.
Skip twine loops and dangling decorations near the holes. Those are exactly the parts a curious bird will try to climb.
Step 6: Fill and Hang the Feeder
Fill through the top opening with seed, filling only halfway to about an inch below the access holes. A fuller feeder empties faster and pulls in squirrels, which is a fix, not a reward.
Hang it 5 to 7 feet off the ground, in partial shade, with a branch or dense shrub within a few feet. That height and nearby cover is what people call the 5-7-9 guideline for placement, and feeders that meet it usually see more visits in the first week.
Plan on refreshing the seed every few days and scrubbing the jug with hot soapy water at least weekly in warm weather. Mold and bacteria show up in days otherwise.
Common Mistakes and Helpful Tips
Most disappointing milk jug feeders fail the same way. Here is what goes wrong and the fix.
- The jug smelled like milk. Old residue carries for months. Soak with warm soapy water, rinse twice, air dry in the sun.
- Sharp edges around the holes. Rub them with a file or fold strips of tape over the rims. Birds probe with their beaks.
- Drainage holes cut too big. Seed pours out all day and lands under the feeder. Patch oversized holes with tape on the underside.
- Loose twine or decorations. Anything dangling inside or around an opening can catch a foot. Keep the interior bare.
- Filling it to the top. A half-full feeder slows squirrels down and lasts longer between refills.
- Hanging it in full sun. Heat and damp seed turn moldy fast. Shade keeps the seed dry longer.
- Skipping the cleaning routine. Dump leftovers, scrub with hot water and a brush, and let it dry in the sun before refilling.
Two more worth knowing. Birds often ignore a brand-new feeder for several days while they get used to it, so do not take silence as a failure. And if squirrels clear it overnight, move it higher and try a simple baffle, like a flat piece of cardboard resting on the cap so they cannot grip it. Filling less seed is the simplest deterrent of all.
Skip the coffee grounds around the feeder and skip the potato trick. Both show up in search results, and neither does what the posts claim.
Frequently Asked Questions
What birds will actually use a milk jug bird feeder?
Sparrows, chickadees, goldfinches, nuthatches and titmice are the regulars. They want a perch near a window and seed they can peck without flying off. A jug feeder works best with plain sunflower or a standard wildbird mix, hung in shade and refilled every few days.
What seed should I put in a homemade bird feeder?
Plain black oil sunflower seed is the safest all-round choice. A commercial wildbird mix works too, but skip blends with colored candy pieces or dried fruit, which can stain plastic and attract pests. Keep the seed below the level of the access holes so it does not pour out, and replace it every few days.
How do I stop squirrels emptying my milk jug feeder?
Fill the jug only halfway and hang it 5 to 7 feet up, since squirrels prefer low feeders and have to work for a hanging one. Widen the access holes a little or shrink them so a squirrel cannot grip the edge. A flat cardboard baffle resting on the cap also blocks the lid, which is where they usually start.
Can children make this project on their own?
No. An adult should handle the cutting, whether that is a craft knife or scissors, and should also press the dowel through the plastic. Children can safely do the washing, tracing the circles, decorating the outside and filling with seed. For toddlers, leave the cutting entirely to an adult and give them the decorating job.
Can I paint a milk jug bird feeder?
Yes, on the outside only. Use acrylic craft paint, since washable paint rinses off in rain and leaves a bare jug within a week. Keep paint, glue and glitter away from the inside surface, the cap and the drainage holes. Anything a bird can peck at or snag a toe on belongs outside the plastic, not in it.
Why is my homemade feeder empty every morning?
Three causes cover most cases: the seed sits above the access holes and pours out, squirrels are visiting, or the openings are too wide for small birds to hold on to. Drop the seed level an inch below the holes, fill the jug halfway instead of full, and check that the perch is snug so birds feel safe landing.
Conclusion
The whole project starts with a rinsed jug and two circles traced low on the sides. Do that much and the rest is a dowel, a handful of small holes and some seed.
That is really all there is to how to make a bird feeder from a milk jug: a clean container, two openings, a perch and a weekly scrub. Fill it halfway, hang it 5 to 7 feet up in partial shade, and clean it weekly once the weather warms. Let the kids own the decorating and the bird counting, since that is the part they remember long after the feeder is finally empty.