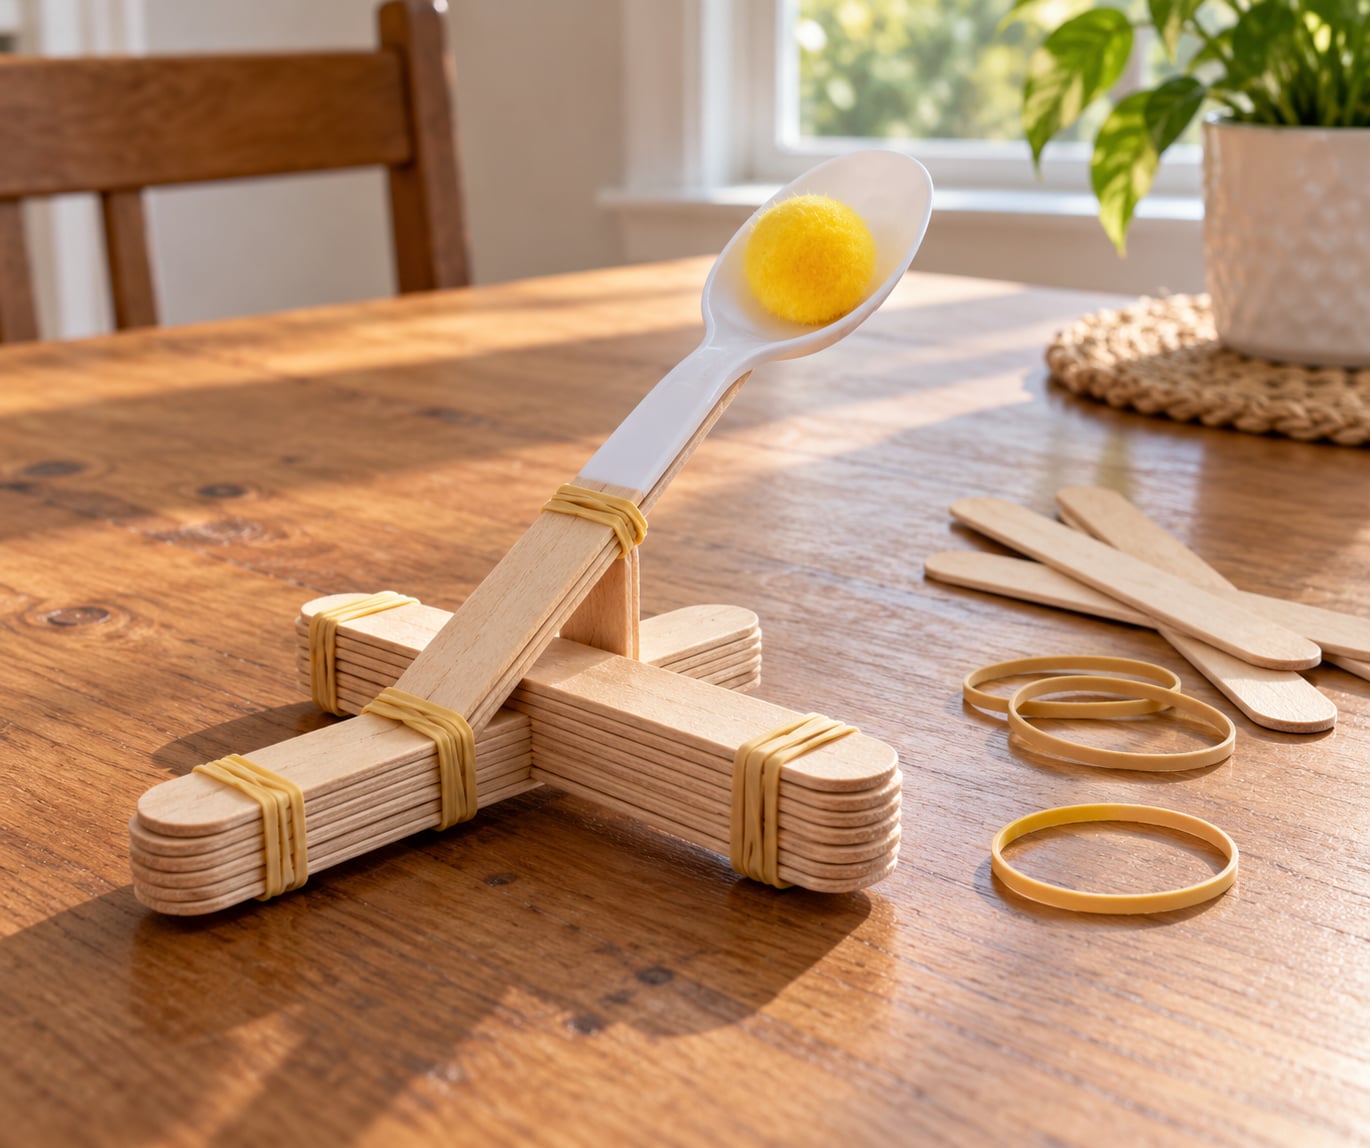
How to make a catapult with popsicle sticks takes about half an hour and needs nothing you don’t already have in a craft drawer. Stack craft sticks into two side frames, slide a single stick between them as the launcher, tape on a plastic spoon, and loop a rubber band over the arm to store the power. Pull down, let go, and it throws.
I’ve built this with my own kids more times than I can count, and the version below is the one that survives being handled by a seven-year-old. What makes the difference isn’t clever materials, it’s geometry: where the fulcrum sits and how evenly the arm swings. Get those two right and the thing hits a paper target from across the room.
You’ll need 9 craft sticks, 5 rubber bands, 1 plastic spoon, a few dots of glue and some soft projectiles. Kids roughly age 5 and up can build it with an adult nearby; anyone under 8 should have that adult doing the hot glue and the notching.
Table of Contents
- 1What You Need
- 2Step-by-Step
- 3Plan the Catapult’s Frame
- 4Attach the Launcher
- 5Build and Secure the Base
- 6Add the Rubber Band Power
- 7Load and Test the Catapult
- 8Common Mistakes
- 9Frequently Asked Questions
- 10What is the best age for a popsicle-stick catapult project?
- 11How do I stop my popsicle-stick catapult from breaking apart?
- 12What can I use instead of a plastic cup?
- 13How far can a popsicle-stick catapult launch a projectile?
- 14What is the safest projectile for an indoor catapult?
- 15How can I make my popsicle-stick catapult launch higher?
What You Need
Everything below is a normal household item. If you want a single recipe to follow without improvising, use exactly these quantities. Adding or removing sticks changes the design, not just the strength.
| Item | Quantity | What it does | Optional? |
|---|---|---|---|
| Popsicle or craft sticks | 9 | Eight form the two side frames, one becomes the launching arm | Required |
| Rubber bands | 5 | Two per side frame to bind the stack, one for power | Required |
| Plastic spoon | 1 | The cup that holds the projectile | Yes, see substitutes |
| Glue dots or clear tape | 6 to 8 | Hold the spoon to the arm and stiffen the joints | Recommended |
| Cork or extra stack | 1 | Fulcrum spacer under the arm | Yes, adds power |
| Soft projectiles | 6 or more | Pom-poms, marshmallows, folded paper balls | Required |
Five rubber bands is the number most people get wrong. Four hold the frame together, so only one is available to do the actual launching, and splitting the difference by adding a second power band is a fine upgrade once the basic version works.
If you have no plastic spoon, a bottle cap works as a cup, as does a folded circle of cardstock taped to the arm, or a small paper cup trimmed down. Jumbo craft sticks are worth hunting down if regular ones are all you have; the standard size sags across the span between the two frames under any real load.
Step-by-Step
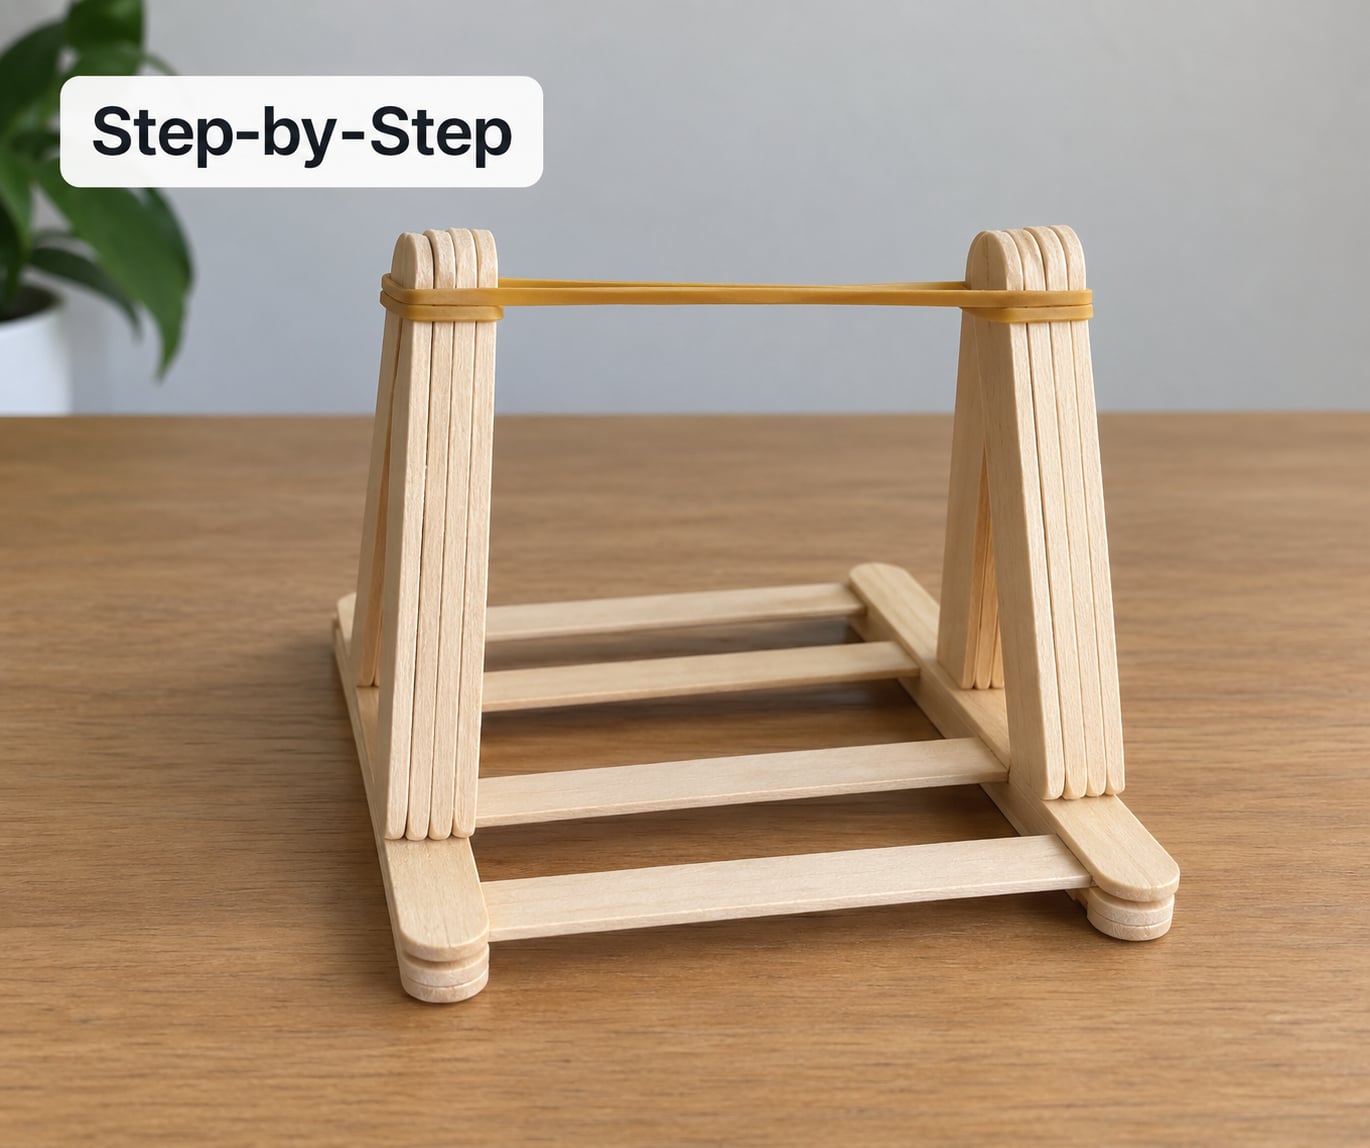
Build in this order and each part supports the next one. If you glue everything at once on a flat surface you’ll end up with a frame that rocks, and a rocking frame throws crooked every time.
Plan the Catapult’s Frame
Lay out eight sticks: four for the left side, four for the right. Stack each group of four on top of each other so they form two flat, parallel rails, then wrap a rubber band around the top end and another around the bottom end of each stack. That gives you two matched side frames with a band at every corner.
Set the frames about six inches apart and slide two more sticks crosswise between them near the bottom, one on each end, so the frame stands square. Check it on a flat table before you glue anything. If it rocks, slide a frame a few millimetres until all four feet touch. That squareness is what keeps the arm swinging straight instead of twisting.
Attach the Launcher
Slide the ninth craft stick horizontally between the two side frames, near the top, so it passes through the small gaps left by the rubber bands. This stick is the launching arm. It should rest with equal length sticking out on both sides at first, then you shorten the near side later if you want a stronger pull.
Wedge a cork, a short piece of stick, or a third stacked stick under the arm near the middle of the span. That’s your fulcrum, and it lifts the arm just enough to clear the frame when it swings up. Tape the plastic spoon to the long end of the arm with the bowl facing up, which puts the cup roughly a foot from the pivot.
Check the geometry by pulling the arm down with one finger and letting it go over a clear floor. The spoon should scoop upward and forward without the arm hitting the side frames. If it clips the frame, add a thinner spacer under the fulcrum.
Build and Secure the Base
Brace the frame by adding the two cross sticks you already slid into place at the bottom and gluing their ends to the side frames with glue dots. Work from the centre outward so the frame stays square while you press. Add a diagonal stick across the back if you want it rock solid; that single brace is what stops the classic mid-launch splay where both feet kick outward.
Sticks split when you squeeze them, so press glue dots between layers rather than clamping them. Where two sticks meet, one dot is enough. Let every joint sit for a few minutes before you load anything, because a catapult tested too early always gives you a misleadingly weak first result.
Add the Rubber Band Power
Loop the last rubber band around the cross stick at the back of the base and stretch it up over the launching arm. Pull the arm down until the band sits taut, then hook the arm down into the corner where the band meets the frame. Keep a finger on the arm the whole time you do this.
Pulling the arm down stretches the band and stores energy in it. Release the arm and the band shortens, swinging the arm up and forward so the spoon flings whatever is inside it. If the arm twists as you pull, the band is off centre. Slide it sideways a centimetre until the arm pulls down in one clean plane.
Make a small notch in the arm with a craft knife so the band has something to sit in, and the band stops sliding off the end at the worst possible moment. Adult hands only for the notching.
Load and Test the Catapult
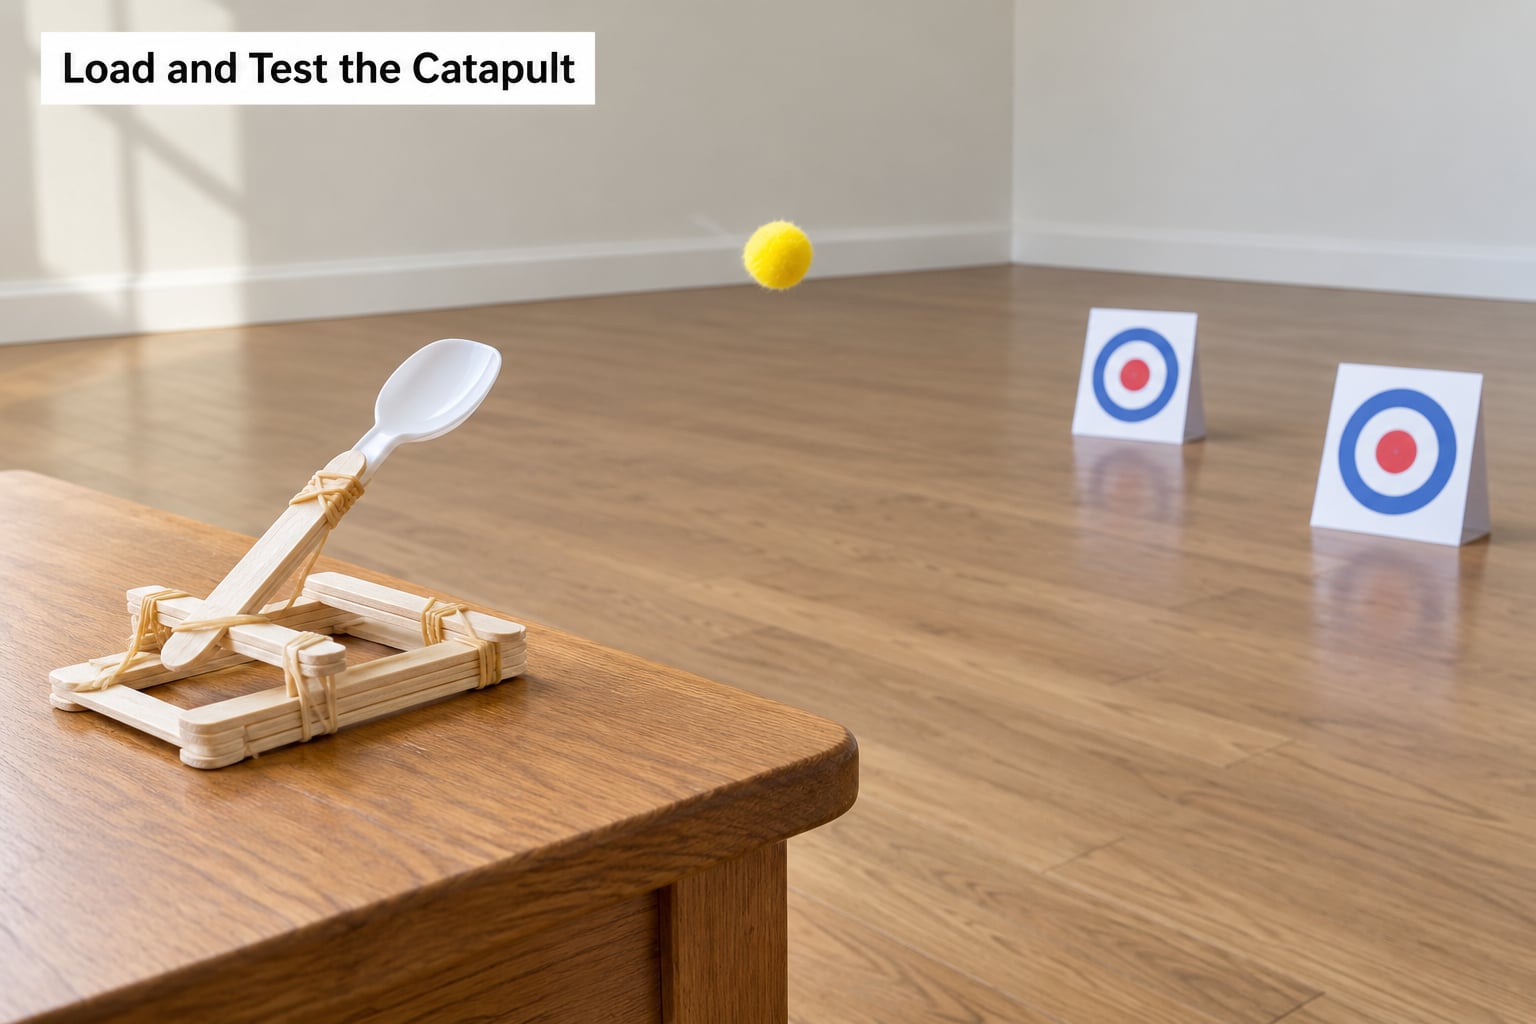
Drop a lightweight pom-pom into the bowl of the spoon and pull the arm down slowly. Let go over a short distance first, three or four feet, with nothing fragile behind it. That first test tells you whether the arm swings clean or whether the frame is splaying.
After each shot, press the joints with your thumb. A joint that has opened up even slightly needs a fresh glue dot before the next launch, because the rubber band will find that gap within seconds. Then move your target back a foot at a time and record where the pom-poms land.
Most simple catapults settle somewhere in the range of 4 to 12 feet indoors with a pom-pom, and the spread is wider than most people expect. The variables that matter most are the fulcrum height and how far down you pull the arm, not the number of bands.
Worth knowing why it works, since kids ask. The stick is a lever, the fulcrum is the pivot, and the spoon end is the long arm doing the work. Pulling it down stores elastic potential energy in the stretched rubber band, and the moment you let go that becomes kinetic energy that travels up the arm and into the projectile. It is the same simple machine in every trebuchet ever built, just made of craft supplies.
That also explains the tuning. Longer resistance arm means more launch speed; a tighter, more evenly stretched band means the arm arrives at full swing instead of stalling halfway. Aim for the middle of the arc, roughly 45 degrees, where the projectile is leaving the spoon fastest rather than being lifted into the air.
Projectile choice changes things more than most parents expect:
| Projectile | Flight | Indoor safety | Best for |
|---|---|---|---|
| Pom-pom | Flies well, light and draggy | Safest option | First tests and young kids |
| Marshmallow | Medium distance | Safe and slightly heavier | Distance comparisons |
| Tightly folded paper ball | Medium distance | Safe, no sticky mess | Using only paper |
| Cardstock cup with a sandbag | Furthest, hardest | Only over a clear outdoor target area | Older kids, controlled tests |
Common Mistakes
An uneven frame is the root cause of most disappointing launches. If the arm cants to one side as it swings, re-square the base before touching anything else. A wobbling base means the projectile squirts sideways no matter how much power you add.
Loose joints show up as a sudden sideways flop mid-throw. Reinforce with glue dots at the corners where the side stacks meet the cross sticks, not between the stacked layers, which add almost nothing structurally.
An off-centre cup throws crooked. Look at the spoon from above: the bowl should sit directly on the arm’s centre line, with the tape wrapping symmetrically on both sides.
An overstretched rubber band either splits the sticks or snaps the arm loose. Heavy-duty bands wound twice around the base are worth the swap once the basic version works. Standard elastics are usually too loose for a spoon-style launcher in the first place.
A projectile sitting in the wrong spot is easy to miss. It needs to rest in the bowl of the spoon, not on the flat of your hand over the arm, or it drops before the spoon ever gets there.
Unstable testing ruins more catapults than bad design does. Load from the same mark every time, point at an open floor, and keep people behind the machine rather than beside it. Classroom and scouting builds do well as a timed team challenge where everyone stands behind the line, which keeps the accuracy contest honest and the fingers safe.
Frequently Asked Questions
What is the best age for a popsicle-stick catapult project?
Around age 5 with an adult handling the glue and the knife, and independently from about 8 or 9. Younger children can place the projectiles and count the distance while an adult assembles the frame. The build itself takes 30 minutes, so a single sitting is enough for most ages.
How do I stop my popsicle-stick catapult from breaking apart?
Glue dots go where sticks meet, never between stacked layers, and a diagonal brace across the back stops the feet splaying on launch. Keep each side frame to four sticks so the stack stays rigid, and press rather than clamp, because clamping splits the wood. Check the joints after every shot.
What can I use instead of a plastic cup?
A bottle cap taped bowl-up works, as does a trimmed paper cup or a circle of cardstock folded into a shallow cup and taped to the arm. All three hold a pom-pom or marshmallow fine. A plastic bottle top cut with scissors is another option once you have a grown-up helping.
How far can a popsicle-stick catapult launch a projectile?
Expect roughly 4 to 12 feet with a single power band and a pom-pom, and measure it yourself rather than trusting a number online. Range depends far more on the fulcrum height and pull-down distance than on the rubber bands. Mark a start line and add a foot at a time to find your own ceiling.
What is the safest projectile for an indoor catapult?
Pom-poms first, then marshmallows and tightly folded paper balls. All three are light and soft enough that a stray shot cannot hurt anyone or break anything. Skip bottle caps, eraser caps, stones and anything hard, and aim at an open floor with nobody standing beside the machine.
How can I make my popsicle-stick catapult launch higher?
Move the projectile further from the fulcrum so the arm has a longer lever to swing it through, and release the arm at roughly a 45-degree angle rather than flat. A taller spacer under the fulcrum raises the pivot point. Adding a second power band increases distance more reliably than it increases height.
Start with the recipe as written: 9 sticks, 5 rubber bands, one spoon. Build the two side frames and confirm the frame sits square on the table before you add the arm, because that one check prevents most of the frustration people report with this build. Then load a pom-pom, mark a start line, and move your target back a foot at a time.