If you want to know how to make a scrapbook for beginners, the short version is this: pick one theme, gather about a dozen photos, and build a single page with a photo, a title, and a few lines you write by hand. A finished page you are slightly unhappy with beats a perfect plan you never start, and most beginners can finish their first album in an evening once they stop overthinking the layout.
I kept photos in a phone folder for six years before I made anything. When I finally sat down, my problem was not creativity. It was that a blank page looked like a test, and I assumed there was a right way to do it. There isn’t. What got me moving was treating the album as a small project with a tiny scope: one theme, one layout, eight pages.
Below is the process I still use. It works for a first baby album, a school project, a travel journal, or a wedding memory book, and it works whether you are making scrapbooks with kids or alone on the sofa after everyone has gone to bed.
Table of Contents
- 1What You Need
- 2What to scrapbook first
- 3Choosing an album size
- 4Free things you already own
- 5Step-by-Step: How to Make a Scrapbook for Beginners
- 61. Choose a Scrapbook Theme
- 72. Sort and Select Photos
- 83. Plan the Page Layout
- 94. Prepare the Background
- 105. Attach Photos and Paper Pieces
- 116. Add Titles, Captions, and Journaling
- 127. Decorate the Page
- 138. Finish and Protect the Scrapbook
- 14Common Mistakes
- 15Frequently Asked Questions
- 16What supplies do I actually need to start scrapbooking?
- 17What size paper should I use for a beginner scrapbook?
- 18Can I make a scrapbook with digital photos?
- 19What age is scrapbooking suitable for?
- 20How do I make a scrapbook without buying expensive tools?
- 21How long does it take to make a scrapbook?
- 22Conclusion
What You Need
You need fewer supplies than the shops would like you to believe. For a first album, gather an album, cardstock or patterned paper, printed photos, an acid-free tape runner, a few embellishments, and a pen. That is genuinely it, and most beginners waste their budget on tools they use once.
If you want to buy exactly five things, choose an album, a pack of cardstock, a pad of patterned paper, a tape runner, and a sheet of die cuts. Everything else can wait until you know what you enjoy.
What to scrapbook first
Start with a subject that already has a story attached to it. A baby’s first year, one trip, a graduation, or a run of ordinary weeks works better than “everything” because a theme gives you a colour and a boundary.
- Baby milestones — monthly photos, a handprint, a first-word list.
- A trip — a handful of days from one place, tickets and maps as memorabilia.
- Everyday moments — one photo per weekend for a season, which is the easiest habit to keep.
- A wedding or anniversary — small album, large prints, family notes.
- A school project — a topic, a date range, and a clear question to answer on each page.
Choosing an album size
Pick the size before you print anything, because it decides which papers and photos you can use. Twelve by twelve is the standard hobby size with the biggest supply range; smaller sizes cost less and print far more easily.
| Album size | Works well for | Watch out for |
|---|---|---|
| 12 x 12 inch | Layered layouts, big prints, the widest choice of patterned paper | Most supplies are made for this size, and 12×12 photos need a home printer or a large-format print |
| 8.5 x 11 inch | Standard paper, standard printers, a book that fits on a shelf | Smaller, so plan fewer photos per page |
| 8 x 8 inch | Four by six photos, simple grids, children making pages with you | Less room for journaling than you think |
| Mini album or spiral notebook | Travel, gifts, quick projects, trying the hobby out | You will crop prints to fit, which is fine |
A plain spiral notebook works well for a first attempt. Many scrapbookers tear the used page out of a cheap blank book so it lies flat, and that costs almost nothing.
Free things you already own
Before you shop, dig out the craft drawer. Old birthday cards give you patterned paper and journalling prompts. Envelope liners, wallpaper samples, wrapping paper and grocery bags all work as backgrounds. A paper trimmer or craft knife saves you from ragged edges, but scissors and a ruler will get you through page one.
Step-by-Step: How to Make a Scrapbook for Beginners
Here is the full process in eight steps, in the order that keeps pages looking tidy and keeps you from gluing things twice. Follow it in sequence and your first page will take about forty minutes.
1. Choose a Scrapbook Theme
Choose one theme and write it on a sticky note before you touch paper. A theme is just a mood plus two or three colours, and it stops you from bringing home a paper pack that fights with everything else.
Pick a title too, even a plain one. “Summer at the Lake” is enough. Next to the title, write three words that describe how you want the album to feel, such as calm, bright and messy. Those three words become your style guide when you are unsure whether something belongs.
Decide the page count now. Eight or twelve pages is a project you will finish. Sixty is a project you will abandon, and the abandoned stack is what makes beginners quit the hobby for good.
2. Sort and Select Photos
Choose three or four photos for the first page, not thirty. This is where beginners stall: too many photos, no decision made, album never started.
Sort them by story, not by date. A morning, an afternoon, and an evening tell a better page than six photos from the same hour. Print four by six for an eight or twelve inch album, three by four for smaller pages, and print two extras of the one photo you would be sad to lose.
You do not need a photo printer. Pharmacies and supermarket photo kiosks print standard four by six prints from a phone in a couple of minutes, and a home inkjet on good photo paper is fine for a first album. Turn off the “fit to page” framing, print on borderless photo paper, and trim the white edges after printing rather than before.
3. Plan the Page Layout
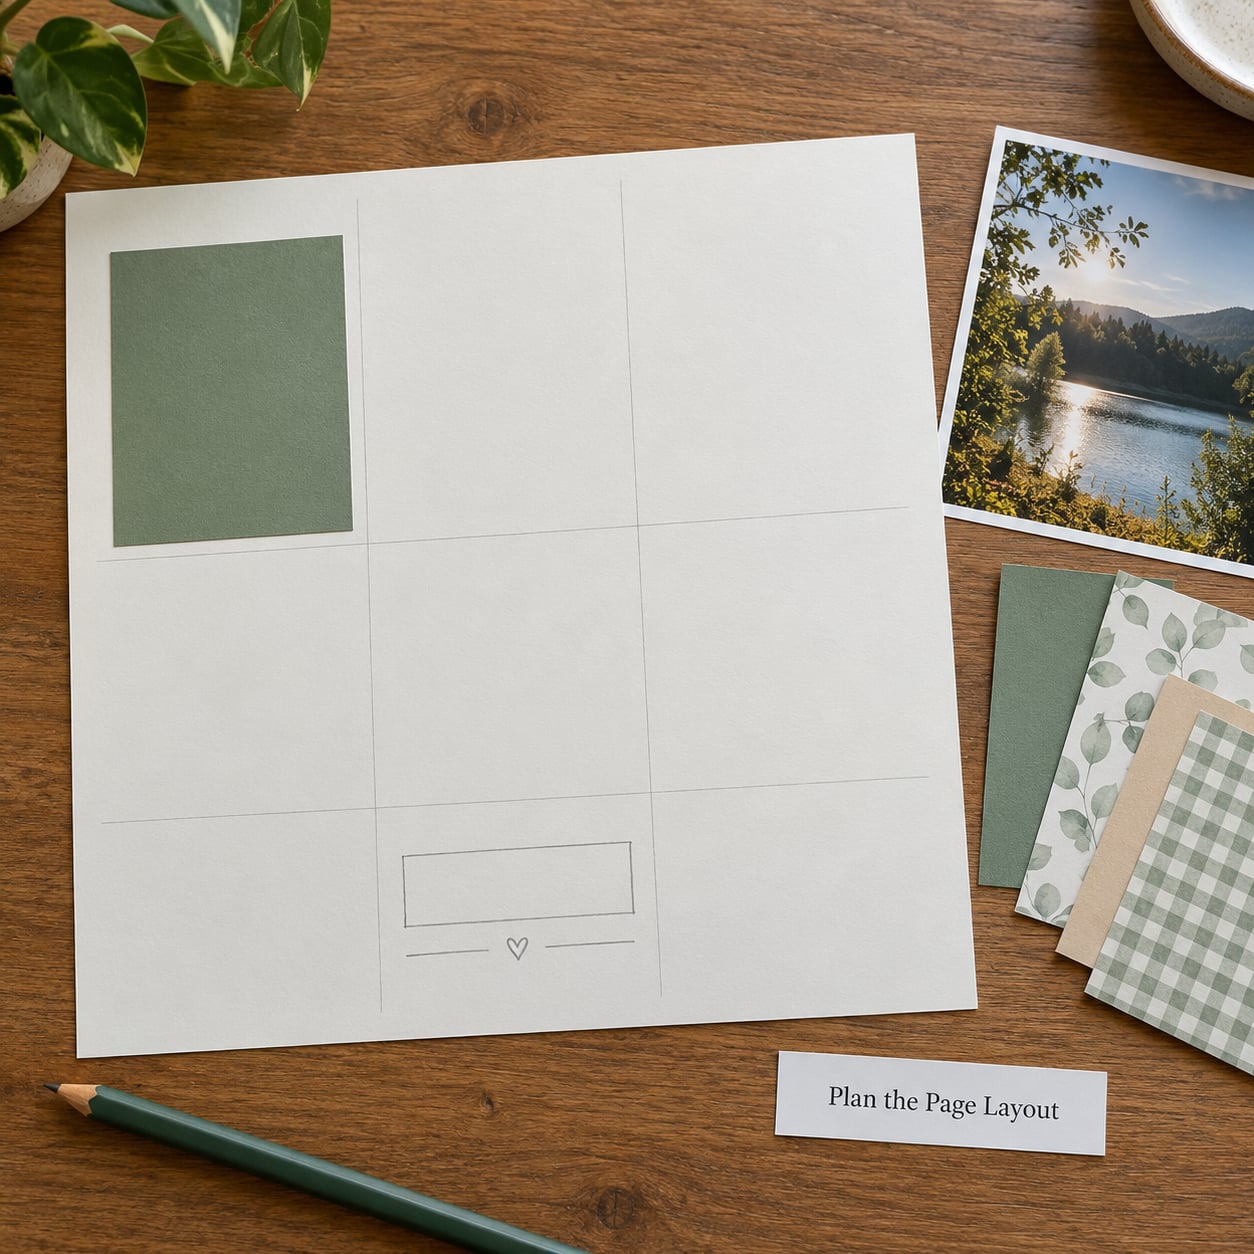
Plan on scrap paper first. Draw a rough rectangle for the photo, a smaller one for the title, and a block for your words, then move the pieces around until the page feels balanced. Five minutes here saves twenty minutes of peeling tape off cardstock later.
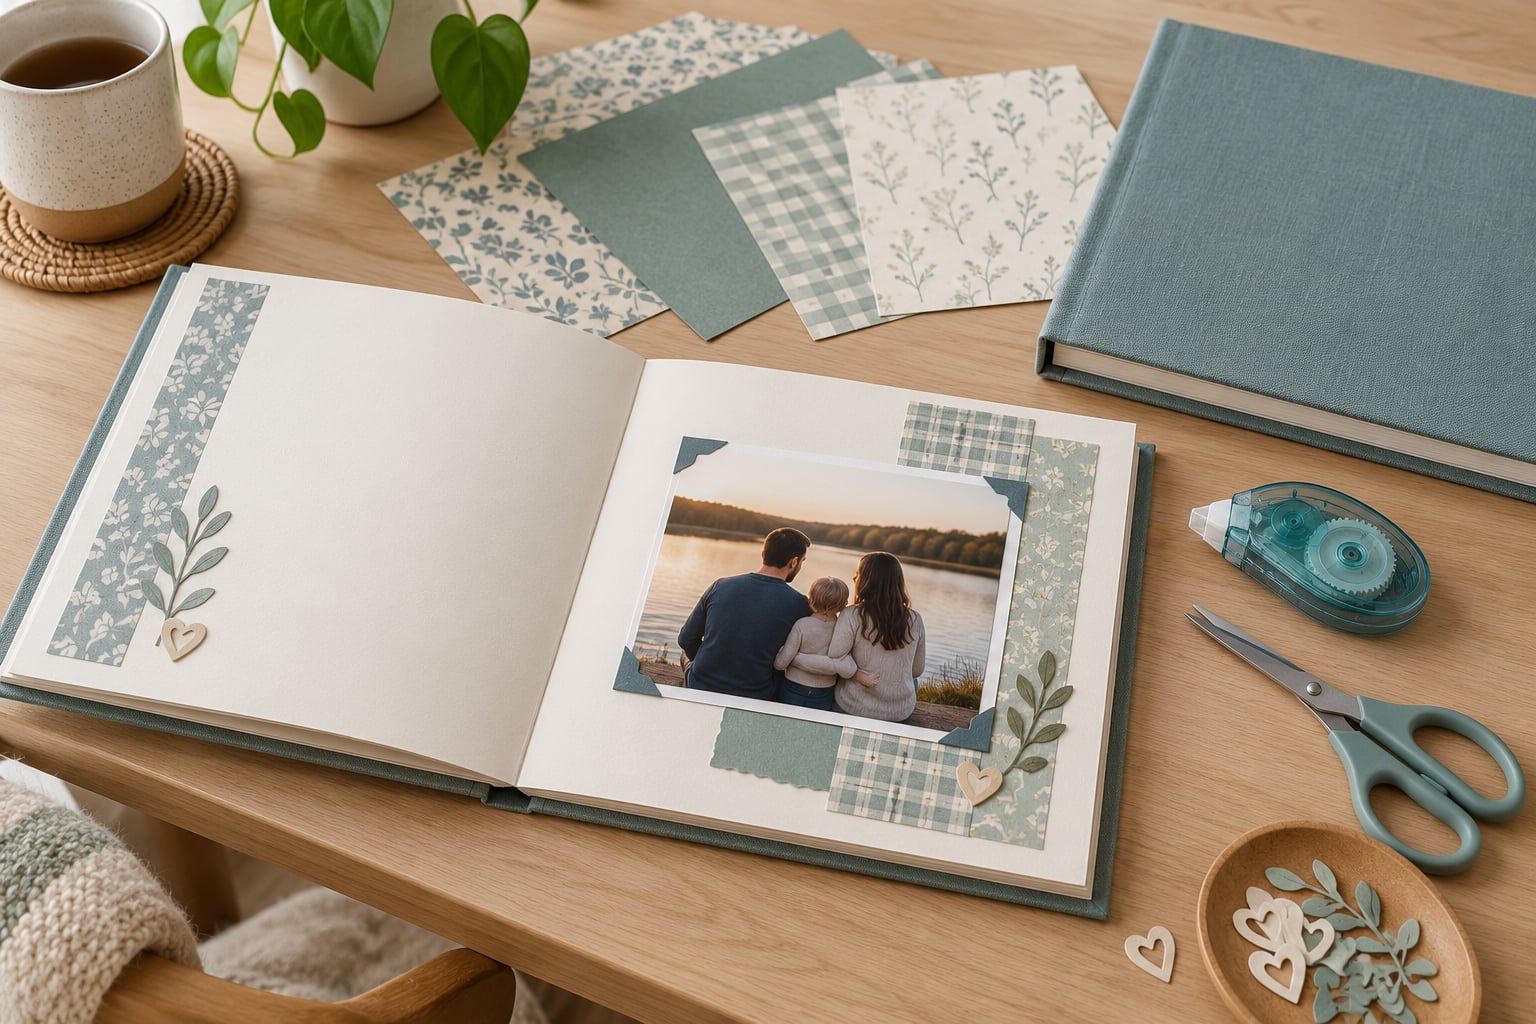
A simple repeatable formula works better than inventing a layout each time: one large photo, one title strip, one small journalling block, two or three patterned papers, then embellishments last. Repeat four or five of these across the album and the whole book looks like it was designed by one person, because it was.
For a grid of three photos, keep the gaps equal and the edges aligned. For a single photo, place it off-centre rather than dead centre, and leave the opposite corner deliberately empty. Empty space reads as confident, not unfinished.
4. Prepare the Background
Prepare a background in layers, starting with a full sheet of cardstock or patterned paper. Cut a second sheet slightly smaller and offset it to create a border, then add a thin strip of a third colour if you want more depth.
Keep it to three papers maximum. Overlapping is what makes a page look designed; four or five patterns on one sheet just look busy. If you cannot decide between two papers, put both on the scrap sketch and view them from arm’s length — the wrong one gets obvious from far away, the right one stays comfortable.
5. Attach Photos and Paper Pieces
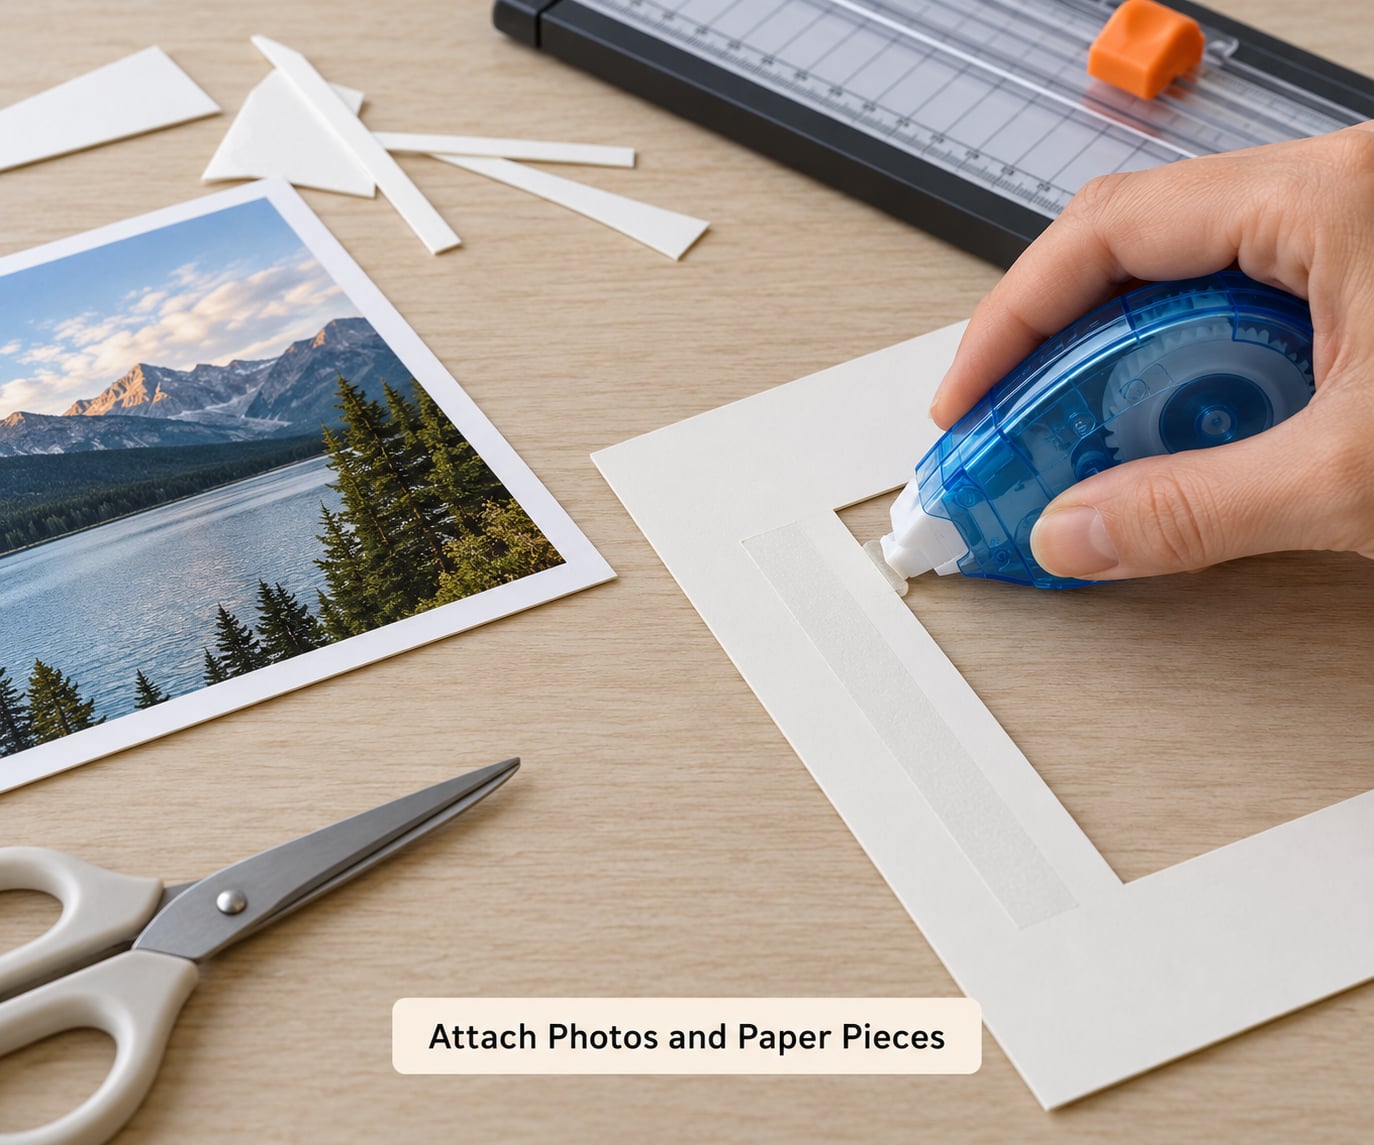
Attach everything with acid-free adhesive and put adhesive on the back of the small piece, never a wet line across the whole page. A tape runner with double-sided archival tape is the beginner’s best tool; liquid craft glue dries unevenly, warps cardstock, and eventually yellows.
Press each piece down with a burnisher or the flat of your hand, working from the centre outwards to push air out. If a photo is going in a plastic sleeve, make its mat one eighth of an inch larger than the print on every side so it drops straight in without forcing.
Work bottom to top: backgrounds first, then mats, then photos, then words, then anything raised. Raised pieces go on at the very end, because they sit on top of everything else and glue underneath them smears.
6. Add Titles, Captions, and Journaling
Write a caption in five words or fewer, then add two or three sentences underneath about what actually happened. A caption names the moment; journaling explains why it mattered. Decades later, your family reads the sentences, not the photograph.
Handwrite it if you can. Printed text looks tidier, but handwriting tells the reader a person sat down with this memory. Ask a child to dictate their version of the day and write it in their words, in their spelling, with the date beside it.
Use a black or dark brown pen for most pages and keep it consistent. If a child wants to write the caption, let them use a thicker marker in a colour that reads clearly from standing distance.
7. Decorate the Page
Decorate lightly. Three or four embellishments per page is plenty, and they should sit near the photo or the title rather than float in the middle of empty space.
Washi tape works as a quick border or to hold a photo corner, and it peels off cleanly later. Stickers and die cuts add shape and colour cheaply. Stamps with ink add texture without more paper. Buttons, ticket stubs, receipts and dried flowers count as memorabilia, and they are the details people flip back to years later.
Make your own elements when you have nothing left: hand-cut frames from kraft paper, a stamped date, or a hand-lettered label. Homemade pieces fit your page exactly, which off-the-shelf embellishments often do not.
8. Finish and Protect the Scrapbook
Finish each page by sliding it into a page protector, or cut it down to fit a pocket page for a pocket-style album. Keep protectors acid-free and lignin-free, the same words you will see on good paper, so nothing yellows or sticks to itself in a warm cupboard.
Before you file it, check the page from a step back: one clear focal photo, no crowding at the edges, nothing hanging over the sleeve. Do one page at a time over several evenings rather than fifty pages in one marathon, because a single finished page every week keeps the project alive and an exhausting weekend ends it.
Then label the spine, date the album, and put it on a shelf rather than hiding it in a cupboard. An album nobody opens is the same as no album, and finishing is the part most beginners skip. Once you know how to make a scrapbook for beginners and the process stops feeling like a test, the rest is just repetition.
Common Mistakes
Almost every beginner problem comes from doing too much at once. Each mistake below has a quick fix you can apply to the page in front of you.
Crowded pages. Four photos, three papers, a title, four lines and nine stickers is a page with no rest. Cut it back to one focal photo and three embellishments, and move the rest to the next page. Empty space is part of the design.
Uneven photo placement. Edges that do not line up make a page look accidental. Use a ruler to mark your photo positions in pencil first, or pick a grid and commit to it. Equal gaps matter more than perfect centring.
Too many embellishments. Stickers and die cuts should point at the story, not fight for attention. If an embellishment is not near a photo or a title, move it or leave it out.
The wrong adhesive. Household glue stick and generic craft glue will bow your cardstock and yellow within a few years. Use acid-free double-sided tape in a runner, and foam squares only for the photo corners so the print stays liftable.
Captions nobody can read. Tiny writing on patterned paper disappears at arm’s length. Write on plain cardstock, keep lines short, and leave the date somewhere visible. If the page is busy, move the words to a strip of white and lay it on top.
Photos never printed. The most common stalled habit is not craft skill, it is a folder of 400 images and no prints. Cull to ten, print ten, and put them in a small box the same day. A box of prints makes a page, and an idea makes nothing.
And one more: buying supplies before making a page. Most long-time scrapbookers went back and cut their first kit in half. You can always buy more paper later, and unused supplies sit in a drawer convincing you the hobby is expensive.
Frequently Asked Questions
What supplies do I actually need to start scrapbooking?
You need an album, printed photos, cardstock or patterned paper, an acid-free tape runner, a black pen and two or three embellishments. That is enough for a full album. A paper trimmer, stamps and a die cut machine are lovely but optional. Start with the five-item list, make three pages, then buy only what you used.
What size paper should I use for a beginner scrapbook?
For most beginners, 8.5 x 11 inch paper or a standard 12 x 12 inch album works best. Twelve by twelve is the hobby standard and offers the widest supply range, while 8.5 x 11 lets you use plain printer paper and standard photo prints. Eight by eight albums take four by six prints nicely and suit pages made with children.
Can I make a scrapbook with digital photos?
Yes, and you do not need to print anything to begin. Print your photos through a pharmacy or photo kiosk from your phone in a couple of minutes, or use a home printer with borderless photo paper and trim the white edges afterwards. You can also build the page in a free digital app and print the whole layout as one large photo.
What age is scrapbooking suitable for?
Anywhere from about five years old upward, with an adult nearby. Younger children enjoy sticking photos, tearing paper and stamping, while adults handle adhesive and trimming. Keep the supplies child-safe and let the child choose the title and captions. Children often write the best journal lines in the album, spelling and all.
How do I make a scrapbook without buying expensive tools?
Use a blank spiral notebook instead of a purpose-made album and tear out the used page so it lies flat. Scissors and a ruler replace a paper trimmer, old cards and wrapping paper replace a patterned paper pad, and hand-cut shapes replace die cuts. A paper trimmer and a good tape runner are the only two tools worth buying later.
How long does it take to make a scrapbook?
A first page takes about forty minutes once your supplies are out. A finished twelve-page album is roughly eight to ten hours spread over a few weeks, and most of that time is choosing photos rather than gluing. Working on one page a week keeps the project alive and is far easier to sustain than one long session.
Conclusion
Start with one theme and eight pages, pull ten photos out of that folder on your phone, and finish a single page before you decorate anything else. Print the photos the same day you choose them, write three sentences about the moment, and put the album on a shelf where you will see it. That is how to make a scrapbook for beginners, and the second album is easier than the first.