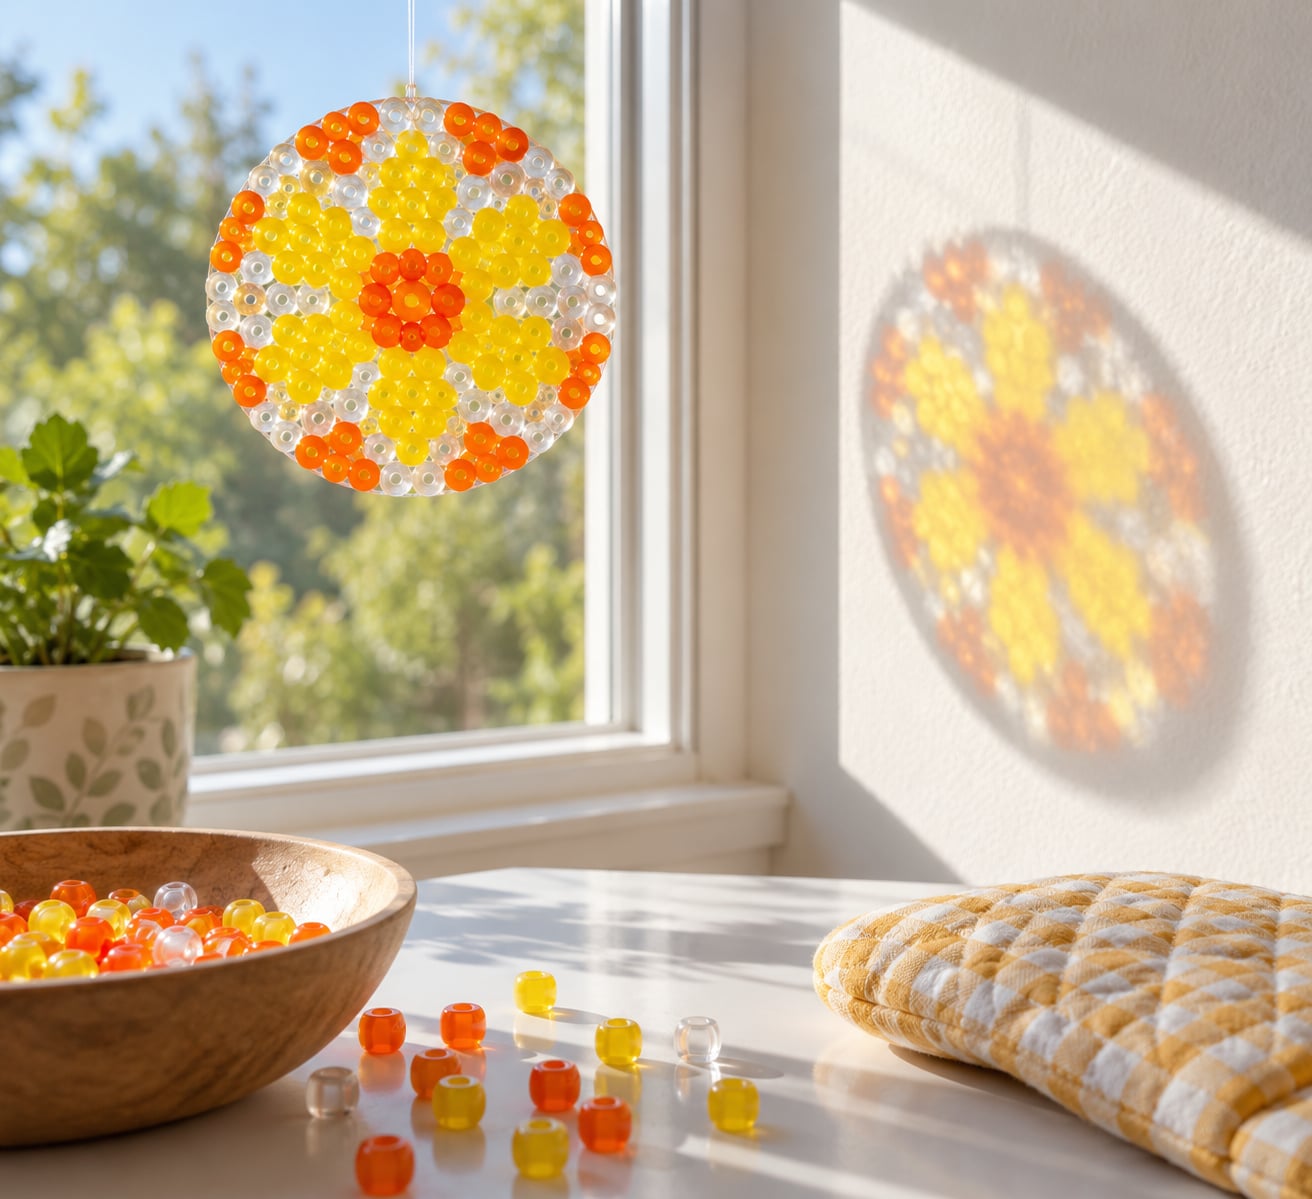
If you want the fastest route to a stained-glass-looking window decoration, here it is: arrange translucent plastic pony beads in a single layer inside an oven-safe metal mold, bake at 400F until they soften and fuse into one flat piece, let it cool completely, then add a hanging loop. The whole project takes about an hour, most of which is waiting.
That is genuinely how to make melted bead suncatchers, and the reason it works so well for kids is that the transformation is visible. Beads go in as loose cylinders and come out of the oven as a single translucent disc that throws colored light across the floor. My own kids check the window every morning to see what shade shows up.
A few things trip people up before they start. Opaque beads look lovely but block light entirely, and a sparse layer bakes into a tray of separate melted dots instead of one piece. Get those two right and the rest is straightforward.
I refreshed this guide for 2026 with the timings and mold options that actually work, plus the fixes for the mistakes I have watched other families make.
Table of Contents
- 1What You Need
- 2Step-by-Step
- 3Step 1: Choose a Design
- 4Step 2: Arrange the Beads
- 5Step 3: Melt the Beads Safely
- 6Step 4: Let the Design Cool
- 7Step 5: Add a Hanging Loop
- 8Step 6: Display the Suncatcher
- 9Common Mistakes
- 10Frequently Asked Questions
- 11What temperature should melted bead suncatchers be baked at?
- 12How long do I bake melted beads for?
- 13Can I make melted bead suncatchers without an oven?
- 14What beads work best for a beginner suncatcher?
- 15How do I stop the design from bending when I remove it?
- 16Will sunlight fade a melted bead suncatcher?
What You Need
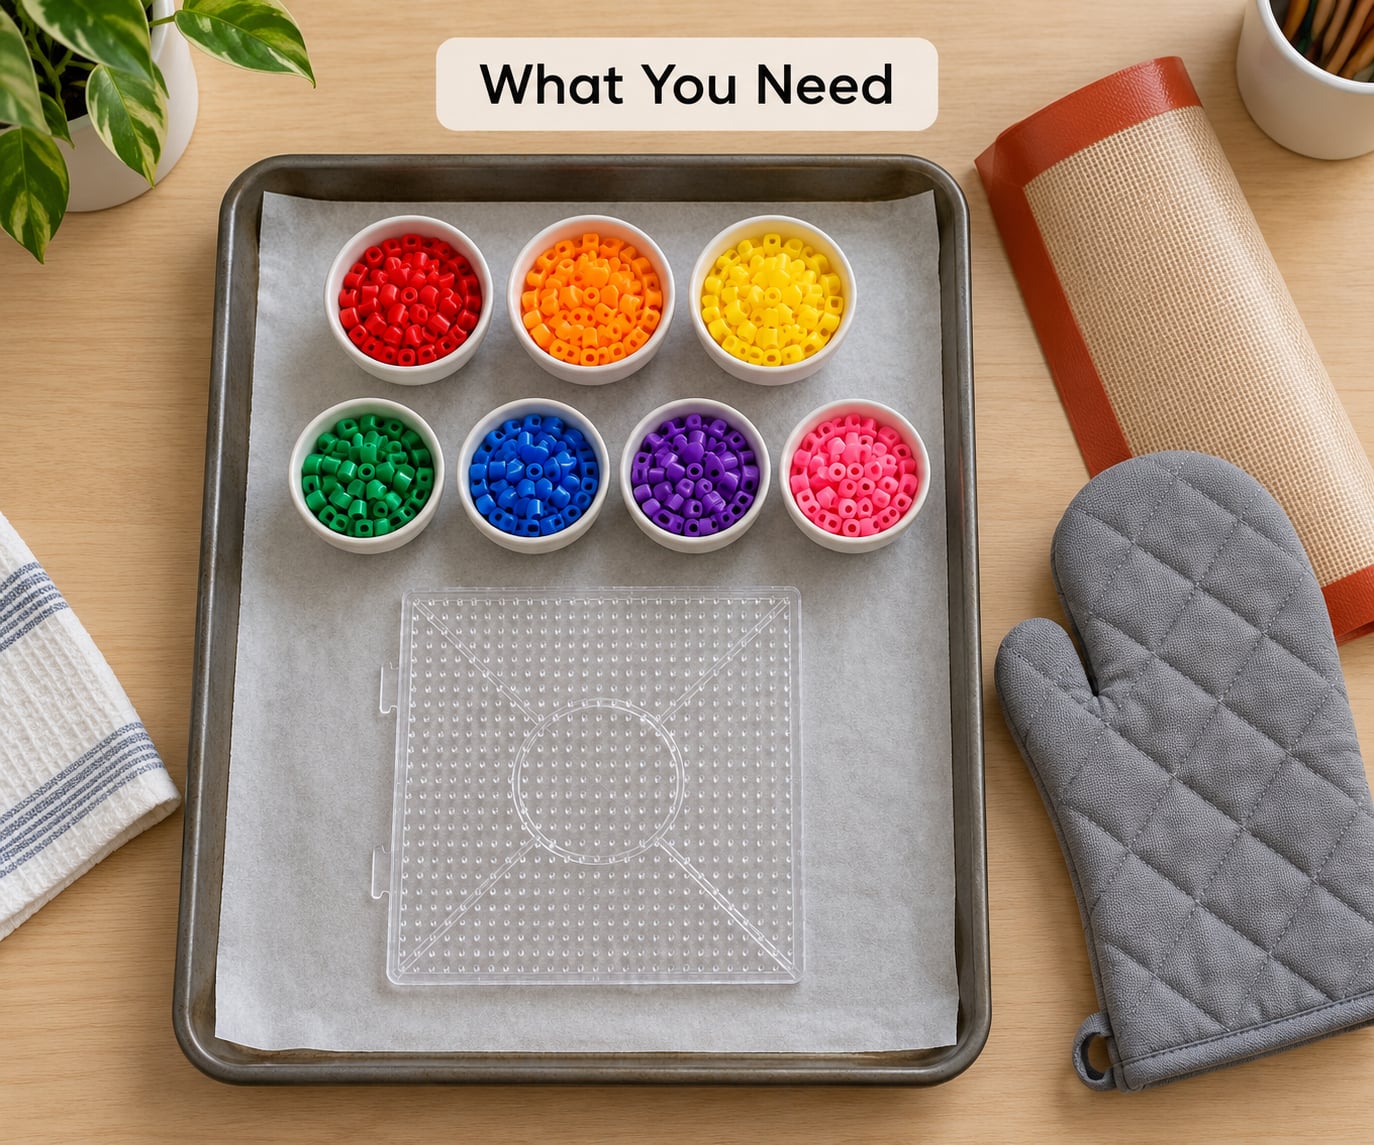
The supply list is short, and most households already have half of it in a craft bin somewhere.
- Translucent plastic pony beads, the larger size that the holes are easier to thread a toothpick through
- An oven-safe metal mold: a muffin tin, a cake pan, a metal cookie cutter or a small glass baking dish
- A baking sheet to set the mold on, plus a wire rack for cooling
- Parchment paper or a silicone baking mat, optional but helpful for cleanup
- A toothpick for the hanging hole
- Clear fishing line, twine, embroidery thread or a ribbon for hanging
- A small pony bead as a spacer so the line does not touch the suncatcher directly
- An oven mitt and a timer
Do not plan to cook in whatever pan you melt beads in. Fused plastic leaves residue that no amount of scrubbing fully removes, so treat your melting vessels as craft-only and keep a separate baking sheet underneath as a second layer of protection.
If you do not own a muffin tin, a metal cookie cutter on a tray works exactly the same way. Silicone molds also work, though the finished piece is thinner and more flexible. A round glass dish is the easiest of all for popping the finished disc out, and a cool baking sheet is a perfectly acceptable substitute for an oven.
You will also need an adult who is comfortable handling a hot oven and a hot pan. The melting stage and the cooling stage are not kid jobs, and the piece stays hot for several minutes after it leaves the oven.
Step-by-Step
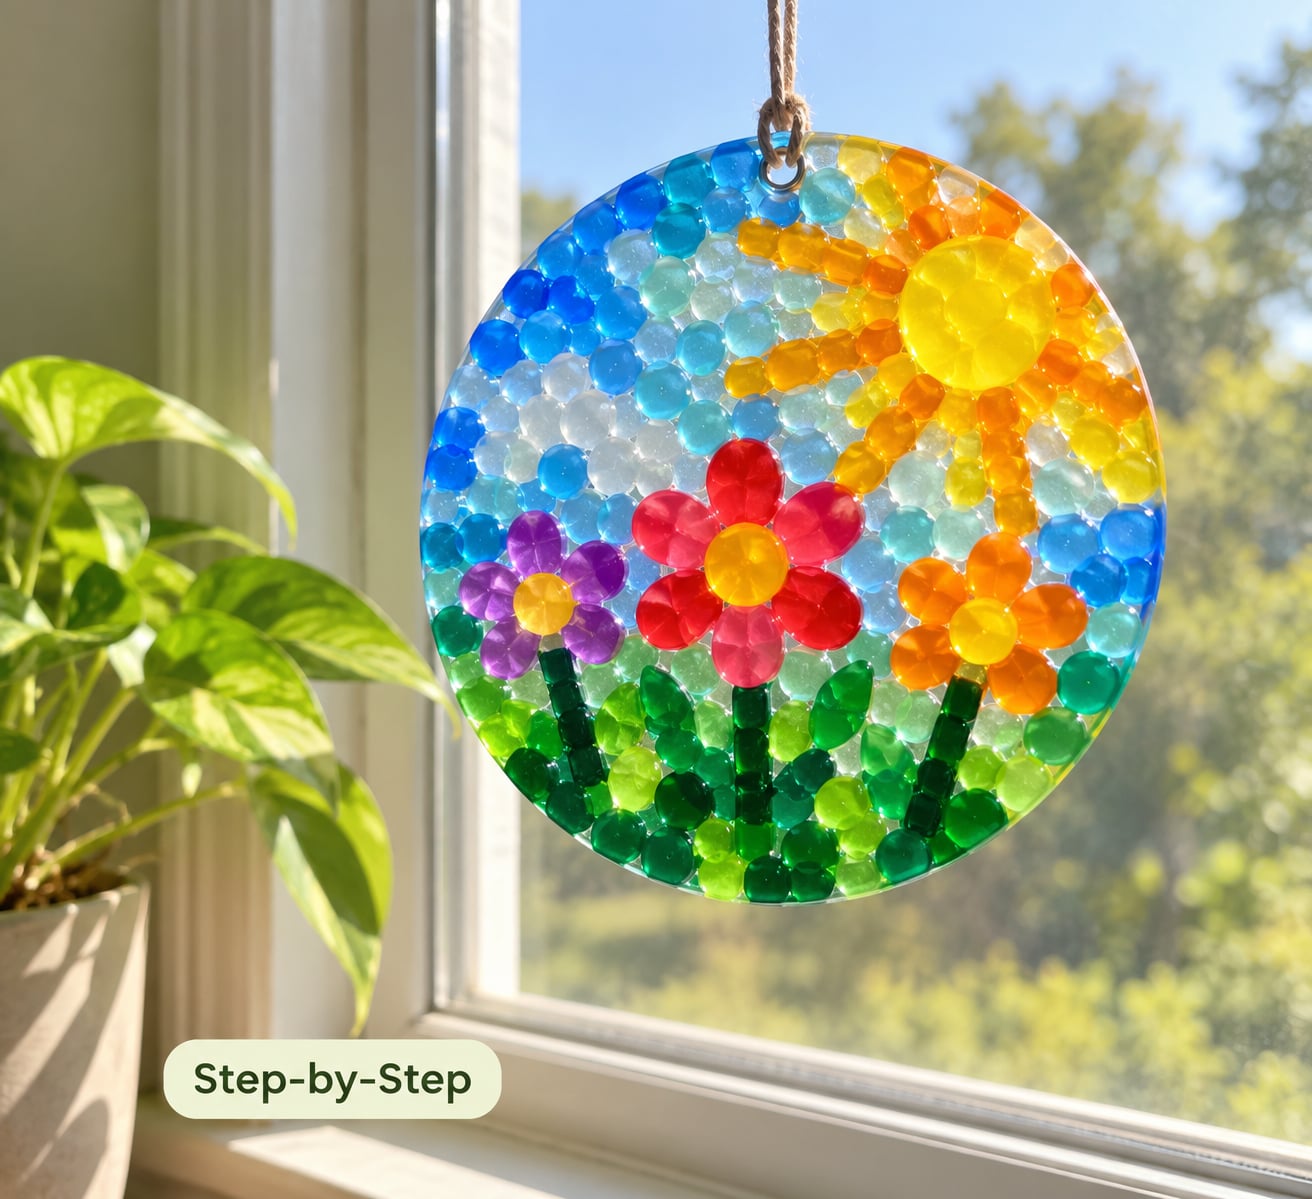
Step 1: Choose a Design
Start with a shape that matches your mold. A round cookie cutter or the bottom of a ramekin gives you a classic disc, a square cutter gives you a pane, and heart or star cutters give you seasonal pieces.
For a first attempt, pick four to six colors rather than fifteen. Beginners do best with a simple theme: a yellow center with orange petals, a rainbow gradient, or a green field with a few red dots. Large translucent beads in warm colors glow best, while dark blues and purples absorb light and read almost black against a bright window.
Sketch the motif on scrap paper first if you want a deliberate pattern. A pencil grid helps if you are fussy, but a photograph of a simple stained-glass design works just as well and takes less time. If you do not care about the design, a random mix still works, provided every bead touches at least one neighbor.
Skip glass beads entirely, even though they are sold in the same aisle. Glass does not soften the way plastic does, and beads that mix the two materials fuse to nothing. Every bead in the mold has to be the same plastic, so pour out the glass jar before you start.
Step 2: Arrange the Beads
Fill the mold with a single even layer of beads, no deeper than one bead tall. Two layers take far longer to melt and tend to bubble unevenly.
The rule that matters most: every bead needs to touch the beads around it. Melted plastic fuses only at the contact points, so a sparse layout bakes into a collection of separate round blobs instead of one disc. Push the beads together until the layer looks continuous and there are no wide gaps.
Leave a small amount of space between different colors, roughly the width of one bead. That thin plastic border keeps colors from bleeding into each other and gives the finished piece a neat outline. Press the layer flat with a fingertip so the top is level, which is what stops the finished suncatcher from curling.
Step 3: Melt the Beads Safely
Preheat the oven to 400F. Set the filled mold on a baking sheet, slide it in, and bake for 10 to 25 minutes. Most pieces finish in the 15 to 20 minute range; dense fills take longer.
Check at the 10 minute mark. The beads are done when their edges have rounded off completely, the individual shapes have lost their outlines, and the surface looks glossy and flat with no bead centers showing through.
Pulling early is not a failure. A piece removed at about 15 minutes has a rippled, textured surface with a handmade look, and a piece left for 25 to 30 minutes goes smooth and glassy. Different members of my household prefer different finishes, which is why I keep an eye on the oven from minute 15 onward.
Ventilate the room. Melted plastic has a strong smell, and the smoke alarm in my kitchen went off the first time I forgot to open the window. Follow the instructions on your bead packet if the manufacturer gives different times, and never use glass beads for this project.
Step 4: Let the Design Cool
Leave the mold on the baking sheet for 10 to 15 minutes, then move it to a wire rack. Wait until the piece is completely cool to the touch before you touch it at all; the plastic keeps shrinking as it cools, and warm plastic bends and cracks easily.
You will often hear a sharp cracking or popping sound as the sheet contracts and releases from the metal. That is normal and it is a good sign, not a warning.
To unmold, press gently on the back of the mold or tap it against a flat surface. If a piece is truly welded to the metal, score the edge with a knife while the plastic is still warm but firm, then cool it fully and flex the mold away. A stuck piece is almost always a sign it was pulled out too early, and the next one will release cleanly.
Step 5: Add a Hanging Loop
The easiest hole is made while the plastic is still soft, straight out of the oven. Push a toothpick down through the fused sheet near the top edge, before it cools, and the tip makes a neat round hole with no cracking.
Once the piece is cool, a small drill bit or a nail file also works. Go slowly, hold the piece on a folded towel so it cannot skate, and keep the bit shallow. Drilling fast through hot-looking but still brittle plastic is the most common way to split a finished suncatcher in half.
Thread clear fishing line, embroidery thread or twine through the hole. Tie a small pony bead below the hole as a spacer so the line does not press a visible dent into the plastic, and leave enough slack above for hanging.
Step 6: Display the Suncatcher
Hang the piece in a window that gets direct sun for at least a few hours a day. A south-facing window gives the strongest glow and the most saturated colors, and the shadow it throws on a wall or ceiling is really the point of the project.
Clear fishing line is nearly invisible, so the suncatcher appears to float. Twine and ribbon read as more handmade and work better outdoors, where wind is a factor.
Direct sun will fade plastic over time, especially pinks, oranges and purples. If the piece lives in a south-facing window all year, hang it on the inside of a shade or move it to an east-facing window in the hottest months. Most pieces hold their color well for at least a few seasons, and rotating two suncatchers between windows spreads the exposure.
Common Mistakes
The beads melted but did not fuse into one piece. This is the number one failure and it always comes back to spacing. If beads were laid down in a single scattered layer, they melt into individual round discs with nothing joining them. Rebook the piece into a tight layer where every bead touches, and give it the full time; a slightly over-baked result still fuses, while a rushed one does not.
Colors turned muddy where they meet. Plastic spreads a little as it softens, so a border-free design turns into a blended smear. Leave a one-bead-wide gap between color groups, and keep gradients short, four or five shades rather than a full spectrum.
The finished piece bent or cracked while being removed. Handle it only when it is completely cool, and lift it from underneath with two hands instead of flexing one edge. A wide, thin disc is stiffer than a narrow shape, so if you keep getting bent pieces, switch to a fuller circle or a thicker fill.
The sheet welded itself to the pan. Score the perimeter with a knife while the piece is warm and firm, then cool it fully and flex the pan away. For the next batch, a light coat of cooking spray or a silicone mat gives you a fighting chance of a clean release, though it makes no noticeable difference to the finished look.
The hanging hole tore. A hole made with a drill bit is too big and a hole made in cold plastic cracks. Do the toothpick while the sheet is still warm from the oven, or use a nail file with light pressure on a piece resting on a folded towel.
It looks dull and dark in the window. Opaque, glittered and metallized beads block light, and so do the darker shades. Rebuild the design with translucent colors in yellows, oranges, reds, greens and light blues, and place it where the sun is strongest.
Colors faded after a season. Continuous direct sun is hard on plastic dyes. Move the piece out of peak afternoon light and give it a break in a shaded window every few weeks.
Frequently Asked Questions
What temperature should melted bead suncatchers be baked at?
Bake them at 400F. That is the temperature plastic pony beads and fusible craft beads reliably soften and fuse at, and it is what nearly every craft guide recommends. If your bead packet gives a different setting, follow the packet. Put the mold on a baking sheet so any melted plastic that escapes stays on the sheet and not on your oven floor.
How long do I bake melted beads for?
Ten to twenty-five minutes at 400F covers almost every fill. Check at 10 minutes, and pull once the bead outlines have disappeared and the surface looks flat and glossy. Fifteen minutes gives a rippled, textured finish, while 25 to 30 minutes produces a smooth, glassy sheet. Thicker fills and larger molds take longer, so judge by the surface rather than the clock.
Can I make melted bead suncatchers without an oven?
Yes, most ways work. An outdoor gas grill with the lid closed takes about 10 to 12 minutes and keeps the plastic smell outside. A toaster oven or air fryer also works at 400F, though you must check the pieces early because the smaller cavity heats unevenly. A craft iron on low can soften the outer edge of the design for touch-ups, but it is not a substitute for even baking.
What beads work best for a beginner suncatcher?
Large translucent plastic pony beads, the kind with a wide center hole, are the easiest starting point. The hole lets a toothpick pass through for hanging, and the translucency is what lets sunlight through the finished piece. Opaque and glittered beads do not transmit light, and glass beads are not plastic at all, so they will not melt or fuse in an oven.
How do I stop the design from bending when I remove it?
Wait until the piece is completely cool to the touch, which takes 10 to 15 minutes after it leaves the oven, and never lift it by one edge. Support the whole piece from underneath with both hands. Warm plastic bends and snaps easily, and a narrow shape is more flexible than a full circle, so pick a rounder design if bending keeps happening.
Will sunlight fade a melted bead suncatcher?
Over time, yes. Direct sun slowly fades plastic dyes, and pinks, oranges and purples show it first. A piece in a south-facing window usually stays vivid for a few seasons. Hang it on the inside of a shade, move it to an east-facing window in summer, or rotate two pieces so neither one sits in full afternoon light all year.
Start with one muffin tin, four or five translucent colors, and a single even layer that touches edge to edge. Bake it at 400F, pull it when the surface goes flat and glossy, wait for it to cool completely, and push a toothpick through the top while you are still at the counter. Hang it in the sunniest window you have and let the colors do the rest.