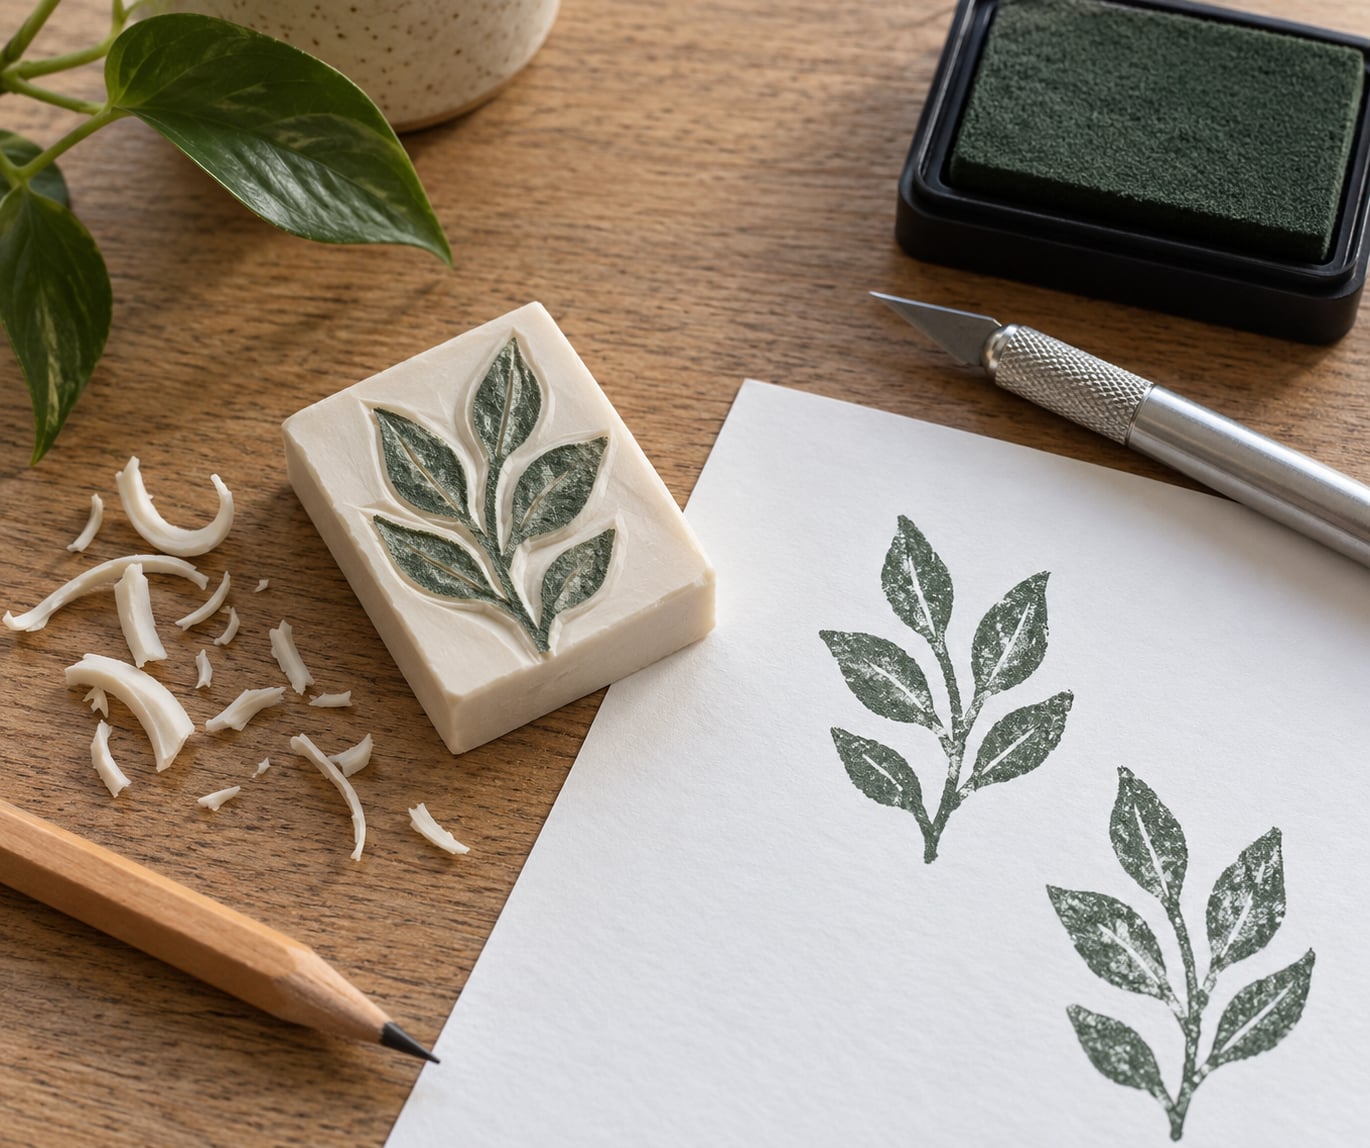
An eraser stamp is a small relief print block you carve by hand into the flat face of a firm rubber or vinyl eraser, then press into an ink pad and onto paper. A simple shape takes about half an hour; clean letterforms take a few hours, which is longer than most beginners expect. The whole project costs almost nothing beyond a craft knife.
Here is the short version: pick a firm eraser, draw your design mirrored, cut away the negative space in shallow passes, test print on scrap paper, then ink. Everything below is the detail behind those five moves, updated for 2026 and written for parents, teachers and kids working at a kitchen table.
Table of Contents
- 1What You Need
- 2Step-by-Step: How to Carve a Stamp from a Rubber Eraser
- 3Design a Simple Stamp Pattern
- 4Carve Around the Design
- 5Test the Rubber Stamp
- 6Use the Finished Stamp
- 7Keep the Stamp in Good Shape
- 8Common Mistakes
- 9Safety and Printing Tips
- 10Carving Safely, Especially with Kids
- 11Cleaner Prints, Every Time
- 12Frequently Asked Questions
- 13How do I turn an eraser into a stamp?
- 14What type of eraser is best for carving stamps?
- 15Do eraser stamps print in reverse?
- 16What are the best tools for carving a rubber eraser stamp?
- 17Can kids carve eraser stamps?
- 18How do I clean and store a carved eraser stamp?
- 19Conclusion
What You Need
You need far less than a printmaking kit suggests. Most of the list is stuff already sitting in a pencil case or a craft drawer.
- A firm eraser. Smooth, dense and big enough to hold your design with a few millimetres of margin around the edge.
- A carving knife. A precision craft knife handles outlines and straight lines; a small linocut gouge handles curves and open areas.
- A soft pencil. A 2B or a mechanical pencil loaded with soft graphite transfers cleanly.
- Printer paper and masking tape. For the design, the transfer and the test print.
- Ink or paint. A dye-based ink pad for paper, fabric ink for cloth, or tempera paint for kids’ projects.
- A self-healing cutting mat. A knife will find your table eventually. This stops it.
- Optional extras. A small stiff brush to flick out rubber crumbs, a scrap bin, and a small wooden block if you want a handle later.
The eraser choice matters more than any other decision, because it decides whether your design survives the carving. Printmakers on r/printmaking consistently reach for firm vinyl and Pink Pearl over the soft, cheap pink erasers that shred before a line finishes.
| Eraser type | How it carves | Holds fine detail | Best for |
|---|---|---|---|
| Pink Pearl | Cuts smoothly, medium firmness | Good | All-round beginner choice |
| Mars Plastic | Firm, slightly springy, very clean cuts | Very good | Small letterforms and thin shapes |
| Firm vinyl (Faber-Castell type) | Firmest of the pencil erasers; the blue ink end is gritty, so chop it off first | Excellent | Crisp detail and repeatable prints |
| Kneadable eraser | Too soft for line work; smears under a blade | Poor | Smudging cleanup, not carving |
| Rubber carving block (Speedball Speedy Carve type) | Consistent, stiff, larger surface | Excellent | Big designs and multi-part stamps |
On tools, the useful rule is narrow blade, wide job. A single fine liner blade will cut a wide open area fine if you take it in several passes, but a broad blade cannot rescue a thin detail line. Many carvers buy a full Speedball linocut set and end up using only the smallest blade, with a Staedtler Mastercarve handle or a Speedball linocut handle holding it.
Step-by-Step: How to Carve a Stamp from a Rubber Eraser
Design a Simple Stamp Pattern
Work out your design on paper, at the exact size of the eraser face, before you touch the rubber. Sketching on paper is cheap and erasers correct mistakes; carving cannot be undone.
Keep it bold. Shapes with a minimum line width of roughly 2 mm print cleanly, while hairline strokes fill with ink and turn into blobs. For the first attempt, a single symbol, a chunky letter or a four-part geometric block works far better than a portrait or a full word in script.
If the design includes text or a letter, draw it backwards, since the print comes out mirrored. Write the word normally, then trace it through tracing paper or flip your sketch over and trace from the back to get a reversed copy. Getting this wrong is the single most common beginner error, and it is fixable now rather than after twenty minutes of carving.
Carve Around the Design
Transfer the design by taping your paper face down over the eraser, rubbing a soft pencil over the back, and lifting. The graphite lands on the rubber and marks where the knife goes.
Hold the eraser in your non-cutting hand with the thumb and index finger bracing the sides, so a slip does not send it across the table. A fork grip on the tool, three fingers loose and the handle resting in the crook of the hand, gives steadier control than a fist.
Cut shallow guide lines along the outline first, about a millimetre deep, so you have a clean border to follow. Then carve the negative space, the material that should stay white on the print. Use light repeated passes instead of one heavy cut, and turn the stamp rather than swinging the blade around corners, which keeps your hand out of the cutting path.
Carve the small inner details first and the large open areas last. Thin raised sections bend or snap if you remove everything around them first, so support them with an uncut island of rubber until the surroundings are gone.
If the eraser feels slippery or flexes under pressure, stop. That means it is the wrong material or too small, not that you need more force.
Test the Rubber Stamp
Before any ink, press the carved face onto plain printer paper and rub it lightly with a finger. The image should transfer as a faint, solid grey with every line present.
A good test print shows the full shape, clean edges and no missing patches. If parts are faint, those areas are carved too deep or the walls collapsed during carving; carve less. If a line is already too shallow to register, take a little more out around it. This dry press costs nothing and shows you exactly what the inked print will do.
You can also use this moment to check the reversal. Read the impression, not the stamp.
Use the Finished Stamp
Load the stamp by tapping it face down onto the ink pad a few times rather than pressing hard, so the ink sits on the raised surface only. Put your paper on a flat, firm table, hold the stamp square, and press straight down with even pressure for a second, then lift straight up without rocking.
Rocking is what causes the half-moon smudge along one edge. If the print comes out light, the paper is too textured, so try a second press or move to a smoother sheet.
From there the stamp suits more projects than people expect: repeated patterns for wrapping paper, kraft gift tags and labels, notebook and journal covers, bookmarks, and fabric with a fabric ink pad. Tempera paint works well on children’s art paper and washes out of most surfaces afterward.
Keep the Stamp in Good Shape
Rubber picks up skin oil and paper fibre, and the print fades long before the stamp is unusable. Wash the face gently with warm water and a drop of dish soap after a session, dry it face down on a towel, and store it in a small box or a labelled envelope so it does not get knocked about in a drawer.
Once you know the design works, mount it. Glue the carved block onto a small wooden handle or a cork, or tape it to a paint stirrer, and a stamp that was a two-centimetre cube becomes comfortable to press. A thin coat of shellac or clear acrylic sealer over the carved face keeps ink off the rubber and makes the raised lines last longer.
Common Mistakes
Almost every disappointing first eraser stamp comes down to one of a handful of problems, and all of them are fixable at the carving stage.
| Problem | What caused it | Fix |
|---|---|---|
| Rubber tears and shreds as you cut | Soft, cheap eraser or a dull blade | Switch to a firm vinyl, Pink Pearl or Mars Plastic eraser and use a fresh sharp blade |
| Crumbs and dust instead of a clean channel | Grit-filled eraser, especially the inked end of a vinyl one | Cut that end off before carving, or pick a different eraser |
| Lines print as weak, patchy marks | Cut too deep, or thin walls collapsed under pressure | Carve less depth, leave thicker islands, carve small details before open areas |
| The print reads backwards | The design was drawn the right way round | Flip the design when drawing it, or carve a new one mirrored; there is no fix after carving |
| Prints come out uneven or blotchy | Rocking the stamp while lifting, or an uneven carved face | Press straight down, lift straight up, and scrape or sand the highest spots level |
| Everything looks smudged | Too much ink, or printing on a textured surface | Dab off excess on scrap paper, and move to smoother card |
A few habits prevent most of the table above. Keep a spare eraser to practise on, since soft practice pieces are the cheapest way to learn pressure control. Sharpen or change blades every few stamps, because a nicked blade is what turns a clean channel into a tear. And photograph your design before you start, so when a stamp fails you can carve another without redrawing.
Safety and Printing Tips
Carving Safely, Especially with Kids
Carving knives are sharp enough to draw real blood, so treat the craft as an adult-supervised activity for younger children. An adult should hold the design, steady the eraser and handle the blade for anything under about 10 years old; kids that age can do the inking and printing, which is the fun half anyway.
Cut on a self-healing mat, keep fingers on the opposite side of the blade from the direction of travel, and pass the tool handle-first. Open windows or work in a ventilated room, since rubber crumbs and ink aerosols are unpleasant to breathe. Skip solvent-based stamp pad cleaners entirely and use warm water with a little soap.
Cleaner Prints, Every Time
Rub ink on the stamp rather than on the pad, and roll or dab rather than smear. Press down with the heel of your hand and count to two before lifting. Keep the stamp face level with the paper rather than tilted at an angle, which halves the ink coverage on one side.
For consistent repeats, print a full row onto scrap paper first, then pick the best impressions for the project. And ink the stamp again between prints rather than every time; over-inking is the most common cause of a muddy, heavy image.
Frequently Asked Questions
How do I turn an eraser into a stamp?
Cut the flat face of a firm rubber or vinyl eraser with a precision knife, keeping the design raised and shaving away everything around it. Draw your design mirrored first, transfer it with a soft pencil, cut shallow guide lines, then carve the negative space in light passes. Press the carved face onto an ink pad and onto paper. Everything you leave standing takes ink and prints; everything carved away stays white.
What type of eraser is best for carving stamps?
A firm vinyl eraser, a Pink Pearl or a Mars Plastic eraser. All three cut cleanly and hold fine detail. Avoid very soft cheap pink erasers, which tear and crumble instead of carving, and skip kneadable erasers entirely. Many carvers chop off the gritty inked end of a vinyl eraser before starting, since that section cannot be cut smoothly.
Do eraser stamps print in reverse?
Yes. A stamp is a relief printing block, so the impression is the mirror image of what you carved. Words and letters have to be drawn backwards before carving. Plain shapes like stars, hearts, arrows and geometric blocks are unaffected, which is why they are the easiest place for a first-timer to start.
What are the best tools for carving a rubber eraser stamp?
A precision craft knife handles outlines and straight lines, and a small linocut gouge handles curves and open areas. Many carvers buy a full Speedball set and use only the finest liner blade. Whatever you choose, the blade has to be sharp, since a dull edge tears soft rubber instead of cutting it. A self-healing mat protects the work surface.
Can kids carve eraser stamps?
Yes, with an adult nearby. Children can draw the design, transfer it and do all the inking and printing, while an adult steadies the eraser and makes the cuts. Keep the work on a cutting mat, pass tools handle-first, use washable non-toxic ink, and clean up with warm water and soap instead of solvent cleaners.
How do I clean and store a carved eraser stamp?
Wash the carved face with warm water and a drop of dish soap, then dry it face down on a towel. Store it in a small box or a labelled envelope so the rubber is not scratched or knocked against other tools. Once it is clean, a thin coat of shellac or clear acrylic sealer helps keep ink off the surface and the raised lines sharp.
Conclusion
Start with one bold symbol, not a word. Choose a firm eraser, draw the design mirrored, cut shallow guide lines, remove the negative space in light passes, and dry-press it on scrap paper before any ink goes near it.
Once that first stamp prints cleanly, the same workflow scales up to matching border stamps, repeated wrapping paper patterns or a mounted handle for your journal. Carving an eraser stamp is also the fastest way to learn the relief-printing skill behind linocut and woodblock work, and it costs almost nothing to practise.