To melt crayons safely, keep the heat low, use a heat-safe container, and never leave the wax unattended. A double boiler over barely simmering water is the gentlest method, while a low oven or a microwave-safe cup work faster for bigger batches. An adult handles every step, and the melted wax needs time to cool undisturbed before anyone touches it.
That whole activity takes about 30 to 45 minutes start to finish, most of it waiting. Kids can sort, peel, and pour, but the heat belongs entirely to the grown-up. Crayons are a paraffin wax with pigment, so the same basic precautions apply as with any warm wax: low temperature, ventilation, and dry hands.
Table of Contents
- 1What You Need
- 2How to Melt Crayons Safely: Step-by-Step
- 3Prepare the Work Area and Check the Crayons
- 4Melt Crayons with a Double Boiler
- 5Melt Crayons in a Silicone Mold
- 6Melt Crayons in a Microwave-Safe Cup
- 7Pour, Shape, and Cool the Melted Wax
- 8Clean Up and Store the Finished Shapes
- 9Common Mistakes
- 10Overheating the wax
- 11Using a plastic container
- 12Using an open flame or a hot glue gun
- 13Pouring too fast
- 14Touching the wax too soon
- 15Filling molds to the rim
- 16Skipping ventilation
- 17White, chalky residue on finished crayons
- 18Lumpy, uneven results
- 19Frequently Asked Questions
- 20What is the safest way to melt crayons for crafts?
- 21Do melted crayons need to be heated on low?
- 22Can I melt crayons in a microwave without a special cup?
- 23What can I use instead of a silicone mold?
- 24How do I clean melted crayon off utensils and tables?
- 25Start With the Double Boiler
What You Need
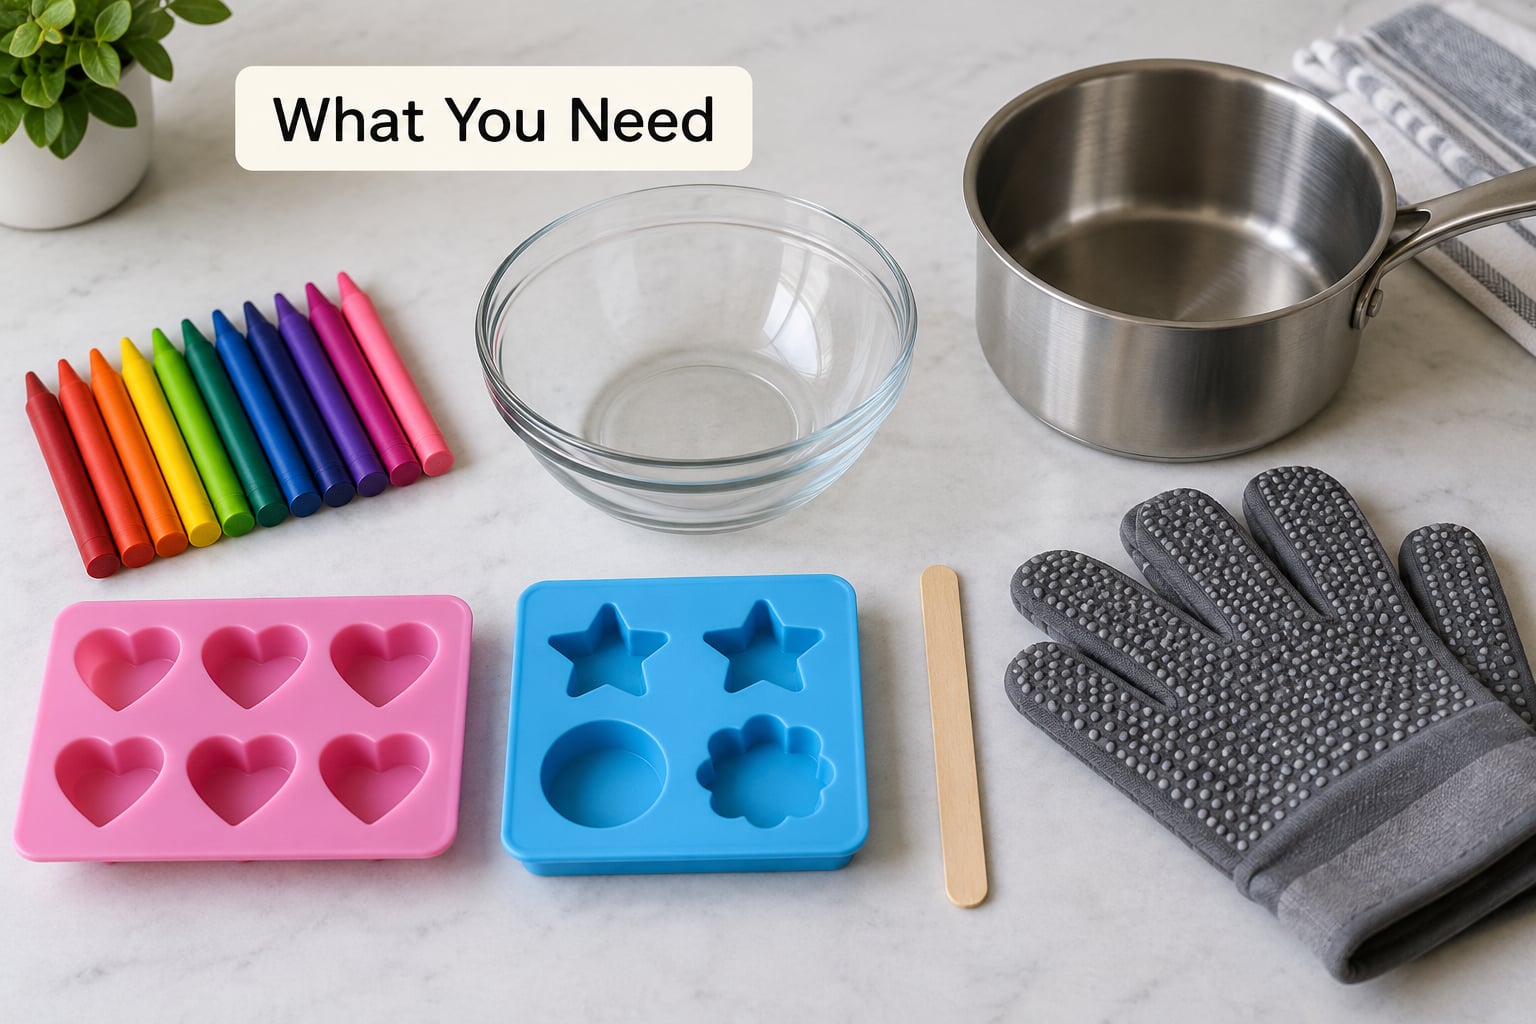
You need very little, and most of it is already in the kitchen. The one thing you should not improvise is the container holding the hot wax.
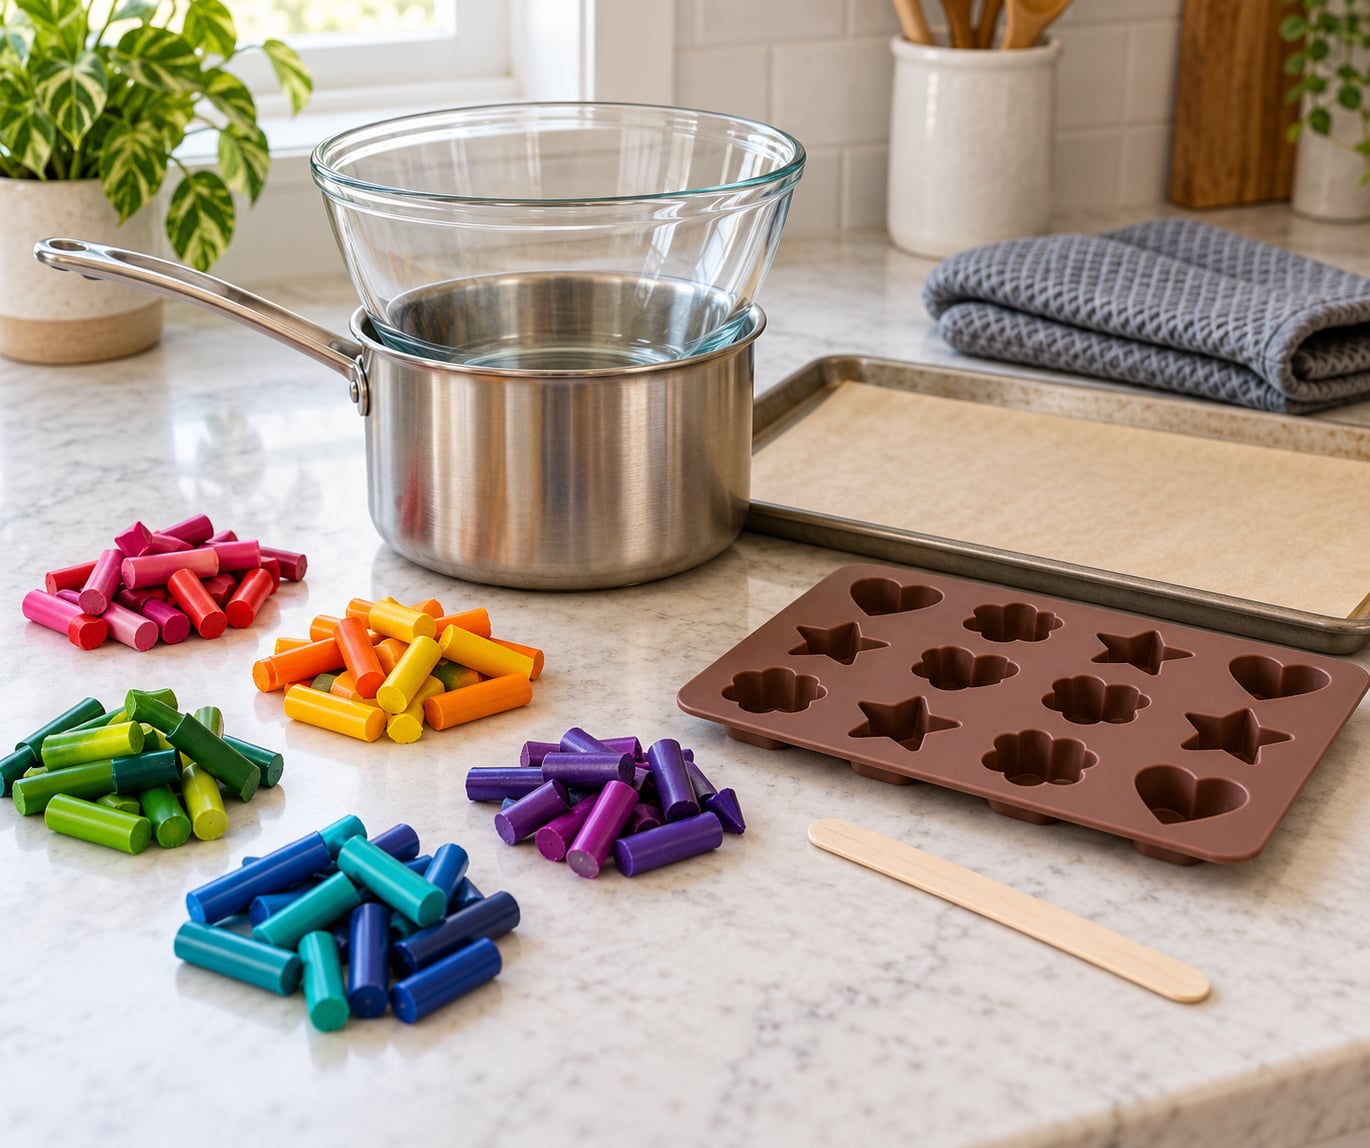
- Crayons — broken stubs work better than whole boxes, since you only need enough wax to fill your molds.
- Heat-safe bowl or saucepan — glass, ceramic, or stainless steel. Never plastic, and never a pan you plan to cook food in afterward.
- Silicone molds or microwave-safe cups — candy molds, ice cube trays, and silicone cupcake liners all release wax easily.
- Heatproof gloves — oven mitts work, and you need them for the oven and microwave methods.
- Baking sheet or tray — for catching drips and for cooling molds.
- Wooden stirring stick and a spoon — metal can scratch a bowl and pick up pigment.
- Paper towels or newspaper — work surfaces get waxy fast.
Open a window or turn on the exhaust fan before you start. Even a well-ventilated room is worth it, since overheated wax gives off an irritating smell and the fumes are the part of this project most people ignore.
A note on brands: the big-box crayons melt more evenly and pour cleaner. Off-brand crayons contain more filler, and that filler is what ends up as the chalky white wax layer people find on the back of their finished crayons.
How to Melt Crayons Safely: Step-by-Step
All three methods below melt the same wax at different heat speeds. The double boiler is slowest and safest, the oven gives even heat for a full tray, and the microwave is fastest but the least predictable.
- Double boiler — the heat comes from simmering water under a bowl, and you aim for water at a bare bubble, roughly 190 to 200 F. The main risk is a steam burn, plus a bowl that cracks if the water boils hard.
- Oven and silicone mold — convection and radiant oven heat at 250 to 275 F. The main risk is wax that smokes or darkens above 300 F.
- Microwave cup — direct radiant energy in short bursts, checked every 30 seconds. The main risk is a very hot cup and a sudden boil-over of liquid wax.
Prepare the Work Area and Check the Crayons
Cover a table with newspaper or a sheet of parchment and set the tray near the sink. Pick out your crayons next: skip anything that is already broken, dull, or flaking, because loose pigment ends up in your finished shapes.
Peel off every paper wrapper. If you have a lot of stubs, soak them in water overnight and the paper slides right off. A little patience here saves you a frustrating afternoon of picking labels off softened wax with a fingernail.
Break the crayons down to about half-inch pieces. Smaller pieces heat evenly and melt faster, which means less time near the heat source. Sort them by color while you are at it, so you can plan layered shapes without sorting twice.
Melt Crayons with a Double Boiler
Fill a saucepan with an inch or two of water and bring it to a bare simmer — you want steam, not a rolling boil. Set a heat-safe glass or metal bowl on top so the bottom of the bowl touches the water but the wax inside never touches it.
This is the method to teach first. The water caps the temperature no matter how long you leave it on, and melted crayon never touches a flame. Kids watch the pieces slump and swirl in the bowl, which is a decent states-of-matter demonstration before anyone gets to the pouring.
Drop in a handful of crayon pieces and stir gently with a wooden stick. Add more as the batch melts down. Expect roughly five to eight minutes for a small bowl, and pull the heat down if you see steam fogging the underside of the bowl.
Melt Crayons in a Silicone Mold
Set the oven to 250 F. If your oven runs hot, add a thermometer and watch it, because wax scorches faster than most people expect.
Place the crayon pieces directly in the silicone mold or spread them on a baking sheet if you want to pour rather than bake in place. Put the tray in the oven and check every five minutes. The wax is ready when the pieces slump into a glossy liquid pool and no solid bits remain.
Use oven mitts to move the tray, and set it on a heat-resistant surface or a folded towel rather than a cold counter, which can shock the glass. Pouring straight from the oven into molds avoids the skin-forming problem that comes with reheating melted wax twice.
Melt Crayons in a Microwave-Safe Cup
Fill a microwave-safe paper cup or a microwave-safe ceramic bowl no more than a third full with crayon pieces. Leave the headroom. Liquid wax expands when it boils, and a full cup will climb out of it.
Warm in 30-second bursts on medium power and stir between each one. Microwaves heat unevenly, so the wax at the edge can be molten while the center is still solid, and stirring is what evens that out. Stop as soon as everything is liquid; extra heat buys you nothing but smoke.
When you open the door, stand back a few inches first. Wax gets hot enough to burn skin quickly, and steam will be waiting. Oven mitts on, carry the cup straight to your work surface, and pour while it is still fluid.
Pour, Shape, and Cool the Melted Wax
Pour slowly and steadily. A fast pour traps air and splashes wax across your workspace, and a thin stream gives you control over where the color lands so you can layer different shades deliberately.
Fill each mold to about three-quarters full. Melted wax shrinks as it cools and can crack a rigid mold that is filled to the rim, so leaving that little gap saves a broken shape and a cleanup job.
Leave the molds on the tray, undisturbed, until the wax is completely firm and cool to the touch at the center. A warm crayon dents under a thumb and leaves a fingerprint that never comes out. Cooling in the fridge or freezer speeds things up, but the jump from warm to freezing cold can make thick shapes crack, so the countertop is gentler.
Flex silicone molds gently to release, and peel them one at a time. Metal muffin tins need a quick spray of cooking spray or a thin film of oil before the wax goes in. If a shape sticks, run the underside under warm water for a few seconds and try again instead of levering it with a knife.
Clean Up and Store the Finished Shapes
Wait for every drop of wax to harden, then lift it off with a spoon or a plastic scraper. Do not run the counter or stovetop under hot water while liquid wax is sitting on it, since heat spreads it further into the surface.
For hardened wax on a table, an open paper towel and a firm scrape works, and a warm damp cloth takes the last film off. Wash bowls, spoons, and trays in warm soapy water the way you normally would. Crayon pigment is a dye, not a food stain, so it needs hot water and a degreaser rather than a quick rinse.
Check sleeves and aprons while the wax is still warm. A folded paper towel pressed against a fresh drip absorbs wax better than wiping it, and a smear becomes permanent once the shirt goes through the wash.
Keep unused crayons in their box, and store finished shapes somewhere out of reach of toddlers and pets. Melted crayons look exactly like edible sweets to a small child, and their colors are the reason that resemblance is a problem.
Common Mistakes
Almost every problem I have seen with melted crayons traces back to heat, speed, or impatience. Each one has a simple correction.
Overheating the wax
Wax above 300 F starts to smoke, darken, and smell sharp. Once you see smoke, open the oven door or take the cup out. Throw out the batch and start again at a lower temperature, because reheated scorched wax colors whatever you pour it into.
Using a plastic container
Crayons can melt straight through a thin plastic cup or tub, and molten wax on a countertop is a burn hazard and a mess that never fully comes out. Use glass, ceramic, or metal. If a container is not marked microwave safe, do not put it in the microwave.
Using an open flame or a hot glue gun
A stove burner or a lighter can ignite the wax, and melted wax running across a hot burner ignites too. This is the one rule worth being rigid about: no flame, ever. A hot glue gun is no better, since wax inside the barrel cools and blocks the nozzle.
Pouring too fast
Thin, steady streams land where you aim them. Fat pours trap air bubbles, splash on the work surface, and stain the sides of the mold. Pause between fills and scrape the container’s rim with a spoon to catch the drip.
Touching the wax too soon
Cool wax looks solid while still being soft enough to dent. Give each shape a full set, then a fingertip test on the underside where it is hidden. Warm wax also re-melts in your hand, which is how a clean shape turns into a smudge.
Filling molds to the rim
Wax contracts as it cools. Molds filled to the top crack or tear during release, so fill to about three-quarters and treat the extra room as your expansion allowance.
Skipping ventilation
Open the window first, not after you smell fumes. This matters most with off-brand crayons, which carry more filler and more pigment, and with any wax that has been pushed past 275 F.
White, chalky residue on finished crayons
That layer comes from filler in lower-cost crayons, not from something you did wrong. Using a major brand, filling the mold thinner, and pouring a thinner layer all reduce it. You can also make the white residue an intentional layer between two colors for a marbled look.
Lumpy, uneven results
Big chunks melt from the outside in and the center lags behind. Cut the pieces smaller, stir more often, and give the batch another minute rather than turning the heat up. In the microwave, stirring between bursts fixes most lumps.
Frequently Asked Questions
What is the safest way to melt crayons for crafts?
The double boiler over barely simmering water is the safest option, because the water keeps the wax below a temperature high enough to burn and no flame is involved. The oven at 250 to 275 F is close behind and gives you a full tray at once. In every method, an adult handles the heat, the room stays ventilated, and nothing is touched until the wax is cool and firm.
Do melted crayons need to be heated on low?
Yes, low heat is what makes the difference between smooth wax and a smoking tray. Crayons melt somewhere around 120 to 135 F, but they stay fully liquid well into the 250 F range, which leaves you plenty of margin. Most ovens sit at 250 F and most microwaves run hot, so you rarely need more than medium power or a hand on the dial.
Can I melt crayons in a microwave without a special cup?
You can, as long as the cup is microwave safe. A plain paper cup, a ceramic mug with no metallic trim, or a microwave-safe glass bowl all work, and all of them should be filled no more than a third full so the wax has room to expand. Warm in 30-second bursts on medium power, stir between each burst, and use oven mitts when you take it out.
What can I use instead of a silicone mold?
Metal muffin tins and cupcake liners both work, though metal needs cooking spray or a light coat of oil so the wax releases cleanly. Silicone ice cube trays, candy molds, and silicone cupcake cases are easier to flex and pop out. Cookie cutters laid on a baking sheet also work, and they let you make one large shape rather than many small ones.
How do I clean melted crayon off utensils and tables?
Let the wax harden first, then lift it with a spoon or a plastic scraper. A firm scrape with a paper towel takes most of the rest, and a warm damp cloth with dish soap gets the film off the surface. Wash bowls, spoons, and trays in warm soapy water as usual, since crayon pigment behaves like a dye and needs hot water and degreaser.
Start With the Double Boiler
If you only try one method, make it the double boiler, and let your child break and sort the crayons while you handle the water. It takes a few minutes longer, the temperature takes care of itself, and kids still get the best part, which is pouring the color.
Keep the heat low, keep the room ventilated, and let every shape cool completely. Those three habits prevent nearly every problem people run into when they melt crayons at home. In our house, the silicone molds live in the same drawer as the cooking spray and a permanent marker for labeling the finished crayons.