To make new crayons from broken crayons, heat the pieces in a low oven at 250-300°F (120-150°C) for 10-15 minutes until the wax turns to liquid, then pour it into an oven-safe silicone mold and let it cool for about an hour. The whole job takes 20 to 30 minutes of your attention plus cooling time, and it is far easier than it looks.
The reason people save broken crayons in the first place is that a two-inch stub is useless to a four-year-old and terrible to throw away. Melted down and remolded, those same stubs become full-size crayons again, and because the wax is remelted only once, the result colors much like the original.
I do this every few months with whatever is in the art caddy, and the whole project fits on one baking sheet. Read through the steps once, set your oven out of the way first, and the messy part is mostly over before the wax even goes in.
Table of Contents
- 1What You Need
- 2Step-by-Step: How to Make New Crayons from Broken Crayons
- 3How to Make New Crayons from Broken Crayons: Sort and Prepare the Pieces
- 4Choose and Fill the Mold
- 5Melt the Wax Safely
- 6Cool and Remove the New Crayons
- 7Common Mistakes
- 8Frequently Asked Questions
- 9What is the easiest way to make new crayons from broken crayons?
- 10Can I melt crayons in a muffin tin or ice-cube tray?
- 11Can children help make recycled crayons at home?
- 12Why are my melted crayons cracking when they cool?
- 13Can I pour leftover melted wax down the sink?
- 14How long do homemade melted crayons last?
- 15Conclusion: Start With Your Smallest Crayon Pieces
What You Need
You do not need a specialty kit. Everything on this list is already in a kitchen or a craft drawer:
- Broken crayons and stubs – any length, any brand, the ones too short to grip.
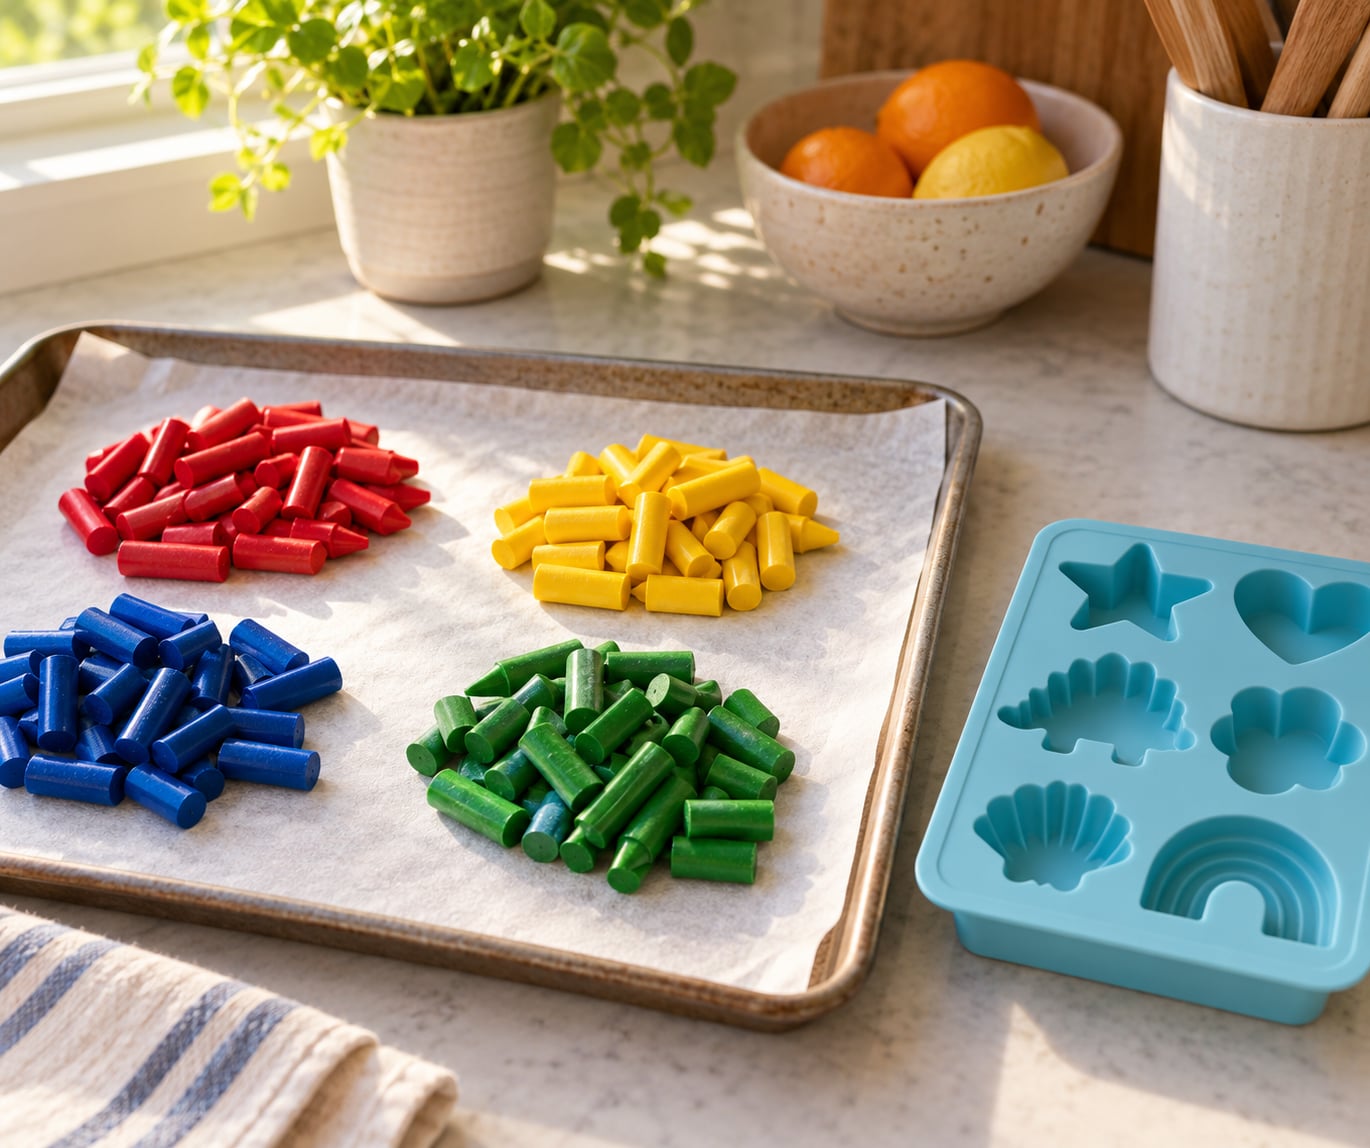
- An oven-safe silicone crayon mold – the flexible kind you can squeeze to release the finished shape. Candy and chocolate molds work well too.
- A baking sheet or cookie sheet – to catch wax that runs over, and to move the mold in and out of the oven.
- Parchment paper or a silicone mat – a liner makes cleanup almost dry.
- An oven-safe container or bowl – for holding the melted wax before you fill the mold, if your pieces do not fit neatly.
- Oven mitts or heatproof gloves – the tray and the wax are both genuinely hot.
- Optional sorting supplies – small cups, a muffin tin, or a divided tray for keeping color families apart.
- Optional decorating materials – small stickers, a marker, and paper gift tags for finished crayons.
Budget about 20 to 30 minutes of active time, plus roughly one hour of cooling before anyone can use the crayons. This project needs an adult for every step that involves the oven, the wrapper, or the hot wax. Children can sort and fill the mold, but the melting, the pouring and the unmolding stay with a grown-up.
A rough yield guide: two to three broken crayons fill one standard-size crayon. Sorting before you melt is the single most useful habit here, because once wax is liquid, the colors are mixed forever.
Step-by-Step: How to Make New Crayons from Broken Crayons
How to Make New Crayons from Broken Crayons: Sort and Prepare the Pieces
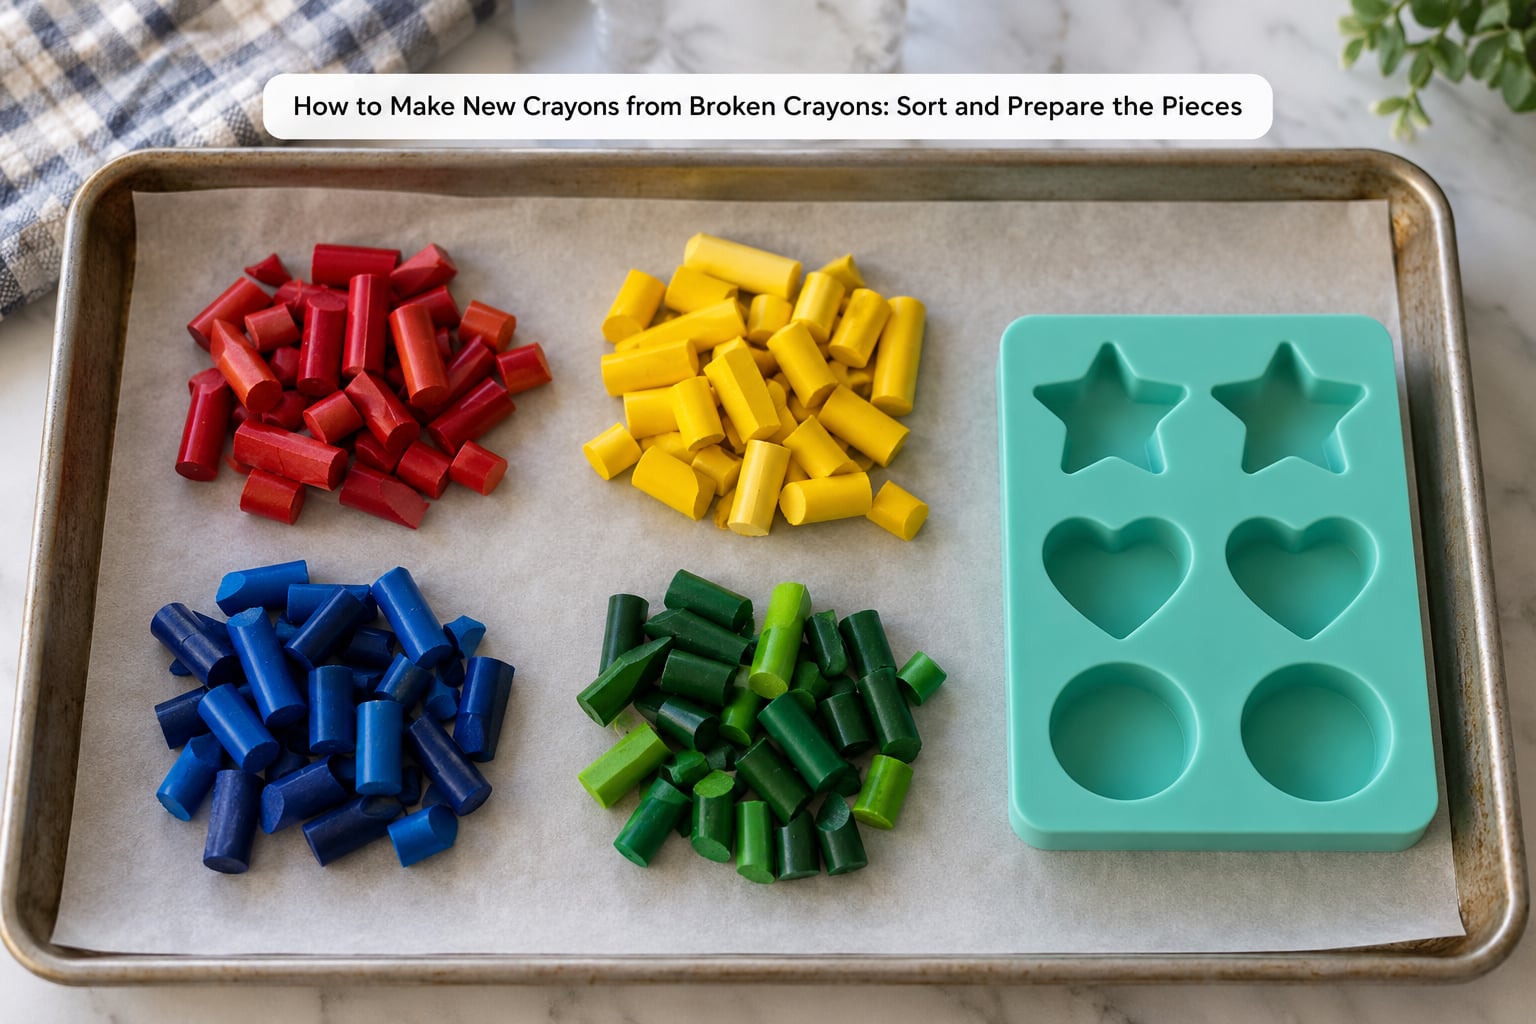
Start by deciding what look you want: one color per crayon, a blended color family, or a full rainbow swirl. Single colors look the most professional, color families give you a soft two-tone result, and a mixed mold turns into a mottled crayon that children tend to love precisely because it is unpredictable.
To get the paper off quickly, roll the wrapper between your thumb and forefinger while the crayon is still warm from a hand, or press the edges against the edge of a table to split the seam. Crayons that have been sitting in a craft bin usually come bare with a little rubbing.
Once they are unwrapped, break each crayon into pieces roughly the size of a fingernail. Small, even chunks melt sooner and more evenly than long sticks, which is why one stubborn lump can survive an entire bake and leave a bald spot in your new crayon.
Pull out anything that is cracked through, covered in fuzz, or smells odd. Crayons do not really grow mold in a sealed box, but an old crayon that has been chewed or stored open can carry dust and grease that will end up in the melt.
Choose and Fill the Mold
Set the silicone mold on a lined baking sheet. The sheet matters more than people expect, because wax that overflows a cavity will run onto the oven floor if the tray is bare.
Fill each cavity about three-quarters full. Wax expands as it heats, and a cavity packed to the rim will push liquid out the top and leave you with a flat, misshapen crayon and a waxy tray. Packing to three-quarters is the difference between a clean stick and a puddle.
If you do not own a crayon mold, several household containers do the job:
- A mini muffin tin gives you small round crayons, which are easier for little hands than long sticks.
- A silicone ice-cube tray works, though the cubes are usually a little too small and shallow to be worth much once cooled.
- A metal mold or candy tin needs a spoon and a little patience to release, and it will cool faster.
- A cardboard tube wrapped in foil is a real shortcut for long stick crayons. Twist the foil into a tube inside a doubled layer so it holds its shape.
Press the wax down gently with your fingers so there are no big air pockets, and level the top with a fingertip. If you are doing a rainbow swirl, drop the colors in alternating spots rather than layering them, so you get color visible on the outside of the finished crayon.
Melt the Wax Safely
Put the baking sheet in the oven and set it to 250-300°F (120-150°C) for 10-15 minutes. Stay at the lower end of that range if you are combining several colors, because steady low heat keeps the pigment evenly suspended instead of letting it drop to the bottom of the mold.
Crayon wax is paraffin, and it goes from solid to liquid somewhere around 120-150°F. That is a much lower number than most people expect, and it is why the lowest oven setting works. You are not trying to bake the crayons, you are trying to liquify them.
Check at the 10-minute mark by looking, not touching. The wax is ready when the solid pieces have disappeared and the cavity is filled with a flat, uniform liquid with no lumps floating in it. If chunks remain, give it another three to five minutes.
Two safety rules cover nearly every problem. Do not touch the melted wax, and never pour it down a drain – wax solidifies inside pipes and creates a blockage that is expensive to clear. Wipe up spills while they are still liquid with a paper towel, then put the towel in the trash.
Take the tray out with oven mitts and set it on a heatproof surface. Wait for it to stop steaming before you try to pop anything out.
Cool and Remove the New Crayons
Give the mold a full hour to cool. Crayons set from the outside in, so a crayon that feels solid at the edges can still be soft and smeary in the middle, and popping it early is how you get a dented stub instead of a stick.
Flex the silicone mold gently and press from the bottom of the cavity. A properly cooled crayon releases with almost no force. If it is fighting you, it needs more time, not more pulling.
Turn the crayon over and look at the end. A pale or clear layer means the pigment settled toward the bottom of the cavity during the melt, and you can shave that end with a paring knife or scrape it on the counter. The rest of the crayon is fine.
Sort the finished crayons into a jar by color and hand one to a small child. Melted crayons are actually sturdier than store-bought ones, because a single solid pour has no seams along the barrel to snap at.
Label a batch with a small sticker or a paper tag if you are making them as gifts. Letter and number molds make the most striking ones, and seasonal shapes – hearts, stars, pumpkins – turn a jar of leftovers into a holiday craft that costs nothing.
Common Mistakes
The crayons look brittle, chalky or misshapen. That is almost always overfilling. Cavities packed to the rim expand, leak, and cool into a squashed shape. Fill to three-quarters, and if a finished crayon is thin, the pieces were just too few – add one more broken crayon per cavity next time.
There is a clear or pale layer at one end. Pigment settles when the heat is high or the bake is long. Drop to the low end of 250-300°F (120-150°C) and shorten the time, then trim the settled layer off with a paring knife once the crayon is cool.
Wax ran out of the mold and welded itself to the tray. This is an overfill plus a missing liner. Line the sheet with parchment paper, fill less, and let the tray cool on a heatproof surface so a spill sets instead of spreading.
The crayon will not come out of the mold. Cool it longer. Ten more minutes on the counter solves it more often than any amount of flexing, and prying a crayon out early leaves a torn, unusable nub in the cavity.
Some pieces never melted. Budget-brand crayons often contain a harder binder and leave visible chunks. Push those pieces into one small mold of their own, give the tray an extra five minutes, and accept that off-brand wax sets slightly chalkier than the real thing.
Someone turned the oven up too high. Wax smoking in the oven is a signal to turn it off and open the door. A little smoke is manageable; burnt wax is a cleanup job you do not want, and the fumes are not something to have in a room with children.
Three habits stop most wasted wax. Keep a jar dedicated to stubs so the material keeps accumulating, sort colors every single time you dump the jar, and buy one sturdy silicone mold rather than three thin novelty ones. When you are done, scrape the cooled wax off the sheet with a plastic scraper, put it in the trash, and wipe the sheet with a warm damp cloth before the wax sets on the fabric.
Not interested in heat? A flat iron pressed over wax paper melts shavings into artwork rather than crayons, which is a much better use for the tiniest scraps. Crayon shavings made with a pencil sharpener double as a fine-motor practice for preschoolers, and the pile you end up with is exactly what a teacher needs for a texture collage.
Frequently Asked Questions
What is the easiest way to make new crayons from broken crayons?
The oven method is the easiest by a wide margin. Peel the wrappers off, break the crayons into small chunks, sort them into color families, and pack an oven-safe silicone mold about three-quarters full. Bake at 250-300 degrees F for 10-15 minutes, then let it cool for a full hour before you flex the mold. No special equipment beyond the mold and a lined baking sheet, and the finished crayons look and color like store-bought ones.
Can I melt crayons in a muffin tin or ice-cube tray?
Yes. A mini muffin tin gives you small round crayons that are easier for little hands than long sticks. An ice-cube tray also works, though the cubes tend to come out too small and shallow to be much use. Set whichever you choose on a lined baking sheet so any overflow is caught. Skip metal tins if you can, since melted wax clings to them and often needs a hot oven to loosen.
Can children help make recycled crayons at home?
Children can absolutely take part, and the sorting step is genuinely good practice for color recognition and fine motor skills. Let them unwrap, sort, break up, and fill the mold. An adult should handle everything involving the oven, the hot tray, the melted wax and the unmolding. Melted wax causes real burns, and crayon wax is not a toy. Skip the project entirely for children under three.
Why are my melted crayons cracking when they cool?
Cracking usually means the cavity was overfilled, so the wax expanded, leaked, and set with a gap in the middle. It can also happen when a mold has sharp corners that stress the cooling wax, or when a batch of many colors was heated hard enough to separate from its binder. Fill cavities only three-quarters full, keep the temperature at the low end of the range, and let the tray cool undisturbed.
Can I pour leftover melted wax down the sink?
No, never. Molten crayon wax solidifies inside the pipe and can block the drain entirely, and the clog usually means calling a plumber. Let the extra wax cool in the mold or on the lined tray, then scrape it off with a plastic scraper and put it in the trash. Wipe up spills with a paper towel while the wax is still liquid, and bin the towel rather than washing it.
How long do homemade melted crayons last?
They last about as long as store-bought crayons, sometimes longer. A single solid pour has no seams along the barrel for a child to snap, which is the usual reason crayons break. Remelted wax does draw a little more smoothly than fresh wax, and it will run out of contact paper eventually like any other crayon. Store the finished batch in a jar or box the same way you would a new one.
Conclusion: Start With Your Smallest Crayon Pieces
To make new crayons from broken crayons, the whole method is four moves: sort the pieces by color, fill a silicone mold three-quarters full, bake at 250-300°F (120-150°C) for 10-15 minutes, and wait a full hour before you touch anything.
Begin with the cleanest, shortest stubs in your jar. They melt fastest, they need less heat, and they are the pieces most likely to have been sitting unloved in a drawer for years anyway. Keep a dedicated jar going so the next batch is already half sorted.
Once you have the method down, the craft writes itself. Turn a batch into letter crayons for a child’s name, do a rainbow batch for a class donation, or pair the leftovers with an iron and wax paper for a melted-crayon art piece. Sorting by color family is also worth doing on its own, with no oven involved, as a quiet table activity for a rainy afternoon.
And if you would rather not melt anything at all, the crayons you cannot use are still worth something. The Crayon Collection and the National Crayon Recycle Program both take crayons that children never adopted, and many grocery and shipping stores host drop-off bins for them. Melt the stubs, donate the rest.