Shrink plastic charms are flat pieces of polystyrene film that you decorate, cut out and heat until they shrink into small rigid charms you can thread onto cords, rings or ribbons. Learning how to make shrink plastic charms at home is simpler than the packaging suggests: the whole job takes about twenty minutes of hands-on work plus a few minutes of oven time, and the trick to getting good results is scaling your design up, punching the hole before baking and watching the pieces curl and uncurl in the oven rather than trusting the clock.
This guide covers the method for beginners working at a kitchen table with an oven, a pair of scissors and a permanent marker. It also covers what to do when a piece will not shrink, curls into a cup or comes out of the oven melted, because those are the three problems almost every first attempt hits.
Table of Contents
- 1What You Need
- 2Step-by-Step
- 31. How to Make Shrink Plastic Charms at Home: Prepare the Sheet
- 42. Draw and Cut the Charm Shapes
- 53. Add Charm Holes Before Baking
- 64. Decorate the Plastic
- 75. Bake the Charms Until They Shrink
- 86. Let the Charms Cool Completely
- 97. Turn the Finished Charms into Gifts or Accessories
- 10Common Mistakes
- 11Frequently Asked Questions
- 12What type of shrink plastic is best for beginner charms?
- 13Can I make shrink plastic charms without an oven?
- 14Do I need a template to make plastic charms?
- 15How do I stop shrink plastic charms from curling?
- 16Can children make shrink plastic charms at home?
- 17Conclusion
What You Need
You need shrink plastic film, parchment paper, a baking sheet, craft scissors, a fine marker, a hole punch, and something to attach the finished charms with. That is the whole shopping list, and most of it is already in a craft box.
- Shrink plastic sheets in clear, white or coloured. Clear sheets take coloured ink and printed images, white sheets suit marker art and photos, and pre-coloured sheets are the easiest starting point for a child.
- Parchment paper or a silicone baking mat to line the tray.
- A baking sheet that fits inside your oven with room to spare.
- Craft scissors, or a craft knife with a cutting mat for precise shapes.
- A fine permanent marker, acrylic paint pens, or an inkjet printer if you want printed designs.
- A hole punch in a couple of sizes, plus an old scrap piece to test it on.
- Jump rings, cord, ribbon or key rings for finishing.
Two checks matter more than they sound. First, confirm the film is a genuine shrinkable polystyrene sheet rather than ordinary craft plastic or a laminating pouch, because only shrinkable film contracts in heat and ordinary plastics will simply warp or give off fumes. Look for a ratio printed on the packaging, usually somewhere between one half and one fifth.
Second, test your hole punch on a scrap offcut before touching a finished piece. Thin films can tear or wedge halfway through, and a torn hole cannot be repaired once the charm is baked. If your punch needs a firm stab that feels like it is dragging, use a slightly smaller punch and cut the hole with a craft knife instead.
Work on a protected surface. Never lay shrink plastic directly on a hot stovetop or an oven door, and keep sheets away from the edge of the table, especially with children nearby.
Step-by-Step
1. How to Make Shrink Plastic Charms at Home: Prepare the Sheet
Prepare the sheet by picking a thickness that matches your project, protecting your work surface, and cutting the film to a size your oven tray can hold. Thin film shrinks more and curls more easily, while thicker film shrinks less and holds a crisper edge, so beginners usually do best starting with a mid-weight sheet.
Sand the surface lightly with fine sandpaper if the film feels slick, because ink beads on a glossy untouched surface and will not bond properly. Wipe off the dust with a dry cloth before you draw. A cutting mat under the film makes the cutting step much safer and stops your work surface from scoring.
2. Draw and Cut the Charm Shapes
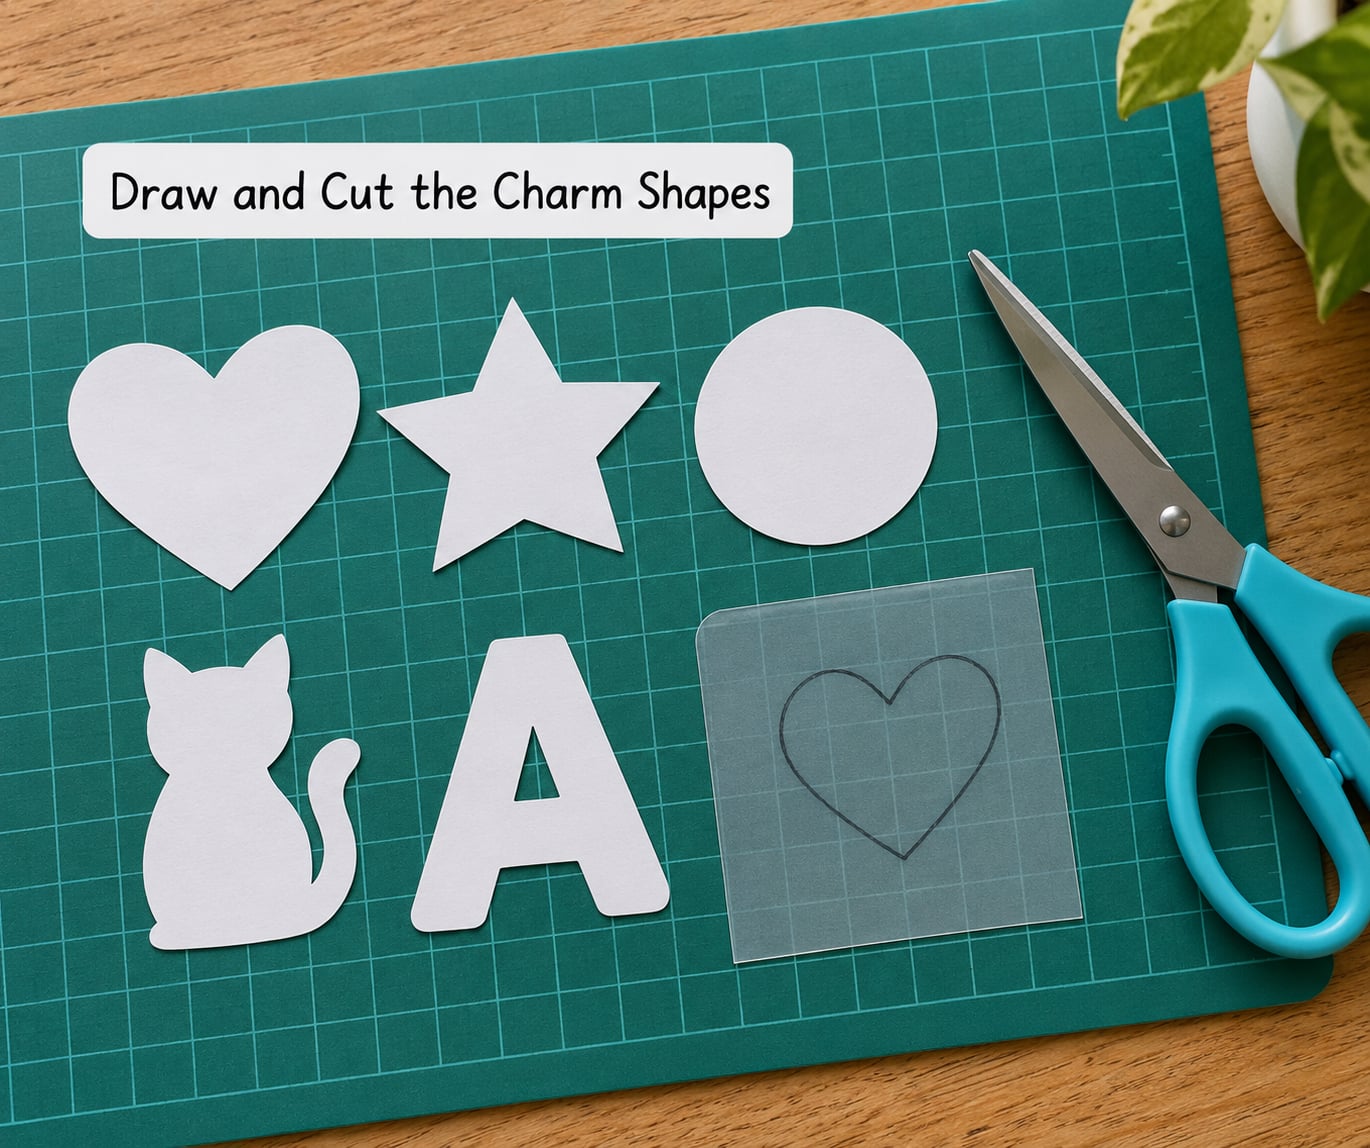
Draw your design at three times the size you want the finished charm. This scaling rule is the single most useful thing to know before you start, and it is where most first batches go wrong. Measure your finished idea, multiply by three, and only then pick up the pencil.
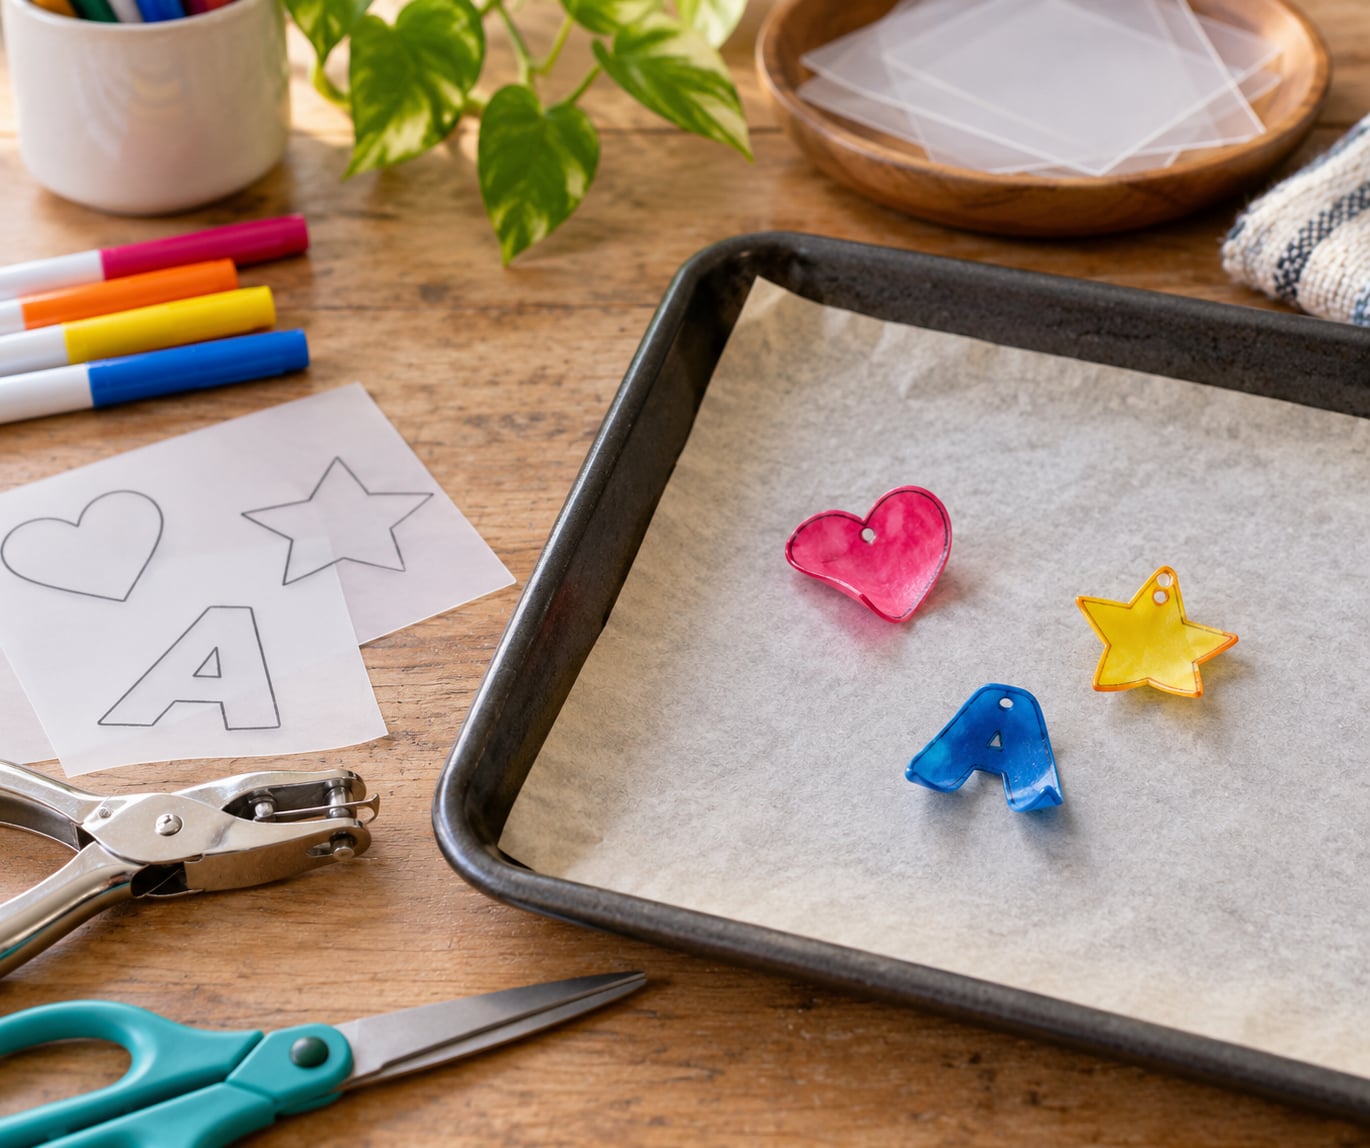
Sketch simple templates on paper first, cut them out, and trace them onto the plastic with a soft pencil so you can erase mistakes before heating. Circles, hearts, stars, simple animals and initials are all forgiving shapes that beginners finish successfully.
Cut with sharp scissors in short, smooth strokes. Shrink film shears if you force the blades, and any jagged edge stays jagged after shrinking. Round off every corner and give yourself roughly 5 mm of plain border around the artwork, because edges that cut too close to the line tend to pucker or burn.
3. Add Charm Holes Before Baking
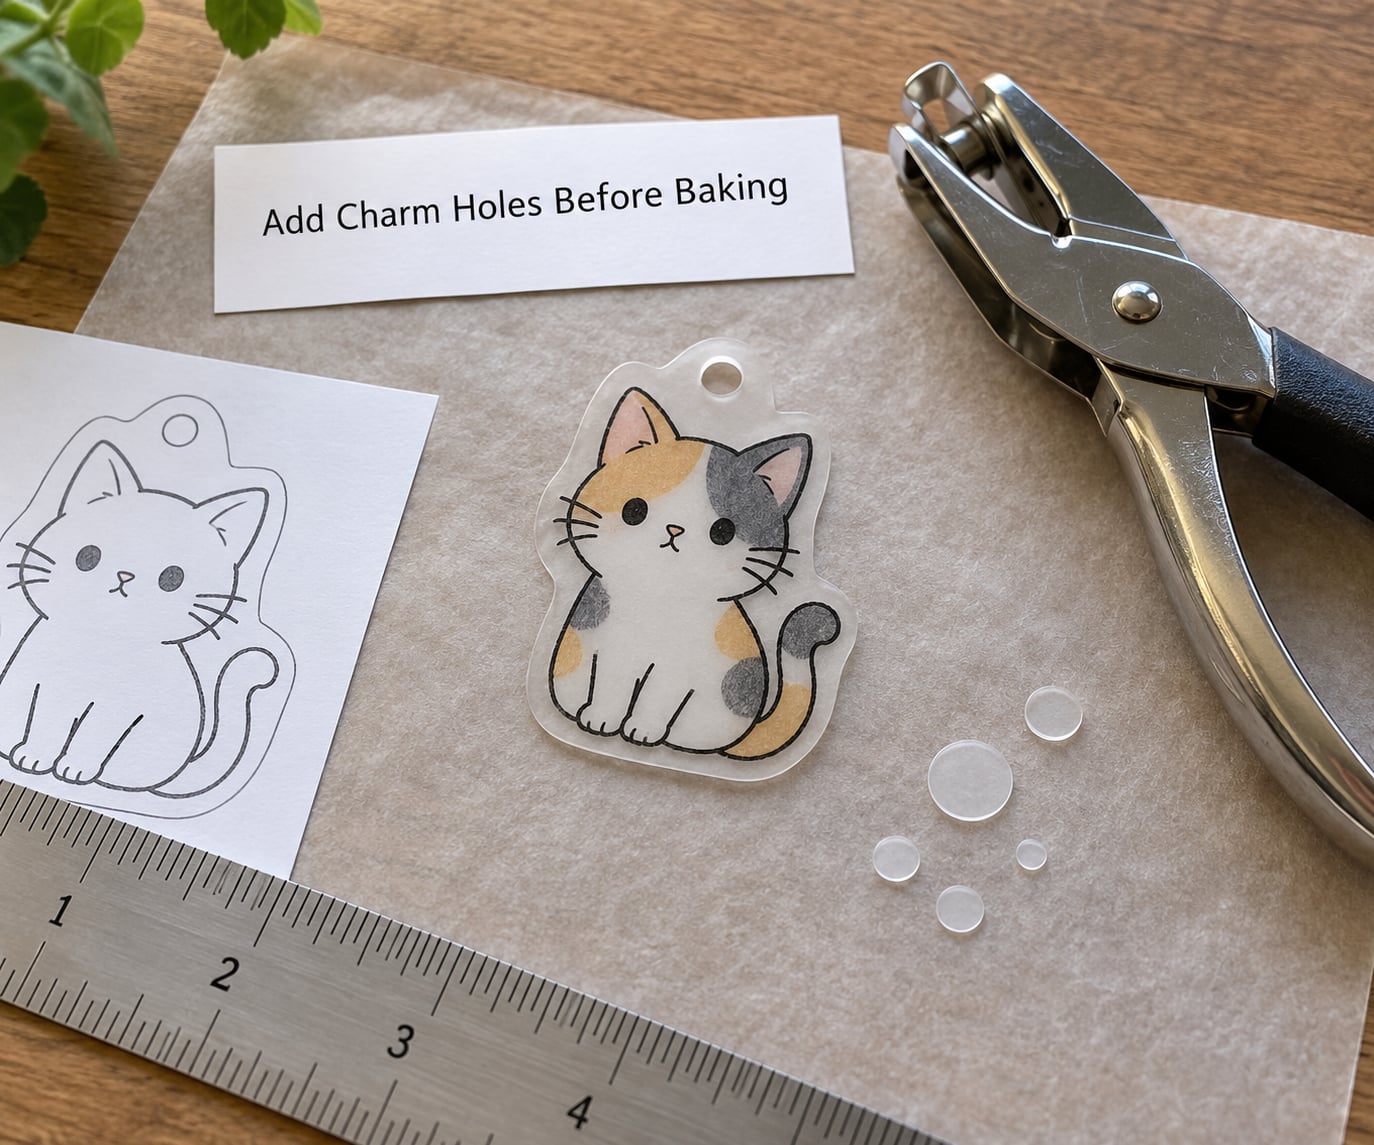
Punch the hole before baking, because the hole cannot be added afterwards. Position it near the top of the shape with enough material above it that the edge will not weaken and snap off, and for a charm that hangs from a ring, aim for the hole sitting about a fifth of the way down from the top.
Make the hole clearly larger than the hardware you plan to use. Everything shrinks by the same ratio, so a hole that fits the ring before baking will be far too tight afterwards. Punch a piece, shrink it as a test, and check it against your jump ring before committing to a whole sheet.
4. Decorate the Plastic
Decorate the plastic before the charms go near the oven, and keep every mark inside the outline. Permanent markers, acrylic paint pens, coloured pencils, glitter glue, stickers and small gems all work, and any of them will end up brighter and more saturated once the plastic shrinks and thickens.
If you are printing, use an inkjet printer on a sheet labelled printable film, since laser printers will not bond to it, and print the artwork lighter than you want it to look because heat darkens ink. Give any paint or glue a full dry time so it does not bubble or smear in the heat.
For a first project with kids, let them fill in pre-cut shapes with markers while an adult handles cutting, gluing and anything small enough to be a choking hazard.
5. Bake the Charms Until They Shrink
Bake on a parchment-lined tray in a preheated oven, with the pieces spaced a couple of centimetres apart and the decorated side facing up. Watch them the whole time rather than setting a timer and walking away, because the whole job takes less time than it takes the oven to cool afterwards.
Temperatures and timings vary by brand and by thickness, so the instructions printed on your own sheet always take priority over any figure you read online. Most sheets bake somewhere in the region of 160 to 175 degrees Celsius, and charms usually finish in one to three minutes, but those are starting points rather than rules.
You will see the pieces curl, twist and lift at the edges within the first minute. That is normal. When they flatten out again, the shrink is finished. An air fryer or a small easy-bake oven is a poor choice here, since you need to see through the door to catch that moment; crafters report that a heat gun or a sandwich press works as an alternative if you are careful.
6. Let the Charms Cool Completely
Take the tray out and let the charms cool flat on the parchment for a few minutes. The plastic finishes hardening as it cools, and a charm handled while still warm bends, marks or burns your fingers.
To confirm the shrink is complete, the piece should be flat, rigid and noticeably thicker at the edge than the flat sheet. If it is still cupped or soft, it is usually under-baked rather than overheated, so return it briefly rather than baking it again for a long stretch. Children should not touch the tray until an adult has checked the pieces have cooled enough to pick up.
7. Turn the Finished Charms into Gifts or Accessories
Thread your hardware while the charms are still warm enough that the hole is slightly soft, or use pliers on a cooled charm. A jump ring needs two gentle twists rather than a hard pull, and a dab of glue gives a permanent bond if you want the charm fixed to a metal tag or a flat back.
A finished charm works as a necklace or bracelet pendant, a key ring charm, a zipper pull on a backpack or coat, a gift tag, a bag tag for a suitcase, or a small ornament for a tree. Making several at the same size turns them into a matching set for a group of friends, a class or a set of siblings, and initial charms make a simple name tag for a school bag.
Give sharp edges a light sanding before they go anywhere near a bag lining, and add a thin coat of clear sealing varnish if you want extra shine and scratch resistance.
Common Mistakes
Most disappointing batches come down to one of a handful of predictable problems, and each has a straightforward fix. Work from the symptom rather than re-baking the whole sheet.
- The piece did not shrink. The film is probably a laminating sheet or ordinary craft plastic, which does not contract. Use a sheet labelled shrink film with a printed ratio.
- It curled into a cup or twisted. Too much heat too fast, or the piece sat too close to another. Bake on a lower setting the package specifies, space the pieces further apart, and press the warm charm flat under a heavy book for about ten seconds as it cools.
- It stuck to the baking sheet. Skip the parchment or use a silicone mat, and never use foil, which grips the plastic far too well.
- It stuck to the parchment and tore when lifted. Cool the tray completely before lifting, and peel slowly from one edge with a fingernail or a thin spatula.
- It bubbled, melted or smells acrid. It stayed in too long or the oven was too hot. Melted plastic cannot be rescued, so discard the piece and shorten the next bake.
- Colours faded or went muddy. Printed images that are too dark burn in during heating. Print lighter, or draw with lighter pressure than feels right before baking.
- It cracked as it cooled. Usually a sharp corner or a too-tight hole. Round the corners more generously and enlarge the hole next time.
- The hole is too small for the ring. There is no fix after baking, so always punch oversized and test one piece before cutting a whole set.
- The edges scratch or poke out. Round the corners before baking and sand the finished edge with fine sandpaper afterwards.
Two habits prevent most of that. Bake a scrap piece first to learn your sheet’s timing, and leave real space between the pieces on the tray. Overheating a batch repeatedly is what turns a recoverable curl into a ruined sheet, so if a piece will not cooperate, take it out rather than pushing it.
Frequently Asked Questions
What type of shrink plastic is best for beginner charms?
Start with a mid-weight polystyrene sheet, either white or pre-coloured, and skip thin film for your first batch because it curls more easily. Coloured sheets suit markers and young children, while clear sheets are better for inkjet-printed designs and photographs. Check the packet for a printed shrink ratio so you know how much to scale your drawing before you cut anything.
Can I make shrink plastic charms without an oven?
You need real, sustained heat for the film to contract, and freezing or simply leaving the plastic in a warm room will not work at all. Crafters do report success with a heat gun held close and moving, or a sandwich press, both of which give a short burst of controllable heat. An air fryer or small easy-bake oven is a poor choice because you cannot watch the pieces curl and uncurl.
Do I need a template to make plastic charms?
No, a template is a shortcut rather than a requirement. Circles, hearts, stars and initials are simple enough to draw freehand, and drawing by hand usually gives more character than tracing. Templates help most when you want a set of matching charms at identical sizes, or when a free drawing is not something you trust your hand with.
How do I stop shrink plastic charms from curling?
Curl in the middle of the bake is completely normal, so the fix is about what happens afterwards. Bake at the lower end of the temperature your sheet specifies, leave a couple of centimetres between pieces, and press each warm charm flat under a heavy book for about ten seconds while it cools. Pieces that stay cupped were usually baked too hot or too fast.
Can children make shrink plastic charms at home?
Yes, with an adult on the oven. Kids can colour in pre-cut shapes while a grown-up handles cutting, punching holes and gluing on anything small enough to be a choking risk. Choose rounded shapes only, keep a close eye on the tray, and let the charms cool fully before anyone picks one up, since warm polystyrene is both soft and hot.
Conclusion
Start by drawing one simple shape on a sheet of shrink plastic at three times your intended finished size, cutting it out with rounded corners, and punching a hole big enough for your ribbon. Follow the heating instructions printed on your own sheet, watch the piece curl and uncurl in the oven, and press it flat while it cools.
Have an adult handle the hot tray, and bake one scrap piece first so you know your sheet’s timing before committing a whole batch.