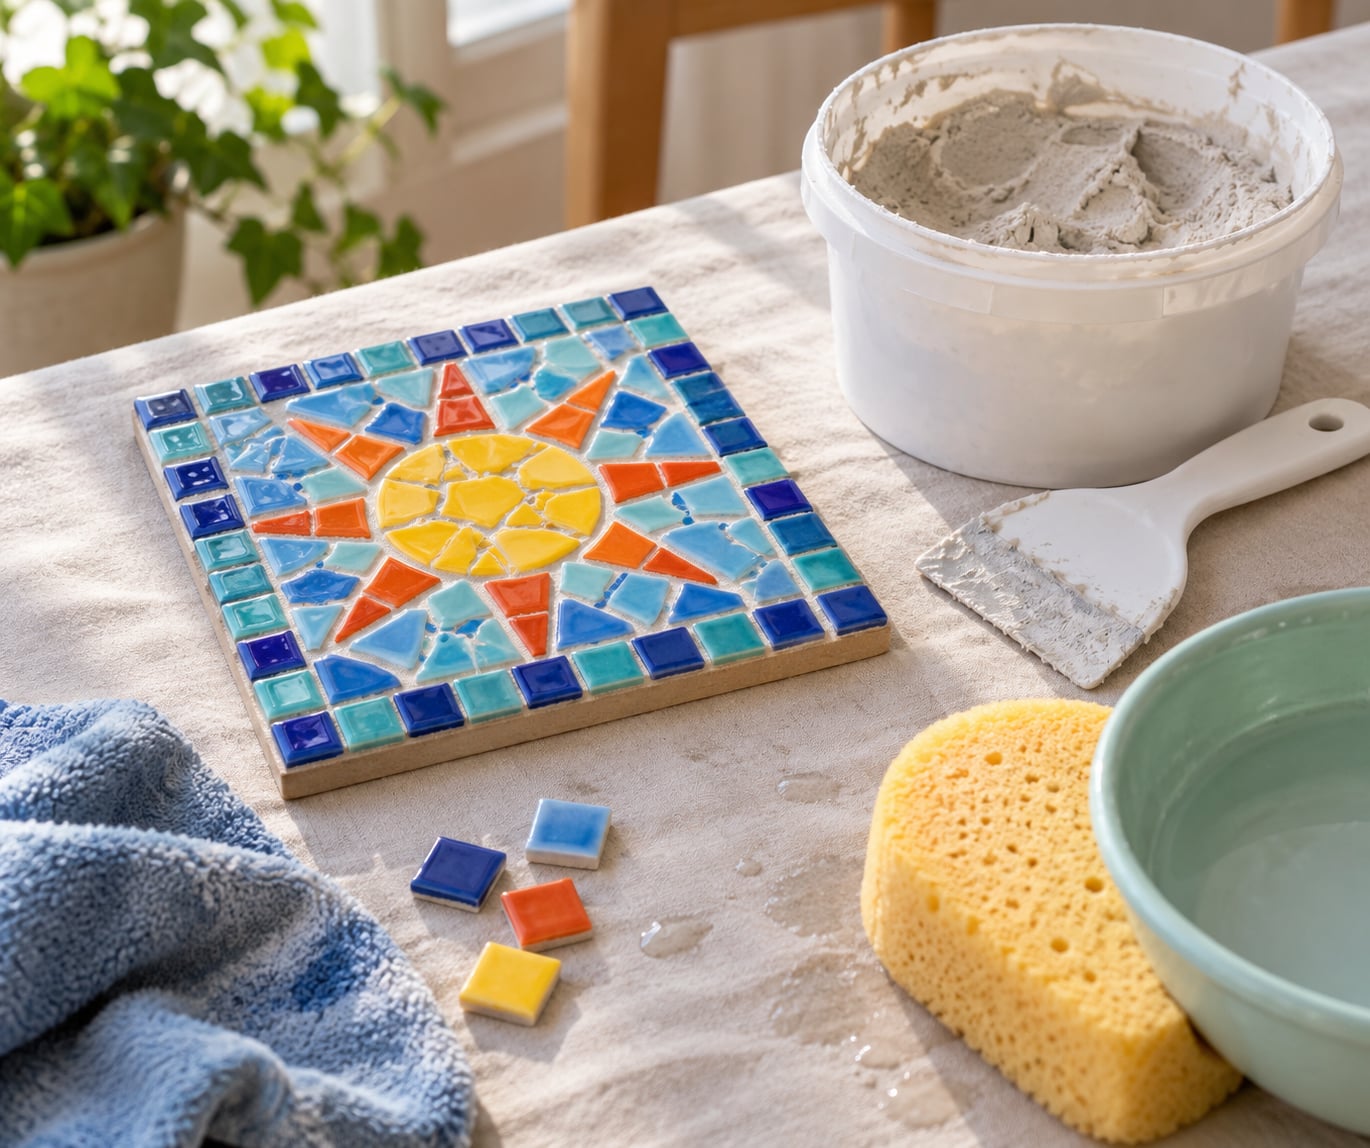
To grout a kids mosaic project, you press a thick paste into the gaps between the tiles, wait 10 to 20 minutes, then sponge the surplus off the tile tops and buff away the haze an hour later. The whole job takes about an hour of active work plus a day of drying, and it is easy enough for a school-age child to help with once an adult has mixed the grout.
Grout is what turns a pile of loose tiles into one solid piece. It fills the gaps, stops pieces shifting or chipping, protects the base from moisture, and gives you the colour contrast that makes each little tile stand out.
A few things trip people up the first time. Most of the “ruined mosaic” stories on craft forums turn out to be a normal haze or a joint wiped too hard, both of which are fixable. Below is the whole process with the timings in one place, so you are not guessing between steps.
Table of Contents
- 1What You Need
- 2Choosing the grout: sanded, unsanded or premixed
- 3How much grout to mix
- 4Pick a colour that contrasts
- 5Step-by-Step: How to Grout a Kids Mosaic Project
- 6Step 1: Prepare and Protect the Mosaic
- 7Step 2: Choose and Mix the Grout
- 8Step 3: Apply the Grout Into the Gaps
- 9Step 4: Remove Excess Grout
- 10Step 5: Let the Grout Dry and Finish the Project
- 11Grout timing cheat sheet
- 12Common Mistakes and Easy Fixes
- 13Keeping it kid-safe and mess-free
- 14Frequently Asked Questions
- 15What is the best grout to use for mosaic projects?
- 16Should I use sanded or unsanded grout for mosaic projects?
- 17How long to leave grout on mosaic before wiping off?
- 18Do you have to grout a kids mosaic project?
- 19What can I use instead of grout for mosaics?
- 20How long does grout take to dry on a mosaic?
- 21Conclusion
What You Need
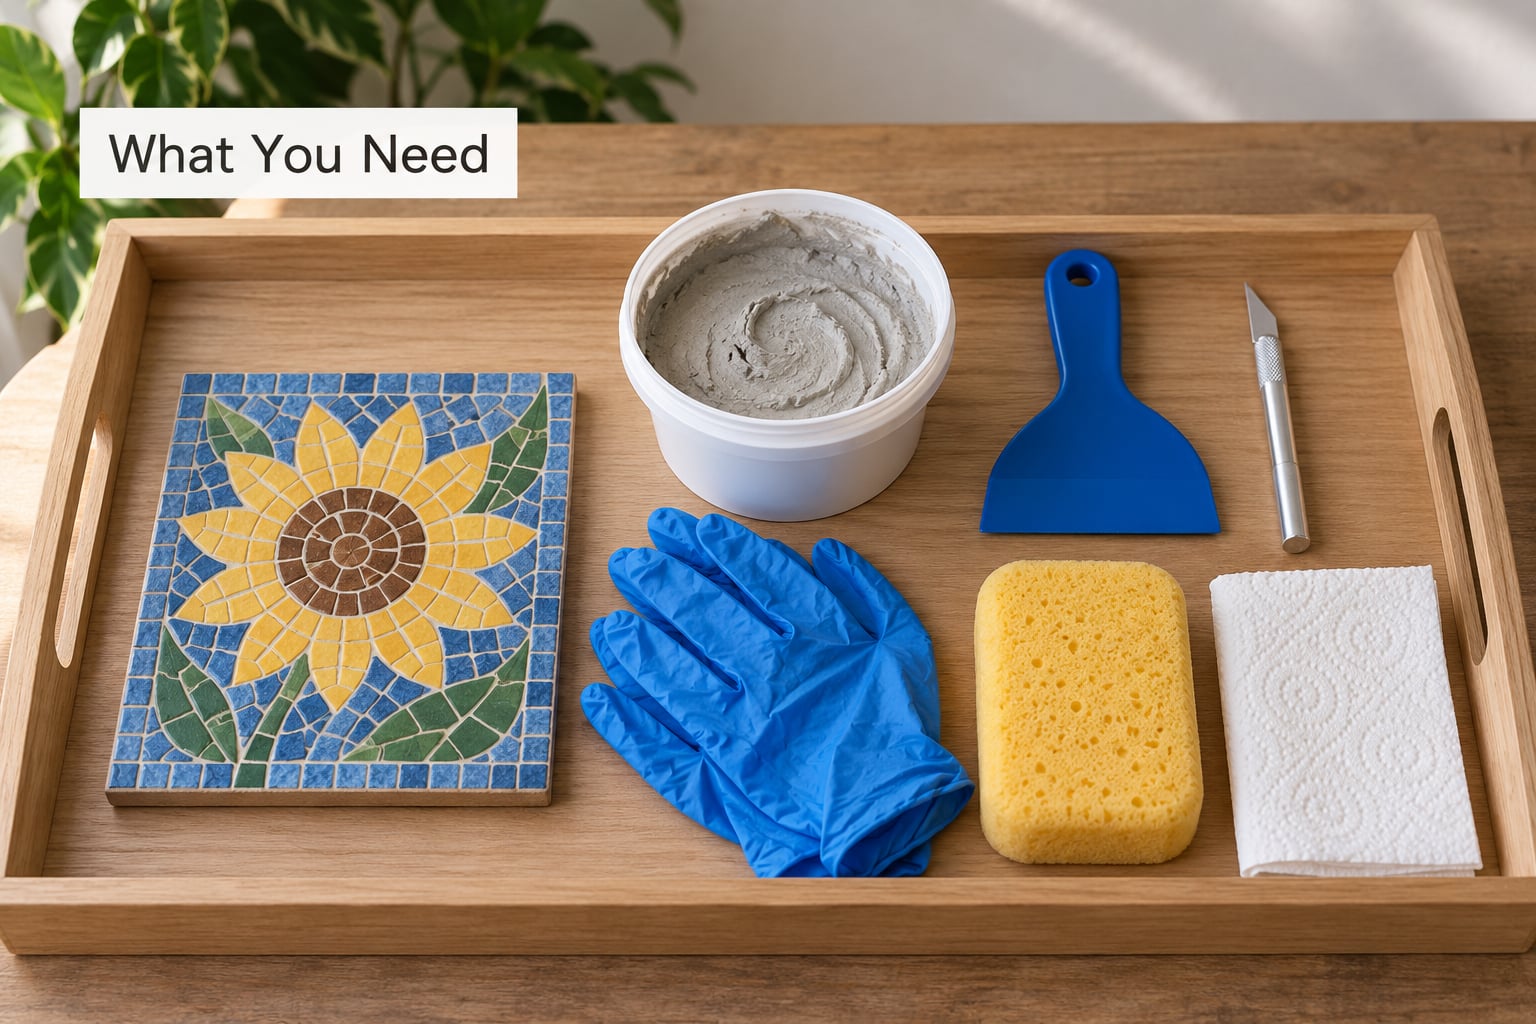
You need very little. Most of it comes from a hardware store or a craft cupboard rather than a specialist supplier.
- Grout — the main decision, covered below.
- Nitrile gloves — grout dries hard in the creases of your hands and is miserable to pick out.
- A dust mask — useful when you pour or scoop dry powder, and worth having if a child helps.
- A mixing bowl, a wooden stirrer and a plastic spoon or craft stick.
- A plastic scraper or grout float — a plastic card from an old loyalty programme works fine.
- A soft grout sponge plus a second sponge and a bowl of clean water for rinsing.
- Newspapers and a plastic sheet — two or three layers of paper, taped down at the edges.
- A damp cloth or old towel for the final haze buff.
- A dental pick or a wooden cocktail stick for grout that has hardened in a corner.
Choosing the grout: sanded, unsanded or premixed
Beginners reach for the ready-mixed grout tub in the craft aisle, and it is the purchase most often regretted. Forum reports describe it crumbling and failing to stick to the tile edges. Sanded grout mixed from powder is the reliable choice for almost every kids mosaic.
| Type | Best for | Watch out for |
|---|---|---|
| Sanded cement grout (powder) | Most glass, ceramic and stone mosaics; indoors or out | Needs mixing; slightly harder to wipe off the tile faces |
| Unsanded grout (powder) | Very fine joints, glass tiles, small craft pieces | Crumbles if packed into a joint that is too wide or too deep |
| Premixed craft-store grout | Nothing much beyond a quick practice board | Commonly reported as crumbly and weak on small projects |
| Silicone or craft glue alternative | Very young children, groutless mosaics, pieces that get handled | Never a waterproof joint; colour and texture are not the same |
Some older guides say premixed grout is unusable for craft. That advice is dated — premixed grout works fine when the joints are narrow and the piece is small. It is still the weaker option when a joint is wider than a few millimetres, because it has nothing binding it together.
How much grout to mix
Mix less than you think you need, in two batches if you have to. Mixed grout has a short working life, and thin leftovers are wasted money.
| Project size | Dry powder | Water to start |
|---|---|---|
| Coaster or name plaque, under 15 x 15 cm | About 100 g | Around 20 ml |
| A4 sheet, under 30 x 30 cm | 200–300 g | Around 30 ml |
| Small tabletop or mirror frame | 500 g | Add slowly, in thirds |
Always add water to the powder a little at a time and stop when the texture looks right. Too much water is the single most common reason grout fails to set.
Pick a colour that contrasts
Choose a grout colour that contrasts with the tiles rather than matching them. Grout dries noticeably lighter than it looks in the bucket, so a pale grey usually ends up a soft off-white, and colours that looked washed out in the tub often settle down once dry. If you can spare five spare tiles, press a dab of grout onto them first and let it dry to see the true colour.
For a first project, keep it small: a coaster, a name plaque or a single A4 sheet. It is far easier to grout something you can hold in one hand on a kitchen table than a full tabletop.
Step-by-Step: How to Grout a Kids Mosaic Project
In short: wait until the adhesive is fully dry, mix sanded grout with water to a thick peanut-butter paste and rest it, press it into every gap with gloved fingers, leave it 10 to 20 minutes, sponge the tile faces clean while the joints stay put, buff off the haze after about an hour, then leave the piece untouched for 24 hours.
Step 1: Prepare and Protect the Mosaic
Tap every tile with a fingertip before you start. Anything that shifts, clicks or rocks needs more adhesive, and grout will not hold a tile that the glue never gripped — PVA in particular struggles on formica, plastic and painted surfaces, which is why tiles pop off mid-job. Give it another 12 to 24 hours to set.
Once everything is secure, brush away loose dust and crumbs. Lay your plastic sheet down first, then two or three layers of newspaper on top, and tape the edges so nothing slides when a sleeve brushes past.
If the mosaic is still on its backing, tape the outer edge of the design with painter’s tape and fill straight up to the tape line. It gives you a straight, clean border instead of a ragged one, and it comes off the next day. If your mosaic is going on a wall or a frame with a visible edge, press a strip of contact paper over that edge first so grout never touches it.
Step 2: Choose and Mix the Grout
Grout is cement-based, so it is not something a child should handle wet. An adult mixes it; kids can watch, stir once it is done, and take on the wiping and buffing stages later.
Put on gloves and a dust mask before you open the powder. Measure out your grout, make a well in the centre, and add water a little at a time while stirring with a wooden stick.
Stop when the paste holds its shape when you lift the stick but still breaks with a nudge. That is about the thickness of peanut butter. Then leave it alone for 5 to 15 minutes so the powder finishes reacting, and give it one more stir. This rest is called slaking, and it is the step people skip when they are in a hurry.
If the mixture goes thin and watery, you cannot pour the water back out. Add another spoonful of dry powder instead.
Step 3: Apply the Grout Into the Gaps
Scoop a small heap of grout onto one corner of the design and work it in with a gloved fingertip. Do not press straight down. Push it down into the joint, then sweep along the gap, then across it, so the paste fills from the bottom up rather than sitting on top.
This matters more than it sounds. Grout that is pushed rather than worked in traps air pockets at tile corners, and those pockets show up later as chipped or missing corners exactly where a child’s eye goes first.
Work in sections about the size of a dinner plate rather than the whole piece at once. Keep scooping small amounts, and scrape any grout that lands on the tile faces back into the joints as you go.
With mixed-height materials — shells, pebbles, gems, beads — fill to the level of the lowest piece. Grout level with the tallest one buries the design and flattens the whole thing.
Step 4: Remove Excess Grout
Wait 10 to 20 minutes after the last section is filled. Too soon and you drag grout out of the joints; too late and it sets on the tile faces and has to be scraped.
Wring your sponge out properly. It should be damp, not dripping. Then wipe in a circular motion, turning to a clean face of the sponge every few passes and rinsing it often, because a dirty sponge smears grey across everything you just cleaned.
Use light pressure and keep the sponge moving parallel to the joint lines rather than digging across them. When you finish, the joints should be flat, slightly recessed below the tile faces, and the tiles themselves should look clean apart from a faint dusty film.
That faint film is the grout haze, and it is normal. It comes off on its own schedule, not now.
Step 5: Let the Grout Dry and Finish the Project
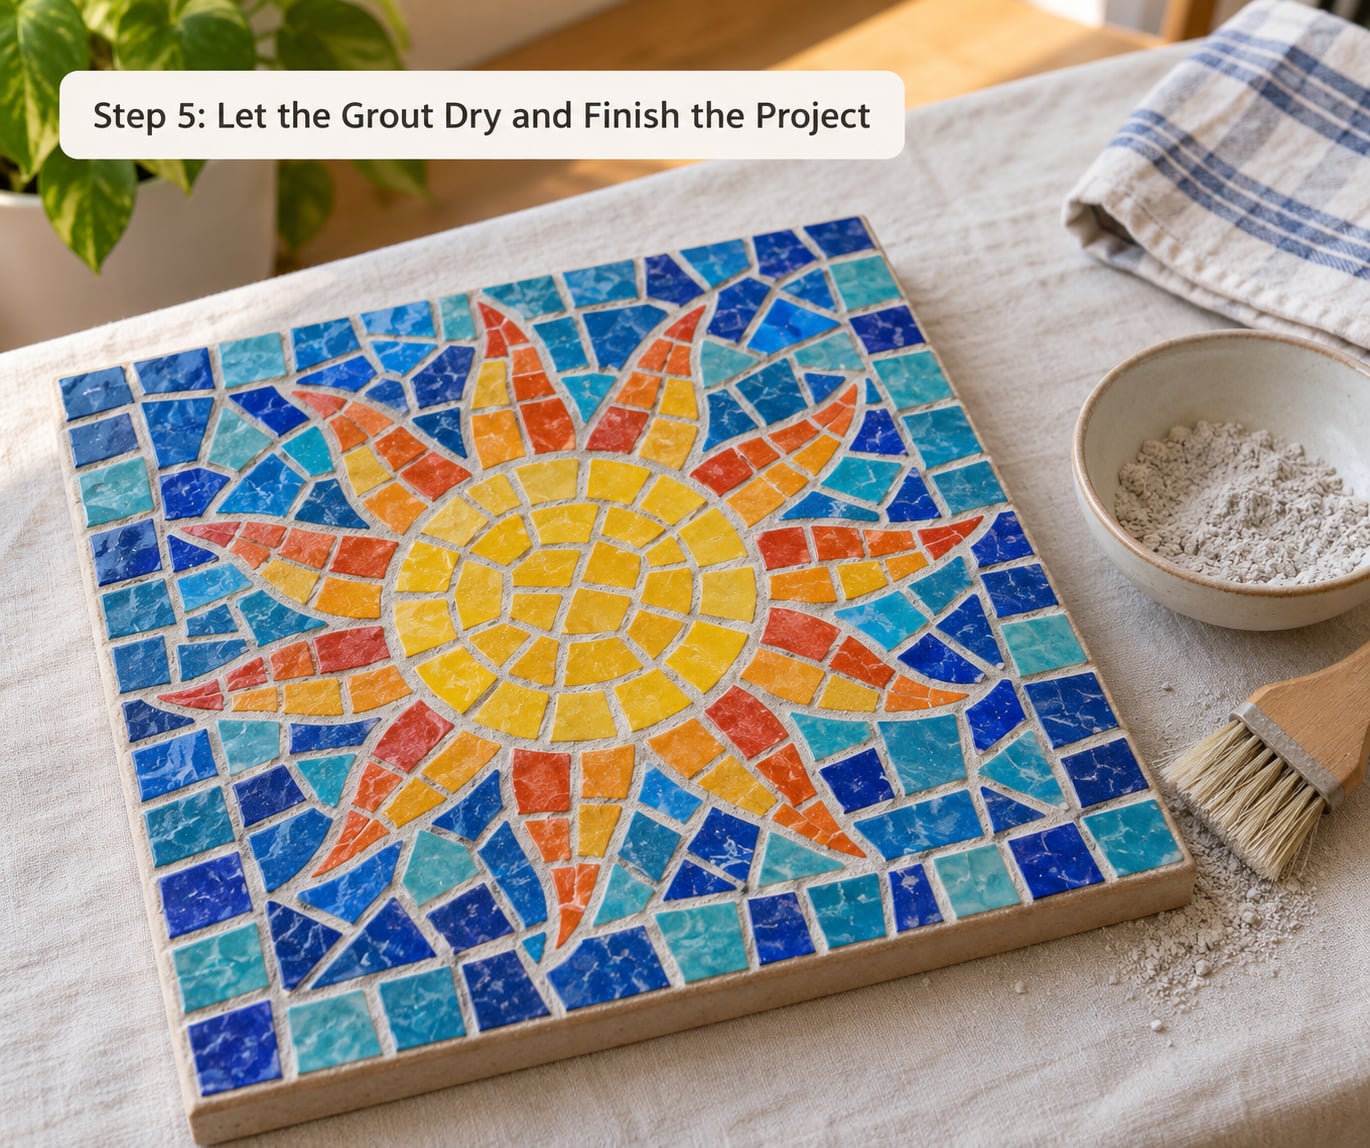
Let the piece sit undisturbed for about an hour. Then buff the haze away with a damp cloth, working in small circles. Most of it lifts off immediately. Anything that has hardened in a pit or along an edge can be lifted gently with a dental pick or the corner of a craft knife, with the blade held away from the tile.
Grout cures for 24 hours before the piece can be handled or wiped. If you want to seal it, wait 72 hours, then use a tile and grout sealer and buff the sealer off the tile faces so the glass stays glossy.
Children should not touch wet grout, and a freshly grouted piece is best left on the protected surface overnight. Once cured it is perfectly fine for a child to hold, hang or carry.
One thing to know about timing: grout hardens by binding water, not by air-drying. So the 24 hours matter even in a warm, dry room, and grouting in the middle of extreme heat or cold slows everything down further.
Grout timing cheat sheet
| Stage | How long | What it looks like when ready |
|---|---|---|
| Wait after gluing tiles | 12–24 hours, longer on non-porous surfaces | Tiles feel completely solid, no movement when tapped |
| Rest the mixed grout (slake) | 5–15 minutes | Surface has settled, paste is slightly firmer |
| Wait after filling the joints | 10–20 minutes | Grout is dull and firm in the gap, not glossy-wet |
| Buff the haze | About 1 hour | Cloth picks up a grey-white film on its first pass |
| Full cure before handling | 24 hours | Grout solid, colour has lightened to final tone |
| Wait before sealing | 72 hours | Surface dry to the touch throughout |
Common Mistakes and Easy Fixes
Almost every beginner mishap on the mosaic forums is recoverable. Here is what the symptom usually means and what to do about it.
| What you see | What it means | How to fix it |
|---|---|---|
| A grey or white film over everything after wiping | Normal grout haze, not damage | Wait an hour, then buff with a damp cloth. It lifts off easily |
| Joints look pale, rough or half-empty | The joints were over-wiped while the grout was too wet | Wait 24 hours, then press fresh grout into the gaps with a damp finger and buff again |
| Crumbling grout that will not hold | Too much water, or unsanded grout in a wide joint | Scrape it out and redo the section with sanded grout mixed thicker |
| Cracks running through the joints | A waterproofing additive in the mix, or grout applied to a flexible base | Remove the cracked grout and re-grout with plain sanded grout on a rigid backing |
| Tiles lifting or popping out as you work | Adhesive was not fully dry, or PVA on a smooth surface | Re-set the tile with more adhesive and let it cure 24 hours before grouting again |
| Missing corners, small holes at tile edges | Air pockets from pushing grout straight down instead of working it in | Press more grout in from a low angle and fill the corner fully |
| Gre staining on pebbles, shells or unglazed ceramic | Porous materials drank the grout in | Prevention only — seal the porous pieces the day before. Once stained, tint the whole piece with acrylic paint |
| Grout much lighter than it looked in the tub | Normal. Grout dries several shades lighter | Leave it. To darken later, paint the cured grout with artists’ acrylic, which wipes off glass and grips porous grout |
| Grout hardened on the tile faces | Left too long before wiping | While it is still curing and soft, lift it gently with a dental pick or a stiff brush. Never scrape glass |
Keeping it kid-safe and mess-free
Wet cement grout is not a toy. An adult should handle the mixing, the gloves and the clean-up, and keep children away from the wet stage. Dry powder is the part worth a dust mask, since the fine dust irritates lungs.
A sensible split for a school-age child: the adult mixes, applies and does the first sponge-off. The child wipes the haze, buffs the dry finish, picks out hardened specks with a dental pick, and chooses the grout colour. A four-year-old can do the wiping and buffing with a damp cloth; anything involving powder or sharp tools is an adult’s job.
For the mess itself, layer your protection properly and put the top sheet of newspaper over the finished mosaic before you walk away. When you clean up, let the wash water sit until the solids settle, scoop the solids into the bin, and never rinse grout water down a household drain — it hardens in the pipe and causes real blockages.
If you are doing twenty projects at once for a class, mix one large batch rather than twenty small ones, keep a covered damp towel over the bowl between applications, and stack the finished pieces on a drying rack with a gap between each one. And make a practice board first: a handful of spare tiles on a scrap of wood costs nothing and teaches the timing without any risk to the real piece.
Frequently Asked Questions
What is the best grout to use for mosaic projects?
Sanded cement grout mixed from powder is the safest bet for most kids mosaics, including glass, ceramic and stone. Unsanded grout suits very fine joints but crumbles if the gap is wide or deep. Premixed craft-store grout is the most common beginner purchase and the most commonly regretted, because it lacks the binder that holds a joint together.
Should I use sanded or unsanded grout for mosaic projects?
Use sanded grout when your joints are wider than a few millimetres, or when the mosaic will sit outdoors or in a bathroom. Unsanded grout is right for narrow joints on smooth glass tile, where the extra sand would catch on the tile faces. If you are unsure, sanded grout is the harder-working and more forgiving option.
How long to leave grout on mosaic before wiping off?
Wait 10 to 20 minutes after you finish filling the last section. Wipe any earlier and you pull grout back out of the joints; wipe later and it sets on the tile faces, where it has to be scraped. The test is simple: the grout in the gap should look dull and firm rather than glossy-wet before you bring the sponge out.
Do you have to grout a kids mosaic project?
No, and plenty of projects are better without it. Small mosaics on a rigid base, especially ones made from closely spaced glass gems, can be finished with a backing and a clear sealant instead. Grout earns its place on pieces with wider gaps, mixed materials such as shells or pebbles, or anything that needs to be strong and moisture-resistant.
What can I use instead of grout for mosaics?
Silicone caulk works for a waterproof joint but shrinks slightly and is harder to smooth flush. PVA glue plus a top coat of varnish or clear acrylic sealer is the simplest option for very young children, because there is no powder to breathe and nothing to mix. Just remember that none of these options will bridge a wide, uneven gap the way grout does.
How long does grout take to dry on a mosaic?
The haze buffs off after about an hour, and the piece can be handled once the grout has cured for 24 hours. If you plan to seal it, wait 72 hours. Grout hardens by binding water rather than by air-drying, so the full day matters even indoors, and cold or very humid conditions will slow it further.
Conclusion
Start by tapping every tile. If nothing shifts, lay down your plastic sheet and newspaper, and you are ready to begin.
From there the sequence is simple: mix to a thick peanut-butter paste and rest it, press it into every joint, wait 10 to 20 minutes, sponge the faces clean, buff the haze an hour later, and leave it for a full day.
Pick a small first project, have an adult handle the mixing and the wash water, and let the child take the wiping and buffing. Every problem you might hit has a fix, and your mosaic is not ruined by anything short of the tiles coming off before you start.