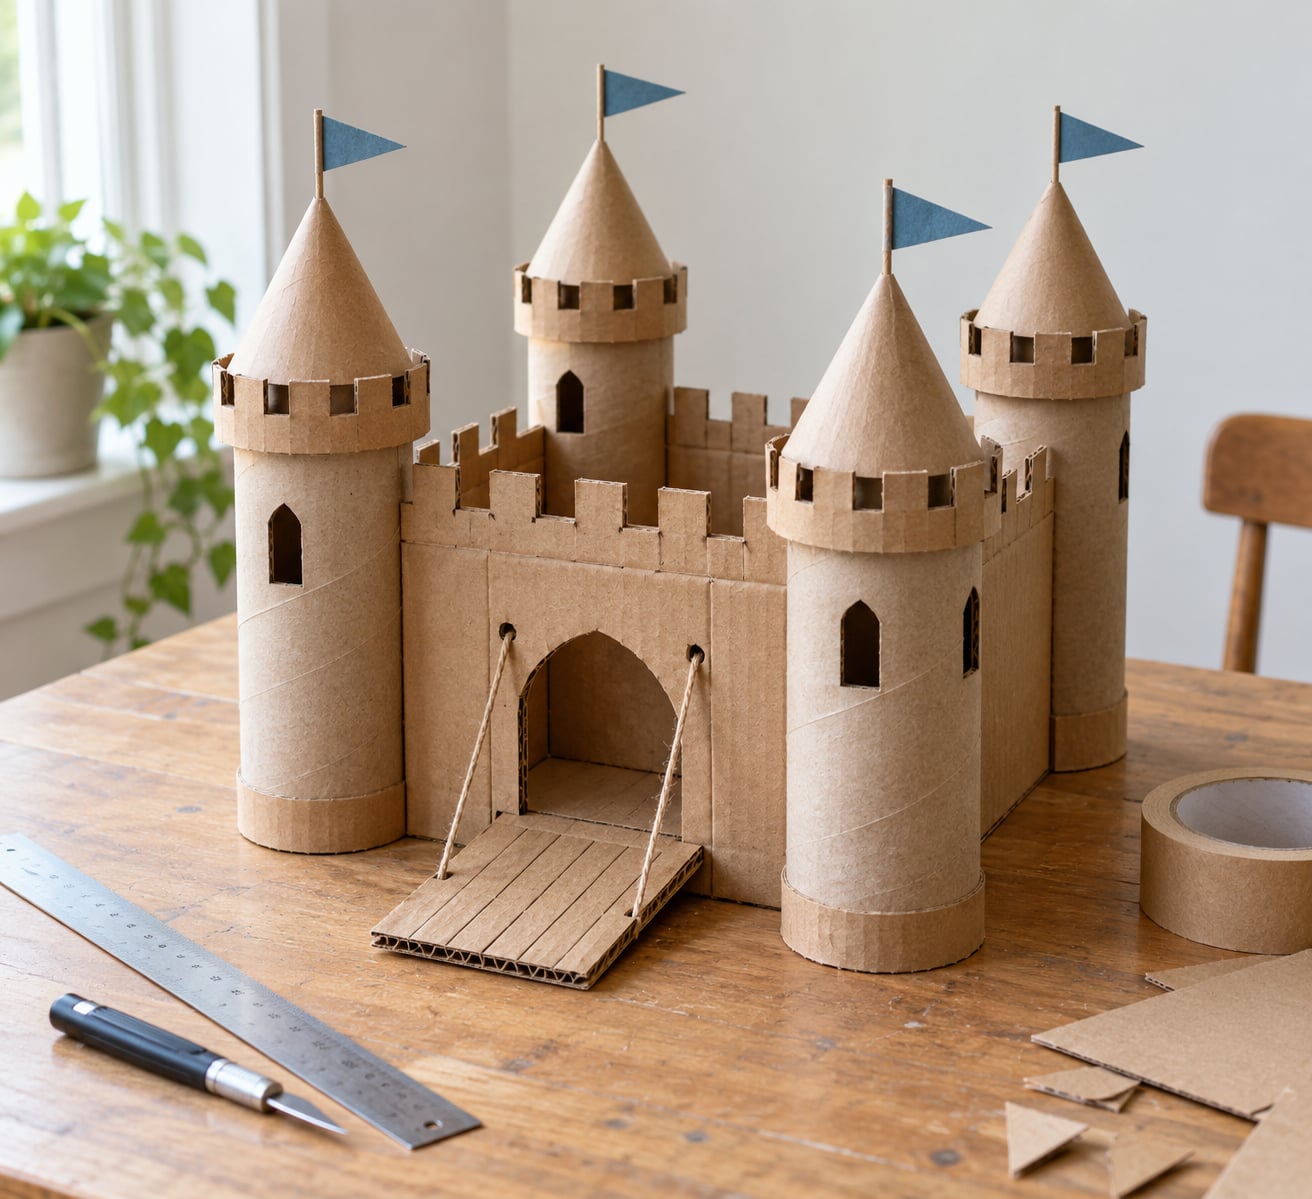
To make a cardboard castle, you cut recycled boxes and paper tubes into walls, towers, battlements and cone roofs, glue them onto a flat cardboard base, then paint and decorate the result. A basic build takes two to three hours plus drying time, and an adult handles every cut made with a box cutter.
I built the version below with my two kids, and the thing that surprised me most was how much the boxes mattered. A thin cereal-box design folded flat the moment a small brother leaned on the wall. Rebuilding the same walls from a double-walled delivery box fixed it, with no other change and no extra glue.
That is why the planning stage comes first here. Pick the cardboard, measure it, sketch the layout, and the rest of the build stops fighting you.
Table of Contents
- 1What You Need
- 2Step-by-Step: How to Make a Cardboard Castle
- 31. Plan the Castle Shape
- 42. Cut the Doors and Windows
- 53. Build the Tower Sections
- 64. Assemble the Walls and Floor
- 75. Add Battlements and a Drawbridge
- 86. Make Flags and a Sign
- 97. Paint and Decorate the Castle
- 10Common Mistakes and Easy Fixes
- 11Walls That Sway or Fold Inward
- 12Towers That Fall Off or Rock
- 13Torn or Curling Cut Edges
- 14A Doorway That Is Too Small or Misaligned
- 15Glue That Curls or Never Sets
- 16Three Ways to Change the Size
- 17Frequently Asked Questions
- 18What is the best cardboard for making a castle?
- 19How do you make a cardboard castle stand up?
- 20How long does it take to make a cardboard castle?
- 21Can I make a cardboard castle without glue?
- 22What can I use instead of paint to decorate a cardboard castle?
- 23How can I make a small tabletop cardboard castle?
- 24Conclusion
What You Need
For a castle about 60 cm (24 inches) wide and 45 cm (18 inches) deep, one main box does most of the work and a second box becomes towers, gussets and repairs. Everything else on this list is probably already in a craft drawer.
- 2 large corrugated boxes of roughly printer-paper size or bigger. One becomes the base and walls, the other is your supply of offcuts.
- 4 cardboard tubes — toilet paper rolls, paper towel rolls cut in half, or mailing tubes for the towers.
- 1 sheet of thick flat cardboard, made by opening and flattening a third box, for the base and the floor inside.
- Craft knife or box cutter with a fresh blade, a metal ruler, and a pencil for marking.
- PVA craft glue and masking tape or duct tape. A hot glue gun works faster but is an adult tool.
- Washable paint, markers or crayons, plus a brush if you are painting.
- Wooden dowels or craft sticks, coloured paper or felt, and a length of string for flags and the drawbridge.
- Optional: sandpaper for rough edges, a paper brad for the drawbridge hinge, and clear packing tape to seal raw cardboard before painting.
Cardboard varies far more than people expect, and picking the wrong kind is the single biggest reason a castle wobbles. This table is the short version:
| Cardboard type | Strength | Best use in a castle |
|---|---|---|
| Single-wall corrugated (most delivery boxes) | Medium | Walls, tower panels, cut-out battlements |
| Double-wall corrugated (appliance and large furniture boxes) | High | Base, load-bearing walls, anything a child will lean on |
| Cereal-box card (thin, printed, single layer) | Low | Flags, banners, small decorative panels only |
| Paperboard / mounting card | Low but smooth | Signage, drawn stone details, window shutters |
Decide on a scale before you cut anything, because it determines the box you need:
| Scale | Base size | Good for |
|---|---|---|
| Toy castle | About 30 cm (12 inches) square | Action figures, a rabbit or small cat |
| Table castle | About 60 cm (24 inches) square | Children aged 3-8 playing on a living room floor |
| Crawl-in fort | About 1.2 m (4 feet) square | Older kids who want to sit inside; check your ceiling height first |
A quick safety note before the first cut: adults handle the box cutter, the craft knife and any hot glue gun. Children can safely measure, mark, tape, paint and decorate, but the cutting, scoring and gluing stages need an adult nearby. Scissors for children still need supervision, and small flagpoles are worth a quick sanding before a toddler handles them.
Step-by-Step: How to Make a Cardboard Castle
Seven stages take you from a stack of boxes to a finished castle with towers, a drawbridge and flags. Work through them in order, because each one assumes the previous step has dried properly.
1. Plan the Castle Shape
Lay the boxes flat and measure the base panel you want — for a table castle, roughly 60 cm by 45 cm. Sketch a bird’s-eye view showing where the doorway sits and which corners become towers, then a front view with the tower heights marked.
Check the finished height against your space before cutting. A castle that is 2.1 m (7 feet) tall is a wonderful thing in a playroom and a serious problem in a room with a 2.3 m ceiling. Leave 20 to 30 cm of clearance above the tallest tower so it can be moved and dusted.
2. Cut the Doors and Windows
Draw the doorway on the front panel with a pencil, roughly half the wall’s height and a quarter of its width. Square off the bottom corners first, then cut the two triangles above them and lift out the rectangle between them — that leaves a clean arch with no curved cut to fumble.
Make windows as simple rectangles or tall arrow slits. Test the largest opening with a paper template first, tape it in place to check it lines up with the tower, and only then mark it on the cardboard. You will know this step worked when the piece still lies flat on the table afterwards instead of springing open.
3. Build the Tower Sections
Cut four panels for each tower, roughly 20 cm by 20 cm, then glue them edge to edge into a square tube. Tape the inside seam as well as the outside one — that second strip is what stops a tower folding in half when a child grabs it.
Check the base is square by pressing it flat on the table; if one flap rides up, trim it with the knife. Add a small triangle of cardboard inside each corner as a gusset, glued into the angle. Towers with gussets survived everything my kids did to theirs.
4. Assemble the Walls and Floor
Lay the flat base cardboard down first and mark the footprint of the walls on it. Glue the wall panels to the base, butting the corners together and taping the inside seam so they form a closed box rather than four loose flaps.
Stand the four towers in the corners and glue them to the base inside the wall line, then add a floor piece inside so there is something solid underfoot. Push gently on each tower top. If the whole thing moves as one piece, the base is doing its job; if a tower rocks, add a cardboard triangle at that corner and let it set.
5. Add Battlements and a Drawbridge
Mark a row of merlons — the upright blocks along a castle wall top — along the top edge of each wall, spacing them evenly with a gap the same width as each block. Cut the gaps out with the knife and lift the battlements free.
Glue the battlements back on, then run a strip of cardboard inside the wall top and tape it to the back of each merlon. This inner strip is invisible and turns a fragile comb of cardboard into a solid parapet. For the drawbridge, cut a flap from a spare panel, hinge it with a paper brad or a folded cardboard tab, and tie string to the top edge so a child inside can raise and lower it.
6. Make Flags and a Sign
Cut triangles from coloured paper or felt and slide each one onto a wooden dowel or craft stick. Push the stick down into a slit cut in the tower roof, or tape it to the inside of the tower wall so it stands upright without a cut hole.
Make the sign from a strip of cardboard with the castle’s name drawn or glued on in thick letters. Check every flagpole, stick and sign corner: sand anything sharp, and keep the sign low on the front wall rather than above the doorway where it could catch on a sleeve.
7. Paint and Decorate the Castle
Draw stone blocks first with a marker, following the corrugation lines so the blocks look like masonry rather than brick wallpaper. Then add colour with crayons or markers, which sit on raw cardboard without soaking into it.
If you want to use washable paint, seal the surface first: run clear packing tape or a thin coat of glue over the panel and let it dry, then paint. Raw cardboard that takes water-based paint directly goes soft, curls at the edges and can collapse under its own weight. Finish with paper stones, cut-out windows, patterned paper roofs and a strip of card for a banner, leaving the cardboard texture visible.
Common Mistakes and Easy Fixes
Nearly every collapsing castle comes down to the same handful of problems. These are the ones we hit, and what fixed them.
Walls That Sway or Fold Inward
The wall panel was too light for the span. Swap thin single-wall cardboard for a double-wall panel, add a second layer glued at right angles to the first, and tape the inside corner seam. Taping a single strip over the joint stops the two panels opening like a book.
Towers That Fall Off or Rock
The tower was glued to a paper-thin base or to nothing at all. Cut a square of thick cardboard for each tower foot, glue that to the base first, then glue the tower onto it, and fill the inner corner with a triangle gusset. This is the fix that matters most for a castle children lean on.
Torn or Curling Cut Edges
Scores of cuts were made without a ruler, so the blade wandered through the corrugation. Cut on a metal ruler with a fresh blade and one firm pass instead of several hesitant ones. Scrape off any fuzzy fibres with sandpaper and trim away any strip that is hanging loose, because a torn edge becomes the starting point for a bigger tear.
A Doorway That Is Too Small or Misaligned
The arch was marked by eye and landed half on the tower. Trace a paper template, tape it in position, and check it against the tower line before cutting. If the opening is already too small, patch it with a strip of cardboard around the arch rather than trying to widen the hole in the middle of a wall.
Glue That Curls or Never Sets
Too much PVA squeezed out from under the panel and dried into a hard ridge that lifted the edge. Apply glue in a thin, even line, press the pieces together, and tape over the joint while it sets. Wipe squeezed-out glue with a damp finger straight away — dried PVA needs scraping off and can take the paper surface with it.
Three Ways to Change the Size
For a larger castle, double every panel by butting two pieces together with a taped seam, and build the base from two laminated sheets of cardboard — the base carries the whole weight. For an indoor play castle, keep the tower heights low, leave the doorway wide enough for a child to crawl through, and add window cutouts so it does not feel like a dark box. For a tabletop version, use a single small box with paper-tube turrets and a folded paper drawbridge; it takes 30 minutes and survives being knocked off a shelf.
Frequently Asked Questions
What is the best cardboard for making a castle?
Double-wall corrugated cardboard is the strongest choice for the base, the walls and any panel a child will lean on. Single-wall delivery boxes work well for tower sides and battlements, and cereal-box card is only good for flags and decoration. Check the flutes by looking at the cut edge: single-wall has one layer, double-wall has two. If you only have cereal boxes, laminate two sheets together with glue.
How do you make a cardboard castle stand up?
Stand it on a laminated base of two cardboard sheets glued face to face, and glue the towers to squares of thick cardboard footings rather than straight onto the base. Fill the inside corners of each tower with triangle gussets, and tape every inside seam where two wall panels meet. Push down on each tower top when you finish; if the base flexes, add a third layer underneath.
How long does it take to make a cardboard castle?
A table-sized castle takes two to three hours of active building, plus drying time between the glue stages, so plan on most of an afternoon. A child-friendly version where the adults cut the openings and the kids handle tape, paint and flags takes closer to an hour of adult work. Add another 30 minutes if you are sealing cardboard before painting it.
Can I make a cardboard castle without glue?
Yes, and it works for simple designs. Duct tape or packing tape alone can hold cardboard panels together, and folded cardboard tabs make serviceable corner joints. Expect less rigidity than glued joints, especially at the tower bases, so reinforce corners with tape and keep the walls short. For a crawl-in fort, tape the base and seams generously and add a floor piece for stiffness.
What can I use instead of paint to decorate a cardboard castle?
Markers, crayons and coloured pencils draw stone blocks, windows and banners directly onto cardboard without any soaking. Glued-on coloured paper, felt shapes, stickers and patterned paper for roofs give a textured result that lasts longer than a washable surface. Collage also suits young children who want immediate results and makes cleanup easy.
How can I make a small tabletop cardboard castle?
Use one small box roughly 30 cm square as the keep, cut an arched doorway and two windows, and add four paper tubes at the corners as turrets. Cap the tubes with circles folded into cones, mark battlements along the top edge with a marker or cut shallow notches, and finish with a paper flag on a toothpick. It takes about 30 minutes.
Conclusion
Start by measuring the boxes you actually have, laying them out on the floor in the shape you want, and cutting one test doorway before anything is glued. That single test cut tells you whether the scale works, and it takes two minutes to redo.
Once the shell stands on its own, hand the decorating over. Drawing stone blocks, choosing flag colours and naming the castle are the parts children remember, and they will keep playing with it long after the last coat of paint dries.