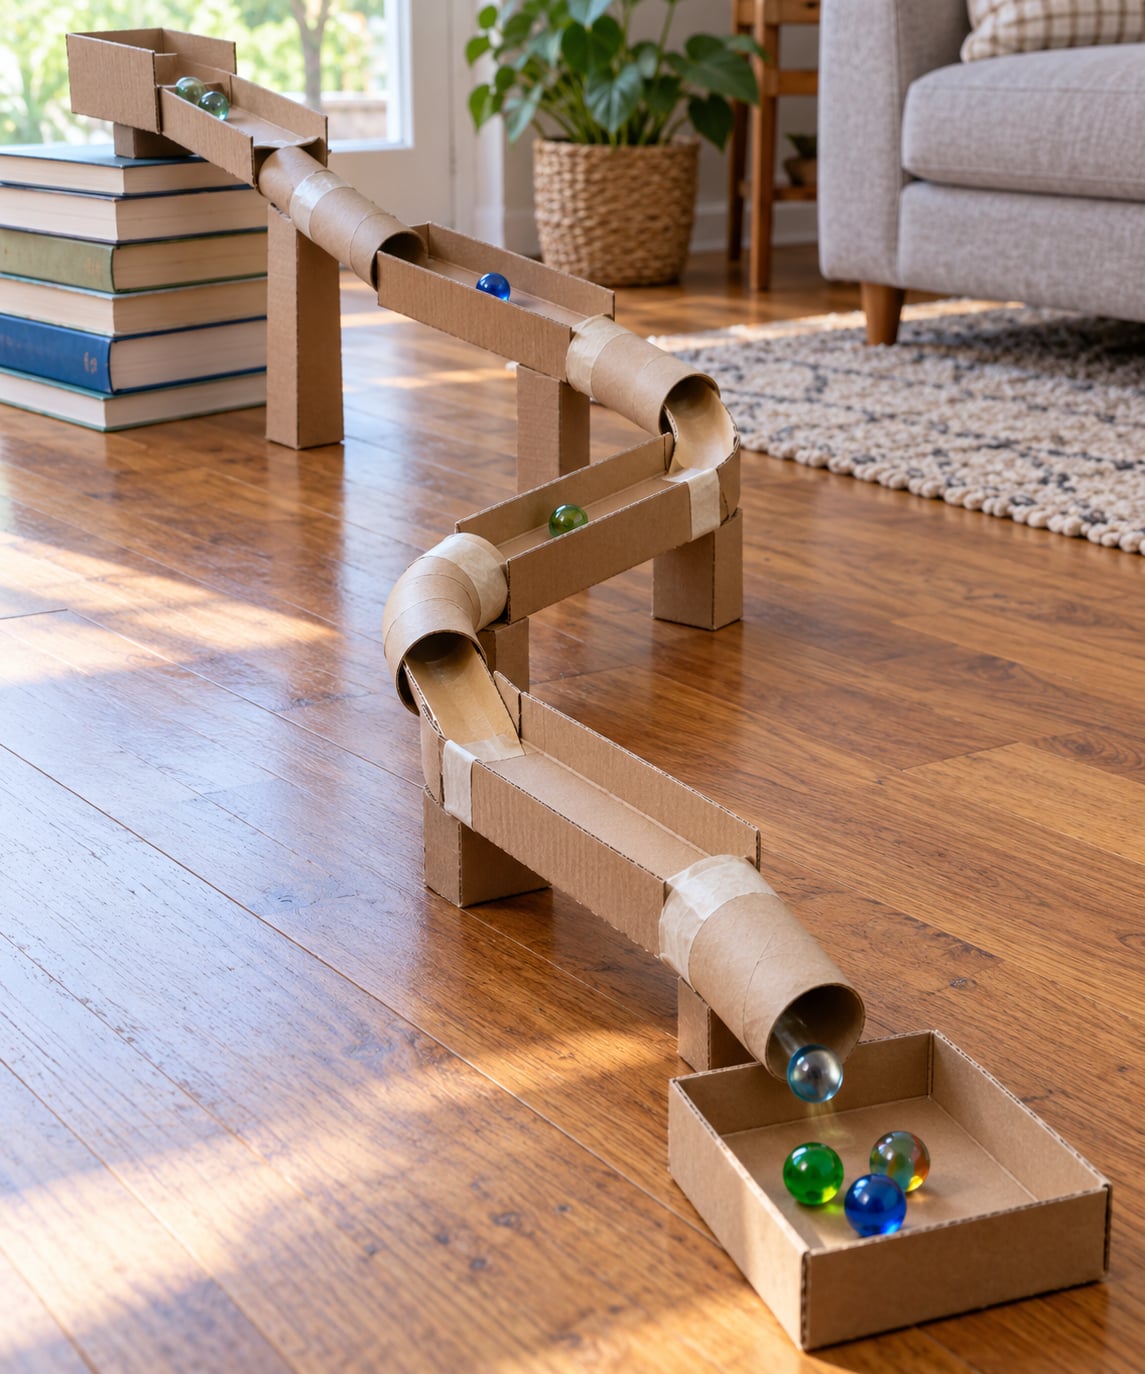
A cardboard marble run is a track built from tubes, cereal boxes and flat sheets that carries a marble from a high point down to a finish line using nothing but gravity, tape and glue. The basic build takes 45 to 90 minutes, suits ages four and up with adult help, and costs almost nothing if you start in the recycling bin.
I have built these with my own kids roughly a dozen times, and the version that works every single time is the boring one: a straight channel for the first meter, one gentle curve, and a tray at the bottom. Kids want loops and switchbacks. The marble wants a predictable slope, and those two wishes fight each other until the marble wins.
So this guide gives you the working version first, with real measurements, then the decorating and challenge ideas once a marble has made it end to end without help. Build the simple run, then add the flourishes.
Table of Contents
- 1How to Make a Cardboard Marble Run: What You Need
- 2Step-by-Step
- 3Plan the Layout and Mark the Track
- 4How to Make a Cardboard Marble Run Tracks That Hold
- 5Add Sidewalls and Support Pieces
- 6Assemble and Join the Sections
- 7Add a Launcher and Catching Area
- 8Test the Marble Run and Make Adjustments
- 9Decorate and Add Challenge Features
- 10Common Mistakes
- 11Frequently Asked Questions
- 12What is the best cardboard for a marble run?
- 13How do you keep a cardboard marble run steady?
- 14Can toddlers make a cardboard marble run?
- 15How steep should a cardboard marble run be?
- 16How long should a cardboard marble run take to build?
- 17What can I use instead of cardboard for the track?
- 18Conclusion
How to Make a Cardboard Marble Run: What You Need
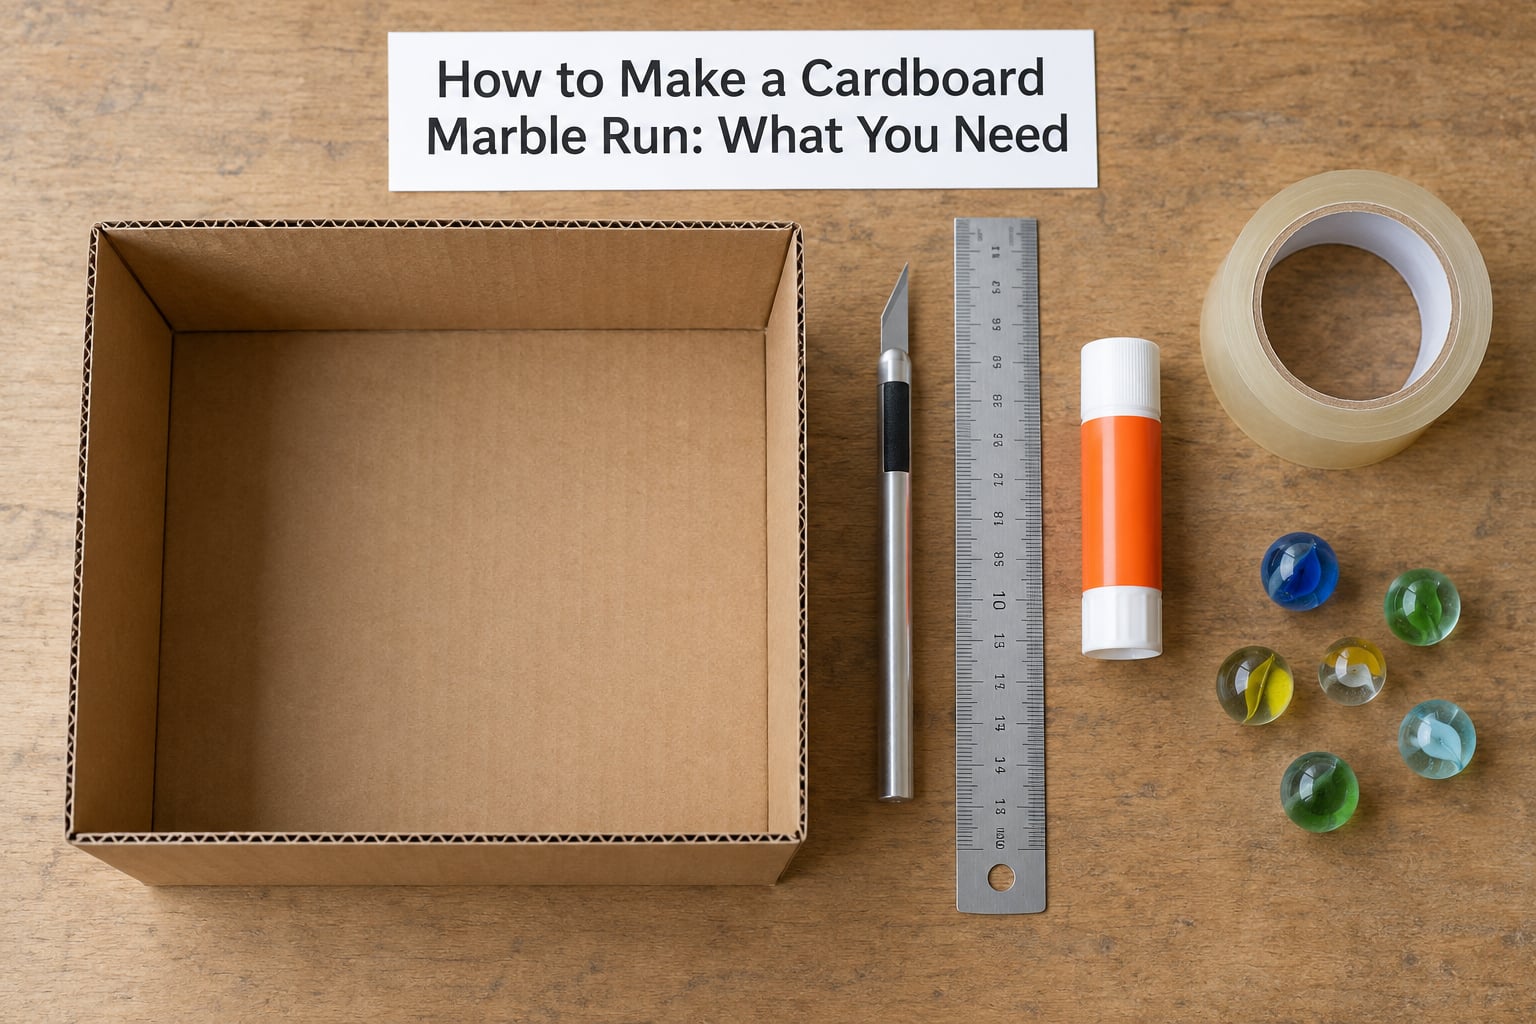
You need three things: a track surface, a way to join pieces, and something to stop the marble at the end. Everything else is optional. Most families can build a full run from materials already in the kitchen or recycling bin, and the only item many people ever purchase is a set of marbles.
Essential track materials
- Cardboard tubes. Two or three paper towel rolls work well. Toilet paper tubes roll up under even light weight, so double them or wrap a strip of tape around them before joining.
- A cereal box or two. Cut these into flat strips. Cereal box card is single-layer, so it bends rather than kinks, which is exactly what you want for curves.
- Corrugated cardboard sheet. One panel from a delivery box for the base, the catch tray and any raised supports.
- Marbles. One marble fits inside a paper towel tube with a little room to roll. A 15 mm marble in a 38 mm tube already feels loose; if it rattles, the channel is too wide for the marble and it will wander.
Joining and marking
- Masking tape or painter’s tape for holding pieces while you test
- A glue stick for paper-to-paper joins, or a hot glue gun with adult supervision
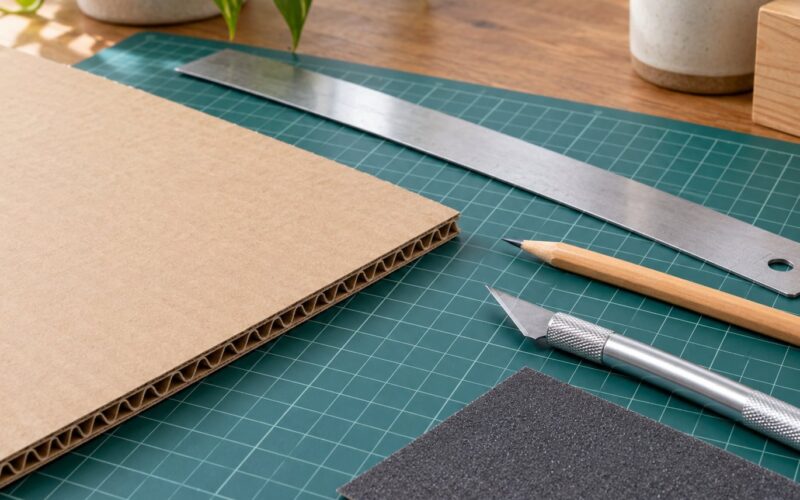
- A craft knife and a metal ruler for adult use
- A pencil and marker for marking the route
Optional extras
- Wide clear packing tape to reinforce the underside of joints
- Straws, cut bottle tops or plastic cup rims for funnels and chutes
- Painter’s tape for removable obstacles that children can reposition
- Wooden blocks or a stack of books for raising the starting point
A run this size takes about 15 minutes to prepare, and give yourself 45 to 90 minutes for the full build including test runs. Before you start, one safety note worth reading.
Safety and age guidance. Marbles are a choking hazard and the whole activity is not suitable as a hands-on project for children under three. Older toddlers can handle wide channels with no loose small parts under direct supervision, but the cutting, the glue gun and the scissors are adult jobs. A cardboard marble run also gets dusty as it is handled; wipe it with a dry cloth before small children play with it.
Step-by-Step
Read the whole sequence once before you cut anything. The order matters because the track has to be laid out flat before the walls go on, and the walls have to be on before the sections join.
Plan the Layout and Mark the Track
Unfold the corrugated box flat and remove any loose flaps or glued panels that would rock under weight. Lay the marble at one end and trace its path with a marker, choosing the route before you cut a single thing.
Mark a route with two gentle curves and two bends rather than a spiral, and finish with a level patch the length of your palm. Reserve flat ground at the end so the marble can stop instead of shooting off the table edge. A slope that loses about 2 cm of height for every 20 cm of run is a good starting point; steeper gets exciting, flatter gets boring, and you will tune it later anyway.
You will know this stage worked when a marble, rolled along the traced line with a fingertip, never touches the line or shoots off it.
How to Make a Cardboard Marble Run Tracks That Hold
Cut the marked track openings with a craft knife held against the metal ruler, scoring several shallow passes rather than trying to slice through in one. Ragged inner edges are the single biggest cause of a marble that stops halfway.
For tube sections, cut each paper towel roll to a length of 15 to 20 cm and cut a rectangular window along one side so the marble is held in a half-pipe. A window roughly 3 cm wide and 6 cm long gives a marble room to roll but keeps it from jumping out at speed. Remove the cut panel completely rather than folding it inward, because a flap left in the tube catches the marble.
For box sections, cut a channel 4 to 5 cm wide and fold the long edges down by about 1 cm to stiffen them. When the channel is cut, run the marble through it by hand; if you feel a catch anywhere, shave that spot thinner before moving on.
This stage is done when every piece has a smooth, continuous path with no flap, staple or glue blob in the way.
Add Sidewalls and Support Pieces
Fold thin strips of corrugated cardboard 2 to 3 cm tall along both edges of each channel and tape them down inside the base, or tape them directly to the rim of each tube. Sidewalls are what keep the marble on the track at curves, so make them taller than you think you need.
Reinforce curves by adding a small piece of card under the outside of the bend, where the board tends to lift away from the table. Cut braces in a triangular shape from the offcuts and slot them under flat runs as removable supports, so you can change the height later without rebuilding.
Check the stage by holding the section in the air and rolling the marble down it. If it stays in, the walls are doing their job.
Assemble and Join the Sections
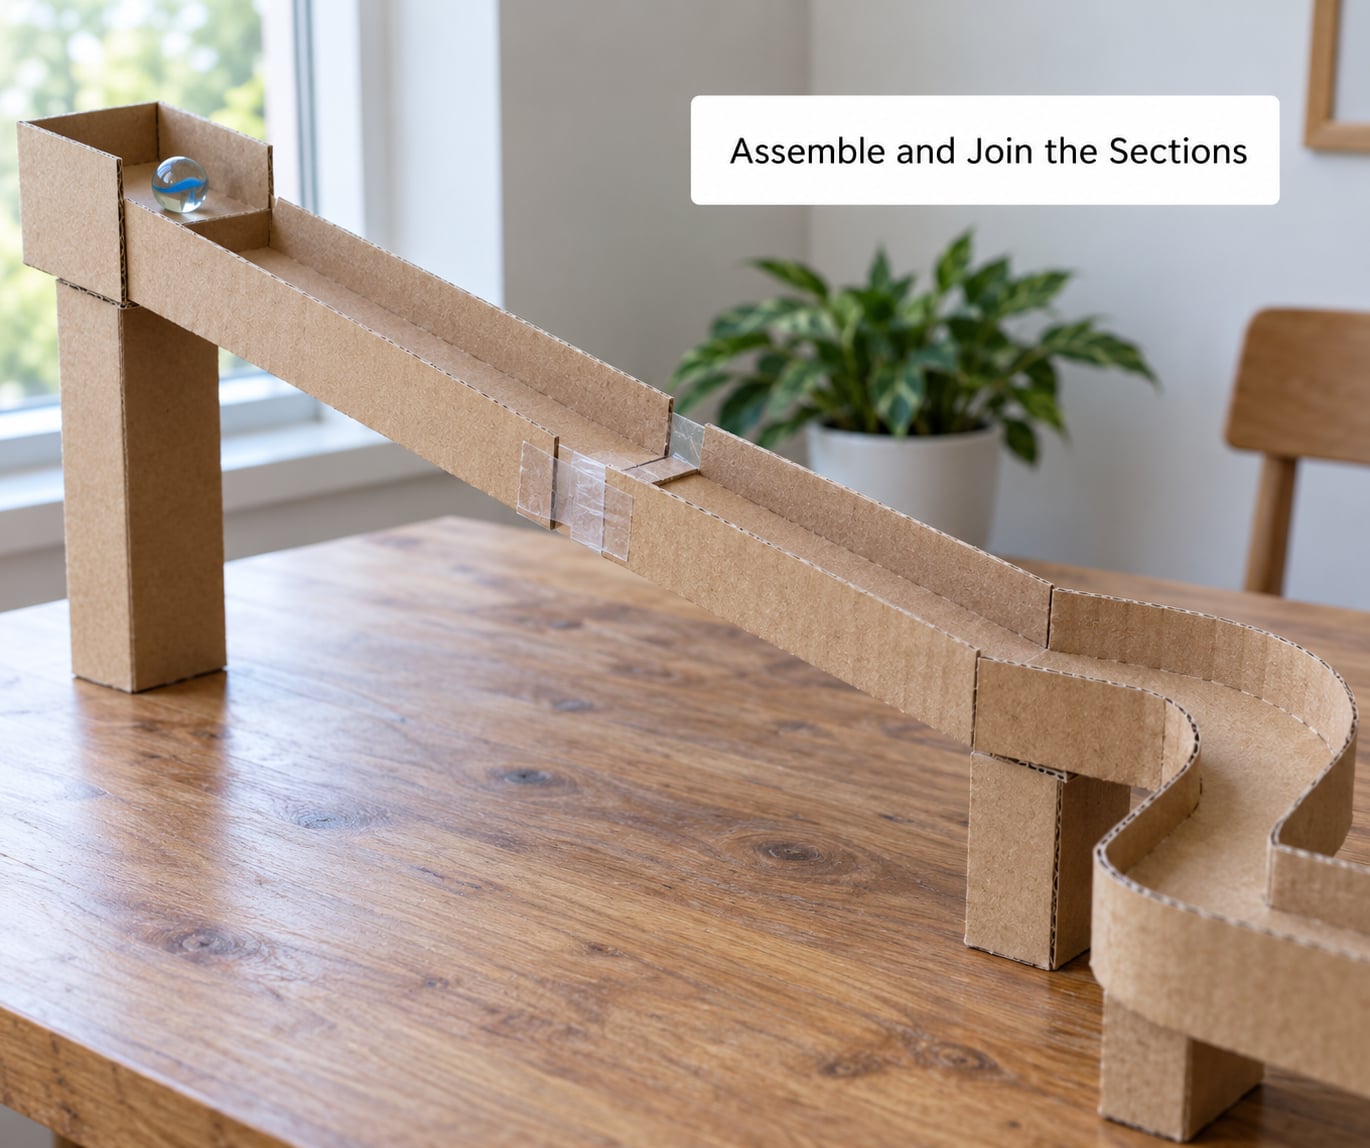
Lay the sections out end to end on the floor or a table and slide one into the other by about 2 cm before fixing anything. Overlapping by a couple of centimetres is what stops a marble from jamming at the seam.
Secure each joint underneath with wide tape or glue, never on the running surface. Glue applied where the marble rolls leaves a bump that stops it dead, and hot glue strings do the same job more slowly and more annoyingly.
Now check the slope. Start a marble at the top and watch where it goes: if it stops on any straight section, raise that section with a brace or a folded card wedge. The whole run should descend without ever flattening out, and each section should be a touch steeper than the one above it.
This stage is done when one marble travels the full length, unassisted, and rolls into the final section rather than stopping on it.
Add a Launcher and Catching Area
The simplest launcher is a folded card ramp at the top: a shallow U with a 1 cm lip so the marble cannot roll back out. An even simpler option is to just release the marble by hand above the top of the run, which is genuinely useful while you are still tuning the slope.
For a small ramp-and-gate launcher, cut a 6 cm wide strip of cereal box card, fold the sides up by 1 cm and tape it to the top section so it sits 2 to 3 cm above the track and feeds onto it.
At the bottom, build a catch area from a cut-off end of a cereal box or a folded piece of corrugated card: a flat tray with a 3 cm back wall, taped to the floor of the run. Do not let the run simply end over the edge of a table, and keep the last stretch level so the marble settles instead of taking a sudden drop into nothing.
This stage is done when a marble stops inside the tray instead of rolling away under the sofa.
Test the Marble Run and Make Adjustments
Run the marble at least five times and watch the same section each time. A run that works once is not a run, it is a coincidence, and the section where it stalls is nearly always the same one every time.
Three fixes cover most failures. If the marble stalls, raise that section by 1 to 2 cm. If it flies off at a curve, widen the curve or raise the outside wall. If it jumps at a seam, extend the overlap so the two surfaces meet at an angle the marble can roll through instead of bump into.
Add speed by dropping the whole starting point higher or increasing the drop per 20 cm. Slow it down with a shallower slope, a narrower channel, a felt strip taped to the running surface, or a slightly tighter curve. Keeping the marble moving at a walking pace is what makes obstacle features possible, because a fast marble simply jumps them.
Write down the height and the angle of each section on masking tape stuck to the side. It takes two minutes and saves you rebuilding the whole run from scratch when you want to change one thing later.
Decorate and Add Challenge Features
Decoration is easier once the run works, and it works best when colours mark function rather than hide it. Colour-code each section differently so children can see which piece to change when a marble stalls, and keep the running surface clear of anything that could catch.
Use painter’s tape for obstacles that come loose with a pull: a low gate the marble has to pass through, a gap it has to jump, or a short spiral taped around the outside of a tube. Removable features mean children can redesign the course themselves instead of asking you to rebuild it.
Height is the easiest challenge lever. Stack books or blocks under the top section to add two, four or six extra centimetres, then time the runs with a stopwatch. Two marbles racing on separate lanes with a divider between them turns the whole thing into a competition that works indoors on a wet afternoon.
A wall-mounted vertical version works too. Tape or pin the sections to a corkboard or wall with the same 2 cm overlap, and keep every course within about 10 cm of vertical so the marble does not stall between runs.
Common Mistakes
Almost every failed cardboard marble run comes down to one of six things. Each has a specific fix.
Rough or ragged cuts. A torn inner edge acts like a brake, and the marble stops. Score repeatedly with a fresh blade against a metal ruler instead of sawing, and replace any edge you can feel with a fingernail.
Loose joints that lift. Tape and glue belong underneath, and the two surfaces need an overlap of about 2 cm. If a joint lifts mid-run, take it apart, re-tape it and test that single section before rebuilding.
Slope that is too shallow. The marble runs out of potential energy and stops mid-track. This is the most common failure by a wide margin. Raise the stalled section by 1 to 2 cm rather than tilting the entire run, since tilting a long run makes the top end unusable.
Blocked curves. A hard bend launches the marble over the outside wall. Replace a tight corner with a wider arc cut from cereal box card, and raise the outside wall by an extra centimetre.
Unstable sidewalls. Walls that are too low, or made from flimsy single-ply card, fold under a fast marble. Use corrugated strips, 2 to 3 cm tall, taped to the base rather than to the marble-facing surface.
A starting point that is too low. If the top section is barely higher than the catch tray, there is not enough height to convert into speed. Raise the launch point until the drop across the whole run is at least 20 cm.
Glue strings and squeeze-out. Hot glue on the running surface catches the marble and creates a sticky patch. Tape underneath instead, and trim any squeeze-out with a craft knife once it cools.
One last habit worth keeping: change one thing between test runs. Adjusting the slope and the curve in the same minute tells you nothing about which fix worked.
Frequently Asked Questions
What is the best cardboard for a marble run?
Corrugated cardboard is the best choice, and a cereal box is the best second choice. Single-wall corrugated card holds a fold and resists crushing while still bending enough for curves. Cereal box card is single-layer and smoother, so it glues cleanly and gives a faster run, but it needs a strip of tape underneath for strength. Avoid thin toilet paper tubes on their own; they collapse under a taped joint or a braced support. Double them or use paper towel rolls instead.
How do you keep a cardboard marble run steady?
Build on a flat, hard floor rather than a table or bed, tape each joint underneath with an overlap of about 2 cm, and brace flat sections from below with triangular card supports. Start at a height you can reach without stretching, and anchor the top end to a stack of books or the side of a chair so the run cannot slide as the marble lands. A wobbling run changes slope mid-descent, which is what makes a marble stop for no visible reason.
Can toddlers make a cardboard marble run?
Young children can absolutely play with one, but not build one alone. Marbles are a choking hazard, so the hands-on activity is generally not suitable for under-threes. From about age four, a child can fold channels, tape sections and test runs while an adult handles the craft knife, scissors and hot glue gun. Wider channels and no loose small parts make the finished run far easier and safer to handle at that age.
How steep should a cardboard marble run be?
Start by losing about 2 cm of height for every 20 cm of track, which keeps the marble moving at a steady roll rather than a stop-start crawl. For a young child, gentler is better because the marble is easier to catch and restart. For older kids racing two marbles, a drop of 3 to 4 cm per 20 cm adds real speed but leaves no room for a marble to pause, so avoid obstacle features at that angle.
How long should a cardboard marble run take to build?
A simple floor-level run of five or six sections takes about 45 to 90 minutes, including test runs, and that is the time most people report. Prepping the tubes and cereal boxes adds another 15 minutes. Decorating, wall mounting or adding a vertical course easily doubles the total, which is worth doing in a second session rather than rushing on the first afternoon.
What can I use instead of cardboard for the track?
Cut plastic drinking straws work for short straight sections, and plastic bottle tops or cut cup rims make good funnels and wide chutes. For longer runs, foam pool noodles split lengthways give a smooth half-pipe that a 15 mm marble rolls through quickly. Wood dowels with a drilled channel are the upgrade beyond cardboard and last far longer, but they need tools and time most families do not have on a rainy afternoon.
Conclusion
A cardboard marble run comes down to three things: a smooth channel, a consistent downward slope and sidewalls tall enough to hold a fast marble. Start by unfolding one box, marking a gently descending route with two curves, and cutting a single section you can test on its own.
Once one marble makes it from the top to the catch tray, add sections one at a time and change only one variable per test run. That is the version my kids still ask for, and in 2026 it is the first thing we build from the recycling bin.