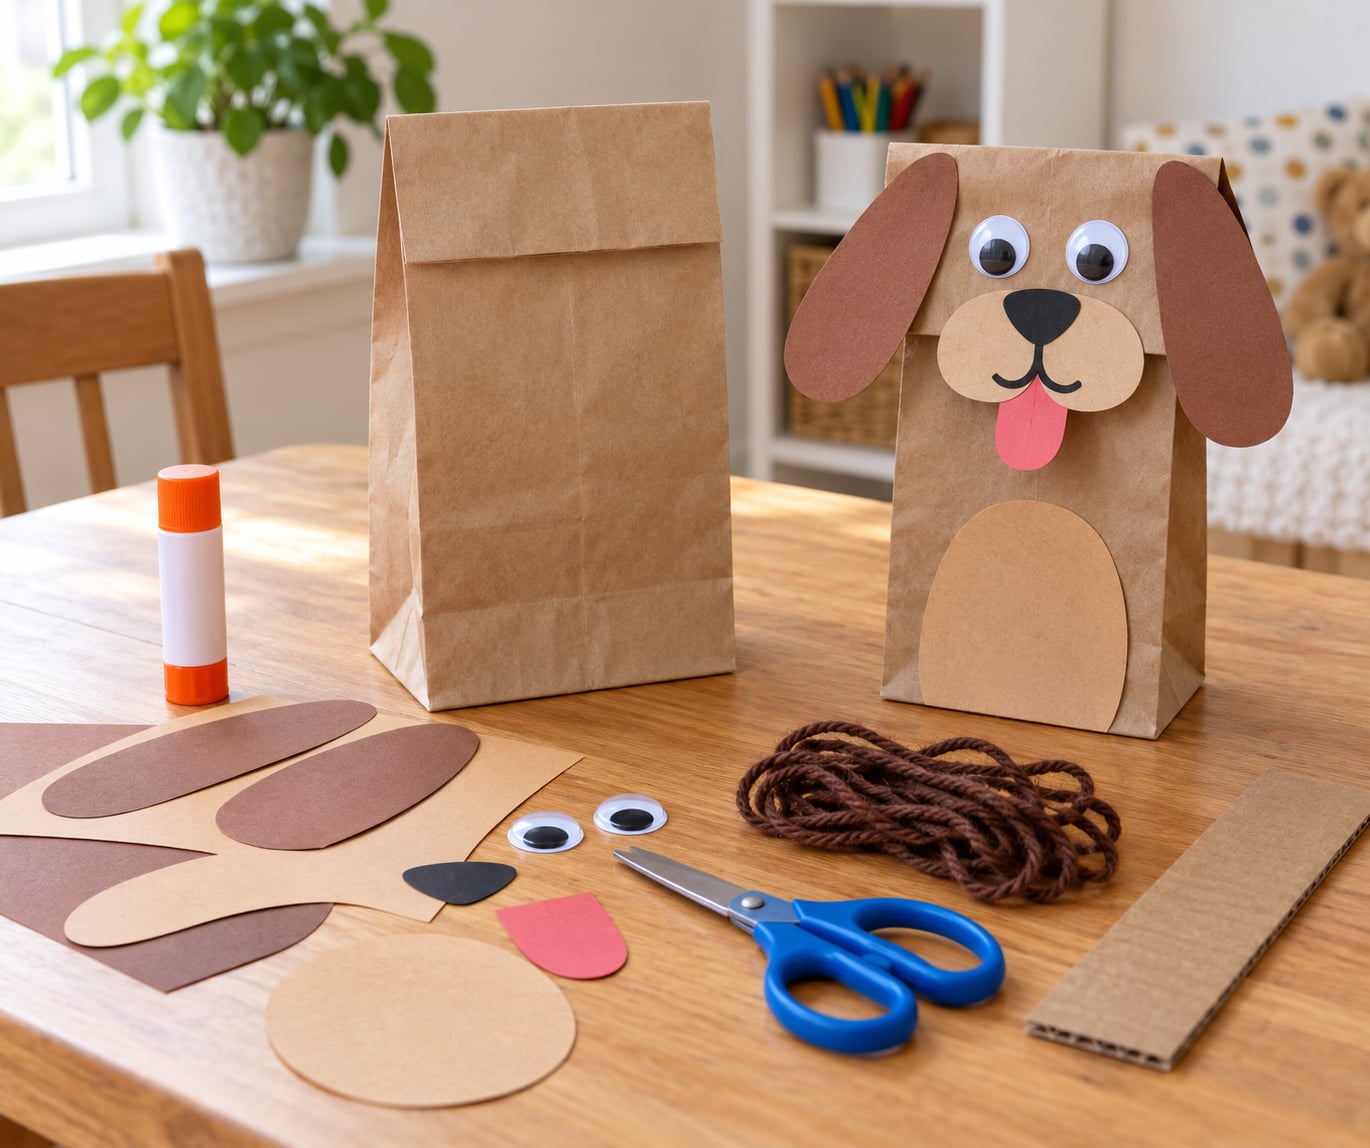
A paper bag puppet is a hand puppet made from a plain lunch bag, where the bottom flap becomes a mouth that opens and closes when a child moves their hand inside. Learning how to make a paper bag puppet takes about 20 minutes and costs almost nothing, because the bag itself is the puppet and everything else is scraps you already have at home.
The trick that trips people up is gluing decorations on the wrong end. The wide, creased end goes on the back, the flat panel goes on the front, and your child’s hand slides into the bag from the top. Get that right and the mouth moves on its own.
I’ve made these with my own kids and with a preschool class, and the ones that survive a week of play are never the fanciest. They’re the ones where the mouth flap was left free and the paper ears were glued on flat rather than sticking straight out.
Table of Contents
- 1What You Need
- 2Step-by-Step
- 3Step 1: Choose a Character
- 4Step 2: Cut the Paper Bag Puppet Pieces
- 5Step 3: Glue on the Character’s Face and Details
- 6Step 4: Add a Puppet Handle
- 7Step 5: Finish and Test the Paper Bag Puppet
- 8Common Mistakes
- 9What each age can do on their own
- 10Frequently Asked Questions
- 11What kind of paper bag is best for a paper bag puppet?
- 12Can I make a paper bag puppet without glue?
- 13How can I make the puppet easier for a young child to use?
- 14What materials can I use to decorate the puppet?
- 15How do I make the paper bag puppet open and close?
- 16Can I use a paper bag puppet for a classroom activity?
- 17Conclusion
What You Need
Most of this list is stuff in a craft drawer already. The only real requirement is a paper bag.
- One brown paper lunch bag per puppet. The standard size is about 5.25 inches wide, 3.25 inches deep and 10.5 inches tall. A grocery bag works too, but the mouth moves less cleanly.
- White computer paper or cardstock for the face, one sheet per puppet if you want a sturdier surface.
- Construction paper in two or three colors for ears, hair, clothing and a tail.
- Scissors plus, for younger children, blunt-tipped kid scissors.
- Glue stick or white glue. A glue stick is mess-free and easy for small hands. White glue holds heavier pieces like pom-poms and buttons better.
- Crayons, markers or colored pencils. Washable markers matter more than you might think. Paper bags absorb ink, and a permanent marker stain on a table is a permanent stain.
- Optional extras: googly eyes, yarn, ribbon, buttons, pom-poms, pipe cleaners, fabric scraps, small pieces of felt.
- A strip of cardboard about 2 inches wide and the length of the bag, cut from a cereal box.
Recycled household materials replace the store version of almost everything. A cereal box becomes the handle, a yogurt lid becomes a button, a torn sock or an old T-shirt scrap becomes clothing, and a brown paper envelope cut apart gives you flat brown pieces for ears and wings. The handle, the mouth flap and the ears are the three parts worth spending an extra minute on. Everything else is decoration, and decoration can be redone with whatever is on the table that day.
One note on bag size: lunch bags give you a mouth that opens wide, and grocery bags fold under the child’s fist rather than over it. If you only have grocery bags, cut the top off at the crease, then staple or glue two of them together side by side. You get a wide mouth and a sturdier puppet for the same effort.
Step-by-Step
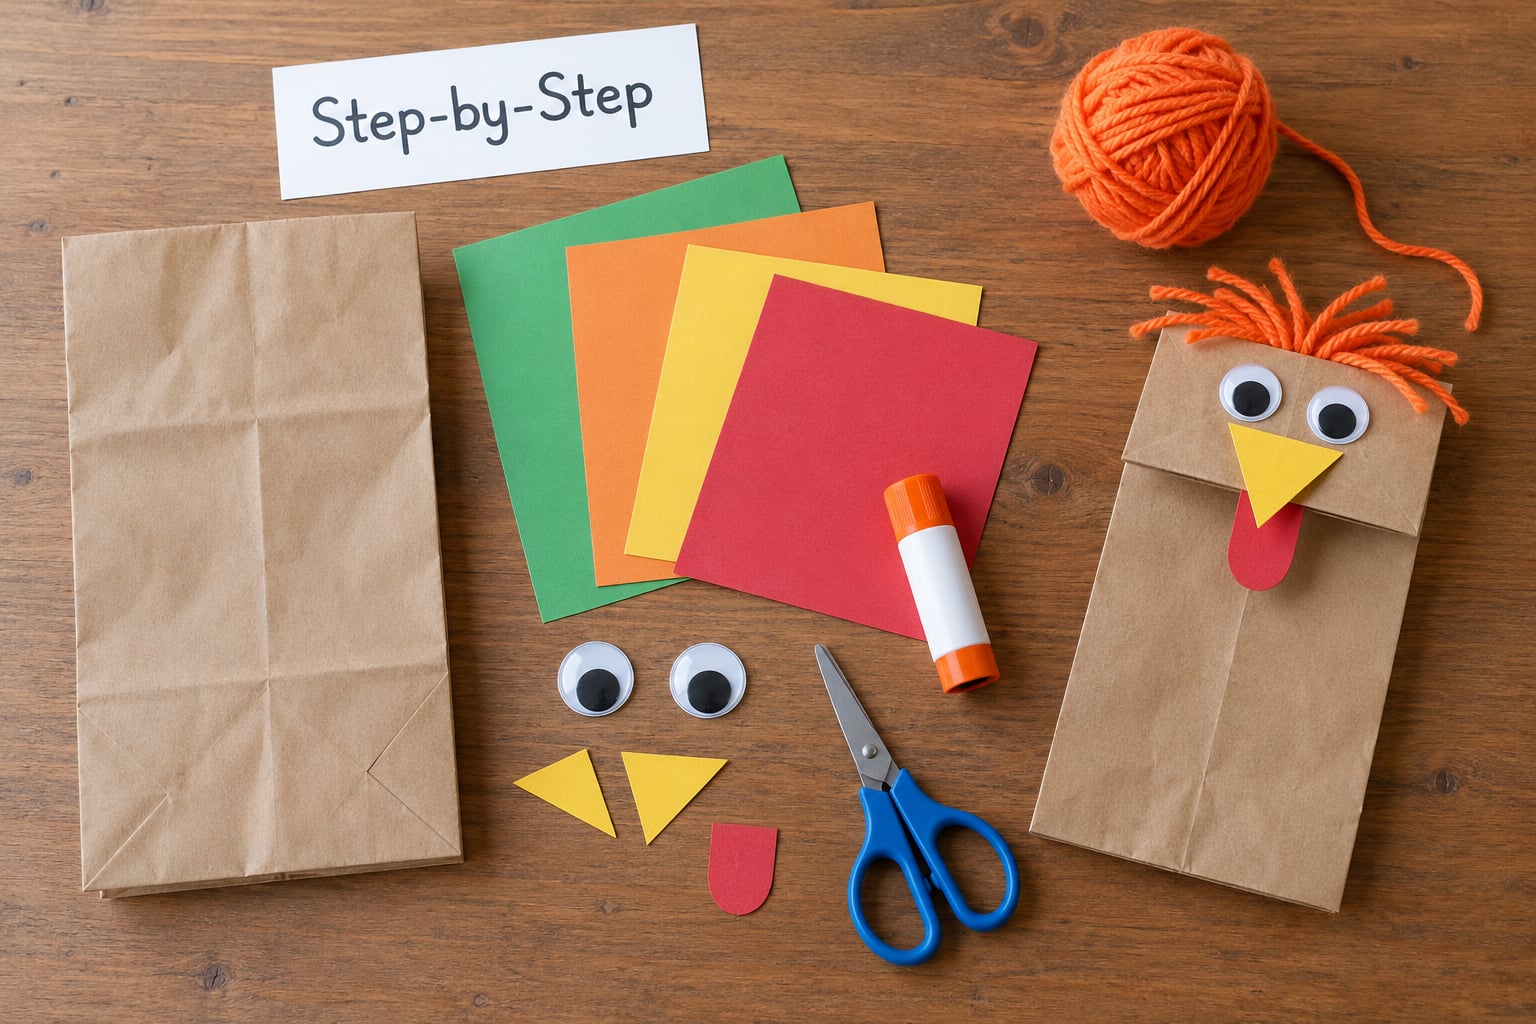
Step 1: Choose a Character
Pick the character first, because the shape of the bag decides what fits. A rabbit, cat, robot or farmer all work on a lunch bag, because each uses the bag’s rectangle with a small addition on top.
Draw the character’s colors on a scrap of paper first and check they suit the size. A flat-eared cat needs nothing beyond the bag itself, while a giraffe needs a long neck that reaches nearly to the creased end. When the design does not match the bag, scale it down rather than stretching it.
Simple faces win with beginners. A circle head, two eyes and a mouth is a complete character, and it leaves room for kids to invent the personality during play. Leave the lower half of the flat panel clear for a mouth that opens.
Step 2: Cut the Paper Bag Puppet Pieces
Lay the bag flat with the creased flap at the bottom and the open end away from you. Draw the face on the flat panel, leaving about half an inch of blank bag above the eyes for the child to see over.
Cut ears, hair, a hat, wings or a tail from construction paper, then layer small details on top of the big pieces before gluing. That’s how you get stripes on a tiger or spots on a deer without the glue drying for thirty minutes between each layer.
Three patterns cover almost every animal. Long ovals with pink centers make rabbit or bear ears. Rounded triangles folded once at the base make cat or fox ears. A folded half-circle with a notch cut out of the middle makes a beak or a fish mouth, and the same shape flipped becomes a wing.
For people and fantasy characters, the same shapes shift meaning. Strips of construction paper make a scarf, a fringe of short yarn strips makes hair, and a folded rectangle with a drawn face becomes a hat or a chef’s toque. Fold clothing pieces over the bottom edge of the flat panel so the puppet looks dressed when the mouth opens.
Step 3: Glue on the Character’s Face and Details
Glue the large pieces down first, then the medium ones, then the small details. Working outward from the big shapes keeps fingers from smudging the glue you’ve already set.
Use a light hand. Squeezing glue out of a bottle and pressing it down soaks the paper, and the wrinkle it leaves is the exact spot where a puppet eventually tears. A thin coat, pressed with a fingertip, holds fine.
To stop the paper rippling as it dries, lay the glued face-up panel on a flat surface and press it under a heavy book for ten minutes. Then slide your hand in and out of the bag a few times to check the flap still hinges freely before the glue sets completely.
Glue details to the front panel only, never across the creased end. Anything stuck on the flap stops the mouth from opening, and that is the single most common reason a finished puppet looks like a block.
Step 4: Add a Puppet Handle
Cut one strip of cardboard about 2 inches wide and just taller than the closed bag. Wrap it in plain paper, tape strip, or a strip of fabric so it does not scratch a small hand.
Tape or glue it flat inside the bag, centred under the flat panel and clear of the flap. It has to sit against the back of the puppet, not the mouth, or the mouth will not open.
Check the fit by putting your own hand in first. You should be able to reach the bottom of the bag with your fingers and close the flap with your palm. A child with smaller hands may need the handle raised a half inch.
Skip the handle entirely if you want a fast preschool version. The bag works in a small hand without it, and the handle is the part most likely to work loose after a week of play.
Step 5: Finish and Test the Paper Bag Puppet
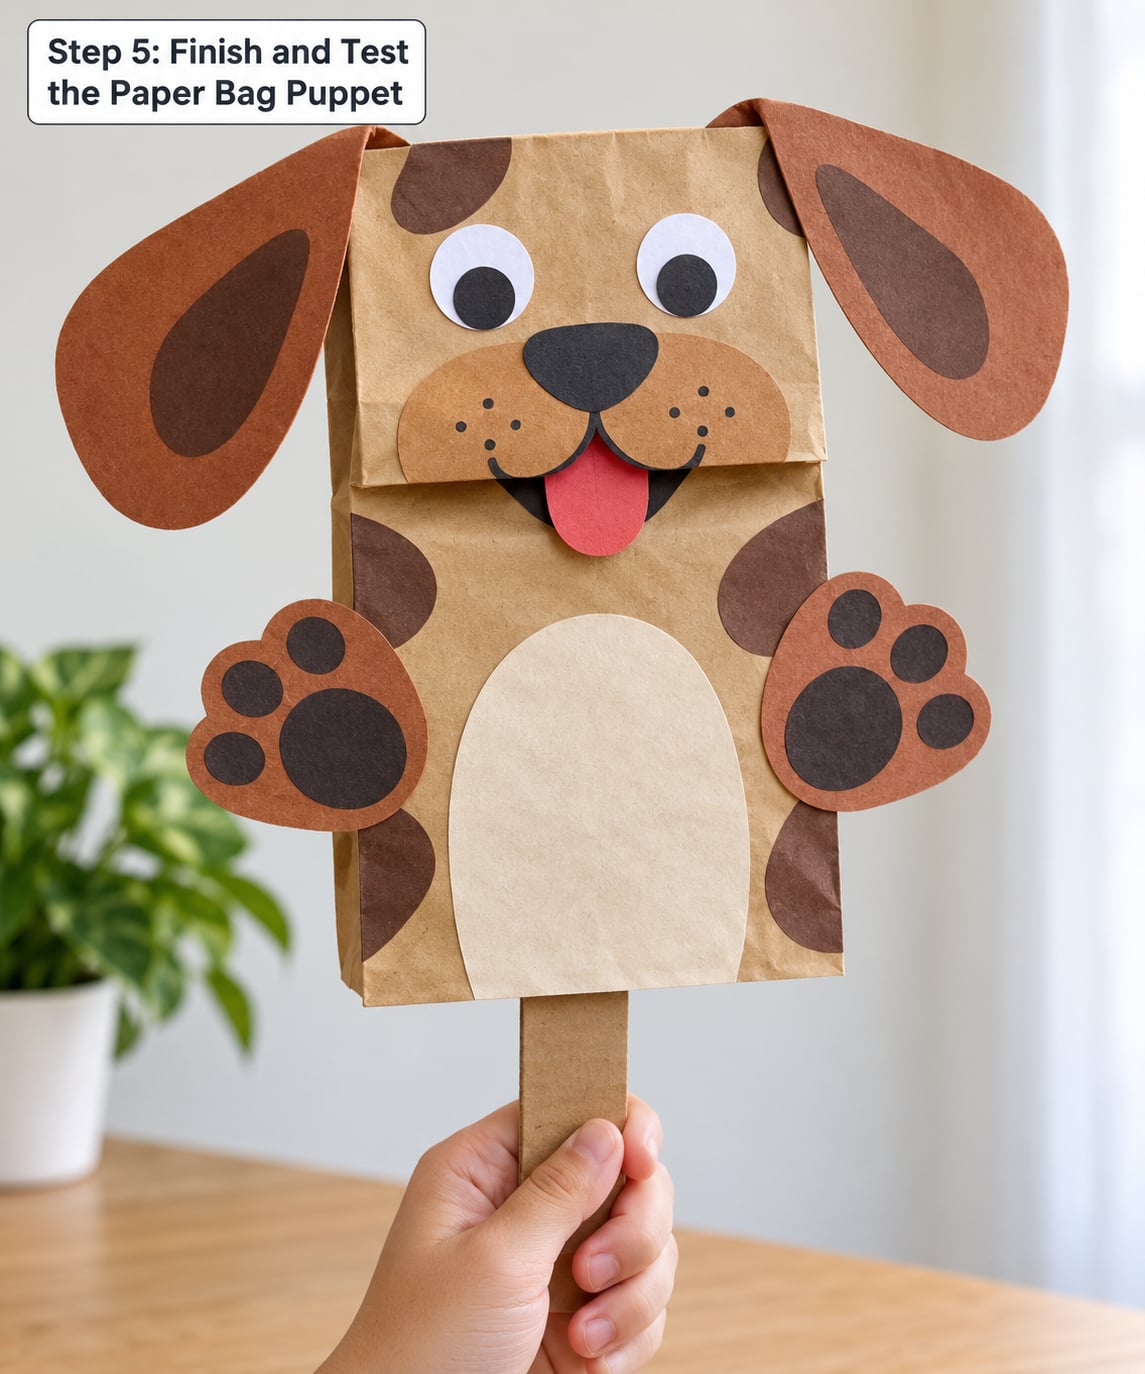
Test it properly before you hand it over. Slide your hand in, open your fingers, and check that the mouth opens on its own and closes when you relax your hand. Then tap it gently on a table and make sure nothing falls off.
Finish with a few small touches that make it feel finished: dots of white paint for freckles, a scrap of felt for a patch, or a googly eye stuck on at the last minute. Those extras stick better once the paper has dried and has a slight grip.
Give the child a story prompt rather than a script. Ask what the puppet wants to eat, or who it met on the way to the market, and let them narrate. Puppets built alongside a story last longer in a child’s imagination than ones built to a fixed plot.
For storage, stand puppets upright in a box or basket with the ears facing up. Laying them flat flattens ears and creases the mouth flap, and a bent flap is one that stops opening cleanly.
Common Mistakes
Most failed puppets come down to one of four things. Each has a quick fix you can apply while the glue is still wet or the next time you start.
Watery glue makes the paper wrinkle. Squeeze the excess out first, or switch to a glue stick for the flat panel and save white glue for pom-poms and buttons. Press with a fingertip rather than your whole palm, and lay the puppet under a book while it dries.
Pieces fall off an hour later. Too little glue, or glue applied to a dusty surface. Wipe the bag with a dry cloth before you start, use a thin coat on both the bag and the paper piece, and give heavy decorations time to set before you test the puppet.
The mouth will not open smoothly. Something is glued across the creased end, or glue seeped into the hinge. Move decorations to the front panel only, and score the crease lightly with a ruler and a craft knife once the puppet is dry.
The bag tears when a child puts a hand in. The bag is thin and gets weaker every time it is opened. Reinforce the top opening with a strip of tape or a glued band of paper, and turn the puppet over regularly so the same crease does not soften.
The handle comes loose in the hand. Cardboard glued to paper inside a bag loses to sweat and friction. Tape the handle first, glue over the tape, and give it twenty-four hours before the first puppet show.
Features are hard to see from the audience side. Small dark details disappear when the bag is held at arm’s length. Go bigger than feels right, and test by holding the puppet across the room.
What each age can do on their own
Cut the same craft into tasks that match the hands doing it. Nothing here changes the puppet itself, only who holds the glue.
- Ages 3 to 4: coloring the face with crayons and choosing between two pre-cut ear shapes an adult made. No cutting, thin glue only.
- Ages 5 to 7: cutting simple shapes with blunt scissors, gluing on paper ears and pom-poms, and drawing the face in marker. An adult handles the handle.
- Ages 8 and up: the full build independently, including the cardboard handle, plus patterning a paper outfit or planning a two-character story.
With a group, pre-cut the pieces onto one tray per table and let the children glue. That cuts the clean-up time and the arguing, and it keeps the interesting part, which is deciding who the puppet is, firmly with the kids.
Frequently Asked Questions
What kind of paper bag is best for a paper bag puppet?
A standard brown paper lunch bag works best, because its short, wide bottom flap opens into a clear mouth. A grocery bag also works, though the flap sits flatter and the mouth moves less. If you only have grocery bags, cut one just below the handles and glue or staple two side by side for a wider opening. Avoid plastic bags, which tear along the fold and are not safe for children to play with.
Can I make a paper bag puppet without glue?
Yes, if your child is under three or you need something in two minutes. Use masking tape for every piece, or fold small tabs of paper over the edge of the face panel to hold it. Tape works best on the smooth printed side of the bag rather than the creased end, since it will not hinge properly there. For anything glued, a glue stick leaves less mess and needs no drying time under a book.
How can I make the puppet easier for a young child to use?
Use a lunch bag rather than a grocery bag, add a wide cardboard handle so small hands do not have to reach into the bag, and stick the mouth flap with clear tape to make it swing more freely. Keep the character simple, with two eyes and one feature on top, so there is less to see when the puppet moves. Skip the handle if the child prefers to hold the bag itself; either way works.
What materials can I use to decorate the puppet?
Almost anything in a craft drawer. Construction paper, cardstock, yarn, ribbon, fabric scraps, buttons, pom-poms, pipe cleaners, felt offcuts and googly eyes all stick on with white glue. Cereal boxes, yogurt lids and cut-up envelopes cover the structural parts. Choose washable markers and crayons rather than permanent ones, since paper bags absorb ink and the stain is hard to reverse once it soaks in.
How do I make the paper bag puppet open and close?
The mouth is the bottom flap. Slide your hand into the bag with your palm facing the creased end and your fingers resting in the flap, then open and close your hand to make it move. Nothing is glued across the crease, or it will lock. If the flap sticks, score the crease with a ruler and craft knife once everything is fully dry.
Can I use a paper bag puppet for a classroom activity?
Yes, and it works well as a reading companion or a retelling activity. Build one puppet per child from a simple template so everyone has the same character to narrate, then read a familiar story and let the class perform it with the puppets. Pre-cut the shapes onto one tray per table and let the children glue, which keeps the session to about thirty minutes and the clean-up to a wipe of the table.
Conclusion
Start by picking one character and pulling out one bag. Fifteen minutes later you have a puppet whose mouth moves because of nothing more than a folded flap of brown paper.
From there, make a second and a third. A whole zoo of animals built from the same pattern gives kids something to narrate, and one puppet per favorite book character turns reading time into a performance. For a classroom, print the shapes ahead and let the gluing be the messy part they remember. For a rainy afternoon at home, keep the simple version and let the stories get as long as they want.