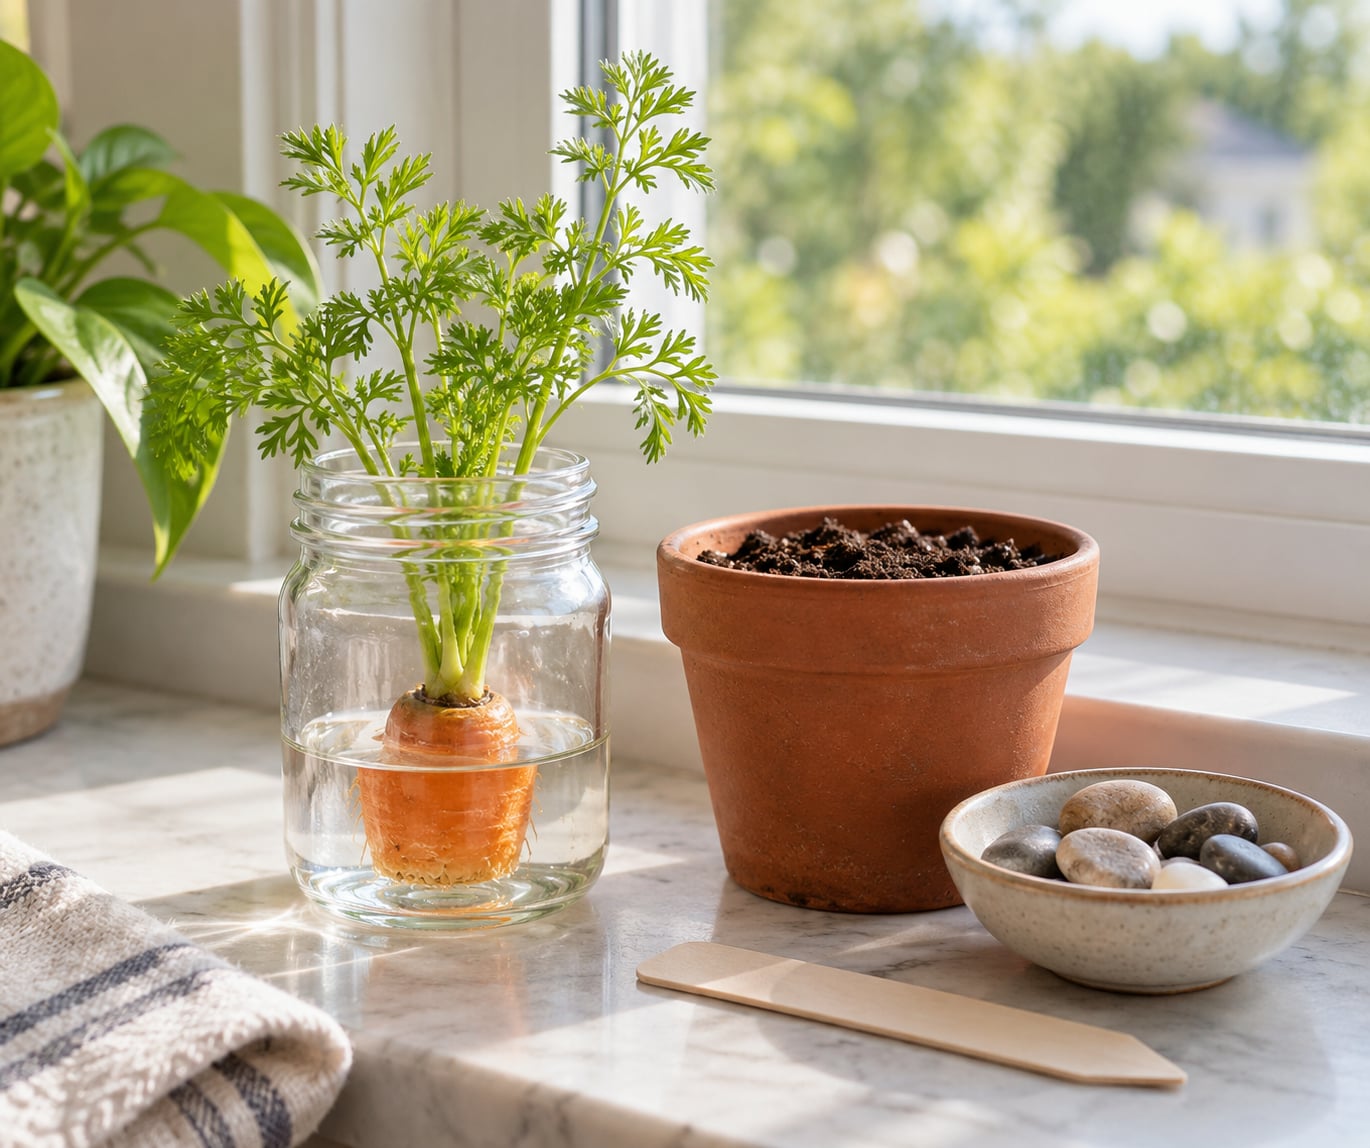
Cut about 1 inch (2.5 cm) off the top of a fresh carrot that still has its leafy greens attached, stand the stump cut-side down in a shallow dish of water, and set it on a bright windowsill. In five to fourteen days the crown pushes up new green shoots you can either keep in water or transplant into soil.
One honest caveat up front, because the internet mostly skips it: you will grow carrot greens, not a new carrot. The root-forming end of the carrot is already underground, so a trimmed top has no way to rebuild it.
That makes this a five-minute setup with a slow, visible payoff, which is exactly why it works so well with children. You get a plant that changes in front of them, on a counter, using something most families throw away.
Table of Contents
- 1What You Need
- 2Step-by-Step: How to Grow a Plant from a Carrot Top
- 3Choose a Fresh, Healthy Carrot Top
- 4Place the Carrot Top in Water
- 5Transfer the Sprout to Soil
- 6Give It Light, Water and Time
- 7What to Expect as the Carrot Plant Grows
- 8Common Mistakes and Easy Fixes
- 9Tips for Successful Regrowth
- 10Frequently Asked Questions
- 11Do carrot tops actually grow back?
- 12How long does it take a carrot top to grow?
- 13Can I regrow carrot tops in water without soil?
- 14Are regrown carrot tops safe to eat?
- 15Why is my carrot top not growing?
- 16How many carrots grow from one carrot top?
- 17Conclusion
What You Need
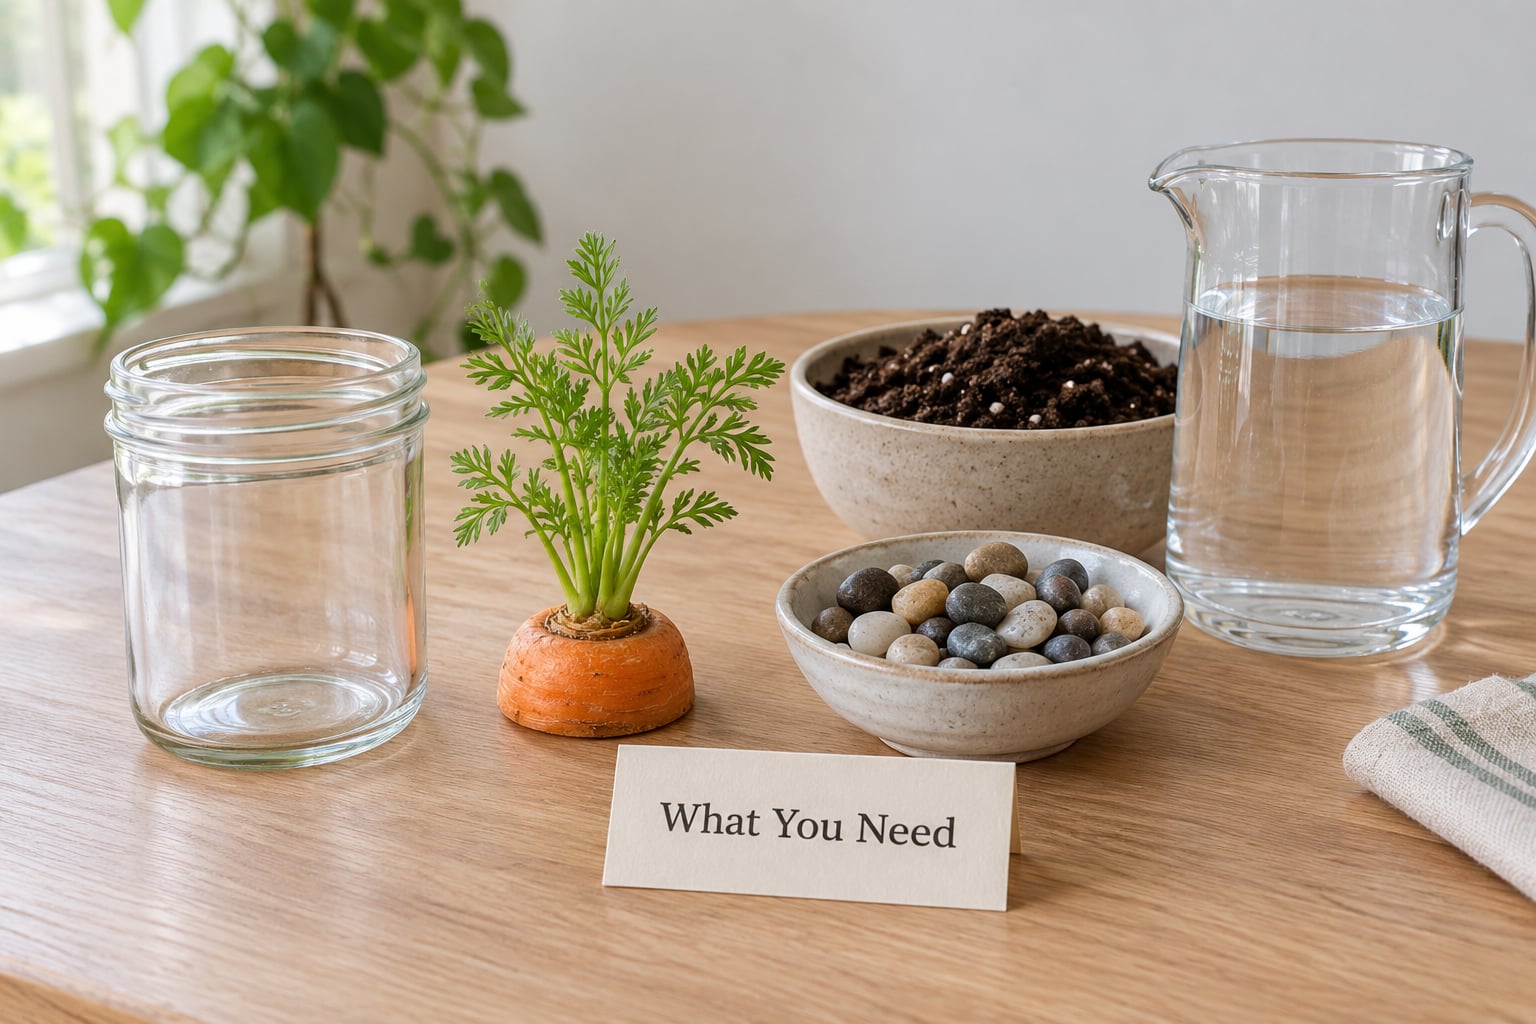
The list is short enough that you probably own all of it already.
- A fresh carrot with the leafy tops still attached
- A sharp knife and a cutting board
- A shallow glass dish, saucer or jar with a wide mouth
- Fresh water, plus a few clean pebbles or a handful of soil
- Optional: a small pot of light potting soil for transplanting later
- Optional: a plant label or marker so a class can tell the tops apart
On choosing the carrot itself, freshness matters more than size. Look for tops that are bright green, perky and firm rather than floppy or yellowing, and use a carrot you just peeled rather than one that has been sitting in the crisper for two weeks.
Bagged baby carrots will not work. Those are cut at both ends, so there is no crown and no leafy top to regrow from. Loose carrots from a farmers’ market or a bunch with the greens attached are your best bet.
A wider stump means more dormant buds and often more shoots, so a fat carrot usually outperforms a thin one. Save the rest of the carrot for dinner and use the top for the project.
Step-by-Step: How to Grow a Plant from a Carrot Top
Choose a Fresh, Healthy Carrot Top
Trim the greens back to about 2 cm above the crown, then cut the carrot itself off about 1 inch (2.5 cm) from the top. Some guides say 2 to 3 cm; either figure works, but too thin and the stump dries out, too thick and the middle rots.
Cut straight down with a sharp knife in one clean motion. A sawing cut crushes the tissue at the base, and crushed tissue is where rot starts.
You will know the cut worked if the end looks pale and moist with tiny leaf-shaped dots. Those dots are dormant growth buds, and they are the whole reason this trick works.
Place the Carrot Top in Water
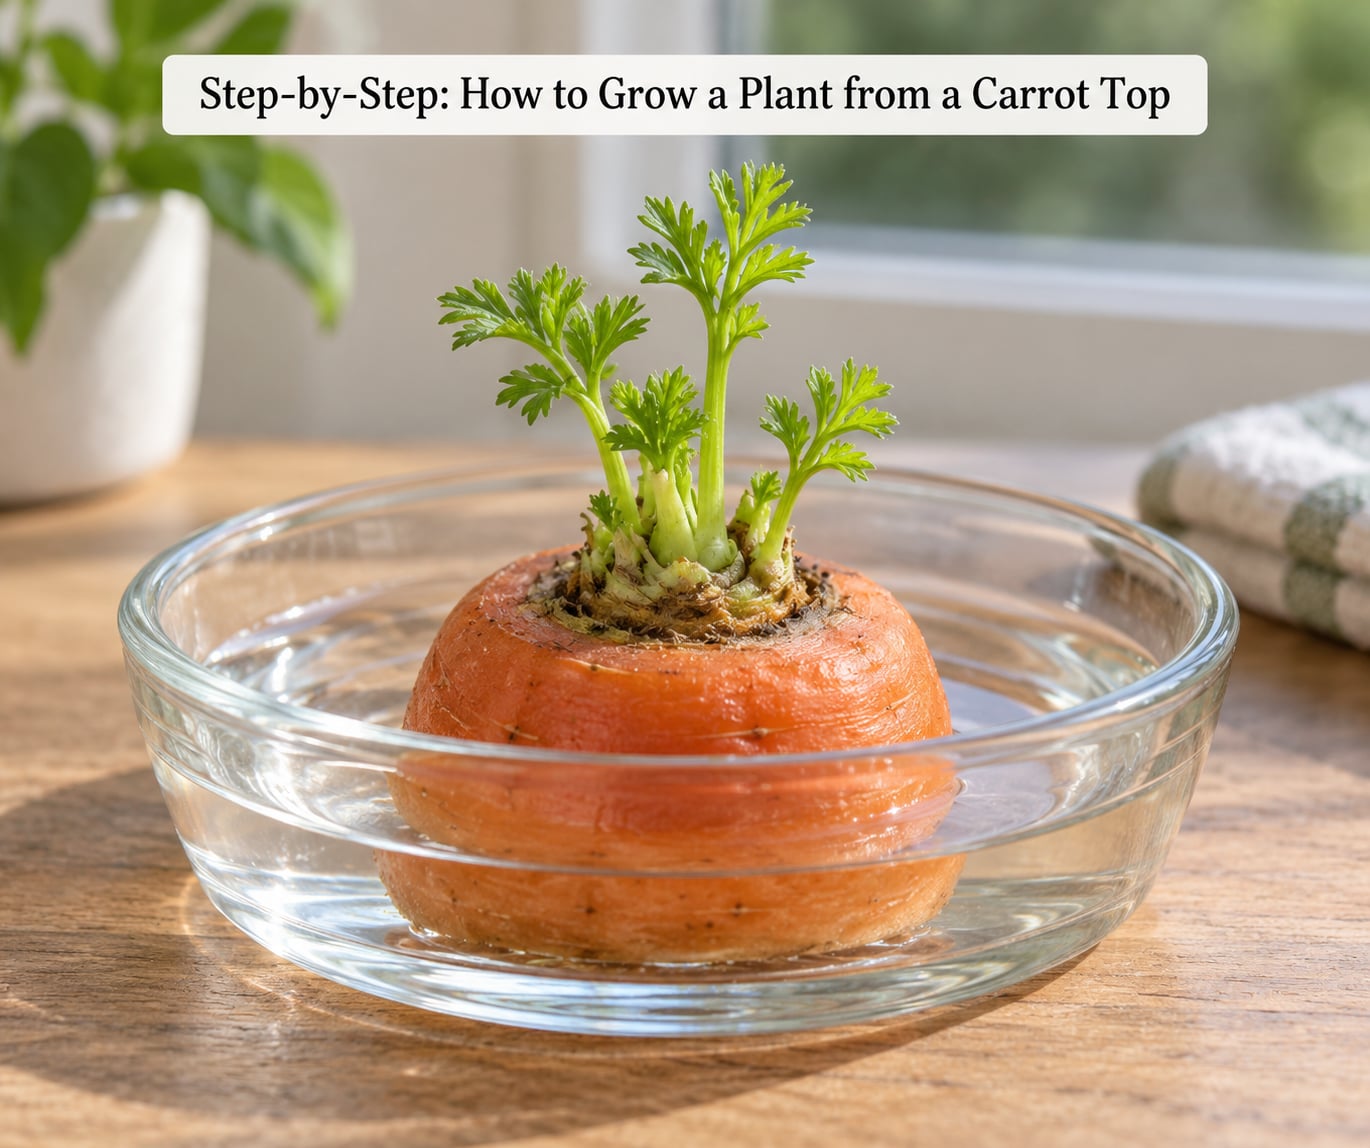
Put a layer of pebbles in the bottom of a shallow dish and add water until it reaches just under the top of the pebbles. Stand the carrot stump in the middle, cut side down, so the base touches the water but most of it sits above the waterline.
Full submersion is the most common mistake. If the whole stump sits in water, the cut face turns slimy within days and you lose the buds you worked to keep.
A jar works too, with the stump balanced across the mouth. Change the water every day or two, rinsing the pebbles and the cut end under the tap while you are there. Cloudy water is the earliest warning sign that something is going wrong.
Small white roots usually show up first, within about a week. If nothing is visible yet, leave it alone. Growth comes from dormant buds on the crown, not from the root, so it can take most of a week before anything moves.
Transfer the Sprout to Soil
Wait until you see several centimetres of white root before moving it. A carrot top with green shoots but no roots will usually wilt in soil and rot in water, so patience here saves the whole plant.
Dig a hole about 5 cm deep in light potting soil, set the stump in with the crown level with the soil surface, and firm the soil gently around it. Planting too deep buries the crown and encourages rot.
If the leaves are tall, prop them up with a bent drinking straw or a chopstick so they are not lying in wet soil. Water the soil until it is damp, not soggy, then drain the pot properly.
Give It Light, Water and Time
Put the pot somewhere bright. Six hours of sunlight a day produces sturdy leaves, while a dim corner gives you pale, floppy greens that eventually yellow and die.
Keep the soil lightly moist. Carrots dislike both drought and waterlogging, so if you are unsure, push a finger 2 cm in and check whether it feels damp before you pour anything.
Rotate the container a quarter turn every few days so the shoots grow evenly toward the window. Cool temperatures suit carrots best, so avoid a windowsill that heats up in direct afternoon sun in summer.
You can keep a carrot top in water indefinitely if you like the look, though the leaves stay smaller and you will need to change the water constantly. A pot of soil gives you a sturdier plant within a couple of weeks.
What to Expect as the Carrot Plant Grows
In days 1 to 3 you should see nothing but a clean cut end sitting in the water. That silence is normal. Day 4 to 7 is when the first hair-thin roots appear, followed by a pale green shoot from the centre. By week 2 to 3 the leaves have unfurled and stand upright, and by month 2 the plant has a proper tuft of feathery carrot foliage.
Some plants bolt early and send up a tall flower stalk. That is the carrot’s second-year habit showing up out of schedule, and the leaves usually turn bitter and tough around that point.
Common Mistakes and Easy Fixes
If the cut end goes slimy, dark or fuzzy, you get rot from sitting too long in water. Scrub the dish, cut the mushy part away with a clean knife, and restart with fresh water. If you see green, black or white fuzzy mould on the stump, throw it out rather than trying to rescue it.
Cloudy or smelly water means it has gone too long between changes. Change it every day for a week and the problem usually disappears.
A stump that shrivels and turns rubbery was never sitting in water properly. The base needs contact with water, not a thin film that evaporates overnight.
Yellow leaves after transplanting usually mean too little light or too much water. Move the pot to a brighter window and cut watering back until the top centimetre of soil feels dry.
No growth after two weeks is the one people panic over most. Check the water level first, then check that you did not invert the stump. A carrot top planted cut side up will sit there indefinitely and look like a failure.
Wilting greens straight after transplanting are normal for the first three to five days. Roots that were living in water need a few days to adjust to soil before they can drink properly.
Tips for Successful Regrowth
Change the water on a schedule you will actually keep. Every other day works for most people, and a small sticker on the jar is the difference between a thriving top and a slimy one.
Try two or three tops at once from different carrots. Success is not guaranteed, and running several makes it far less likely that one failure ends the project.
For children, keep a simple growth log beside the jar. Draw the carrot top each morning and write the date and height in centimetres. It turns a quiet wait into something trackable, and a flat week becomes data rather than failure.
Trim the outer leaves as needed for salads and pesto while the centre keeps producing. Always leave the youngest leaves in the middle, since that is where new growth comes from.
Frequently Asked Questions
Do carrot tops actually grow back?
Yes. The crown of a carrot keeps dormant leaf buds, so a fresh top cut about 1 inch above the root and placed cut-side down in shallow water will push up green shoots within about a week. The catch is that you get foliage, not a new carrot root, because the root-forming part of the carrot stayed in the ground or in your dinner.
How long does it take a carrot top to grow?
Expect nothing visible for the first three days, hair-thin roots around day five to seven, and a green shoot from the centre within ten to fourteen days. Leaves usually unfurl in the second or third week. If two full weeks pass with no sign of roots, check that the stump is cut side down and still touching water.
Can I regrow carrot tops in water without soil?
Yes, and it is the easiest method. Stand the stump on pebbles in a shallow dish with water reaching only the base, then change the water every day or two. The plant can live this way for months, though the leaves stay smaller than a soil-grown one and you will need to keep up with water changes indefinitely.
Are regrown carrot tops safe to eat?
They are edible once you are confident about how the plant was grown. Wash the leaves under running water, skip any that are slimy, discoloured or mouldy, and avoid leaves from a top that sat in unwashed water for days. Discard the whole plant if you noticed fuzzy mould on the stump at any point.
Why is my carrot top not growing?
Most often the stump is upside down, fully submerged, or from a bagged baby carrot with no crown left. Water that never gets changed also stops regrowth by turning the cut end slimy. Check the orientation and the water level first, then start a fresh top from a carrot that still had its greens attached.
How many carrots grow from one carrot top?
None, unfortunately. One top produces one leafy plant, sometimes with several shoots fanning out from the same crown, but no new root. If you want actual carrots, plant seed in loose soil instead, or let a healthy regrown plant flower in its second season and save the seed.
Conclusion
Start tonight, not this weekend. Save the top of a carrot you are about to peel, trim it 1 inch from the crown, and stand it cut-side down in a shallow dish of water on the brightest windowsill you have.
Then give it one small routine: check the water every other day and change it if you can. Show a child where to look each morning, and by next week the same quiet stump has hair-thin roots and a green shoot pushing out of the middle.
To get real carrots, sow seed in loose soil instead. The carrot-top plant is worth growing anyway, as it turns a scrap into weeks of fresh greens and gives children something real to watch change.