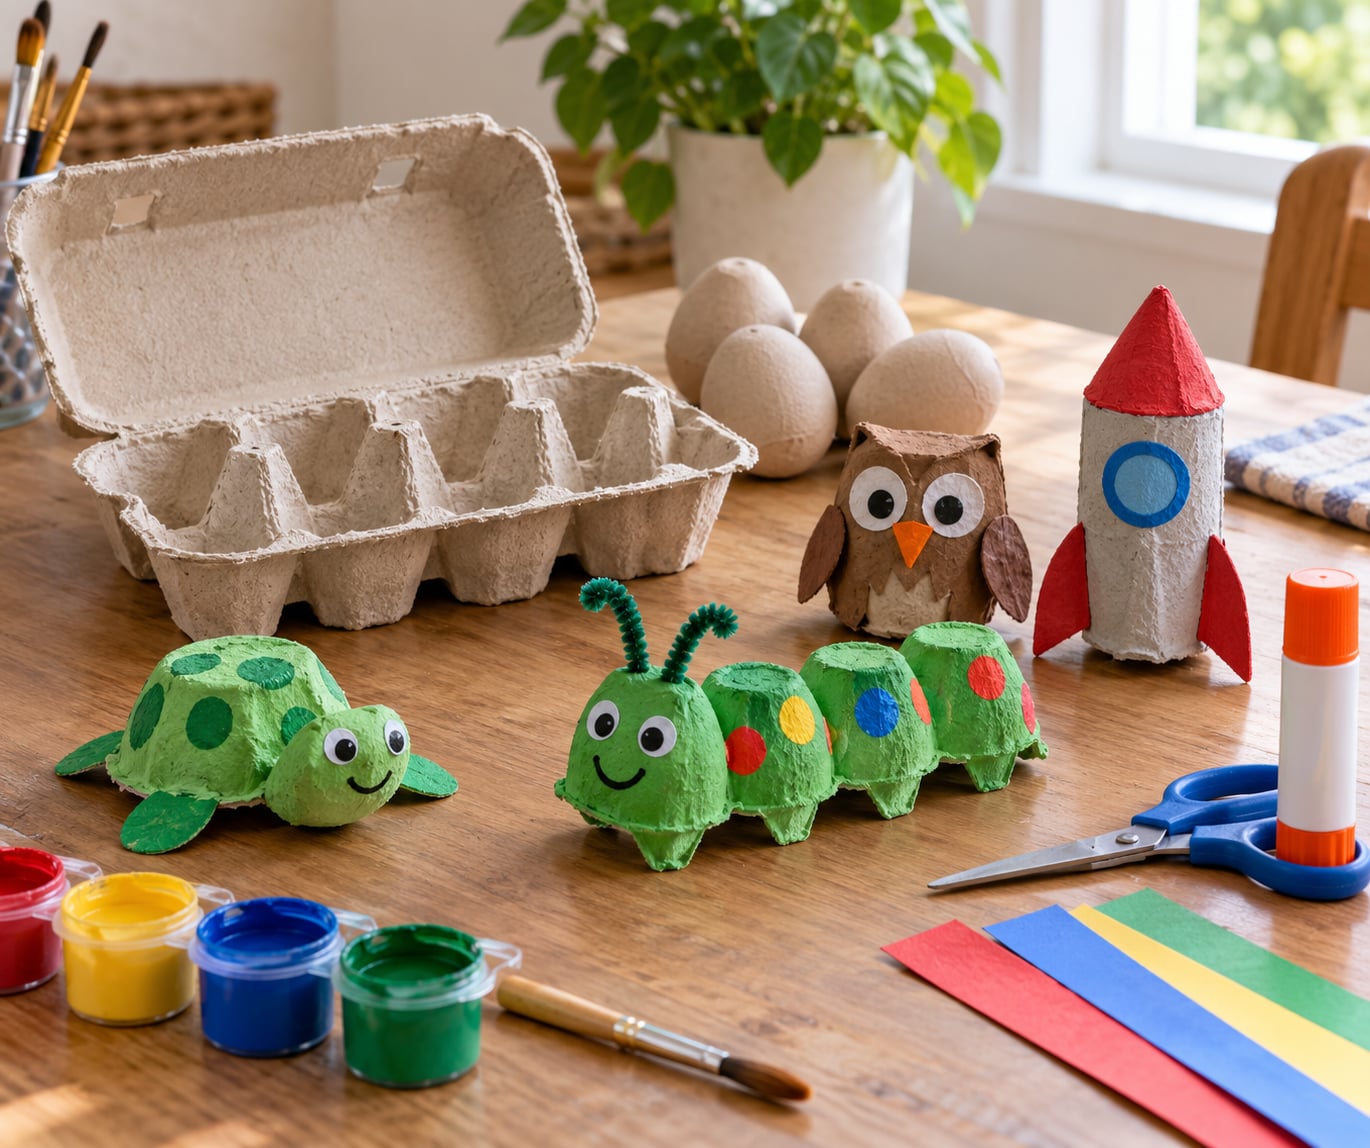
What to make with egg cartons runs from lap-friendly ladybugs to a rocket ship that survives a whole afternoon of pretend launches. The trick is that the moulded cups, the central pyramids and the flat lid are three different shapes, so one carton gives you a body, a roof and a base before you even open the scissors. Most projects need nothing beyond paint, PVA glue, paper scraps and whatever is already in the craft drawer. Here are twelve, ordered from quickest to fiddliest, with the materials and the age that suits each one.
Table of Contents
- 1What to Make with Egg Cartons: Quick Project Guide
- 21. DIY Egg-Carton Animals
- 32. Mini Egg-Carton Trains
- 4How do you make the wheels roll properly?
- 53. Egg-Carton Monster Trucks
- 64. Dinosaur Fossil Display
- 75. Egg-Carton Ladybugs
- 86. Caterpillar Counting Game
- 97. Egg-Carton Puzzle Pieces
- 10What to make with egg cartons when a puzzle joint tears
- 118. Mini Egg-Carton Birdhouses
- 129. Egg-Carton Mask
- 1310. Reusable Craft Organizer
- 1411. Easter Egg-Carton Nest Craft
- 1512. Rocket Ship for Pretend Play
- 16Frequently Asked Questions
- 17What is the best material to use for egg-carton crafts?
- 18How do you make an egg carton sturdy enough for a craft?
- 19Can I use an egg carton for crafts with toddlers?
- 20Should I wash or sterilize egg cartons before crafting?
- 21What paint and glue are best for painted egg cartons?
- 22Start with the Carton That Suits Your Child
What to Make with Egg Cartons: Quick Project Guide
Every project below uses a standard 6-egg carton. Read the table first if you are choosing for a specific child or a short window on a rainy afternoon.
| Project | Main materials | Difficulty | Best age |
|---|---|---|---|
| 1. DIY Egg-Carton Animals | Washable paint, paper, glue | Easy | 3+ |
| 2. Mini Egg-Carton Trains | Paper, paint, glue | Easy | 4+ |
| 3. Egg-Carton Monster Trucks | Bottle caps, cardboard, paint | Easy | 5+ |
| 4. Dinosaur Fossil Display | Play dough, sand, paper labels | Easy | 4+ |
| 5. Egg-Carton Ladybugs | Red and black paint, paper | Easy | 2+ |
| 6. Caterpillar Counting Game | Marker, number stickers | Easy | 2+ |
| 7. Egg-Carton Puzzle Pieces | Paint, brush, card | Medium | 3+ |
| 8. Mini Egg-Carton Birdhouses | Craft knife, glue, paper | Medium | 6+ |
| 9. Egg-Carton Mask | Craft knife, string, paint | Medium | 4+ |
| 10. Reusable Craft Organizer | Marker, stickers, paint | Medium | 5+ |
| 11. Easter Egg-Carton Nest Craft | Shredded paper, felt, glue | Easy | 2+ |
| 12. Rocket Ship for Pretend Play | Card, paint, foil, tape | Medium | 5+ |
Cardboard and moulded pulp are the best egg carton materials for almost everything here: both cut cleanly with household scissors, hold paint and glue well, and come apart into recognisable pieces. Foam cartons cut with a serrated knife and shed crumbs, so they suit thicker shapes and storage rather than small paper figures. Whatever the material, flatten the carton, cut it, and paint a base coat before adding detail, because raw grey pulp shows through thin paint.
1. DIY Egg-Carton Animals
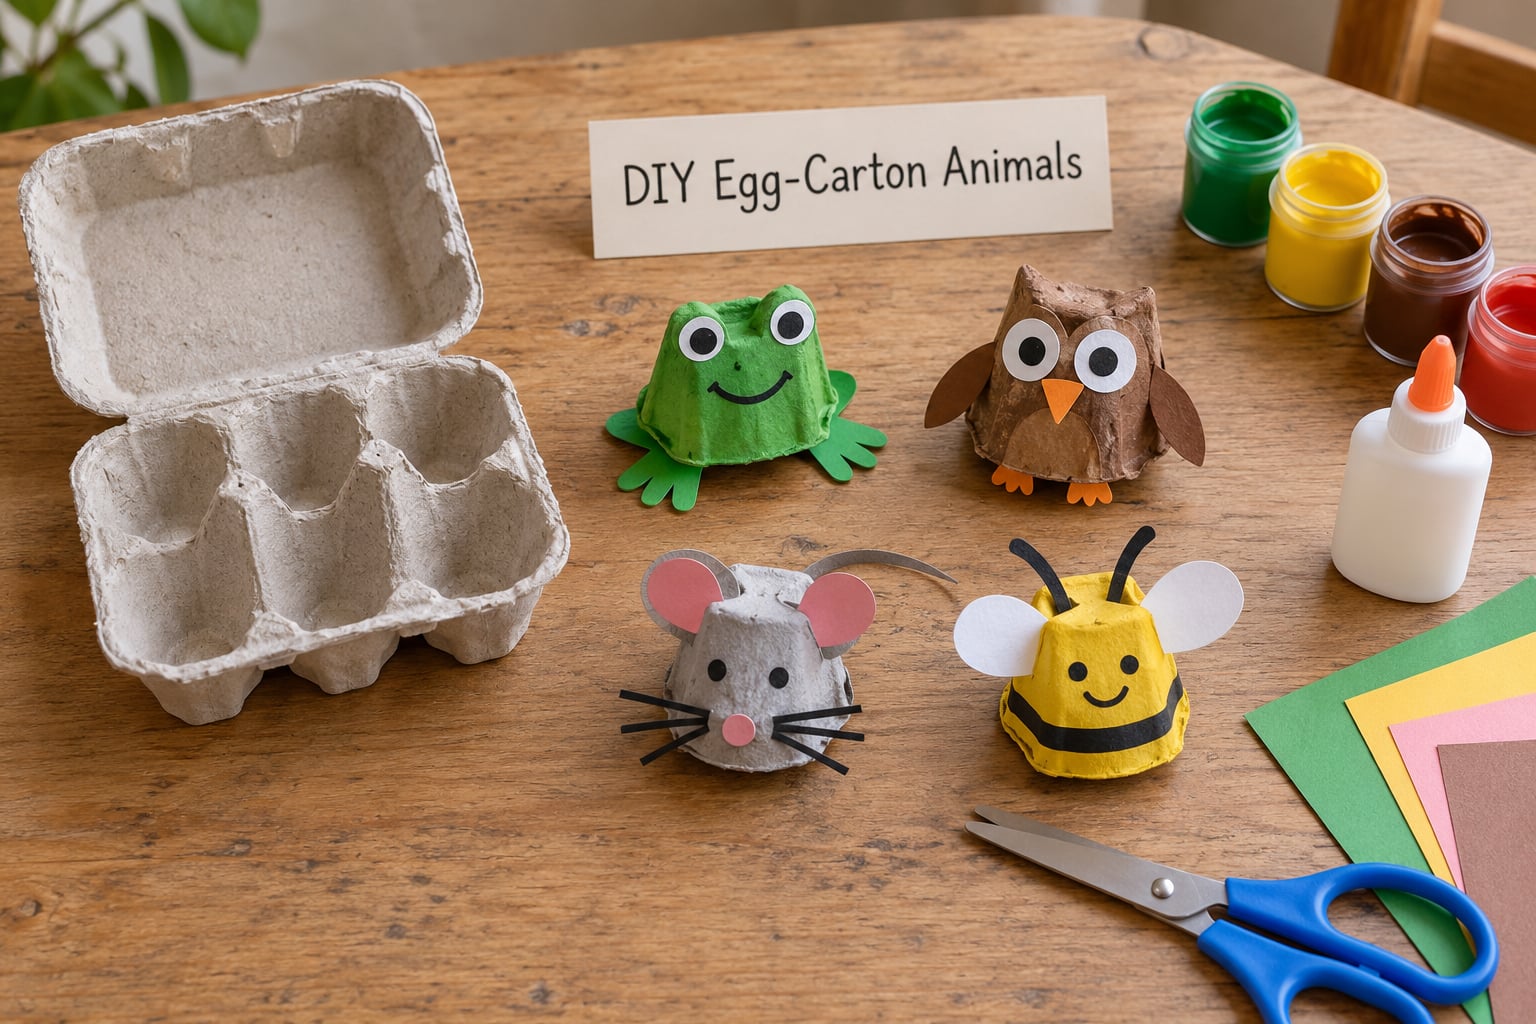
Cut two neighbouring cups away from the carton with a craft knife, working from the outside so the blade does not slice into the next section. Snip a flat bottom off each cup and you have a body that stands upright on its own. That single cut is what turns a tray of identical hollows into a whole zoo.
Paint each body a base colour, then add features according to the animal: ears from small triangles of paper, a fox tail from a strip of orange card, a woolly sheep surface from dabbing on cotton wool while the paint is still wet. Pipe cleaners threaded through two needle holes make legs that hold their shape, and googly eyes fix an expression in one second.
The nicest part is that the animals coordinate. Make four from one carton, pick a colour family, and you have a set that was never sold together. A four-year-old will happily spend twenty minutes on the eyes alone.
Save the pyramid-shaped tops rather than binning them. Cut them free with a craft knife and they become bowls, hats, beehives or the base of a wobbly stacking tower, which is a second activity from the same carton. When you keep cartons, press them flat and stack them inside a large bag; a binder with rings punched through the sides keeps every piece usable and stops the pile collapsing mid-project.
2. Mini Egg-Carton Trains
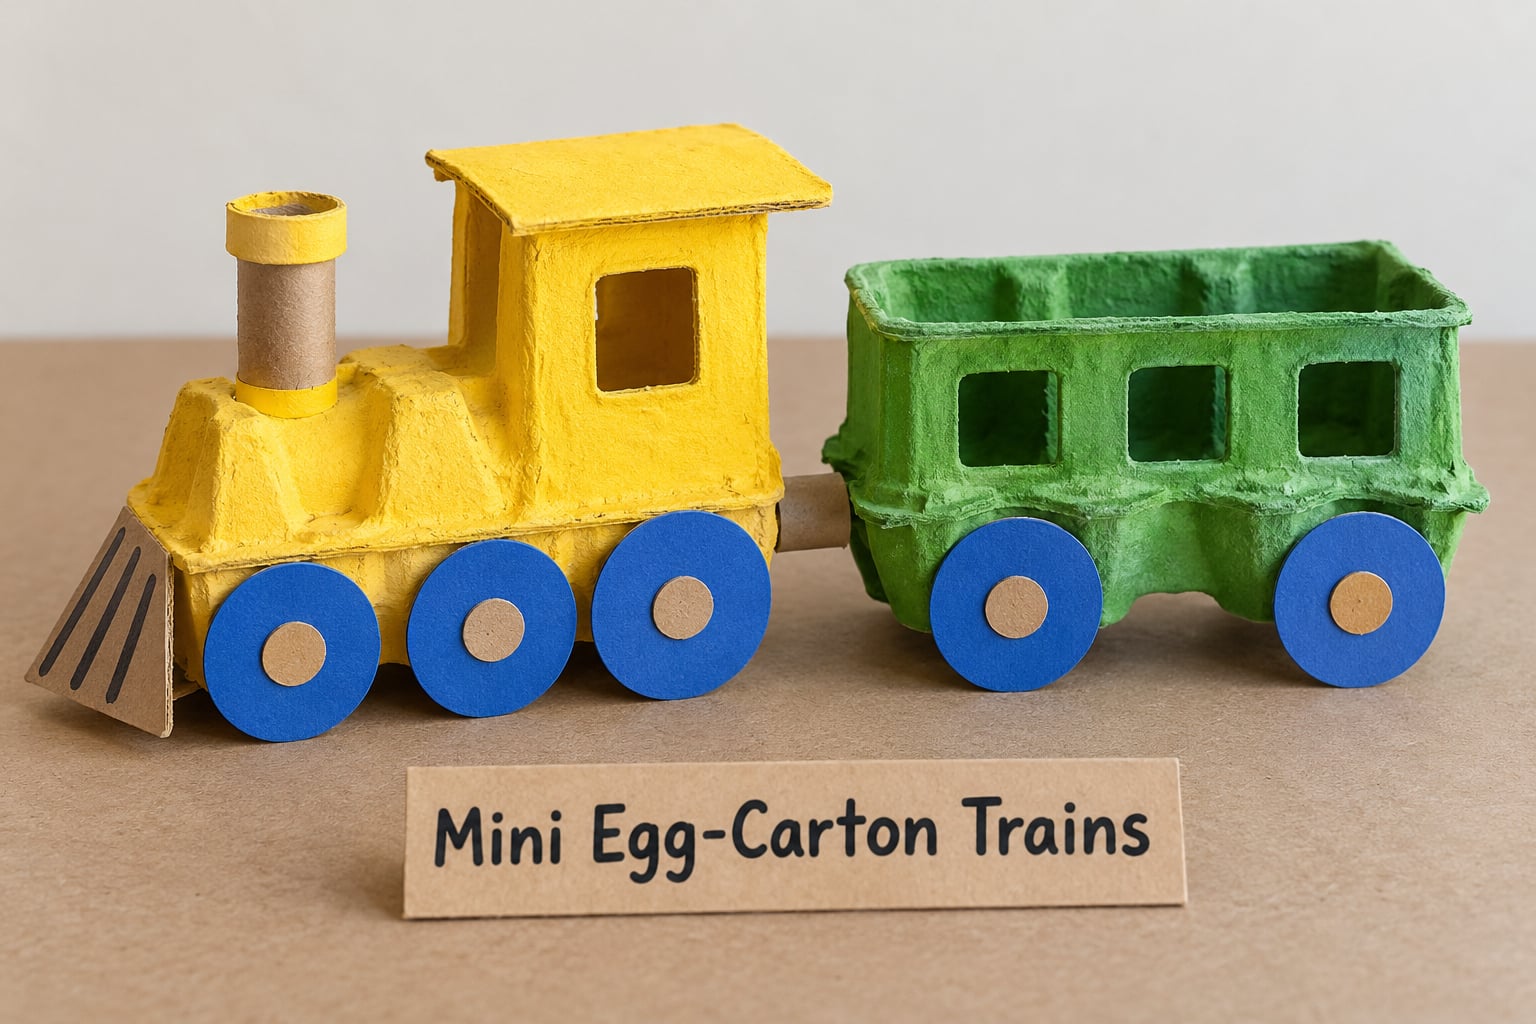
Build one carriage by cutting a single cup free and gluing a disc of card to each side as a wheel. The easiest wheel needs no cutting at all: roll a strip of paper into a loop, glue the ends together, and you have a ring that rolls smoothly. Invert one loop at each corner of a flattened section for a carriage, and leave a cup upright with a paper chimney for the engine.
A six-egg carton gives you enough material for an engine and one or two carriages, with the lid becoming a carriage roof if you trim it to fit. Card loops come apart under rough play; a strip of tape over the seam fixes that in seconds.
If you would rather not cut at all, a train still works from the whole carton: the three inverted cups on one side run as wheels and the other side carries a cab with a paper chimney. It will not run along rails, but it looks like a train from across the room, which is what matters for most play.
How do you make the wheels roll properly?
Keep the wheel diameter larger than the cup height so the model does not tip, and weight the base with a thin layer of card glued underneath. If a loop wheel flattens, push a layer of tape around the rim and it springs back.
3. Egg-Carton Monster Trucks
A truck needs weight and clearance, and the carton already provides both. Cut away one long side of a six-egg carton, leaving the opposite side tall, then glue two bottle caps on each side near the corners as wheels. The exposed cups face outward like a row of teeth, which is where the monster look comes from.
Paint the body before attaching the caps, or the brush will never reach under them. Cardboard discs make good wheel arches, and a bent strip of card under the nose gives the front a lift. Add a driver made from a paper cone head and a matchstick body if you want somewhere for the hands to sit.
To make each vehicle distinct without buying anything, vary one thing only: wheel size, cab height or colour. Three trucks with the same body but different wheel sizes read as a family of construction vehicles, and small children sort them by size without being told to.
These roll further than most parents expect. A layer of card glued under the carton keeps the base flat so the caps stay in contact with the floor, and a short push across a rug sends one across a whole room. Rolling them down a ramp cut from a cereal box turns the trucks into a ramp experiment, and children adjust the ramp angle without being asked to.
The best bit is the noise. Bottle caps on card produce a rattle that makes a plain cardboard box feel like a real vehicle, and that sound carries pretend play further than the paint does.
Another option is to glue the caps through the side walls rather than onto them, which gives the wheels a little more clearance and lets the truck roll over the corrugation in a rug. If a cap wobbles, run a bead of hot glue along the join or sandwich the cap between two card discs and glue that to the wall.
4. Dinosaur Fossil Display
Open a carton flat and fill each cup with a pale play dough mix, then press a plastic dinosaur, a shell or a bone-shaped biscuit into the surface at a slight angle. When you lift the toy out, the impression looks exactly like the kind of pressed fossil that sits in a museum case.
Let the dough dry fully, pop each fossil out, and glue it into a cup of tan sand with a strip of cardstock on the front carrying a hand-written label such as “Tyrannosaurus, 68 million years”. A paper lid label turns the whole carton into a display box on the shelf.
This one earns its place in a classroom because the labelling is half the activity. Children who have just learned about fossils can write their own, and you get a labelled display out of one carton and a bowl of sand.
Rougher toys give better impressions than realistic ones. A plastic dinosaur with a thin tail, a shell and a ridged back leaves three distinct shapes in the dough, so one press produces a fossil with several features instead of a single smudge. Wipe the toy between presses and the edges stay crisp.
Half a pressed shell in one cup and the whole skeleton silhouette in another gives you a set that looks like a real excavation once the cups are filled with sand. Add a folded card stand at the back of each cup and the fossils stop rolling out of the display the moment someone bumps the shelf.
5. Egg-Carton Ladybugs
Cut one cup free, trim it into a rounded shell shape, and paint it red once it is dry to the touch. Black circles are painted or glued on afterwards as spots, and a straight black line down the centre splits the wing cases. Two pipe cleaners pushed through the base become legs that bend when the cup is stood on a table.
For younger children, skip the scissors entirely: paint the cup as it comes, since the moulded cup already reads as a body. A dab of black paint at the head end gives a face, and two googly eyes finish it. One carton makes six ladybugs, which is exactly enough for a bug-centre table.
Set the painted side out on kitchen roll and let each piece dry fully, roughly an hour. The card stays soft enough for small hands to squish without snapping, which is half of why this craft works so well with a two-year-old who wants to hold the finished thing immediately.
The scraps do not waste either. A ring of leftover card trimmed from a cup makes a stand, and an egg-box lid flattened and painted becomes a shared palette with wells for each colour. Held to the light the moulded texture shows through thin paint as a mottled pattern, and some children like that pattern enough to leave the base coat off.
6. Caterpillar Counting Game
Cut individual cups apart and join them along one straight edge with tape, inside-out so the caterpillar curls naturally when you move it. Write the numbers 1 to 6 on the tops in marker, one number per cup, then add googly eyes to the first cup so the head is obvious.
Children match objects to the number on each cup: six buttons, six pom poms, six toy animals. Ask them to walk the caterpillar along a line while calling out the numbers, which turns a quiet craft into a counting game that runs itself.
For a harder version, leave the tops blank and put the numbers on small discs that go in and out of the cups. Matching and removing the discs gives small fingers a pincer grip, which is the fine motor skill the painting alone would not have trained.
Add a jar of buttons, a jar of beads and a jar of pasta beside the caterpillar and the counting spreads itself across the table. Ask how many more beans they need to reach ten, which is early addition without a worksheet. Keep the jars out of reach afterwards, because loose small parts are the one real risk in this craft.
7. Egg-Carton Puzzle Pieces
A painted carton cut into a grid makes a puzzle with a shape no shop sells. Paint one flat side of the open carton with a single scene: a green field with a blue sky and a red barn reads well from about a foot away, which is roughly how far a puzzle sits on the floor. Let it dry for a full day before any cutting.
Cut along straight lines with a craft knife, pressing lightly and moving the blade away from your body rather than toward it. Then glue a sheet of plain card onto the back of the whole puzzle so the joints double their strength. Trimming each piece slightly larger and rounding the corners keeps small hands and mouths safer.
Small children cannot manage a six-piece puzzle with jagged edges, so glue the painted grid onto card, cut it into three or four large squares, and round those. Same picture, same carton, and it survives being handled.
Test the puzzle before handing it over by sliding all the pieces apart and asking a child to put one back. If a piece fits two places, repaint over the offending joint so the cut line reads clearly from both sides.
What to make with egg cartons when a puzzle joint tears
Spread a thin line of PVA glue along the inside of the joint and press a strip of tape over it before the glue dries. Let it set for half an hour with something flat and heavy on top, then check the joint by flexing it gently. A torn joint is usually one that was cut while the paint was still damp, so drying a full day is the real fix.
8. Mini Egg-Carton Birdhouses
Cut a square opening in one long side near the top, high enough that the roof overhangs it, and glue the lid on above as a sloping roof. A stick glued under the opening makes a perch, and a flat strip below it gives the birds a landing. Card punched with holes in the same panel adds ventilation.
Treat this as a display piece or a counting prop. In a classroom, a line of them on a shelf with different coloured labels turns into a bird survey, and children can count the perches, the holes and the roof angles.
For a real outdoor birdhouse, use a wooden box with a proper roof rather than a carton. Cardboard pulps when it rains, and a nest built on wet pulp collapses; a hanging carton will do nothing to keep birds safe from predators either. Make the carton one, keep it indoors.
Plenty of children meet a real nest only in a photograph, so the indoor version has an educational job a wooden box cannot do as well. Open the front, hand over a magnifying glass and a sheet to log what was counted, and the roof angle becomes a maths problem rather than decoration.
Cut the opening in the end panel rather than the long side if you plan to stand it on a shelf: the panel is narrower, so the same cut produces a smaller, more realistic hole relative to the bird you are imagining watching it.
9. Egg-Carton Mask
The flat lid of a carton curves slightly at the ends, which is exactly the shape a mask needs. Wrap it around your child’s head with the curve facing forward, mark where the eyes fall, and cut two holes a little larger than the openings you marked. An adult should do the cutting from start to finish.
Punch small holes at each side and thread string or elastic through for ties. Decorate with animal features from the cartons you already have: a beak or muzzle from a spare cup, ears from triangles, whiskers from a pipe cleaner. Painting the lid red and white with felt shapes makes a superhero version that suits older children.
Measure with the lid in place rather than guessing, and leave at least a finger’s width of card around each eye hole so it does not crack on the first squeeze. Reinforce the tie holes with tape on the inside, since paper tears there faster than anywhere else.
A mask made from the flat lid is light enough for a three-year-old to keep on, which is not something you can say for most costume props. That also makes it a good classroom costume project: one carton per child, the same template each time, and a different painted creature on every lid.
10. Reusable Craft Organizer
Turn the carton back into a tray and use it to sort the small things that turn up in every craft session: crayons, paintbrushes, buttons, sequins, spare beads. Label the outside of each cup with a marker or a small sticker so the sorting job belongs to the child, not to you.
Lightweight things belong in the pyramids, because the raised centres carry almost nothing. Cans and bottles go in the corner cups, which sit on the flat bottom of the carton, and nothing heavier than a roll of tape goes in the lid. Keep the weight in the lower half and the whole tray stays steady when a seven-year-old pulls a crayon out.
A slot cut into the lid holds paintbrushes standing up, which solves the dried-brush problem as well. Decorate the outside with a single colour and it looks like a deliberate purchase rather than a reused tray.
Two organisers, one for drawing and one for gluing, cut the end-of-session tidy to a few minutes and teach the sorting habit rather than the tidying. Once the tray exists, most families stop losing the small buttons and sequins that turn up in the vacuum cleaner for weeks afterwards.
Label the lid as well as the cups and the tray doubles as a storage box with a handle. Stand it on the lid, fill the cups, and put the lid back on top: the same carton that sat on the table at the start of the session is the one that tidies it away at the end.
11. Easter Egg-Carton Nest Craft
Cut one cup and half a cup, glue them side by side, and cover the inside with shredded paper or paper grass. A few felt or papier-mache eggs go in the bottom, and a strip of cardstock under the nest gives it a base that sits flat on a shelf.
Keep this craft entirely separate from anything edible. Real eggs and wrapped sweets that sit against reused cardboard carry a real risk of contamination, so make the nest for decoration, use fake eggs, and hand-wash the carton before you start so nothing from the kitchen migrates onto a surface a child later touches.
Three nests of different sizes grouped on a shelf look like a deliberate display, and each child can name and colour their own eggs, which is enough for a two-year-old with no cutting involved.
Give the smallest nests away as place-card holders, with a folded cardstock name written on the front. That version works at any time of year and turns the same shape into something guests take home instead of something that ends up in a bin.
12. Rocket Ship for Pretend Play
Stand a six-egg carton on its end and the pyramid caps become the nose and the base. Cut one cup out of the side to make the cockpit opening, glue a card circle inside it, and draw a window in the middle. Three fins from stiff card fix to the corners with tape, and folded newspaper or paper flames push underneath.
Add mission-control labels and the play lasts far longer: a launch countdown, a countdown sticker for each flight, and a strip of paper with names written on it for the crew. Paint the body grey with a bright band, because the contrast is what makes a homemade rocket read as a rocket from across the room.
Non-toxic glitter is worth adding after the paint dries, not before. Mixed into wet paint it settles at the bottom of the cup and stays there, which wastes it and scratches nothing.
Two rockets with different mission labels make the play better rather than more complicated: one becomes the supply ship and one the crew. Children negotiate the landing protocol themselves, which is the sort of thing cardboard toys invite and bought plastic ones often do not.
Build the launcher from a cardboard box lid propped at an angle and both rockets have somewhere to take off from. That single extra prop tends to occupy a child longer than any decoration you could add to the rocket itself.
Frequently Asked Questions
What is the best material to use for egg-carton crafts?
Moulded paper pulp and cardboard are the best materials for most egg carton crafts. Both cut easily with household scissors, hold PVA glue and acrylic paint well, and are light enough for small hands. Foam cartons cut with a serrated knife and crumble, so they suit thicker models and storage boxes rather than small paper figures. Avoid cartons that are damp or have a strong food smell left in them.
How do you make an egg carton sturdy enough for a craft?
Glue a layer of thin card onto the back of the flat carton, then a second layer on top of that. This doubles the strength at every joint and turns a floppy tray into a board that takes pencil, paint and repeated handling. Where pieces will be pulled, such as wheel axles and mask ties, wrap the joint in tape rather than relying on glue alone. Round every cut edge with a file before a child handles it.
Can I use an egg carton for crafts with toddlers?
Yes, and several of these projects suit toddlers well. Ladybugs, the counting caterpillar and the spring nest need paint, stickers and gluing rather than cutting, which is the safest combination for small hands. Let the adult cut the pieces first and leave the decorating to the child. Avoid loose small parts such as googly eyes and pom poms with children under three, who still put things in their mouths.
Should I wash or sterilize egg cartons before crafting?
Wash them. Rinse the empty carton under warm water, scrub out any dried egg with a brush, and leave it to dry completely on a towel. A carton used for raw or cooked food carries a real risk of transferring bacteria to a surface a child later touches, and washing takes two minutes. Sterilizing is not necessary for a craft project, but never skip the wash, and check for dampness before the paint goes on.
What paint and glue are best for painted egg cartons?
Acrylic or poster paint works on both pulp and cardboard, and white PVA glue dries clear and holds paper firmly, so it is the right choice for anything glued rather than slotted. Prime the surface with a thin base coat first, because grey pulp shows through thin paint and flaking looks like a mistake. Non-toxic paint matters for anything a toddler will handle, and let each piece dry before gluing it to another.
Start with the Carton That Suits Your Child
Pick one project and finish it before starting the next. Wash the carton, check it is dry all the way through, gather only the materials listed for that craft, and hand the colour choices to your child.
Most of these come together in under half an hour, which makes them a good answer to a wet afternoon. Once the first one is done, the empty cartons in the kitchen start to look like a supply shelf rather than rubbish.
The projects I come back to most are the ladybugs and the counting caterpillar. Both take minutes, both wash off the table in a wipe, and both get asked for again the next day.