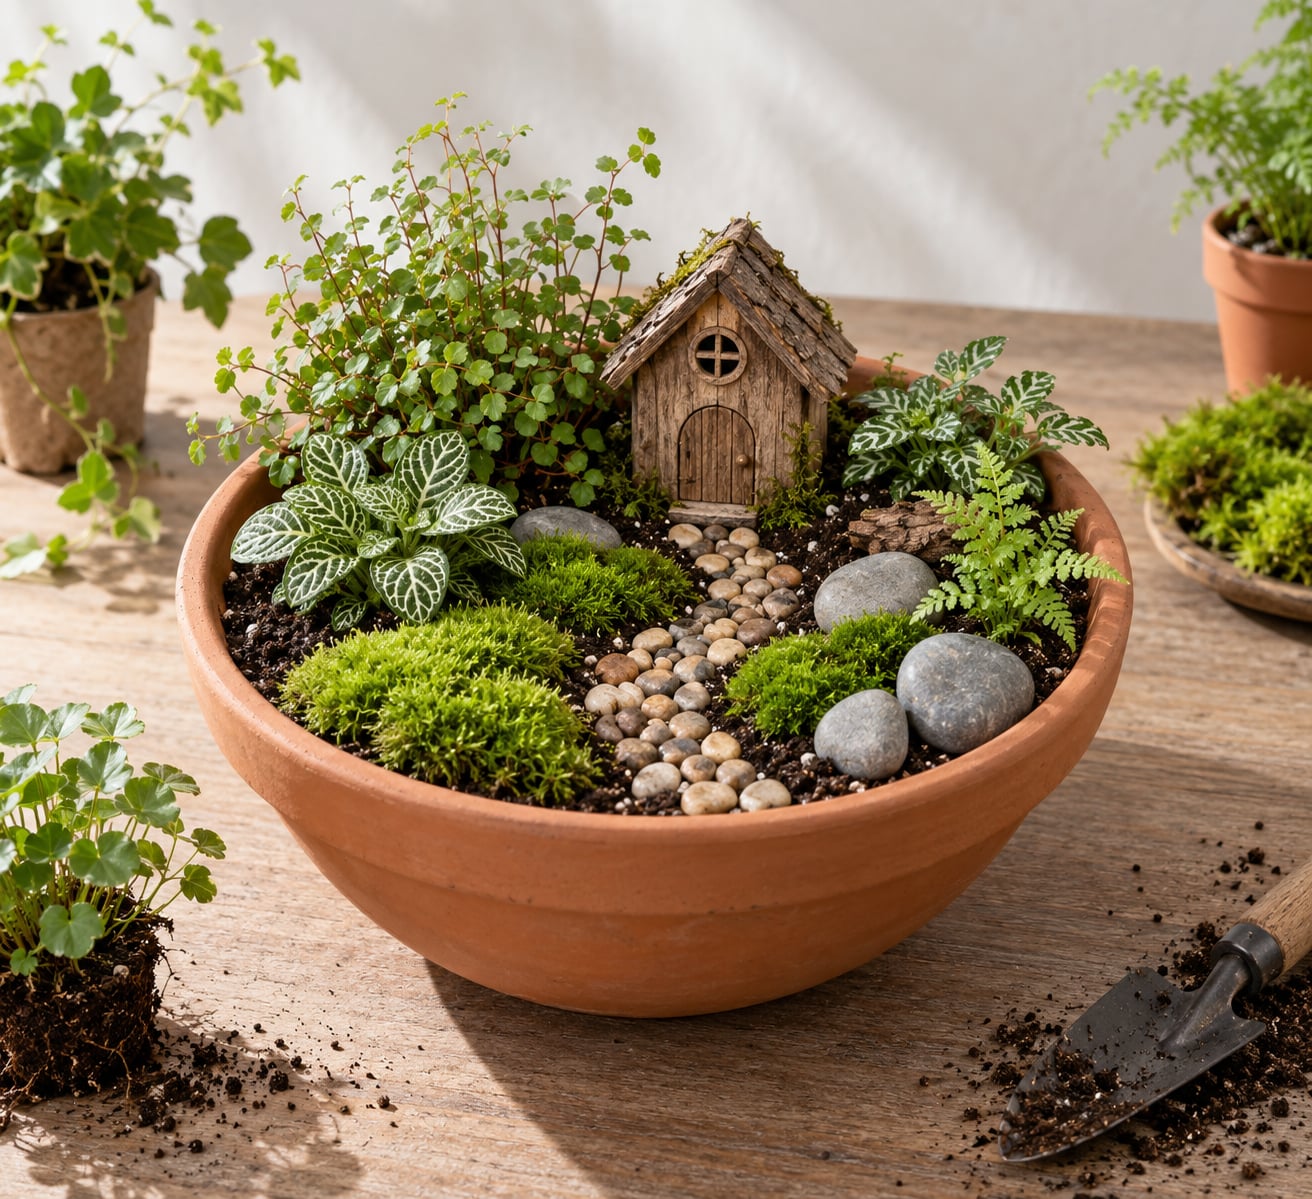
To make a fairy garden in a pot, choose a container with drainage holes, fill it with well-draining potting mix, plant a few slow-growing miniature plants, then finish with gravel paths, moss and tiny accessories. Budget about an hour from empty pot to finished scene. No special skills, and nothing expensive.
A fairy garden is a planted scene built at miniature scale, usually around one-twelfth the size of a real garden. A 6-inch pot holds plants that would reach 6 feet in a bed, which is exactly why fairy gardening works so well in containers.
It is a genuinely good project for kids, because the building is hands-on, the result is small enough to hold, and there is no screen involved. It also works as a quiet weekend craft for adults. My rule: let the child pick the plants and the fairy house, and you handle the soil and the drainage layer.
Table of Contents
- 1What You Need
- 2Step-by-Step: How to Make a Fairy Garden in a Pot
- 31. Choose a Pot with Drainage Holes
- 42. Prepare the Pot and Add Drainage
- 53. Add Potting Soil and Plan the Layout of Your Fairy Garden in a Pot
- 64. Plant the Miniature Garden
- 75. Create Paths, Fairy Details and Final Decorations
- 86. Water and Care for the Fairy Garden
- 9Common Mistakes
- 10Frequently Asked Questions
- 11What container can I use for a fairy garden?
- 12What is the best planter for a fairy garden?
- 13What to put in the bottom of a fairy garden?
- 14Do fairy gardens need drainage holes?
- 15How often should I water a fairy garden in a pot?
- 16What plants stay small enough for a fairy garden in a pot?
- 17Conclusion
What You Need
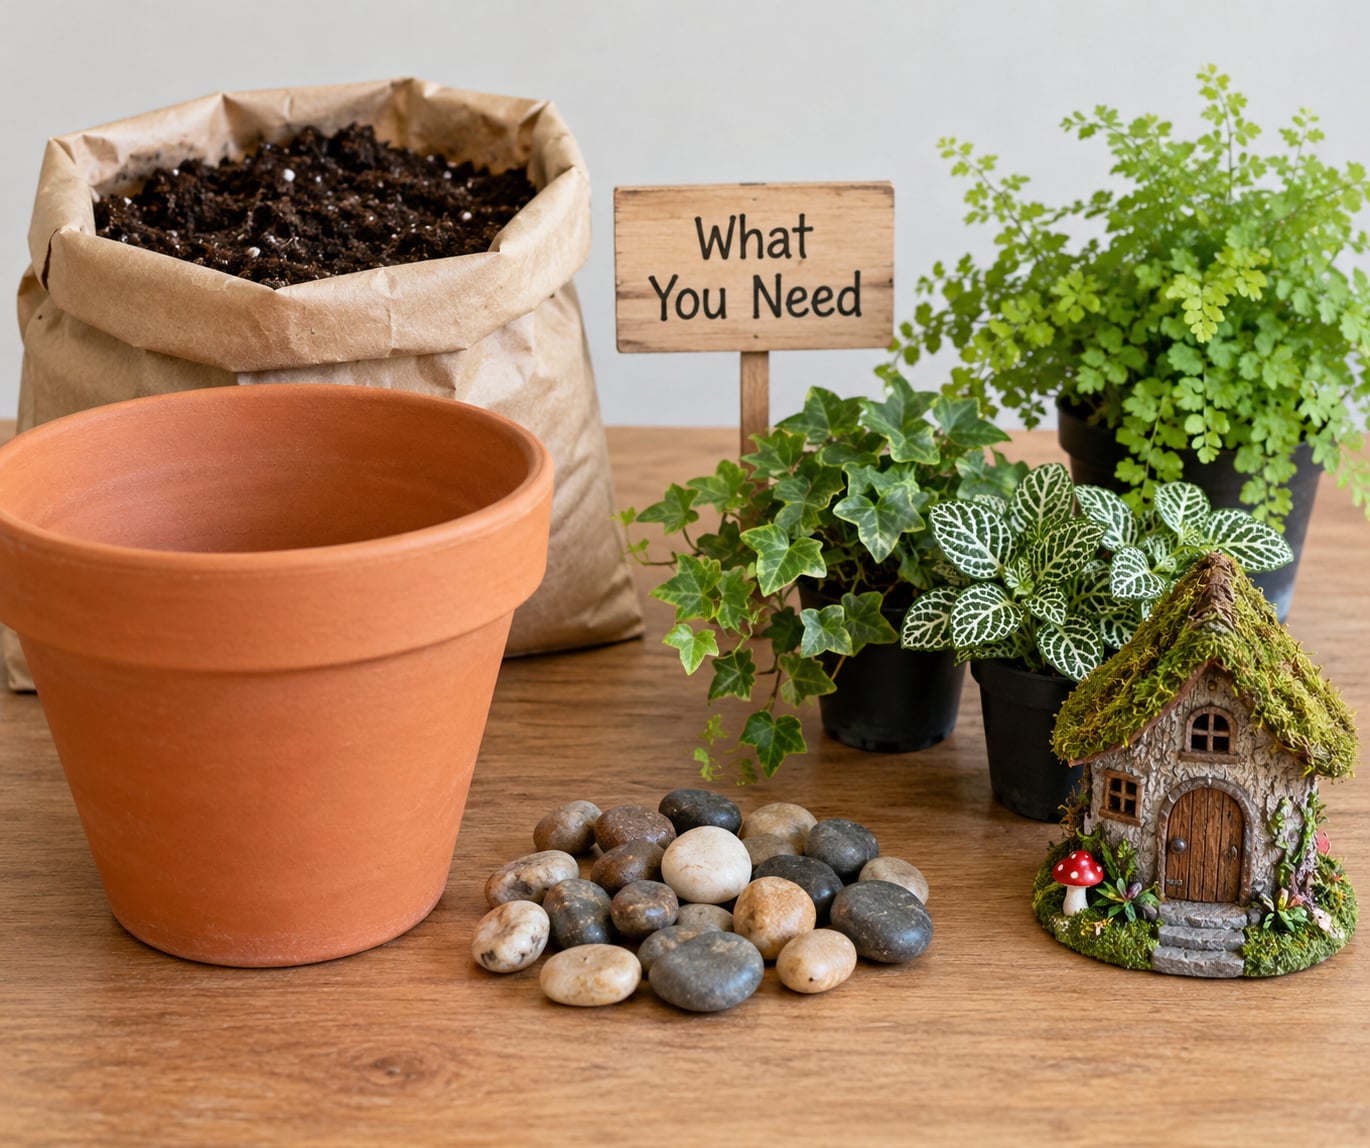
Everything falls into five categories. Gather them all before you start, because the middle of a build is the worst time to discover the fairy house is still in the car.
- Pot: A shallow, wide container, ideally 6 inches deep and 12 inches across, with drainage holes. Terracotta works well because it dries out evenly.
- Soil: Standard potting mix, or a half-and-half blend of potting mix and cactus or succulent soil if you want the bed to drain faster.
- Plants: Three to six starter plants in 2-inch nursery pots. Small sedum, hens and chicks, and baby succulents are the easiest to find.
- Hardscape: Small gravel, river rocks or glass pebbles for paths and borders, plus a few twigs or slices of wood for steps.
- Decorations: One larger piece such as a miniature fairy house or birdhouse, then smaller items: tiny fences, a bench, mushroom figurines, a fairy or two, preserved moss.
On container choice, think about where the pot will live. A windowsill garden wants a wide bowl or a shallow dish, while a patio pot can be deeper and hold more plants. Glazed ceramic, an old wooden bin, or even a sturdy plastic tub will all work as long as you can drill holes or already have them.
For young children, skip anything with sharp edges or small loose parts that could be swallowed, and choose chunky, smooth pebbles rather than fine gravel. Kids also do most of the planting with a spoon, so a spoon and a chopstick are worth adding to the list.
Step-by-Step: How to Make a Fairy Garden in a Pot
1. Choose a Pot with Drainage Holes
Pick something shallow and wide rather than deep and narrow. Deep pots hold more water than a miniature planting can use, and that is the fastest route to root rot. Drainage holes matter more than material: if water has nowhere to go, it sits at the roots and the soil turns sour.
Set the pot on a saucer or a shallow tray from the start. It protects a windowsill, a table or a patio from the run-off that happens every time the pot is watered.
2. Prepare the Pot and Add Drainage
Wash the container, especially if it has been used for another plant, and let it dry. For what to put in the bottom of a fairy garden, the answer is a loose layer of small pebbles or gravel about 1 inch deep, kept loose rather than packed solid.
If the holes are large enough to let soil wash through, cover them with a small square of mesh or a single layer of paper towel first. The loose layer gives excess water somewhere to sit instead of pressing right against the roots, which is the whole point of building one.
3. Add Potting Soil and Plan the Layout of Your Fairy Garden in a Pot
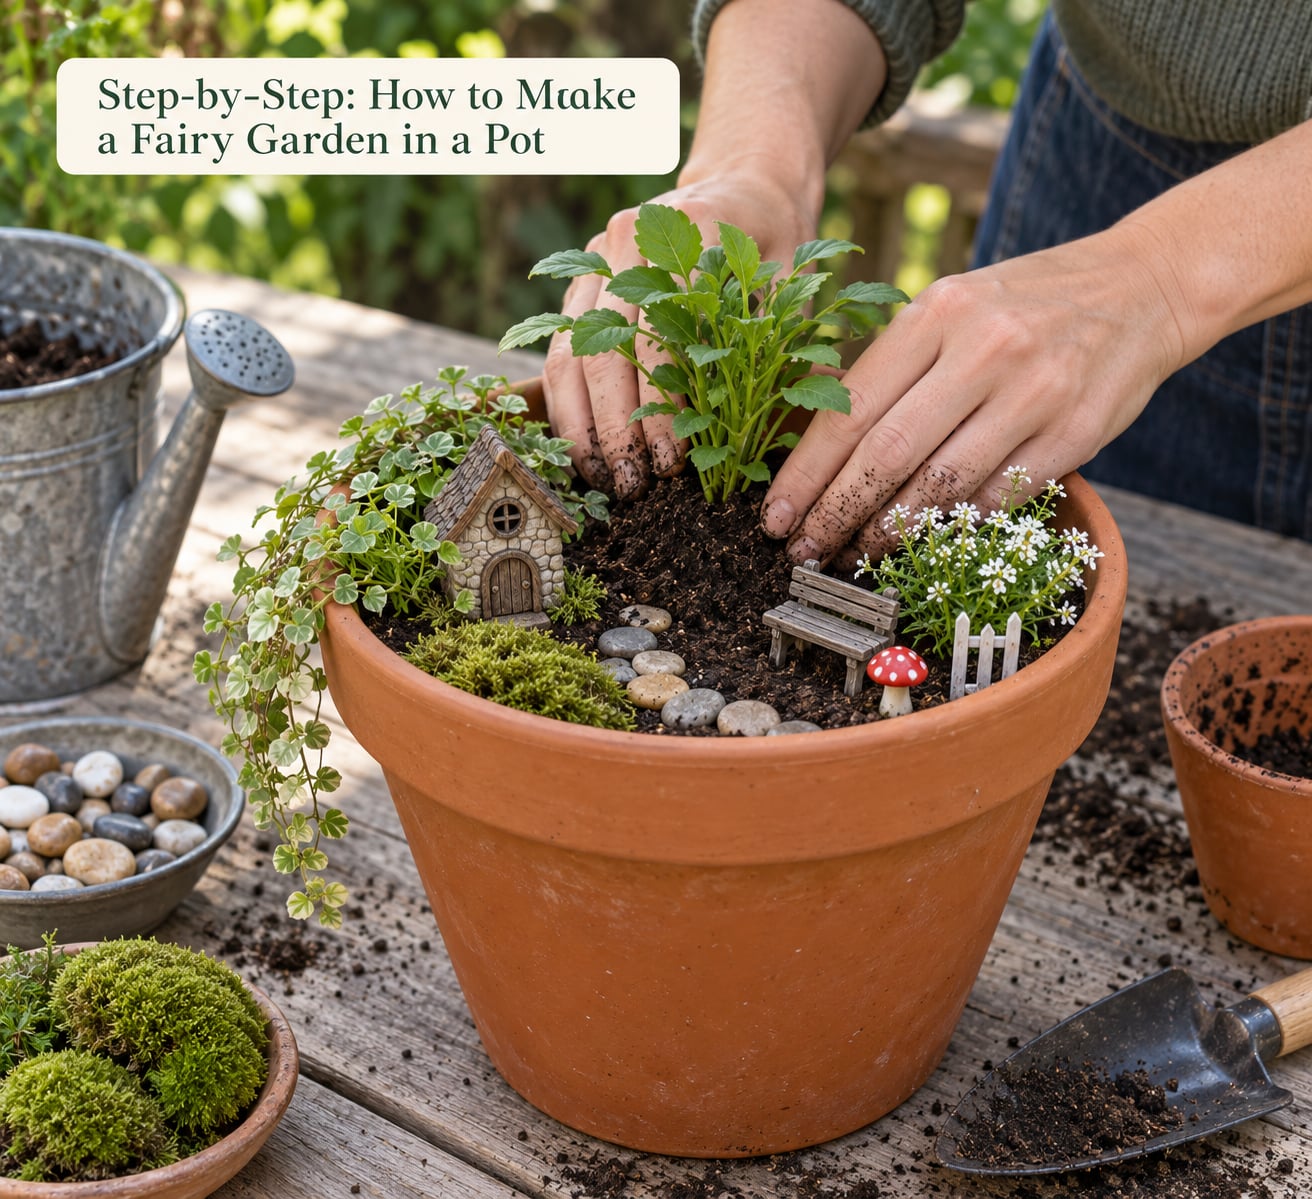
Scoop in potting mix and leave about 1 inch of space below the rim so water has somewhere to go. Before you plant anything, stand back and decide where the fairy house goes, because it should sit at the back where taller plants will not hide it.
A workable layout is simple: tallest plant at the back, medium plants in the middle, the smallest plants and any ornaments at the front. That single rule gives you a scene with depth instead of a flat row.
4. Plant the Miniature Garden
Tip each plant out of its nursery pot by tapping the base and squeezing the sides. Loosen the root ball with your fingers so the roots fan out instead of circling, then set the plant in a hole at the same depth it was growing.
Backfill and press the soil down gently around the stem. Do not pack it hard; you want the soil firm enough to hold the plant upright, loose enough for water to move through. For kids, a chopstick makes a tidy planting hole in seconds.
Pick plants by their mature size, not their size on the shelf. Small sedum and hens and chicks spread across the soil and are forgiving. Avoid mixing lithops, also called living stones, with the rest of the planting, because they want far less water than anything else in the pot and will rot alongside happy neighbours.
5. Create Paths, Fairy Details and Final Decorations
Lay gravel or pebbles from the front of the pot toward the fairy house to make a path, and add two or three larger rocks as steps. Press each one down until only the top shows, so nothing tips over in the first wind.
Fill the gaps with preserved moss or real moss, then add the fairy house, a tiny fence, a bench or a couple of mushroom figurines. Push ornaments down into the soil about half their height rather than balancing them on top, and skip fragile pieces outdoors where sun and rain take a toll.
If you want furniture to last, glue matters more than the miniature itself. Hot glue often gives up within a single season in hot, sunny conditions, so a slower-setting adhesive such as E6000 or a waterproof glue holds better. Give it the full drying time on the label before planting.
6. Water and Care for the Fairy Garden
Water the soil directly with a small watering can or a syringe so you do not wash out the path and the moss. Then check it every couple of days by pushing a finger about half an inch into the soil. Water when it feels dry at that depth and not before.
Bright indirect light suits most fairy garden plants. Outdoors, a few hours of morning sun works; harsh all-afternoon sun scorches small leaves and dries the pot fast. Indoors, turn the pot a quarter turn each week so one side does not stretch toward the window.
Refresh the scene a few times a year. Swap the ornaments for a seasonal set, replace any plant that has outgrown its spot, and top up soil that has settled. Building four gardens a year, one per season, gives you the play value of a new project without throwing away the pot each time.
Common Mistakes
- The drainage hole is blocked. Do not seal the holes with cement or pack gravel into a solid plug. A loose inch of pebbles plus mesh over the holes keeps water moving.
- The pot has no holes at all. Use it, but treat it as a semi-dry container. A rock layer and a watering spoon once a week are safer than a full watering can.
- The plants look root-bound. Lift one out. If roots circle the bottom, trim a third of them and spread them into the new hole instead of squeezing the whole ball in.
- Stems are crushed under ornaments. Push each ornament down between the plants rather than on top of them, and use a chopstick to reopen the gap afterwards.
- Everything keeps dying. Small pots dry out fast in sun and wind. Move it out of midday heat, water more often in small sips, and stop watering if the soil is already damp.
- A sharp or breakable piece gets handled roughly. Choose resin, wood or ceramic ornaments with no spikes, and keep pebbles large enough that they cannot fit in a small mouth.
- Miniatures blow away or topple. Press stones in until only the tops show, and set the pot where wind is blocked by a wall or railing.
- Glued furniture peels apart outdoors. Skip the hot glue gun for anything living outside and use a waterproof adhesive, then leave it to cure fully.
Frequently Asked Questions
What container can I use for a fairy garden?
Almost anything that holds soil and lets water out. A shallow terracotta pot, a glazed ceramic bowl, a wooden bin or a plastic tub all work. The container should be at least 6 inches deep and 12 inches wide, and it needs drainage holes. If it has none, drill holes, use a pot with holes as an inner pot, or add a rock layer and water sparingly.
What is the best planter for a fairy garden?
A wide, shallow terracotta planter is the most forgiving choice. Terracotta breathes, so it dries evenly and reduces the risk of soggy soil, and a shallow profile suits plants that stay miniature. Set it on a saucer so run-off does not mark a windowsill or table. Whatever you choose, drainage holes and a wide rim matter more than the material.
What to put in the bottom of a fairy garden?
Put a loose layer of small pebbles or gravel about 1 inch deep in the bottom. Do not pack it into a solid plug, because water still needs to pass through. If the drainage holes are big enough to let soil escape, cover them first with a small square of mesh or a single layer of paper towel so the gravel and potting mix stay put.
Do fairy gardens need drainage holes?
They really do. Water that cannot drain sits against the roots and causes rot, which shows up as yellowing leaves and soft, dark stems. If your container has no holes, drill a few, place a hole-less pot inside a larger one with holes, or add a rock layer and water only when the top of the soil is dry, usually about once a week.
How often should I water a fairy garden in a pot?
Check it every two or three days and water only when the soil feels dry about half an inch down. Small pots in sun can need it daily in hot weather and almost nothing in winter. Water the soil rather than the foliage, and use a syringe or small spout so the gravel path and moss stay in place. Never water on a fixed schedule alone.
What plants stay small enough for a fairy garden in a pot?
Choose by mature size, not by how the plant looks in its nursery pot. Small sedum, hens and chicks, baby succulents, elephant bush and tiny ferns all stay compact. Terrarium plants sold in the greenhouse section are sized for small containers. Avoid fast-spreading ground cover and anything that grows tall, and keep lithops in their own pot because their watering needs differ from everything else.
Conclusion
Start with the pot: pick a shallow container with drainage holes, rinse it, and add a loose inch of gravel before anything else. Everything after that takes ten minutes per plant.
Let the child choose the plants and the fairy house, and you take care of the soil, the drainage layer and the gluing. That split makes the build easy enough for small hands and gives you a garden that looks like it came out of their imagination rather than a shelf.
The best fairy garden in a pot is the one that gets repotted, re-decorated and played with. Make it in 2026, change the ornaments for summer, and keep going.