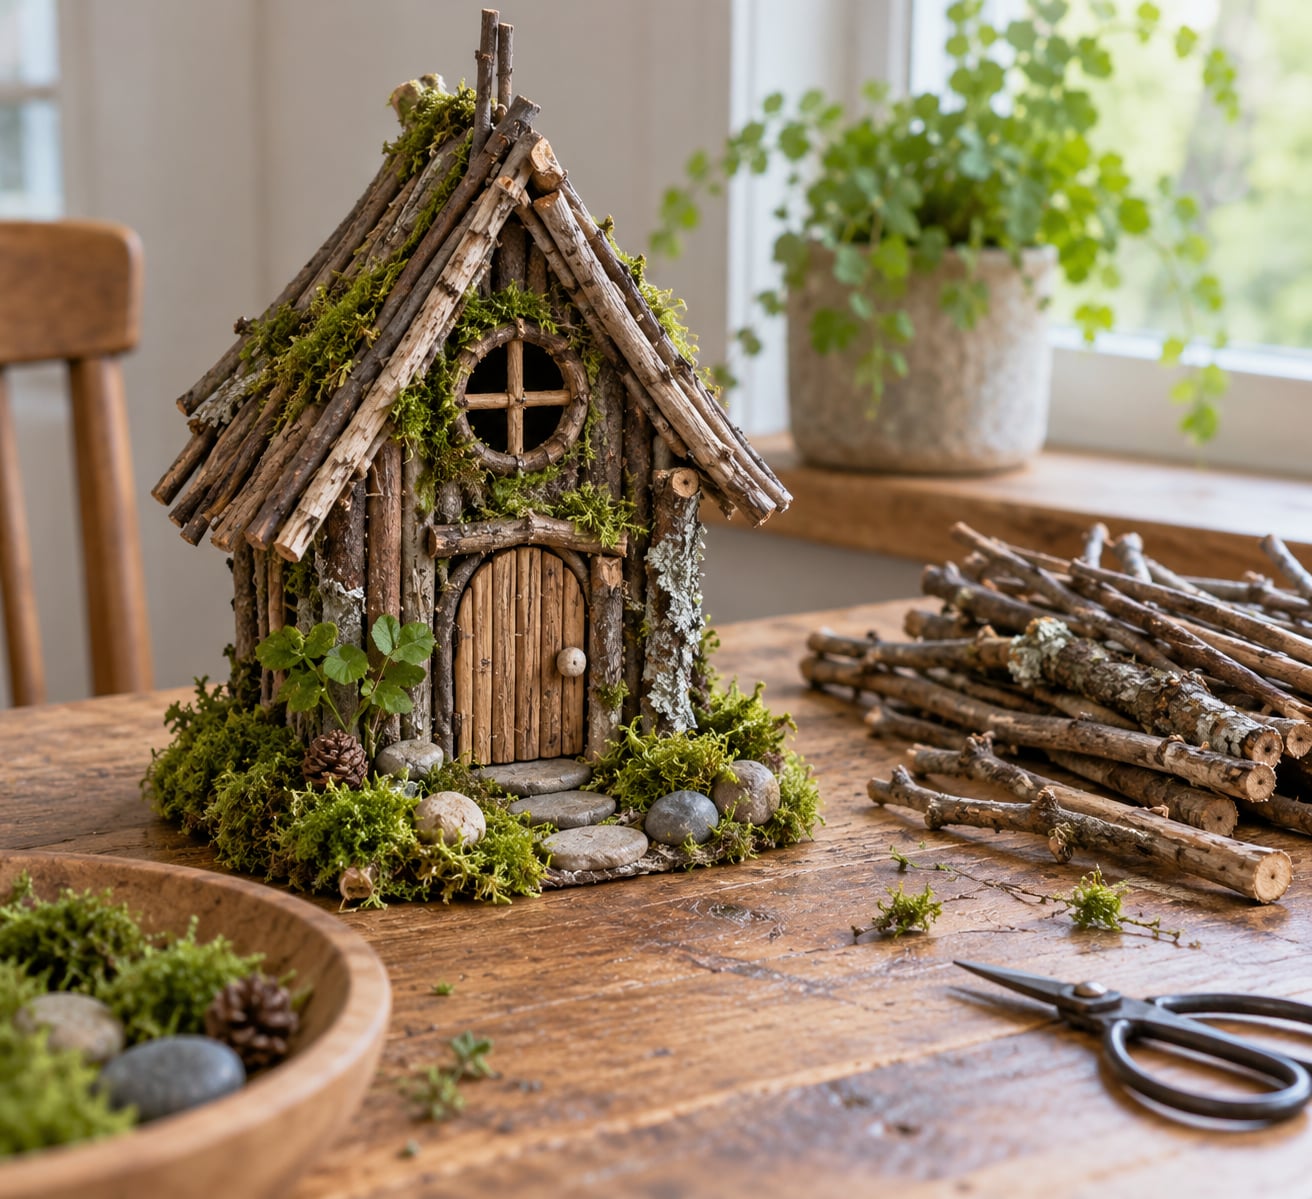
A fairy house built from sticks is a small cottage made by gluing twigs, branches or craft sticks side by side into flat walls, adding a peaked roof, and setting it on a base of soil and moss. How to make a fairy house from sticks is mostly a matter of choosing sticks of similar length and thickness, gluing them flat, and leaving an opening big enough for a small figurine to walk through.
The whole build takes about an hour, plus drying time. Most of that hour is gathering sticks, which is the part children like best. Updated for 2026.
Table of Contents
- 1What You Need
- 2Step-by-Step
- 3Step 1: Choose a Shape and Gather the Sticks
- 4Step 2: Build the Base
- 5Step 3: Assemble the Walls and Doorway
- 6Step 4: Add a Roof
- 7Step 5: Decorate the Fairy House
- 8Step 6: Add Finishing Details
- 9Common Mistakes
- 10Frequently Asked Questions
- 11What size sticks should I use for a fairy house?
- 12How do I keep a stick fairy house from falling apart?
- 13Can I make a fairy house without a hot glue gun?
- 14How big should a fairy house be for my child?
- 15How long does it take to make a fairy house from sticks?
- 16What natural materials can I use besides sticks?
- 17Conclusion
What You Need
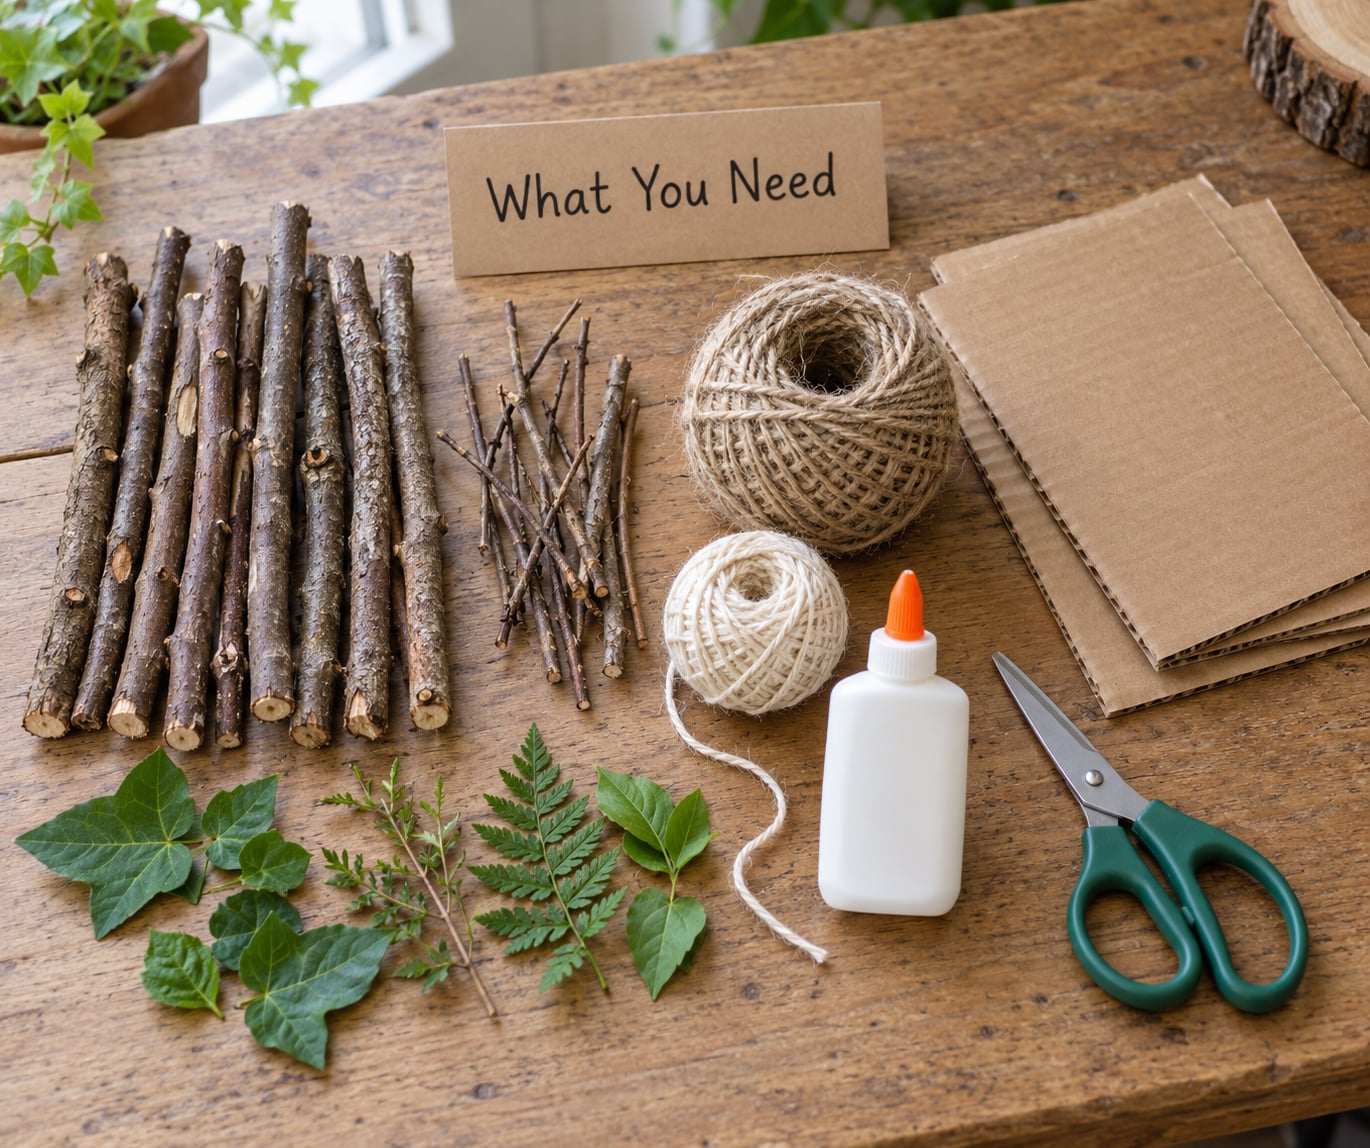
The trick to a fairy house that stands up is picking sticks before you pick a design. Group them by length and lay the matching ones out in piles, so you can see what you have before you start gluing.
A standard small house works out to roughly this:
- Long sticks for the frame: 4 pieces, about 15 cm long, from garden prunings or deadfall.
- Side sticks for the walls: 20 to 30 pieces, roughly the same length, from pruned branches and straight twigs.
- Roof sticks: 10 to 15 shorter pieces, offcuts and thin twigs.
- Base: 1 piece of cardboard or thin wood, 15 to 20 cm across, from recycled packaging.
- Adhesive: school glue for craft sticks, hot glue for twigs.
- Decorations: moss, pebbles, leaves, buttons, small flowers, gathered outdoors or in the garden.
- Tools: scissors or pruning shears, a ruler, and fine sandpaper for smoothing rough ends.
Any natural material works as decoration: moss, lichen, seed pods, small pine cones, acorn caps, flat stones and dried flowers. Paper, ribbon, pipe cleaners and tiny pom-poms sit nicely on top if you want colour.
One note on where the sticks come from. Gather deadfall and sticks from your own prunings whenever you can. Do not strip bark from living trees, and check that fallen branches are firm rather than crumbly before you commit them to a wall. If your local park has a no-picking rule, stick to your own garden and the kerb edges you are allowed to collect from.
Step-by-Step
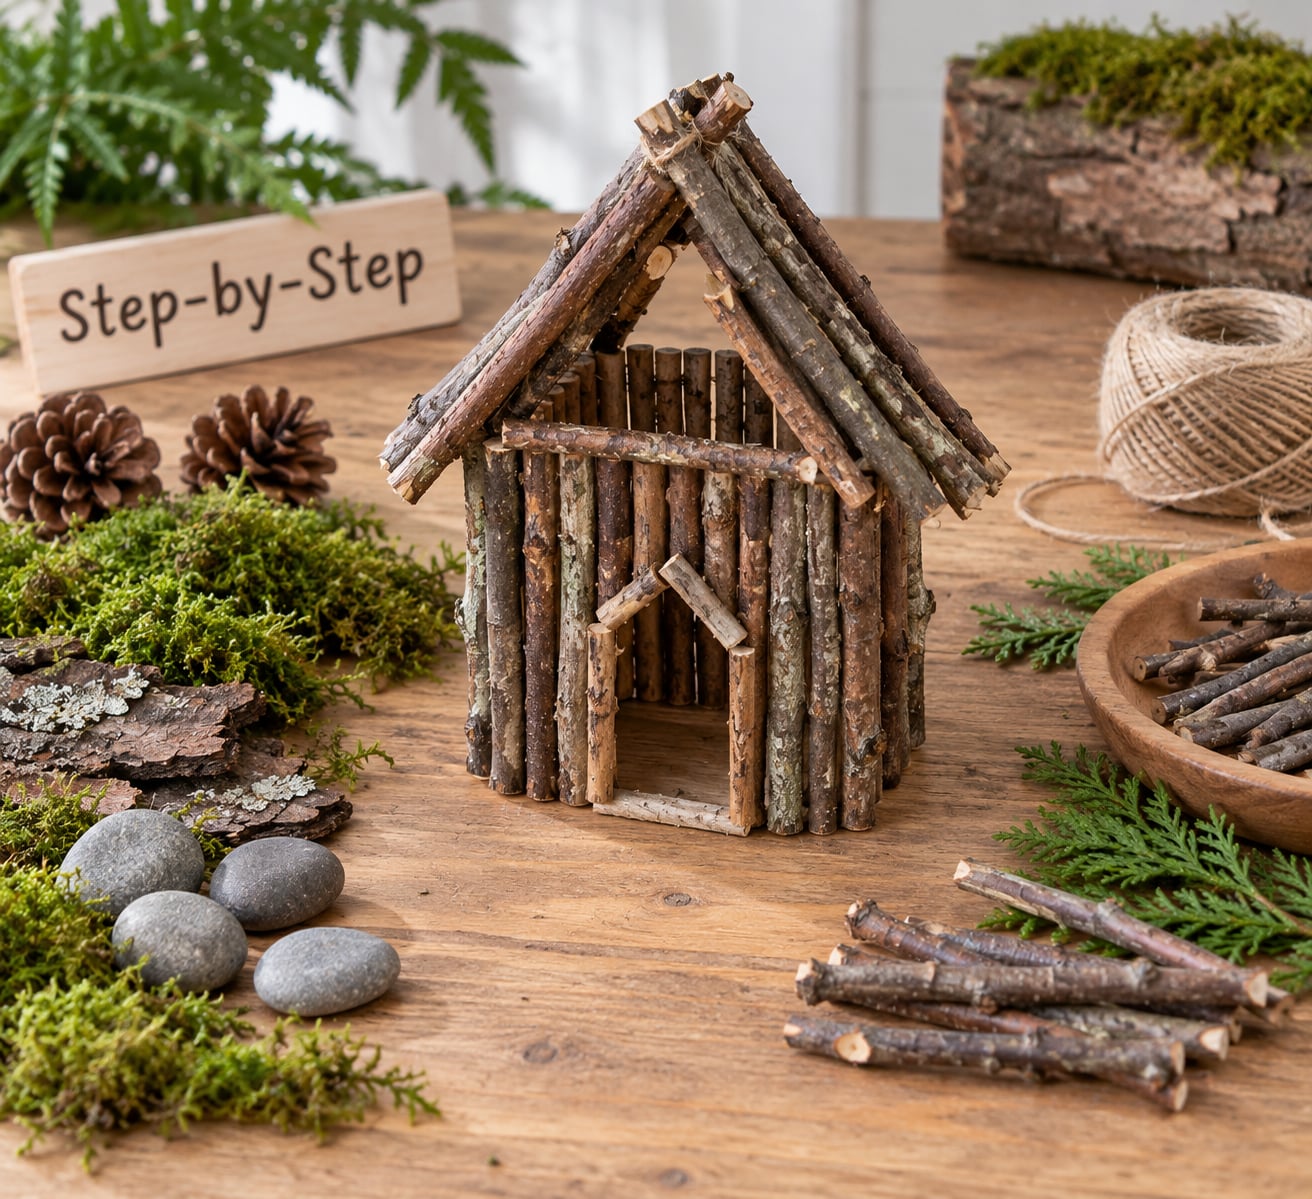
If you only learn one thing from this guide, learn this: make the walls flat panels before you try to make a house. A flat panel of glued sticks can be built by a child with school glue, and four panels can be turned into a cottage in twenty minutes.
Step 1: Choose a Shape and Gather the Sticks
A little gabled cottage is the easiest shape, and a teepee or a lean-to shelter is even simpler. Sort the sticks into three piles: long pieces for the frame, medium pieces for the walls, short pieces for the roof.
If your sticks are bent, uneven or a slightly different shade, that is not a failure. Those pieces usually go on the roof or at the back, where nothing depends on them being straight. Wipe each one with a damp cloth and let it dry before gluing.
Step 2: Build the Base
Cut a piece of sturdy cardboard or thin wood roughly 15 to 20 cm across and lay two foundation sticks across it, one near each end. Run a line of glue down each foundation stick and set your wall panels on top.
The foundation rails are what stop the walls sliding sideways once children start playing with the house. Without them, a stick wall will drift every time someone bumps the table.
Step 3: Assemble the Walls and Doorway
For a natural twig house, stand the sticks on edge, side by side, and run hot glue across the base of each one. Leave gaps of roughly the width of your little finger between sticks so the wall still reads as twig rather than a solid plank.
Hot glue sets in seconds, so work on one wall at a time and hold each stick for a moment before moving on. If you are working with young children, keep this step on the adult side of the table and hand the frame over once it is cool.
Leave out one or two sticks near the bottom centre to make a doorway. Measure it against your fairy figurine first, because a door that is too small is the single most common disappointment in this craft.
Step 4: Add a Roof
A gabled roof is two panels of sticks angled up to meet at a ridge. Lay the longest roof sticks across the top of each wall, then add a ridge piece down the middle to lock the two slopes together.
Three other roof styles work well. A flat top suits a modern little cabin and is the most forgiving. A moss roof looks at home in a woodland garden and hides the glue joins completely. A layered twig roof, where the sticks overlap like shingles, gives the thickest look and the most shelter from rain.
Step 5: Decorate the Fairy House
Let the whole structure cool and firm first, then let your child take over. Press moss along the roof line, glue flat pebbles into a path from the door to the edge of the base, and set small flowers in a bottle cap by the door.
Buttons make surprisingly good furniture. Glue one on a flat stone for a chair, or two buttons side by side on a card for a bench. A plant label with a name on it, or a strip of ribbon tied to a stick, finishes the place off nicely.
If you want to paint it, wait. Paint sticks that are still green and damp will peel off later, while sticks that are properly dry take chalk paint and stay put. Leaving some bark showing is what gives the chippy look people chase.
Step 6: Add Finishing Details
Add a stick chimney, a tiny window cut from card with four strips of tape around it, or a fairy-sized doorstep made from a cracked acorn cap. Then do the final stability check: press gently on the roof and each wall, and re-glue anything that moves.
Put the house somewhere it will actually be found, not tucked on a high shelf. At the base of a tree, in a pot near a window, or on a woodland path works well. Children invent stories around it when it sits at their eye level.
Common Mistakes
Walls that lean or collapse. Shorten the wall sticks so they are no longer than the foundation rail, and glue the rails on first. Leaning walls almost always come from a base that is too small or a panel that was assembled before the glue had set.
A roof that slides off. Cap the ridge with one stick laid across the top, and add two sticks inside the roof line so the slopes have something to grip. Slap a small amount of extra glue along the ridge and leave it overnight.
A doorway too small for the fairy. Test the gap against the figurine before the glue dries. If you already sealed it, cut a new opening with scissors and fill the sides with extra sticks.
Glue strings everywhere. Hot glue leaves strings no matter how careful you are. Pull or snip them while the glue is still warm and soft, before it fully hardens.
Sticks that snap mid-build. That means the piece was hollow or already rotting inside. Break it in half before you use it and if it snaps, bin it. Brittle pieces still work as roof material or path edging, just not as a wall.
A build that cannot handle rain. Glue-only houses have a limited life outdoors. Expect a few weeks to a couple of months depending on sun and rain, keep a spare stick and the same glue type handy for repairs, and bring it in for the winter if you want it to survive.
If you prefer no hot glue at all, build outdoors from fallen branches by leaning them into a shelter shape and weighting the bases with stones. It will not be square, it will not last, and children will not care.
Frequently Asked Questions
What size sticks should I use for a fairy house?
For a small cottage, long sticks of about 15 cm form the frame, medium sticks of 8 to 12 cm make the walls, and anything shorter works for the roof. What matters more than exact length is that all the wall sticks are roughly the same size as each other. If your sticks are too long for the base, cut them to match or lay them the other way.
How do I keep a stick fairy house from falling apart?
The fix is a solid base plus tight glue joints. Glue every wall stick individually rather than brushing one long line across several at once, and hold each stick in place for a few seconds while hot glue sets. Keeping the base flat and the walls short relative to it stops most of the wobble.
Can I make a fairy house without a hot glue gun?
Yes, if you build from craft or popsicle sticks and school glue instead. Give the glue fifteen minutes between layers or work overnight so it dries fully, and you will get a house that holds together well enough for play. Another option is a no-glue outdoor shelter built by leaning fallen branches into a teepee shape and weighting the bases with stones.
How big should a fairy house be for my child?
Small is better. Build it so the doorway just clears your smallest figurine or doll, and the whole house fits in one hand. Miniature builds are also easier to move and rearrange, so a child can carry the fairy home from one room to another instead of asking you to carry it.
How long does it take to make a fairy house from sticks?
About an hour of building time, plus anywhere from twenty minutes to overnight for glue to dry. Gathering and sorting the sticks takes a third of that. Add twenty minutes more if you are painting, since paint needs a dry surface and drying time of its own before it will stick properly.
What natural materials can I use besides sticks?
Moss, lichen, small pebbles, seed pods, pine cones, acorn caps, flat stones, shells, feathers, dried flowers and bark all decorate a stick house well. Leaves are the easiest filler for gaps in the walls, and a small jar or bottle cap makes an instant flower pot. Nearly all of it comes out of the garden for free.
Conclusion
Start by sorting the sticks and picking the simplest shape. Lay the matching pieces out in piles, decide whether the doorway fits your figurine, and the rest is glue and patience.
Everything else is up to whoever is decorating. Sticks, moss, pebbles, buttons and whatever else is in the craft box will make a fine fairy house, and none of it needs to look like anyone else’s.