Tissue paper flowers take about ten minutes each and need nothing more than a few sheets of paper, scissors and a pipe cleaner. Stack, fold, pinch and fluff, and you have a bloom that never wilts. Children as young as five can make them with supervision.
If you only remember one thing, remember this: the whole flower comes from one stack of tissue paper. Cut the sheets to size, fold them back and forth like a fan, pinch the middle tight, trim the edges into petals, then pull each layer up toward the center one at a time. Everything else is decoration.
Table of Contents
- 1What You Need
- 2How to Make Tissue Paper Flowers Step by Step
- 3Choose and Cut the Tissue Paper
- 4Fold and Shape Each Petal
- 5Layer the Petals and Add a Center
- 6Attach the Stem and Finish the Flower
- 7How to Make Tissue Paper Flowers in Four Sizes
- 8Common Mistakes and Easy Fixes
- 9Frequently Asked Questions
- 10What kind of tissue paper works best for making flowers?
- 11How many sheets of tissue paper are needed for one flower?
- 12Can I make tissue paper flowers without glue?
- 13What can I use instead of a pipe cleaner for the stem?
- 14How do I keep tissue paper flowers from looking flat?
- 15Make Your First Tissue Paper Flower
What You Need
The starter list is short, and you can build a whole bouquet from almost nothing.
- Tissue paper — 5 to 8 sheets for one standard flower, 8 to 12 for a full peony look, 3 for a small quick bloom.
- Scissors — regular or craft scissors for adults, blunt-tip scissors for young children.
- A pipe cleaner or a 6 to 7 inch piece of floral wire, folded in half.
- Craft glue — optional, for the layered method and for attaching leaves.
- Green paper or a spare green sheet — optional, for leaves and a wrapped stem.
- Floral tape — optional, but it makes a stem look finished and holds the layers tighter.
Paper thickness changes the result. Standard gift tissue is thin and forgiving, which is what you want for the first attempt. Two thin sheets glued together behave like one thicker sheet and are easier to cut without tearing, so double up before you start if your tissue feels flimsy.
Glue strength matters more than people expect. A water-based craft glue dries clear, will not warp tissue paper if you use a thin line, and comes off your fingers with a damp cloth. Hot glue melts through tissue paper and leaves a shiny scar, so keep it away from this project.
For scissors, an adult cutting from a folded stack gets much straighter edges than a child cutting single sheets freehand. That single switch is usually the difference between a tidy flower and a lopsided one.
How to Make Tissue Paper Flowers Step by Step
Read the whole sequence once before you start. Each stage has a checkpoint, a visible sign that the previous one worked, and the checkpoints are where beginners usually rush.
Choose and Cut the Tissue Paper
Square, rectangular and round sheets all work, and the shape only changes the final silhouette. A square sheet gives you an even, balanced bloom. A rectangle gives longer petals that suit daisies and sunflowers. A round sheet, cut from a large roll, saves you trimming corners and gives a natural rounded petal for peonies.
Pick one size per flower and stick to it. Cutting 4 by 5 inch sheets for every flower in a batch is faster than judging each one by eye, and a matching set looks intentional when they sit side by side on a table.
For symmetry, fold the sheet in half, cut the half shape, open it out, and you have a matched pair. Small children do best with this shortcut because they are cutting one line rather than tracing a whole outline.
Fold and Shape Each Petal
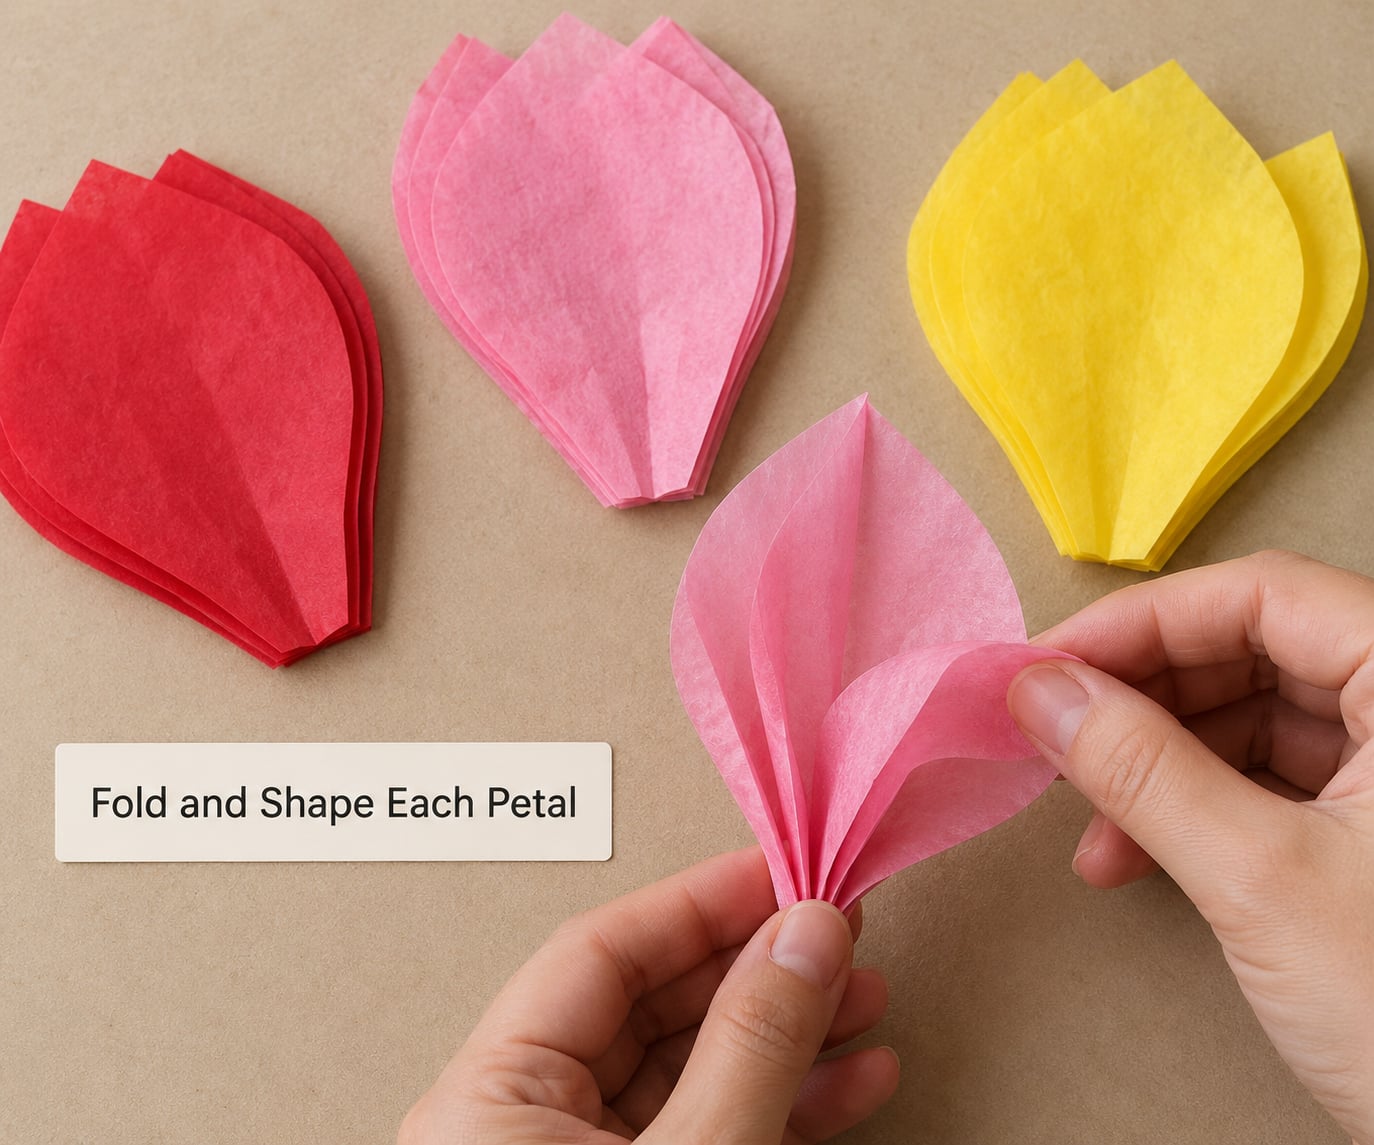
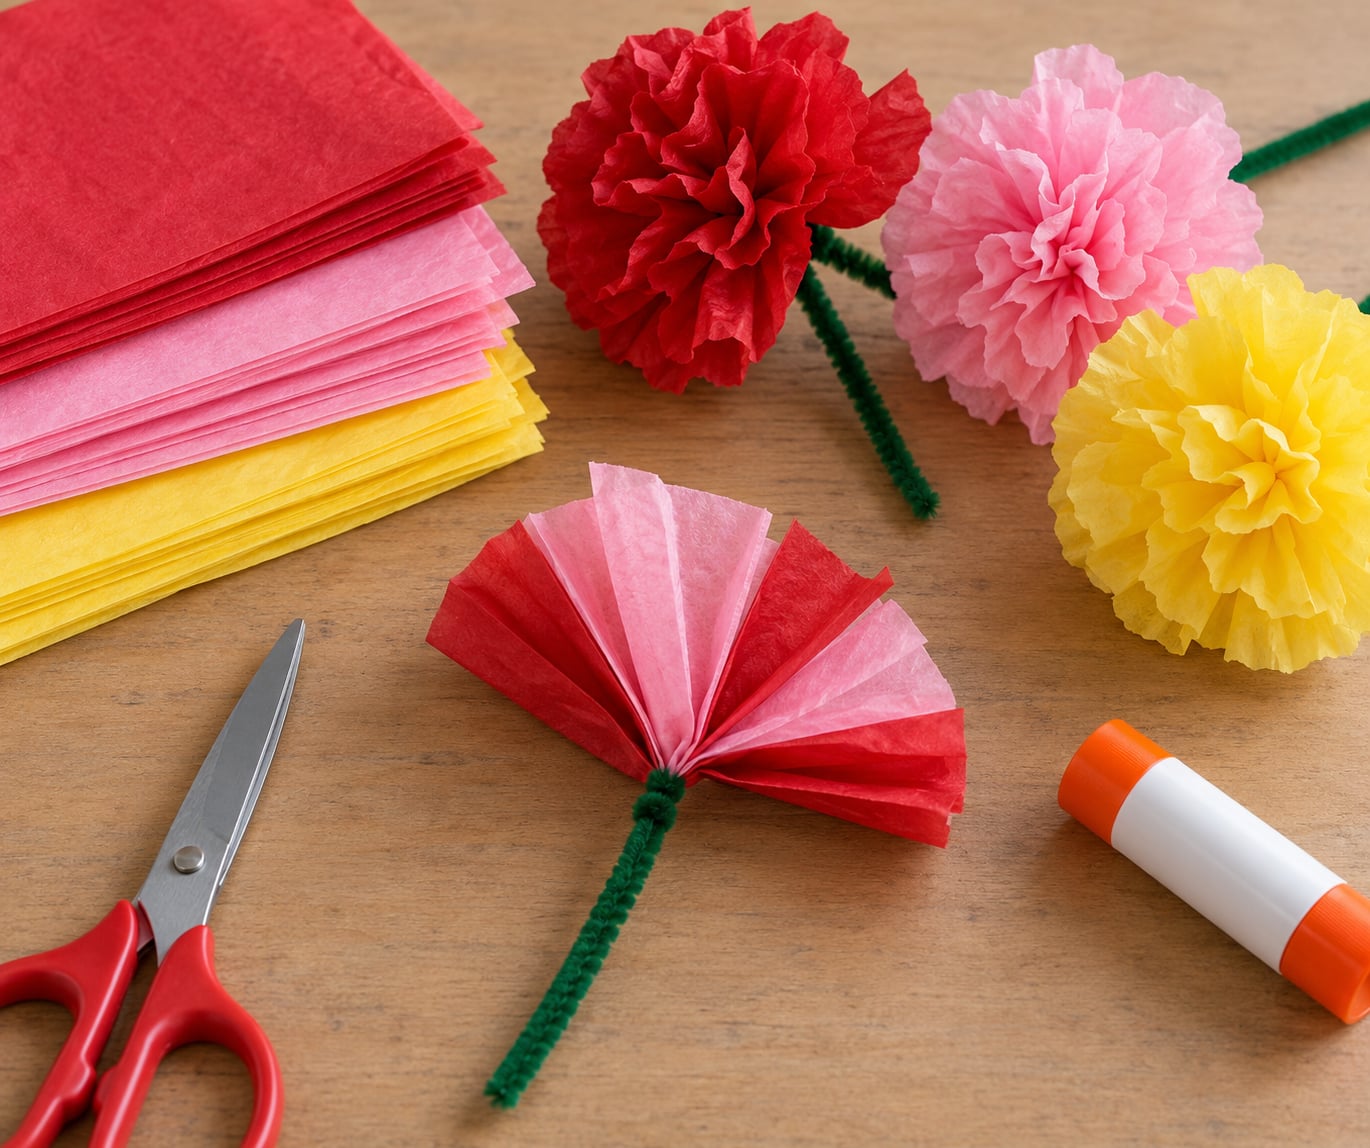
Accordion fold the stack. Align the sheets, then fold the pile back and forth in even sections about 1 inch wide, turning the stack over on each fold so the creases land in the same direction. Six to eight folds is the sweet spot. Narrower folds give more, thinner layers and a fluffier flower, and wider folds give a stiffer bloom that holds its shape better on a table.
Softening the crease is the step people skip and regret. Tissue folds stiff, and a hard crease stays stiff once the flower is assembled. Run a fingertip along each fold to relax it, or crumple the folded stack once in your hand and let it flatten out.
Curl or pinch the edges next. Fan the stack open until it forms a circle, then gently push the two edges toward each other until the layers compress into a rounded center. Rolling the edges of each sheet between your thumb and finger before you compress them adds a natural outward curl that survives the fluffing.
How to make tissue paper flowers with more depth: instead of folding every sheet together, fold three sheets, pinch them, and set them aside, then fold three more and layer them slightly offset. Offset layers mean the petals do not stack in the same place, so the flower looks looser and more natural.
Layer the Petals and Add a Center
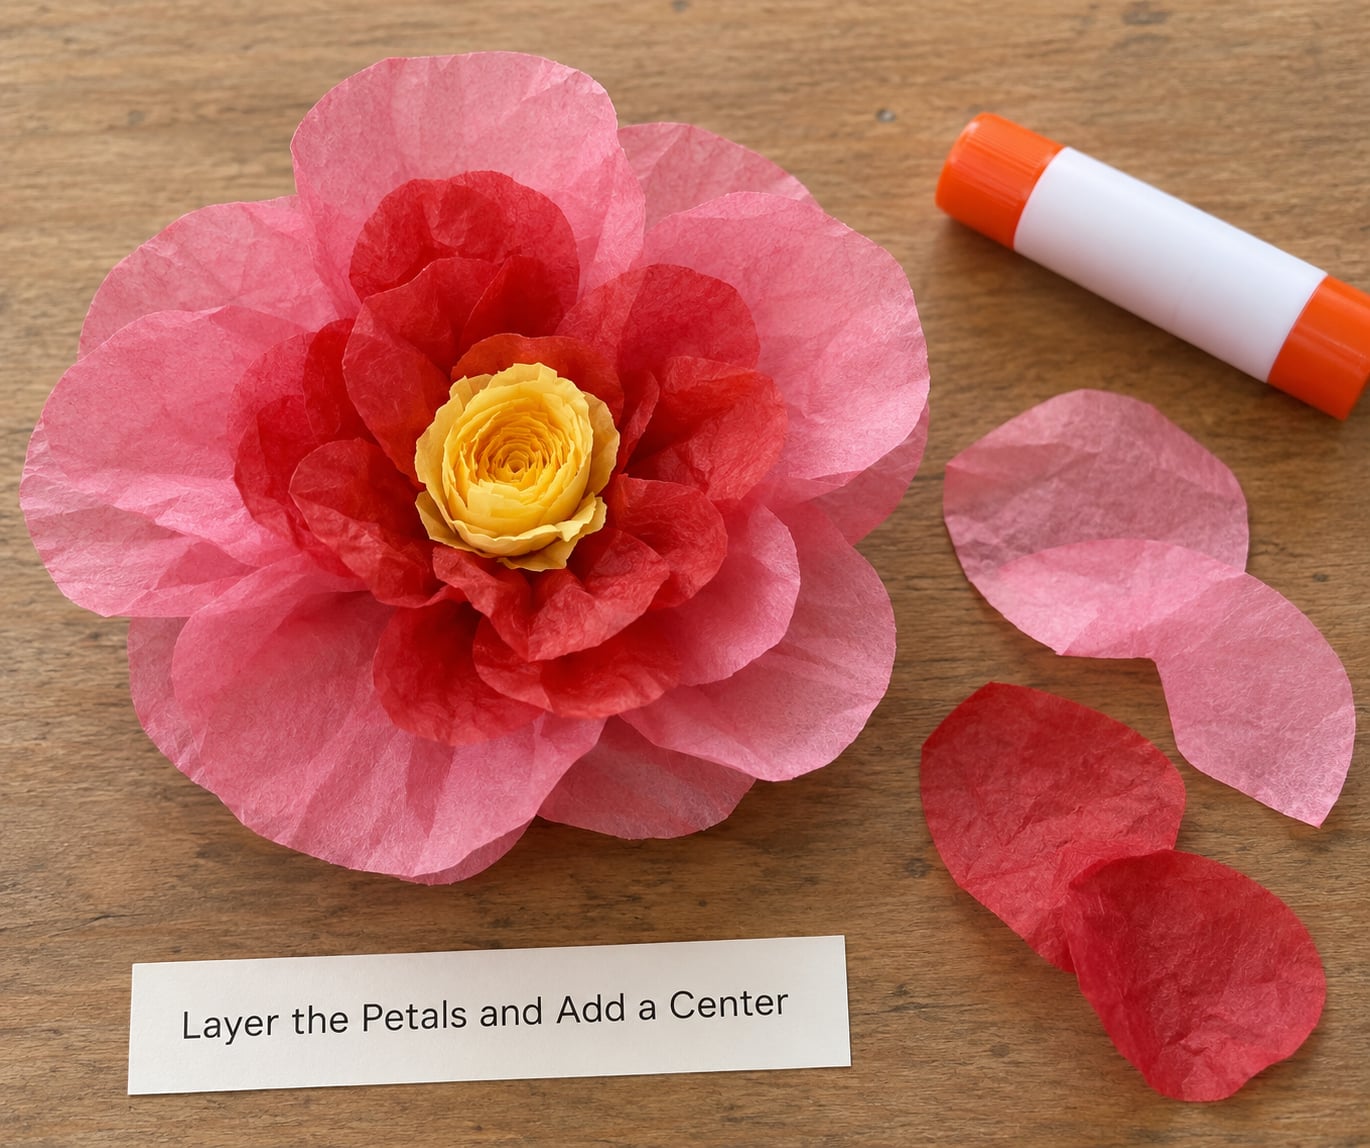
For a layered bloom, work from largest to smallest. The biggest petals form the outside, and each smaller group sits on top, turned a few degrees so the edges do not line up. That rotation is what stops a flower from looking like a dahlia stamp.
Use glue sparingly here. A thin line or five small dots along the back of each layer is plenty, and too much glue soaks through the tissue and makes it stiff and brittle once dry. Press each layer down for a few seconds rather than scrubbing it.
A contrasting center finishes it. Roll a small square of yellow, gold or orange paper tightly and tape or glue one end so it unrolls into a tight coil. Push it into the middle of the flower with the pipe cleaner tail, or lay the flower over it while the center is still soft.
The simplest trick to make the bloom look fuller is a white sheet. Place one white or cream sheet on top of the stack before folding. Every layer then shows a pale edge, and the flower appears to have depth that the paper does not actually have.
Attach the Stem and Finish the Flower
Lay the flower on its side, set the pipe cleaner or folded wire across the pinched center, then gather the paper around the wire and twist the wire tightly until the layers hold. Keep the pinch narrow. A wide, loose pinch gives a floppy flower that droops the moment you stand it up.
Twist the two free ends together to form a stem. Fold them to the length you want and wrap the join with floral tape, winding from the flower head down the stem for a neat finish. Without tape, the twist alone is usually strong enough.
Now pull the layers. Hold the flower by the stem, and lift one layer at a time toward the center with your fingertips, moving around the flower as you go. Work slowly. The layers should separate and stand up without tearing, and any layer that tears has almost certainly been pulled faster than the paper can follow.
Finish with leaves if you want them. Cut two or three leaf shapes from green paper, curl them gently over a pencil, and glue them where the head meets the stem. Pinching the top of the stem flat gives the flower a slight, believable nod.
How to Make Tissue Paper Flowers in Four Sizes
One method covers every size. What changes is the sheet measurement and how many you stack.
- Mini bloom — 3 sheets cut to 3 by 4 inches. Fits a cupcake topper or a small jar.
- Standard — 5 to 8 sheets cut to 4 by 5 inches. The everyday flower, good for gift toppers and centerpieces.
- Large — 8 to 12 sheets cut to 6 by 8 inches. A full peony look with real depth.
- Giant — 10 to 12 sheets of 12 by 12 inch paper. Party backdrops, aisle markers and photo-booth props. Mount each one on a piece of cardboard before folding so it holds its own weight.
One pack of 20 sheets makes roughly three standard flowers at 8 sheets each, or about 25 mini blooms at 3 sheets each. Buy two colors if you plan a full bouquet and alternate them.
Common Mistakes and Easy Fixes
Almost every disappointing tissue paper flower comes down to one of six things.
- Torn tissue when fluffing. This is the most common problem by a distance. It happens when layers are pulled instead of lifted, or when the paper was creased too sharply. Work one layer at a time with slow fingertip pressure, and use a lighter paper with more sheets if tearing continues.
- A flower that looks flat. Add more sheets, narrow the folds, or pull each layer a little higher. Pinching the center too loosely is the usual culprit, so tighten the wire before you fluff.
- A lopsided center. The wire sat off-center or too short. Hold the pinched stack upright on the table, look at it from directly above, and mark the center with your fingertip before adding the wire.
- A weak or bending stem. Craft wire for anything that must stand on its own, and wrap the head-to-stem join in floral tape. A pipe cleaner twists easily but flexes, so it suits flowers that sit in a jar rather than stand in a vase.
- Too much glue. Tissue soaked with glue dries stiff, and the petal edge tears later. Wipe any squeeze-out with a damp finger before it dries.
- A stiff, papery bloom. Crumple the folded stack once in your hand before pinching, and use 1 inch folds rather than 2 inch ones.
Two shaping habits do most of the work. Soften every crease before you pinch, and rotate each layer slightly as you fluff. Skip either one and the flower reads as folded paper instead of a bloom.
Finished flowers keep indefinitely if you store them dry and shaded, loosely boxed rather than sealed. A box traps humidity, and damp tissue paper goes limp and then tears. Out of direct sun, a bloom will look the same next year, which is exactly why people keep making them.
Frequently Asked Questions
What kind of tissue paper works best for making flowers?
Standard gift tissue paper works best because it is thin enough to fold crisply but strong enough not to tear when you pull the layers apart. Double-glue sheets behave like one thicker sheet and are easier for children to cut. Avoid anything labelled recycled-heavy or waterproof, since those fibres crease unevenly and split along the fold.
How many sheets of tissue paper are needed for one flower?
Use 5 to 8 sheets cut to 4 by 5 inches for a standard flower, 8 to 12 for a fuller peony look, and just 3 small sheets for a mini bloom. More sheets means more layers and a rounder, less flat result. A 20-sheet pack makes about three standard flowers or roughly 25 mini blooms.
Can I make tissue paper flowers without glue?
Yes. The accordion-fold method needs no glue at all, because the pipe cleaner or wire pinches and holds every sheet at once. Glue only comes in when you build the flower from separate petals, or when you attach leaves and a rolled paper center. Both approaches work well.
What can I use instead of a pipe cleaner for the stem?
Floral wire is the sturdier swap and gives you a longer stem that holds its shape in a vase. A rolled strip of green paper works for a soft stem, and a thin wooden skewer is fine for mini blooms and cupcake toppers. Plain twist ties from the hardware drawer do the job for short stems.
How do I keep tissue paper flowers from looking flat?
Add sheets, narrow your folds to about 1 inch, and tighten the pinch at the center before you fluff. Then lift each layer up toward the tie individually instead of pushing the whole fan open at once. Rotating each layer slightly as you go also stops the bloom from reading as one flat disc.
Make Your First Tissue Paper Flower
Start with four to six sheets cut to 4 by 5 inches, accordion fold them in 1 inch sections, pinch the middle around a pipe cleaner, round the edges, and pull the layers up one by one. That is the shortest route to a flower that looks finished.
Once that one feels easy, vary the colors, the sheet sizes and the center. A second batch in an ombre stack of three shades, or a set of giant blooms for a party wall, takes the same ten minutes per flower. Keep them dry and out of the sun, and next season you will already have the decor sorted.