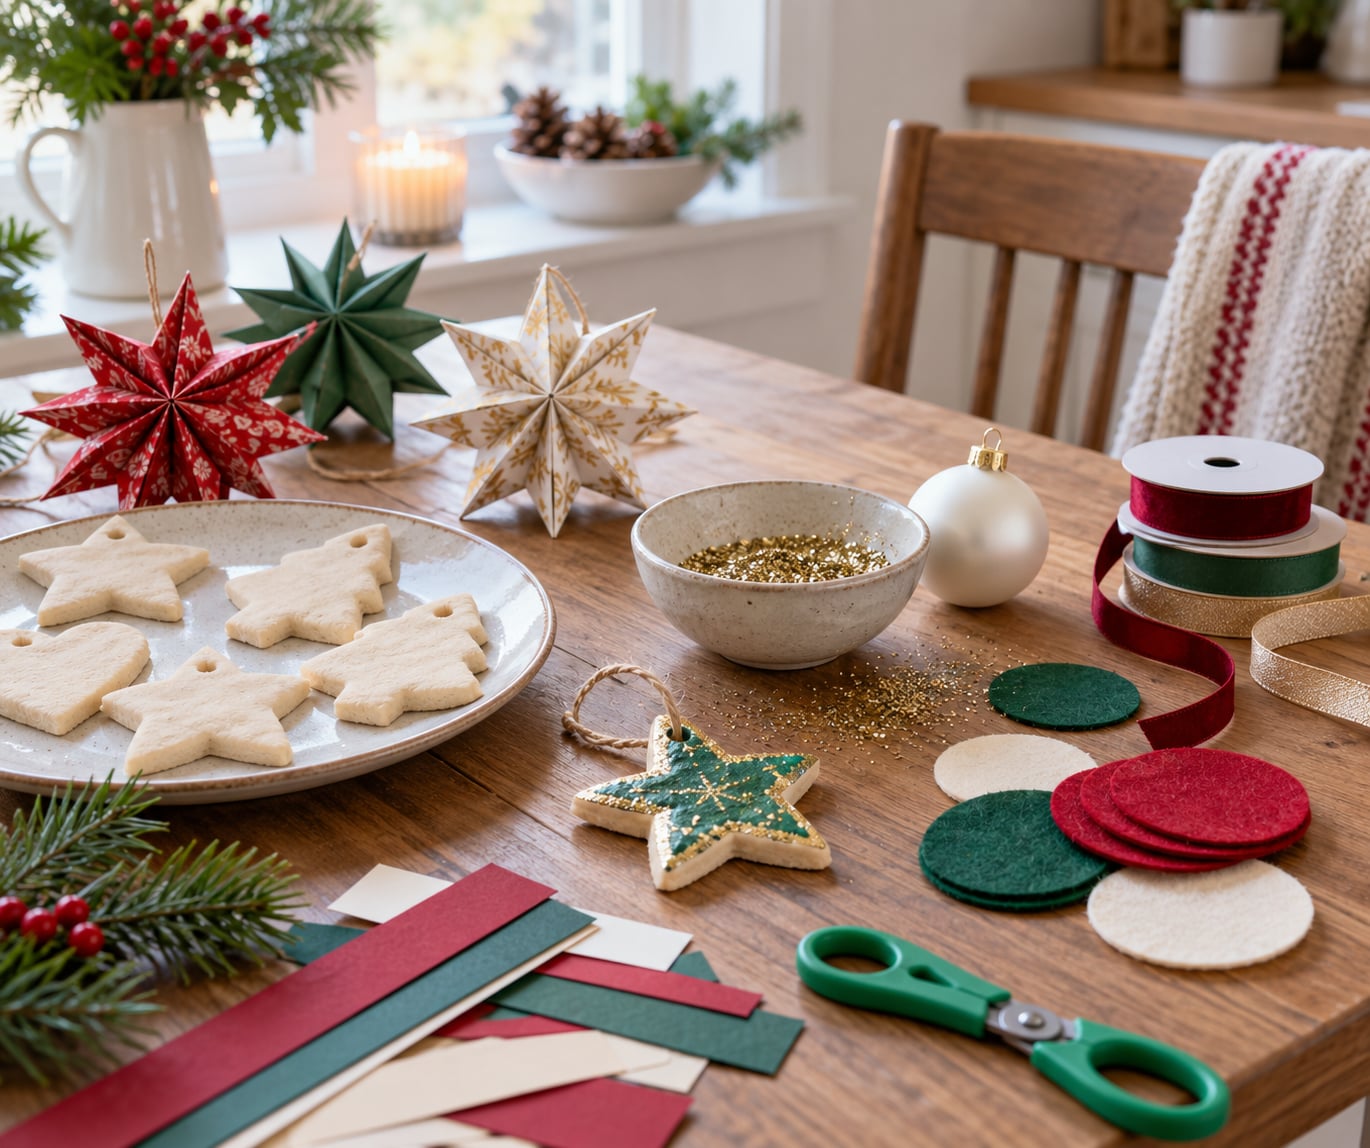
How to make Christmas ornaments with kids is mostly about picking a material your children can actually finish: folded paper stars take about 20 minutes and never break, painted dough ornaments take two days because of drying time, and felt baubles take 30 minutes and survive a decade in a storage bin. Every project below works with supplies you already have or can pick up in one trip, and each one ends with a real ornament rather than a lump of glue.
I have done this with kids from two years old to twelve, and the pattern is consistent: the ornament that gets finished is the one where the child makes every decision themselves and the adult handles only the parts that need adult hands. Pick one project per session rather than three, put a sheet of newspaper or a cheap tablecloth down first, and let the glue dry before anyone asks to hang it.
Table of Contents
- 1What You Need
- 2How old do children need to be for each material?
- 3Step-by-Step
- 4How to Make a Folded Paper Star Ornament
- 5How to Make Painted Dough Ornaments
- 6How to Make a Felt Christmas Ornament
- 7Common Mistakes
- 8Frequently Asked Questions
- 9What is the easiest way to make Christmas ornaments with kids?
- 10What materials are best for homemade Christmas ornaments with children?
- 11How long do homemade dough ornaments take to dry?
- 12Can young children make these ornaments without using scissors or glue?
- 13How can I personalize homemade Christmas ornaments for family members?
- 14Can paper or felt ornaments be used outside?
What You Need
The base supply list for all three projects is short. Everything else is decoration, and decoration is where kids get to choose.
- Paper and cardstock. Thick cardstock holds a fold; thin printer paper tears at the points. Scrapbooking card, the back of a cereal box flattened, or a brown paper bag all work.
- Felt sheets. Wool or craft felt, one color per ornament, plus a contrasting piece for the hanging loop.
- Plain baubles or flat wooden blanks. Unfinished wood shapes and cardboard circles give you a base when you want a painted surface. Clear plastic bulbs work too.
- Flour, salt and water for the dough, plus optional applesauce and ground cinnamon.
- Paint. Acrylic for wood and cardstock, tempera or washable paint for hands and dough. Acrylic rinses with warm water if you catch it fast.
- Child-safe glue. White glue for paper and felt, a glue stick for thicker cardstock. Skip hot glue guns around anyone under 12.
- Scissors, string, ribbon, buttons, yarn and pom poms. Plus a hole punch, tweezers and a blunt tapestry needle if a child is ready to sew.
Substitutions are easy. No felt means cut shapes from cardstock and glue two layers together; no wooden blanks means a folded paper shape works as the whole ornament. Salt dough can be replaced with any air-dry clay, which needs no oven at all and dries in roughly the same time.
Do a ten-minute setup before anyone starts. Cover the table, put glue sticks and scissors within reach but not within grabbing distance, and set out only the colors you are using. Fewer choices means fewer stalls.
How old do children need to be for each material?
Ages two to three: torn paper, finger paint on cardstock, pom poms glued with a stick, handprints pressed into clay. Nothing cut with a blade, nothing small enough to swallow, no beads or buttons loose on the tree.
Ages four to six: scissors with rounded tips, folded paper stars, simple cookie-cutter shapes in dough, felt with glue instead of stitches.
Ages seven and up: sewing with a blunt needle, paint swirling inside clear bulbs, and anything involving a hot glue gun handled by an adult.
Small parts are the real safety limit. Beads, jingle bells and loose buttons swallow easily before a fourth birthday, so skip them or glue them on permanently.
Step-by-Step
How to Make a Folded Paper Star Ornament
This is the fastest project here and the one toddlers can finish with help. A five-pointed star from a single strip of paper takes one cut and six folds.
- Cut a strip of cardstock about 4 inches long and 1.5 inches wide for a star roughly 4 inches across. Longer strips make bigger stars.
- Fold one short end over at an angle to make a point, then keep folding the strip over on itself at the same angle, as though you are wrapping a present without tape.
- Stop when only a short tail is left. Flatten the whole strip so you can see a five-point star and one overlapping flap.
- Glue the flap down and pinch the five points until they are sharp. Let it sit flat under a book for 10 minutes so it does not spring open.
- Decorate with glue-on glitter, a dot of paint, or a small pressed leaf before threading.
- Poke a hole through the top point with a sharp pencil, tie a 10-inch loop of string or thread a ribbon, and hang it.
A good one looks crisp with five separate points and no visible gap where the paper overlaps. If the points droop, the paper is too thin, or a child folded the angle differently on one turn.
Success indicator: it should still look like a star after you pick it up by the string. If it collapses, glue the flat back surface as well.
How to Make Painted Dough Ornaments
Dough ornaments are the ones children keep for years, because they carry a handprint or a first attempt at a name. They are also the slowest, so start them at least three days before you want them on the tree.
Mix 2 cups flour, half a cup salt and three-quarters cup of water for a batch of about 20 small ornaments. Add a few drops of food coloring, or a spoonful of applesauce and a teaspoon of ground cinnamon for a scented batch that smells like the kitchen in December.
- Knead the dough until it stops cracking, then let it rest under a cloth for 20 minutes.
- Roll to about a quarter inch thick and cut with cookie cutters, or hand-press a small disc for a toddler to press a handprint into.
- Poke a hole near the top with a straw or a chopstick before the dough bakes, not after.
- Have the child paint now, on the dough, while it is still soft. Paint applied after baking peels off.
- Bake at 325°F (163°C) for 30 minutes. An adult handles the oven and the cooling rack.
- Cool completely, then thread ribbon or twine through the hole and seal the surface with a clear sealant or a thin coat of glue.
An adult must always handle the oven and any sharp tools, and the ornaments need to reach room temperature before a string loop goes through the hole. Warm dough cracks when you thread it.
A well-made dough ornament is hard all the way through, warm, and dense in the hand. Thin patches near the edges mean the dough was rolled too thin, and those areas crack first.
For air-dry clay, skip every baking step and let pieces dry on a flat surface for 24 to 72 hours depending on thickness. Turn them halfway through. Air-dry clay is a cleaner choice for a playdate because there is no hot oven in the room, and Model Magic-style lightweight clay dries flatter and seals easier than heavier clay.
How to Make a Felt Christmas Ornament
Felt baubles are the sturdiest kid-made ornament and the best one to make in bulk. A circle, a bauble shape and a small tree are all the same construction, so one template serves the whole afternoon.
- Draw your shape on paper. A circle about 3 inches across is the easiest for small hands to cut.
- Pin the paper template to two layers of felt and cut around it with child-safe scissors.
- Decorate before gluing: buttons for eyes, a felt triangle for a hat, a scrap of contrasting color for a scarf.
- Glue the two layers together with white glue around the edge, leaving the top inch open.
- For a stitched version over age 7, sew around the edge with a blunt needle and yarn instead of glue. Poke two matching holes at the top and tie a loop between them.
- Let the glue dry flat for several hours before hanging.
For children who cannot sew, glue alone is fine. Press the layers together with a book on top for an hour to make the shape secure, and put the ribbon loop through the open edge before the last gluing.
A finished bauble should feel flat at the seam with no felt edge lifting, and the hanging loop should take weight without pulling the layers apart. If it flexes, add a strip of cardstock inside as a stiffener.
Common Mistakes
Most failures come from the same handful of causes, and each has a fix you can apply during the project rather than after.
Torn paper at the fold lines. Thin paper splits at the points where you fold the strip. Use cardstock, or score the fold line with a ruler edge and an empty pen before folding.
Ornaments coming apart on the tree. Hanging loops break because the hole is too close to the edge. Leave a quarter inch of margin around every hole, and glue the loop knot itself onto the ornament so the pull is on the glue, not the paper.
Paint bleeding or not sticking. Paint bleeds when it is too thick or applied wet onto wet dough. Let the first layer dry fully before the second, and thin acrylic with a few drops of water so it behaves like ink.
Cracked or puffed dough. Cracks mean the dough was rolled too thin or undercooked. Puffing means it was baked hot and fast. Use a quarter inch thickness and a low oven for the full 30 minutes.
Dough ornaments molding in storage. Scented applesauce and cinnamon dough need a full coat of sealant, and they belong indoors rather than in a damp shed. Fragrance also fades over a year or two.
Weak hanging loops on thin ornaments. Paper and felt loops snap under their own weight by January. Use thread rather than ribbon on anything light, and double the loop.
A few habits fix most of this. Work within what each child can manage alone, keep one adult in charge of hot tools and sharp blades, and date ornaments on the back with a fine-tip pen or a rubber stamp rather than a thick marker that bleeds.
For storage, wrap finished ornaments in tissue and stand them upright in a labeled box rather than piling them. A shoebox per child per year is the simplest system, and it turns into a tradition you can open again.
Frequently Asked Questions
What is the easiest way to make Christmas ornaments with kids?
Folded paper stars are the easiest. A child cuts one strip of cardstock, folds it into five points and glues the flap. The whole project takes about 20 minutes, needs no drying time, and cannot break. It also suits ages three and up, with an adult handling the hole punch for younger children.
What materials are best for homemade Christmas ornaments with children?
Cardstock, felt, plain wooden blanks and salt dough cover most needs. Acrylic paint sticks best to wood and cardstock, washable tempera works for hands and dough, and white glue holds paper and felt together without a hot glue gun. Skip beads, jingle bells and loose buttons for children under four.
How long do homemade dough ornaments take to dry?
Baked salt dough ornaments cool within an hour and are firm the same day. Air-dry clay needs 24 to 72 hours depending on thickness, so turn pieces halfway through. Either way, thread the ribbon loop only once the ornament is fully cool and hard, otherwise the hole can crack.
Can young children make these ornaments without using scissors or glue?
Yes. Tear pre-cut paper shapes and let children press a handprint into a soft dough disc. Felt pieces can be secured with double-sided tape instead of glue, and pom poms stick to cardstock with a glue stick a toddler can manage alone. Anything sharp stays an adult job.
How can I personalize homemade Christmas ornaments for family members?
Write the name and year on the back with a fine-tip pen, or press a rubber stamp for a neater look. A thumbprint in paint inside a clear bulb, a photo cut to a circle, or a fabric-softener sheet tucked inside a felt bauble all add a personal note without extra craft time.
Can paper or felt ornaments be used outside?
Not well. Paper dissolves, felt stretches and both fade in wet weather. For an outdoor display, use plastic baubles, sealed dough ornaments or pine cones on the porch instead, and bring paper and felt ornaments indoors where they stay dry and last for years.
Start with the paper stars, because they finish in one sitting and a finished ornament on the tree on the first afternoon keeps everyone willing to come back for dough the next day. Pick one project, protect the table, date the back of each one, and box them up by year.