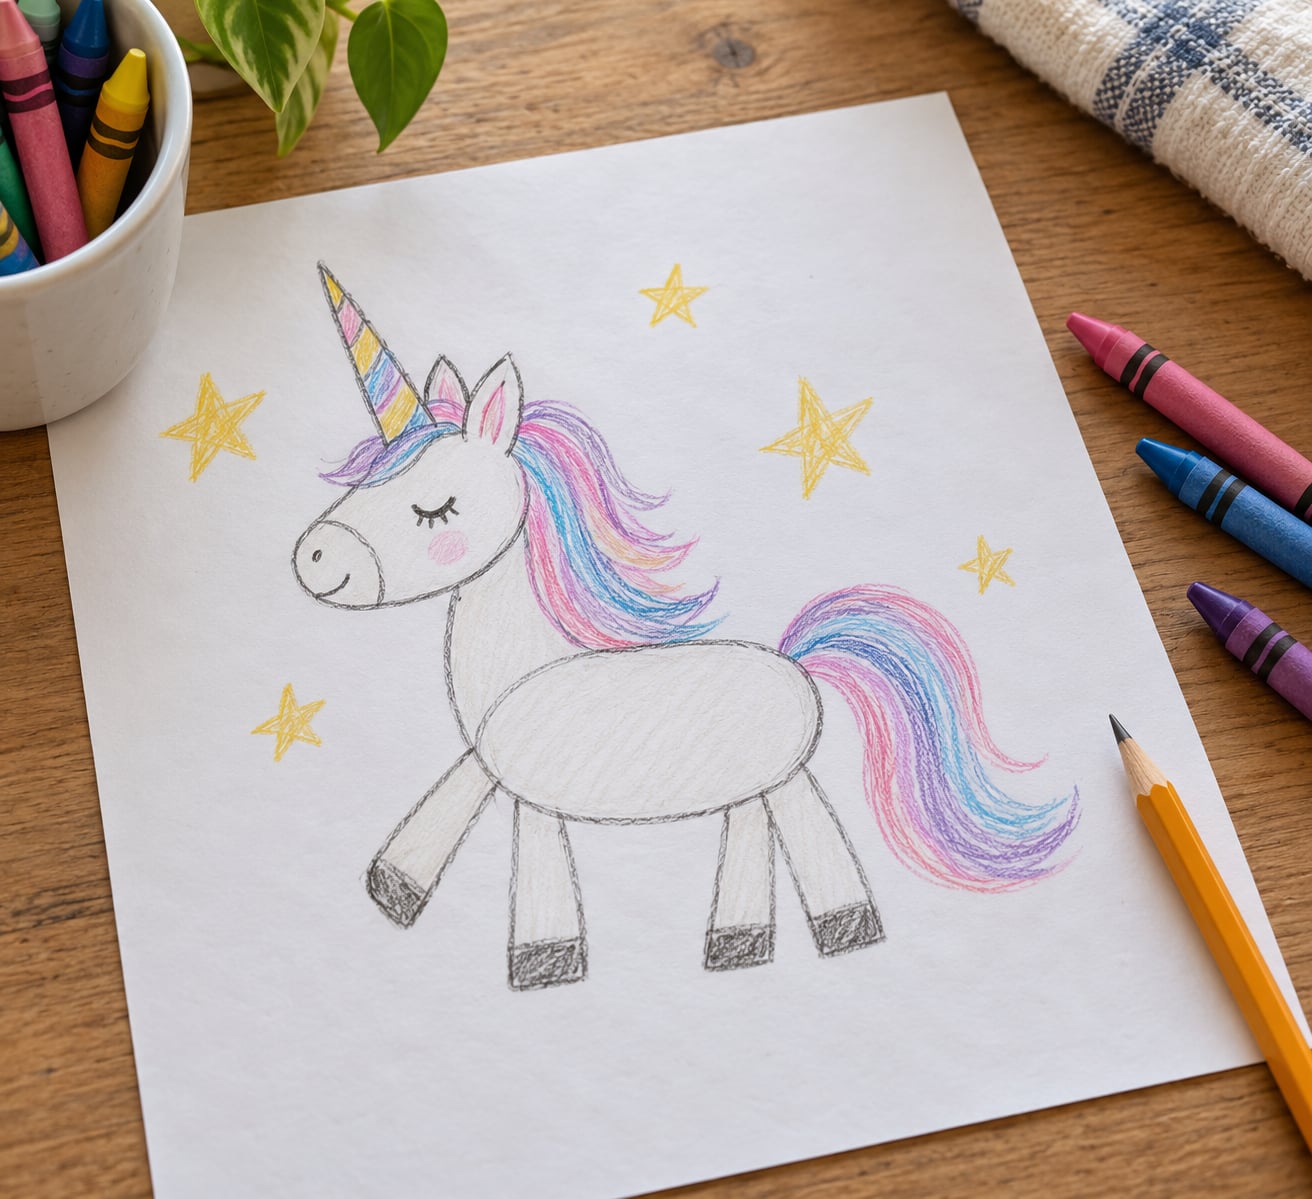
Learning how to draw a unicorn for kids is simple once you break the picture into three shapes: an oval body, a circle head, and a triangle horn. A child can finish one in about ten minutes with paper, a pencil, and an eraser, and the same method works from about age three all the way up to eight.
Most of the frustration in children’s drawing comes from asking them to invent a whole animal at once. Shapes remove that problem. This guide walks through the steps in order, then covers supplies, color ideas, and what to do when the legs come out lumpy.
At a glance: six steps, one oval head, one circle body, four legs, a triangle horn, and roughly ten minutes for the first attempt. Ages 3 and up can do it; ages 7 and up can add texture, a background, and a second character.
Table of Contents
- 1What You Need
- 2Step-by-Step: How to Draw a Unicorn for Kids
- 3How to Draw a Unicorn for Kids: Start with the Head
- 4Add the Horn and Face
- 5Draw the Body and Legs
- 6Add the Tail and Hooves
- 7Add Color and Magical Details
- 8Easy Ways to Make Your Unicorn Different
- 9Common Mistakes
- 10Common Drawing Mistakes and Easy Fixes
- 11Frequently Asked Questions
- 12Can a toddler follow the same drawing method?
- 13How long should it take to draw a unicorn for kids?
- 14What colors are easiest for a beginner unicorn drawing?
- 15Should children erase the light pencil lines before coloring?
- 16How can I turn this into a simple drawing lesson for elementary students?
- 17Conclusion
What You Need
You do not need an art store for this. Everything below is either already in a school bag or costs a couple of dollars at a supermarket checkout.
- White paper. Plain printer paper or a sketchbook page both work. Give a child under five the largest sheet you have, because small paper makes small drawings and small drawings get abandoned halfway.
- A pencil. A standard HB pencil is right. A sharpened point gives cleaner construction lines, but a dull one is fine for the first pass, since the lines get erased later anyway.
- An eraser. A vinyl or gum eraser lifts pencil without tearing the paper, which matters more than it sounds when a five-year-old changes their mind three times.
- A black marker or fine pen. Optional in theory, essential in practice. Tracing the final outline in dark line is the moment most children decide their drawing is good, and it hides a lot of wobbly pencil.
- Something to color with. Crayons suit small hands best. Colored pencils give a neater result and suit older children who want to try shading. Markers are the most fun and the least forgiving.
Two optional extras help. A ruler makes the leg lines straighter on a drawing that will hang on a wall. Tracing paper, or a lightbox underneath a sheet, lets a child trace the shapes instead of guessing where to put them, which is a good version for a nervous drawer or a very small hand.
Step-by-Step: How to Draw a Unicorn for Kids
The easy way to draw a unicorn for kids is to sketch light guide shapes first, then connect them, then erase and ink, then color. Nothing in this method needs straight lines or a steady hand. Each step stands on its own, so a child can stop after the head and finish later.
How to Draw a Unicorn for Kids: Start with the Head
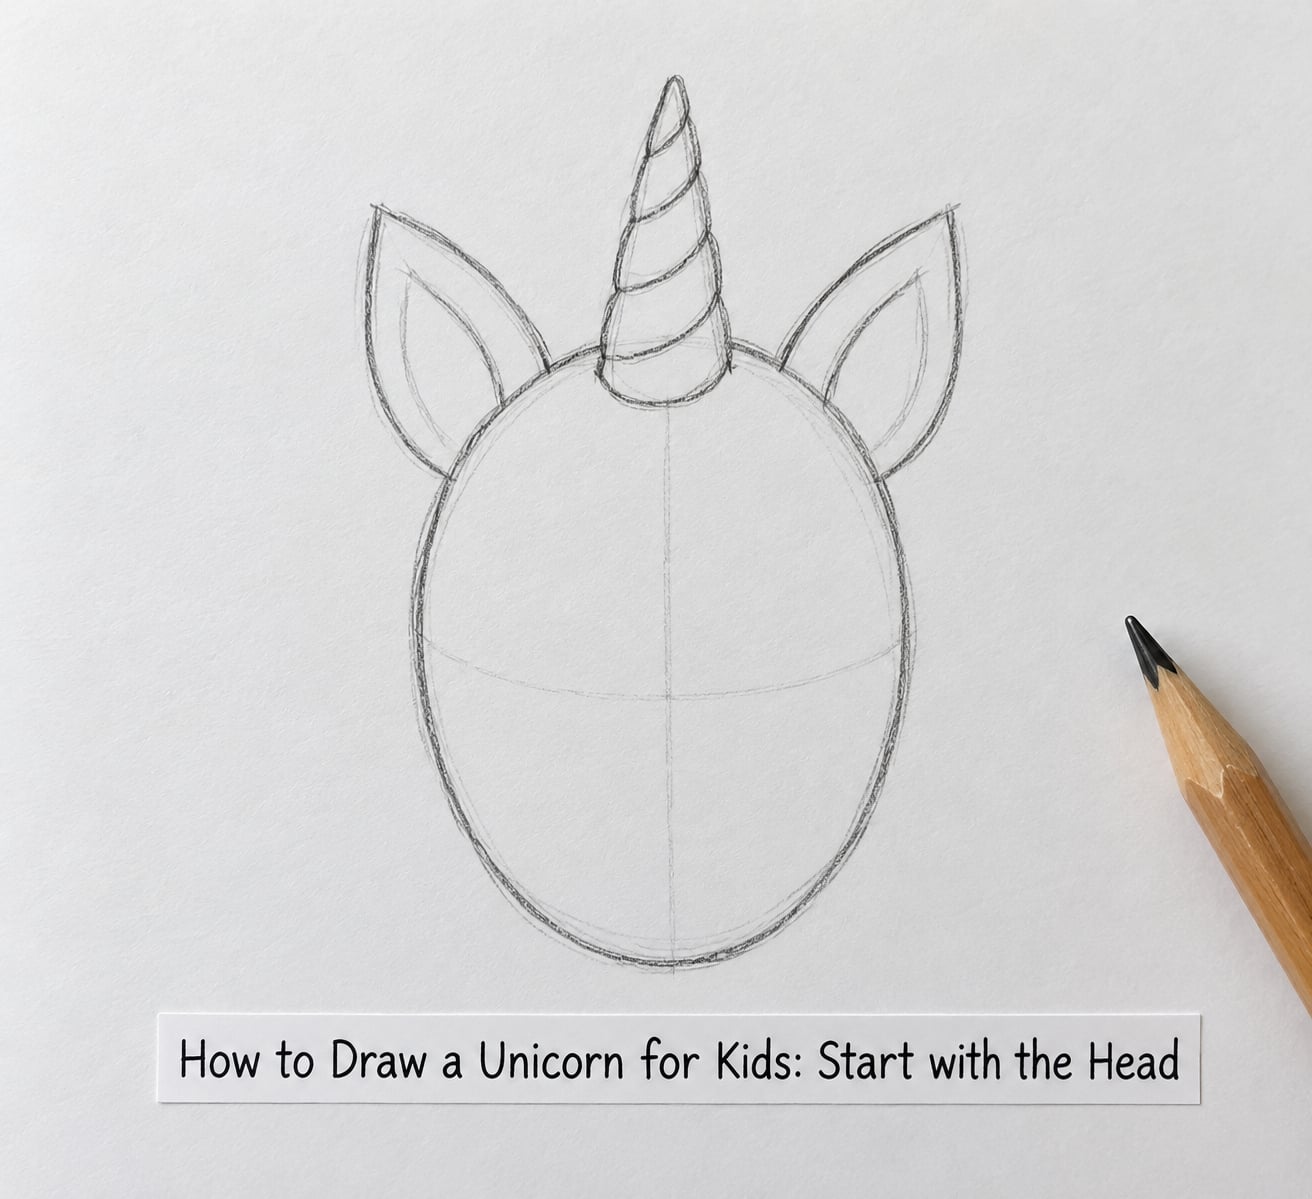
Draw an egg shape for the head. Leave the narrow end at the top, because that is where the ears and horn will sit. Make it big relative to the page, since a large head reads as cute and a small head reads as serious.
Add two ears as small triangles on the narrow end, one on each side. Before moving on, check that the head takes up about a third of the space you want the finished unicorn to fill. If it fills the whole page, there is no room for a body later.
Add the Horn and Face
Lightly mark a short horizontal line across the top third of the head. That is the forehead line, and it tells you where the horn belongs. Draw the horn as a narrow triangle rising from the middle of that line, then add two or three diagonal stripes inside it.
Now the face. Two large circles for eyes sit on either side of the center, and a few long lashes above them make the expression friendly. Add a tiny oval for the muzzle, a small curved line for the smile, and two dots for nostrils.
Optional details change the mood more than you would expect. Blush circles on the cheeks and three whiskers on each side of the muzzle give a softer, younger look. Closed eyes with long lashes instead of round ones give a calm, sleepy unicorn.
Draw the Body and Legs
Move down the page and draw a large oval or a bean shape for the body. Tilt it slightly so the pose feels like it is moving rather than standing like a table. Leave a gap between the head and the body for the neck.
Connect them with two curved lines that widen from head to chest. That widening is what makes an animal look like a horse rather than a dog with a mane.
Add four legs as slightly bent lines dropping from the body, then thicken them at the bottom into small rounded rectangles. Even feet give a cute, toy-like result and are much easier for small hands than detailed hooves.
Add the Tail and Hooves
The tail is a long curve flowing out from the back of the body, ending in a point or three soft points. The mane follows the same idea along the neck, starting at the ears and flowing down to the shoulder.
Fill in the hooves with a darker pencil or marker, or leave them plain if the coloring step is next. Tufts of hair over the tops of the hooves, drawn as three short lines, make a plain leg look finished.
Give the mane and tail movement with direction. Curving the strokes the same way as the body makes the whole picture feel like it is turning, and it takes about ten seconds of work.
Add Color and Magical Details
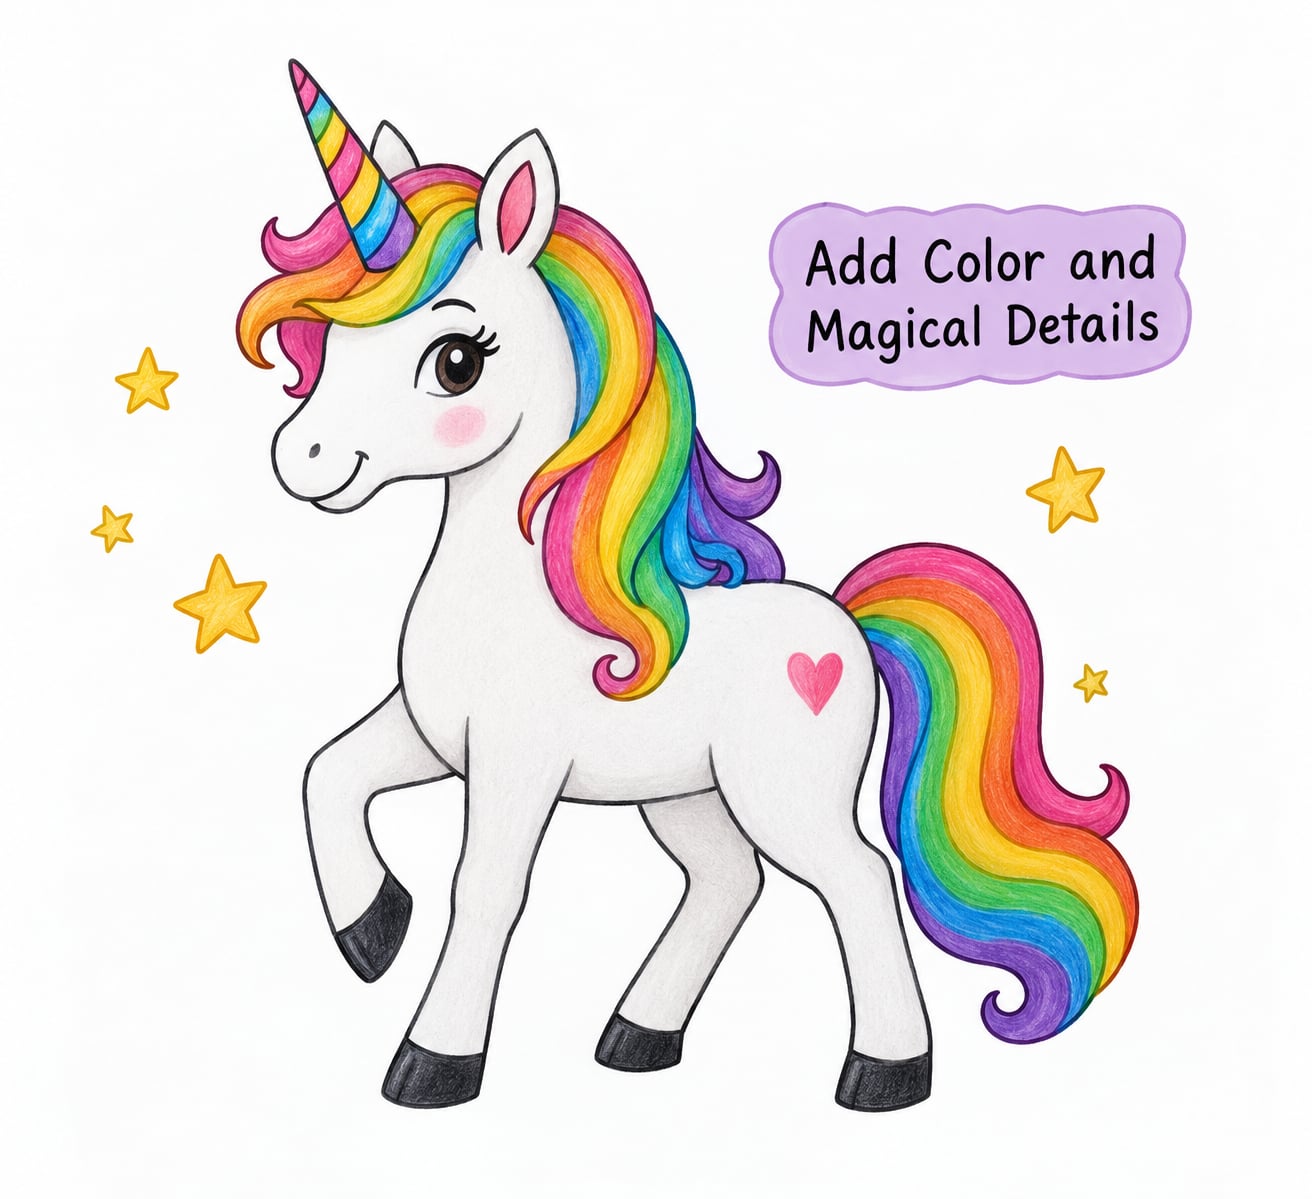
Color from light to dark. Start with the body, then the mane and tail, then the smallest details like nostrils and eyelashes, and leave the darkest colors for hooves and outlines last.
Try one of these named palettes for a beginner unicorn drawing:
- Classic: white body, pastel pink, lavender and baby blue mane and tail, gold horn.
- Rainbow: one color per stripe of mane, ordered the same way every time.
- Galaxy: deep purple body with white speckles and a pale blue mane.
- Ice: pale blue body, white and silver mane, icy blue horn.
Finish with small additions in the background: stars, clouds, a rainbow arch, or a few dots that read as magic. Leave some white space around the unicorn so the shape stays the focus.
Easy Ways to Make Your Unicorn Different
Once the base drawing works, variations take almost no extra time. A sitting unicorn is just the same shapes with the legs folded under the body. A jumping unicorn has all four legs off the ground and the head tilted up.
Other easy changes: a sleeping unicorn with a closed eye and small curved lashes above it, a peeking unicorn drawn as just the head rising over a hill or a wall, and a baby unicorn drawn small with a bigger head in proportion to the body.
For children who want a real challenge, add a second character, a friend such as a cat, a rabbit, or a small dragon standing beside the unicorn. Two figures that overlap slightly look more natural than two that sit far apart.
Common Mistakes
Most problems have one cause: the guide shapes were drawn too small or too low on the page. If the head and body already touch the edges of the paper, there is nowhere left for the horn and mane to go, and the drawing reads as cramped.
The second common issue is a horn placed at the very top of the head. A horn that starts at the forehead line, halfway between the ears, looks attached. A horn that starts above the head looks pasted on.
Stiff straight legs are the third. A slight bend at the knee makes a leg look like it can hold weight, and it is a one-line fix while the pencil is still in the hand.
Common Drawing Mistakes and Easy Fixes
Here is a short troubleshooting list to read alongside the drawing, or after, when something looks off.
The body is too small for the head. Draw a light circle around the head and the body together, then see whether the head fills more than half of it. If it does, redraw the body a little larger.
The horn is crooked or pointing sideways. Erase it and start again from the center of the forehead line, going straight up in one movement rather than turning the wrist. A ruler beside it helps.
The legs are lumpy or uneven in length. Add a faint horizontal guide line across both back legs so the knees land at the same height. Draw the two legs on each side one after another, not one side then the other.
The face is crowded. Fewer features look better than squeezed ones. Two eyes, a muzzle, a smile and nostrils is plenty. Erase anything that does not read as a feature at arm’s length.
Color went outside the lines. This is normal and not worth fixing. Color the outline itself in the same color as the fill and the edge disappears, which is a good trick to teach before the next drawing.
Two habits keep results steady. Pause between shapes instead of drawing everything in one long line, and press the pencil lightly so guide lines stay erasable. And let imperfect results stand: the goal is a finished drawing they recognize as theirs, not a clean outline.
Frequently Asked Questions
Can a toddler follow the same drawing method?
Yes, with two adjustments. A toddler usually handles the circle head and the triangle horn, then needs a grown-up to sketch the body and legs as one shape. Keep the paper large so there is room to move, and stop the session while it is still going well rather than pushing for the finishing details.
How long should it take to draw a unicorn for kids?
Allow about ten minutes for the first attempt with a child aged four to six, and fifteen minutes if coloring is included. An older child working slowly with colored pencils may take half an hour. Short sessions work better than long ones: the drawing can be finished the next day.
What colors are easiest for a beginner unicorn drawing?
Start with a white body and a mane and tail in two or three pale colors, such as pink, lavender and light blue, with a yellow or gold horn. Pale colors are forgiving because small mistakes are hard to see. Save dark colors for the hooves and the outline, which are small and forgiving.
Should children erase the light pencil lines before coloring?
Erase the guide lines once the outline looks right, before any coloring starts. This is the step that makes the drawing look finished, because leftover construction circles make it look like a worksheet. After erasing, trace the outline in a black marker or fine pen so the shape stays visible.
How can I turn this into a simple drawing lesson for elementary students?
Teach one step per session instead of all six at once, and let each child finish a stage before moving on. Give every child the same starting shape so the class shares a reference point. A finished drawing after six sessions is a strong classroom display and works well for any subject.
Conclusion
Start with one egg shape for the head and one triangle for the horn, and let those two shapes carry the whole drawing. Work slowly through the body, legs, mane and tail, erase the guide lines, and then add the color and the details that make the unicorn yours.
Everything else is decoration. A wobbly leg or an off-center horn will not bother a child holding the finished page, and the practice of drawing one shape at a time carries straight over into handwriting.