Shading with pencil comes down to three decisions: choose one light source, map where the shadow falls, and build your tone in several light layers instead of one heavy pass. That is the whole method. Everything below is those three decisions applied to a sphere, which is the fastest way for a beginner to learn how to shade a drawing with pencil for beginners.
Shading is what turns an outline into an object. Graphite darkens when you press harder or lay more passes over the same spot, so light and dark are things you control rather than things you go hunting for. Most muddy drawings are not a talent problem. They come from a skipped value step or a pencil pressed down too early.
I have watched beginners improve more in two weeks of fifteen-minute daily sessions than in a month of long weekend sessions. Repetition is the teacher here, not tutorials. Assume no art vocabulary as we go; every term gets explained the first time it appears.
Table of Contents
- 1What You Need
- 2Step-by-Step: How to Shade a Drawing with Pencil for Beginners
- 31. Choose a Simple Subject with Clear Light
- 42. Make a Light Pencil Sketch
- 53. Divide the Drawing into Light, Middle, and Dark Values
- 64. Build Shadows with Short, Controlled Pencil Strokes
- 75. Blend the Values Smoothly
- 86. Add Texture, Direction, and Final Contrast
- 97. Check the Drawing from a Distance
- 10Common Mistakes
- 11Frequently Asked Questions
- 12How can a beginner learn to shade with pencils?
- 13What is the best way to shade a drawing?
- 14What are the basic rules for shading in drawing?
- 15How do I stop my pencil drawing from smudging?
- 16Are you supposed to sharpen blending stumps?
- 17What is the 4 8 8 method of drawing?
- 18Conclusion: Start with Three Values
What You Need
You can start with almost nothing, but these four things make the difference between a frustrating afternoon and a good one.
- Paper with a slight tooth. A 110-140 gsm sketchbook sheet is fine. Very smooth newsprint refuses to hold soft graphite, and heavily textured cartridge paper is punishing when you are still learning pressure control.
- Graphite pencils in at least three grades: HB, 2B and 4B. A 6B helps later for the darkest accents.
- Two erasers: a kneaded putty eraser for lifting highlights, and a clean plastic eraser for tidy corrections.
- Blending tools: a blending stump (tortillon), a folded square of tissue and a cotton swab.
A sharpener and a spare sheet to test your pressure on complete the kit. A single desk lamp is genuinely useful, because one consistent source makes shadow shapes predictable. Optional extras are a soft brush for lifting dust and a board to rest your hand on.
Pencil grades are named backwards from how you might guess. H means hard and leaves a light, precise line. B means black and gives a soft, dark mark. HB sits in the middle. Higher numbers are softer and darker.
| Grade | What it does | Where it fits in shading |
|---|---|---|
| 2H / H | Hard, pale grey line | Construction lines and the light initial sketch |
| HB | Neutral mid grey | General sketching and the first value layer |
| 2B | Soft, medium dark | Mid-tone and form shadow on most drawings |
| 4B | Softer, dark | Deepened cast shadow and core shadow |
| 6B | Softest, near-black | Small accent darks and contact points |
Before you draw anything, spend five minutes making a value scale. Draw six small squares in a row and fill each one darker than the last, starting at barely-there grey and ending near black. This is the single most useful warm-up, because it trains your hand to make even steps rather than jumping from white to dark.
Step-by-Step: How to Shade a Drawing with Pencil for Beginners
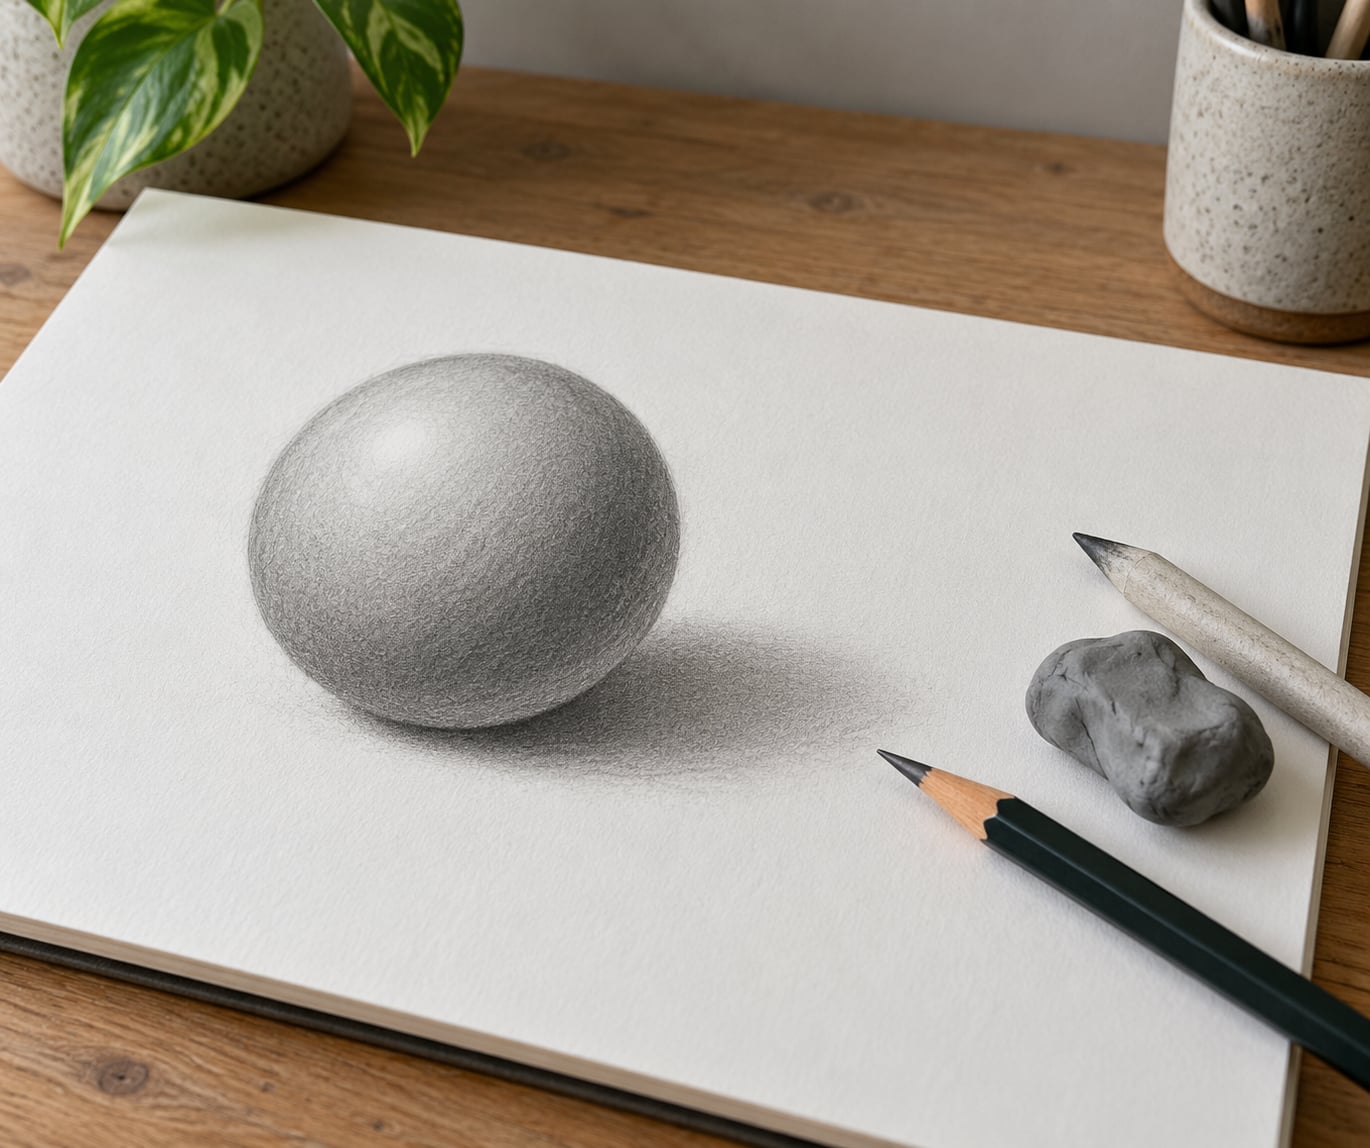
The exercise below shades a sphere. It looks simple, and that is the point: every principle you need later shows up in a rounded object with one clear shadow side.
1. Choose a Simple Subject with Clear Light
Start with something rounded and small: an apple, a ball, a crumpled sheet of paper, a folded napkin. Flat-sided subjects demand good edge control, and edges are hard to judge while you are still learning how light behaves. Round shapes are kinder to beginners.
Then pick your light source and commit to it. Put a single lamp above and to one side of your paper, and sketch a small arrow on the page showing where the light comes from. Almost every shading problem traces back to a light source that drifted halfway through the drawing.
2. Make a Light Pencil Sketch
Hold an H or HB and lay in the outline with a light, continuous line. Keep the pressure even and ignore small details for now; shapes and proportions first. Work in one continuous contour rather than little corner strokes, so the line has no broken ends.
Shading on top of a heavy outline is a trap, because a thick dark line around every edge makes the drawing read flat. The test is simple: at arm’s length your outline should almost vanish. If it does not, go lighter before you go further.
3. Divide the Drawing into Light, Middle, and Dark Values
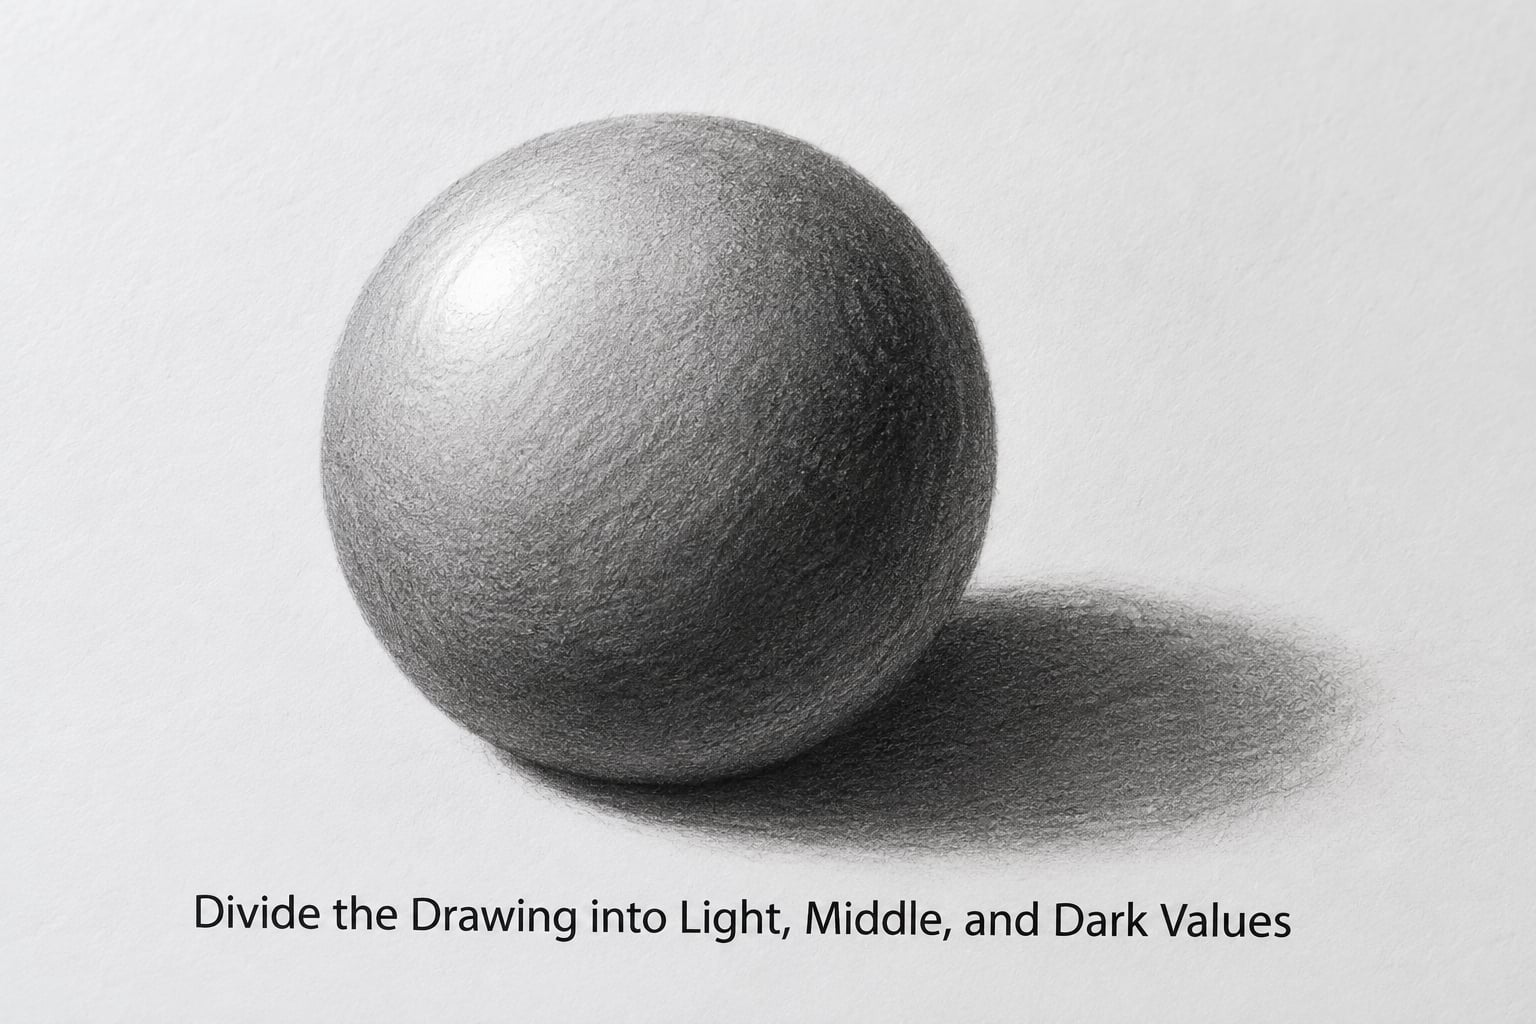
Before any graphite goes on, name the zones out loud. There is the highlight, the brightest point on the form. There is the lit side, which holds the mid-tone. There is the shadow side, which splits in two: the form shadow, the broad turn of the object away from the light, and the cast shadow, the shape the object throws onto the surface below it.
Fill the lit side first with a light, even layer of HB or 2B. Then step back and squint. If the lightest area is not clearly lighter than the shadow area, you have no range yet, and that is what muddy drawings look like. Fix the range before you add any detail.
4. Build Shadows with Short, Controlled Pencil Strokes
Lay graphite down with the broad side of the pencil for wide areas and the point for tight edges. Follow the curve of the form with small strokes. On a sphere the strokes wrap around; straight parallel lines across it flatten the shape instantly.
Build in layers rather than going dark in one go. Three light passes will get you further than one heavy pass, because you can adjust each one. Watch for shine and tiny dents in the paper: both mean you have already gone as dark as that spot can go.
5. Blend the Values Smoothly
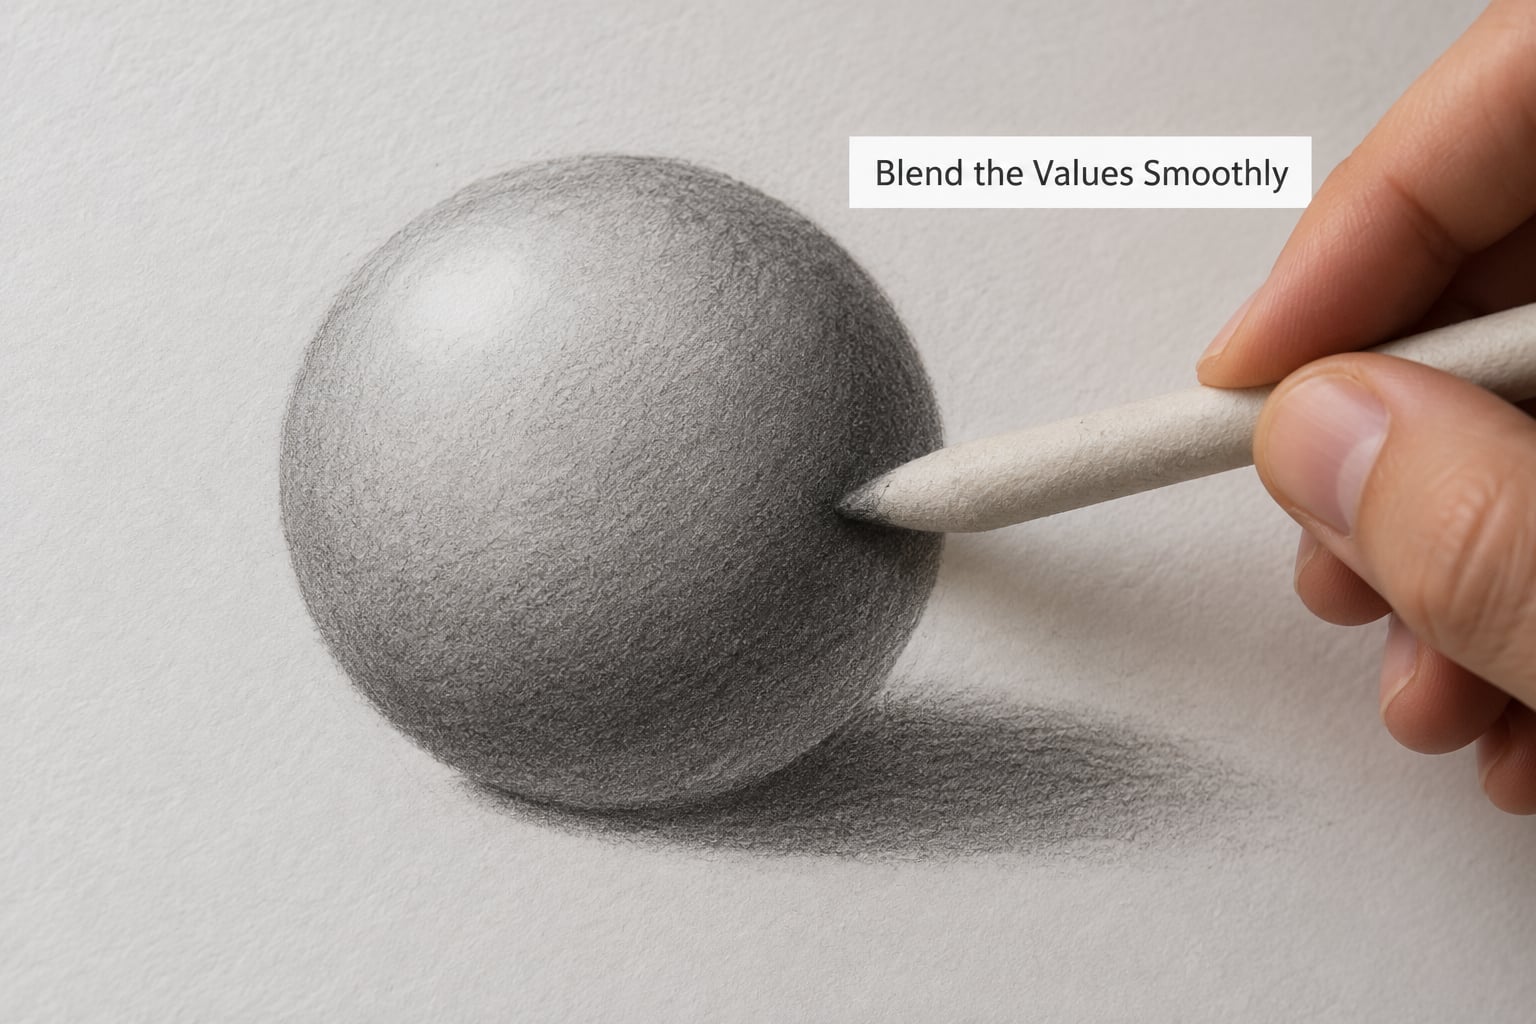
A blending stump softens the boundary where two values meet. Roll it gently across the surface rather than scrubbing, and clean it often by rubbing it on spare paper. Do not sharpen it; a hard tip digs channels into the graphite and catches on every bit of paper tooth. Tissue is softer for large areas, and a cotton swab is good on small shapes like a nose.
Leave two things alone while you blend: the highlight, and the shadow-side edge where light meets dark. That edge should stay fairly crisp. Beginners who smudge everything produce soft, shapeless drawings, and the missing crisp edge is usually why.
6. Add Texture, Direction, and Final Contrast
Change stroke direction to change material. Hair follows the direction of growth, wood follows the grain, fabric follows the way it drapes. For texture, leave small gaps between strokes so the paper tooth shows through; that is where hatching and stippling live.
Then push contrast only where the subject needs it. The deepest darks normally go in the contact point right under the object and in the darkest corner of the cast shadow. Lift highlights by pressing a kneaded eraser down and lifting it straight away rather than dragging it across.
7. Check the Drawing from a Distance
Hold the page at arm’s length and squint. Squinting removes detail and leaves only values, which is exactly what you want to check. Flat overall means your value steps are too close together. One area that looks detached usually means the cast shadow is missing or too weak.
Compare with your subject, squint again, and fix the single largest problem only. Repeat that cycle instead of reworking the whole sheet at once.
Common Mistakes
Almost every beginner drawing problem shows up in this list, and each one has a specific correction rather than vague advice to practise more.
Pressing too hard too early. The paper goes shiny, the tooth flattens, and that area can never go darker again. The fix is to lighten the pressure and add a fourth layer. Almost every over-dark drawing can be improved by pressing less and working longer.
Filling in the whole drawing. When no white paper is left, there is no highlight and the object has no light on it. Keep the brightest area completely untouched, even if it looks like a gap.
Making every edge equally sharp. Uniform outlines are the flattest thing you can do. Edges next to a shadow should be softer; edges at the silhouette and the contact point stay sharp. Beginners who learn edge control usually report a bigger jump in realism than anything else.
Using one pencil for the whole range. A single grade forces you to press harder for darks, which brings back problem one. Two or three grades is plenty to start.
Smudging with a finger. It smears oil into the paper and leaves a patchy mess you cannot fix. Use a stump or tissue instead, and keep your blending light.
| Symptom | Cause | Fix |
|---|---|---|
| Patchy, grainy tone | Too much pressure, not enough layering | Start again lighter and build four passes |
| Greasy grey smears | Finger blending | Use a stump, and lift graphite dust with a brush |
| Everything looks flat | No cast shadow or no highlight | Map three values before any detail |
| Drawing looks like a cut-out | Outline is too dark and too even | Lighten the outline, vary edge hardness |
| Highlights turn grey quickly | Over-blending across the whole form | Stop at the shadow edge, protect the light side |
| Drawing looks dirty | Rubbing the stump without cleaning it | Roll the stump on scrap paper every few passes |
Frequently Asked Questions
How can a beginner learn to shade with pencils?
Learn in four stages: make a value scale, light a simple object from one direction, map three values before any detail, then layer tone in light passes. Ten to fifteen minutes a day beats one long session, and spheres, apples and folded fabric teach form faster than faces. Reviewers on beginner art forums consistently say the breakthrough is understanding hard versus soft edges, not copying techniques off videos.
What is the best way to shade a drawing?
The best method is layered pressure: lay down several light passes of graphite instead of one dark one. Graphite builds in value every time you add a layer or press harder, so gradual passes give you a full range from white paper to near-black and let you correct as you go. Start with a mid-tone, then deepen only the shadow side, and protect the highlight.
What are the basic rules for shading in drawing?
Five rules cover most situations: pick one light source and keep it consistent, put the shadow on the side away from the light, follow the curve of the form with your strokes, vary edge hardness instead of outlining everything, and leave a clean highlight. Add a cast shadow so the object sits on the surface rather than floating above it.
How do I stop my pencil drawing from smudging?
Work from light to dark and stay patient, since fresh graphite smudges and dried graphite resists more. Blend with a stump or tissue rather than a finger, keep a scrap sheet under your hand so your palm does not drag across the page, and let the drawing sit for ten minutes before touching it. A spray fixative handles the worst of it once the tone is where you want it.
Are you supposed to sharpen blending stumps?
No. Never sharpen a blending stump. The point is meant to be rounded and soft; a sharp tip gouges grooves in the graphite and catches on paper tooth, which leaves streaks instead of a smooth blend. Clean it instead by rolling it firmly on a spare sheet of paper every few passes, and replace it once it turns uniformly black.
What is the 4 8 8 method of drawing?
The 4 8 8 method is a time-boxed practice drill rather than a shading technique. You split a session into three stages and give each a fixed number of minutes, so no single stage eats the whole session. In the version most beginners meet, that is four minutes sketching the shapes, eight minutes on tone, and eight minutes refining. Details vary by teacher, but the point is the timer.
Conclusion: Start with Three Values
Draw one rounded object, mark where the light comes from, and fill in three values: a light, a mid-tone and a dark. That is the whole first session, and it teaches more than hours of hatching practice.
Build the darks in layers rather than pressing harder, keep a highlight untouched, and stop to squint at the drawing from arm’s length before you decide it is finished. Realism comes from the value pattern working, not from any single realistic stroke.