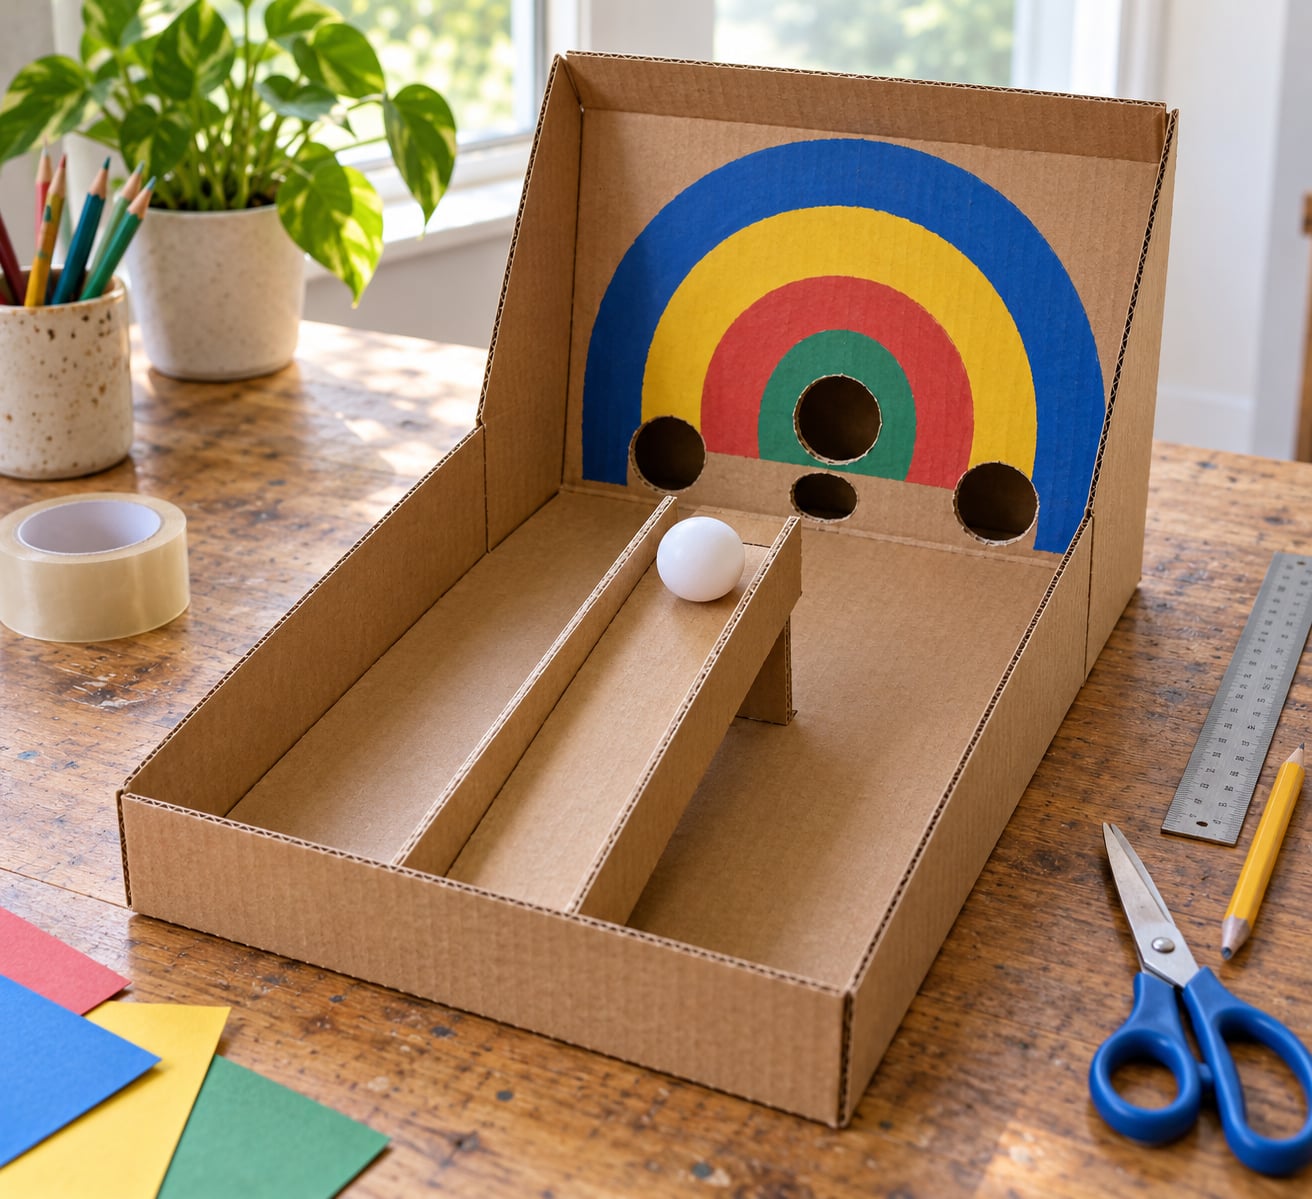
A cardboard arcade game is a homemade arcade-style game built from recycled shipping boxes, tape, glue and a few household parts, and you can make one in an afternoon with a ball launcher and a scored target. The classic version leans on simple machines, mostly an inclined plane and a lever, and it works because kids can pick it up and run it themselves without an adult refereeing every turn.
If you have been wondering how to make a cardboard arcade game that actually holds up to a room full of kids, most of what you need is already in a recycling bin. Balloons, marbles, popsicle sticks, cereal boxes, tape and a stapler cover the whole build.
Budget about two hours for the first one. The first ten minutes are deciding which box to use; the last twenty are testing and adjusting, which is the part people skip and shouldn’t.
Table of Contents
- 1What You Need
- 2How to Make a Cardboard Arcade Game: Step by Step
- 31. Choose and Prepare the Box
- 42. Build the Ball Launcher
- 53. Add the Target and Scoring Areas
- 64. Assemble and Secure the Game
- 75. Decorate and Test the Game
- 8Common Mistakes
- 9Frequently Asked Questions
- 10What materials do I need to make a cardboard arcade game?
- 11Can I make a cardboard arcade game without glue or hot glue?
- 12What kind of small ball should I use for the game?
- 13How do I make the game easier or harder for different ages?
- 14How can I make the cardboard arcade game more durable?
- 15Can I use a cereal box instead of a large cardboard box?
- 16Start With the Launcher
What You Need
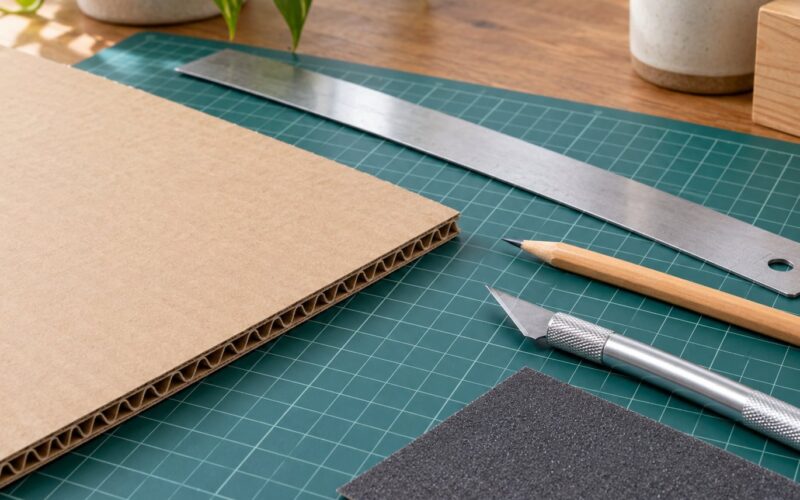
Everything below is either free, already in the house, or bought once and reused for every build that follows. If you’re working from a single box, you can make a working game.
- One medium to large shipping box or two cereal boxes taped together. A flattened box from a monitor or a bookshelf works well too.
- Cardboard offcuts from the box, for the ramp and the target panels. Save every piece you cut off.
- Masking tape or packing tape for holding panels while glue dries, and for reinforcing corners.
- Craft glue or a hot glue gun to bond the panels. Craft glue dries slower but is safer around children.
- A utility knife or scissors for the slots and panels. Adults should handle the knife.
- A ruler, a pencil and a paint marker for marking the layout and labelling score zones.
- A small ball such as a ping pong ball, a marble, or a rubber bouncy ball.
- Popsicle sticks or craft sticks for a flipper or a lever arm.
- A drinking straw, paper towel tube or plastic spoon to make the launcher.
- Paper for score zones, plus a jar of tickets if you’re running a carnival.
A few items have stand-ins, so you don’t need to hunt down a specific supply before you start.
- Instead of a hot glue gun: craft glue plus tape. Give each joint extra drying time before play.
- Instead of wooden dowels or skewers: popsicle sticks, folded paper tubes or a pencil. Popsicle sticks snap, so tape them where the pivot takes force.
- Instead of a ping pong ball: a marble, a bouncy rubber ball or a rolled-up sock ball. A marble is heavier and makes the ramp steadier.
- Instead of painter’s tape: masking tape. Same job for holding cardboard in position.
- Instead of scoring holes: a paint marker on coloured paper. Readable from further away for younger players.
Safety first, since this is a project kids will handle. An adult should make every cut with a utility knife, and hot glue should be applied by an adult and allowed to cool fully before anyone plays. Skip skewers near toddlers and keep balls small enough that a choking risk is considered before a child under three plays.
How to Make a Cardboard Arcade Game: Step by Step
Here is the build order for a cardboard arcade game that plays consistently. Follow the phases in sequence and test the ramp before you decorate anything.
1. Choose and Prepare the Box
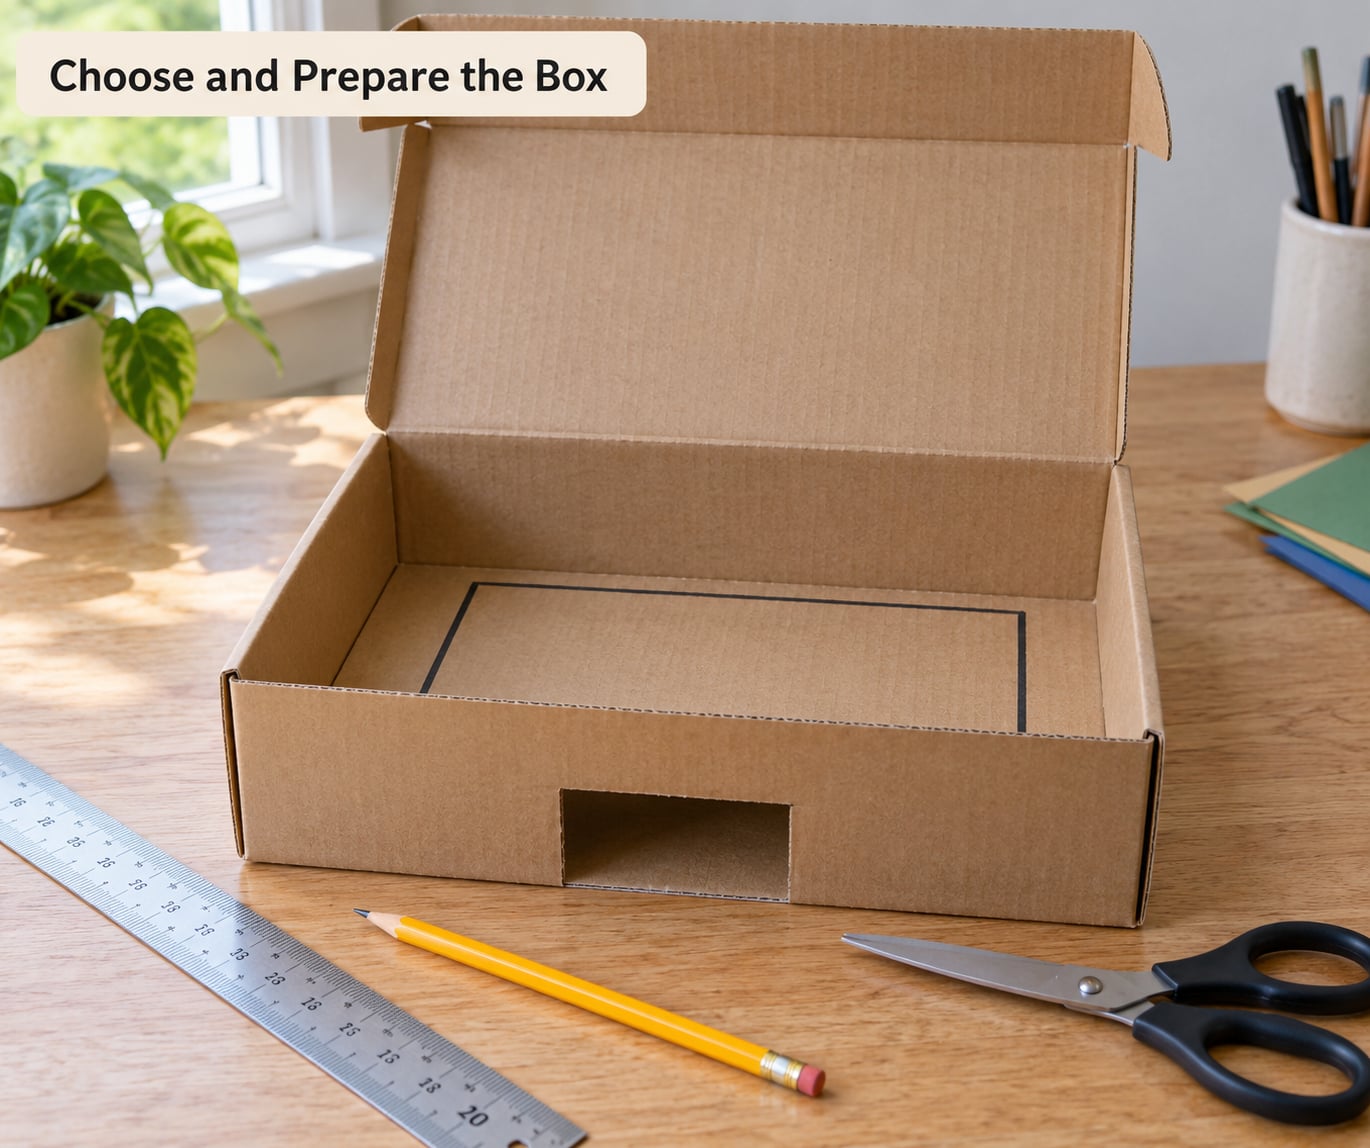
Turn the box on its side so the opening faces the player, then measure and mark the inside with a pencil before you cut anything. A box roughly 30 centimetres wide, 40 centimetres deep and 25 centimetres tall gives enough playfield for a ramp and a scoring wall.
Cut away the top flaps so nothing blocks the ball path, and fold the remaining tabs flat against the sides. Score every fold line with the back of the knife so the cardboard bends cleanly instead of splitting.
Run a strip of tape along each inside corner now rather than later. Corners are where cardboard fails first, and taping them before the walls go up means you can reinforce the joint while it is still flat and reachable.
You’ll know the box is ready if it stands on its base without any side leaning in by more than a few degrees. Check by looking at it from the front at play height.
2. Build the Ball Launcher
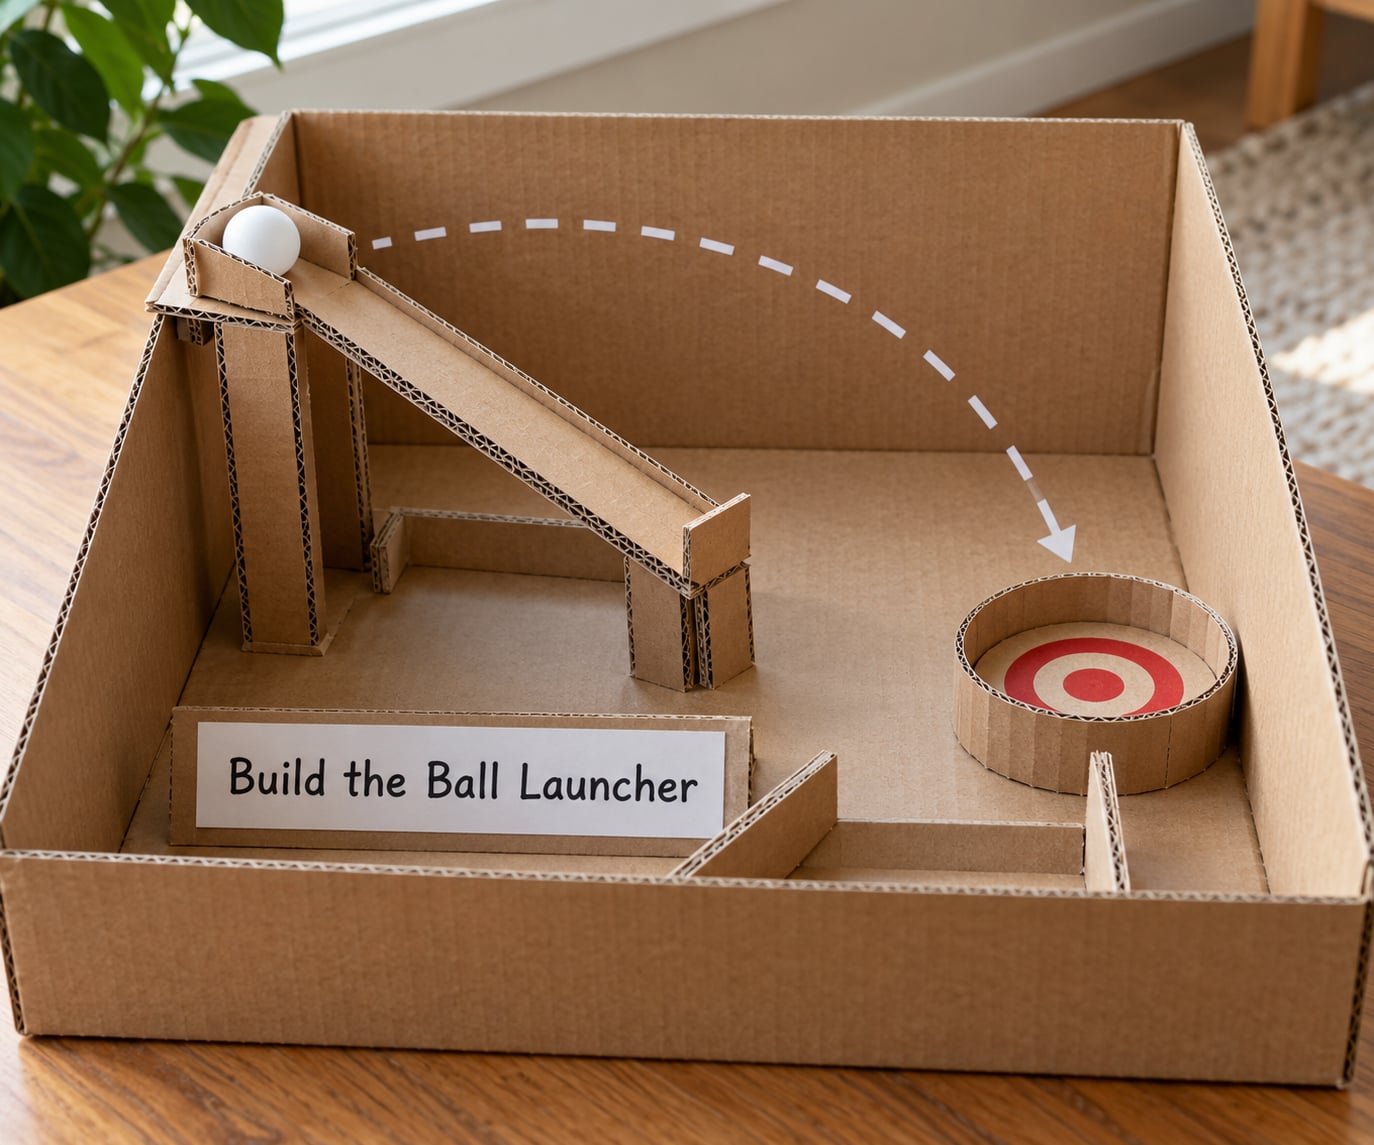
Cut a narrow slot in one of the short walls, roughly 3 centimetres wide, so the launcher sits at the front of the box. The slot is the player’s access point for feeding the ball, and its width should be about twice the width of your ball so the ball rolls in cleanly.
Build the launcher as a short ramp from a strip of card about 6 centimetres wide. Fold it into a channel with two cardboard side rails and tape the rails on, which stops the ball from leaving the track sideways.
Add a small paper tube, straw or the bowl of a plastic spoon at the top of the channel as a rest. The ball sits there until the player flicks it forward, and the rest keeps the launch consistent instead of the ball rolling back down before the shot.
Angle the finished ramp at roughly 20 to 25 degrees. Hold a spirit level or your phone’s level app against it, since anything flatter than about 15 degrees will not build speed and anything steeper than 30 sends the ball straight past the scoring zones.
3. Add the Target and Scoring Areas
Glue a piece of card to the back wall of the box as the target face, then divide it into three horizontal bands. Common scoring bands are 5 points for the bottom band, 10 for the middle and 25 for the top narrow band at the end wall, which gives a natural risk-and-reward gradient that older players understand quickly.
Write the point values large enough to read from across a room, using a paint marker rather than a pencil. A number that only resolves at arm’s length turns every shot into a squint.
Add a cut hole in the bottom band of the front wall if you want a miss to drop out of play. A hole is a better tension mechanic than a wall bounce, and it gives you a natural place to put a ticket chute underneath.
Label the zones before you decorate, and check the labels against the ramp angle. If the ball cannot reach the top band at your launch angle, move the top band lower or cut the ramp steeper before you start papering over anything.
4. Assemble and Secure the Game
Attach the launcher to the box with glue along its long edge and tape over the joint as it sets. Then add side walls: cut two triangles or rectangles from card and glue one to each side so the ball stays in play and the box stops flexing when a ball hits the back wall.
Reinforce anything that took a hit during testing. In practice the two spots that fail are the back wall where the ball lands and the bottom of the ramp where it takes the most weight, so double-box both with a second layer of card taped on the inside.
Tape the ramp to a cardboard block underneath so it sits at a fixed angle instead of sagging toward the base over a few dozen plays. A folded cardboard wedge works as the shim and needs no cutting.
Set the game on a flat surface and push the sides gently in opposite directions. If nothing flexes and the ramp has not shifted, it is ready to decorate.
5. Decorate and Test the Game
Paint or draw a theme over the outside once the glue has fully set, and keep the inside of the play area plain so you can see the ball at all times. Let the paint dry before the first round or the ball will pick up colour.
Run ten test shots and count where the ball lands. Aim for a spread of results: a game where every shot scores the same number is dull, and one where the ball never leaves the launcher is frustrating.
Tune the difficulty by changing one thing at a time. Move the ramp angle or the launcher position to make the shot easier or harder, widen the top scoring band to raise the score ceiling, or move the front wall’s drop-out hole closer to centre to reward accuracy over power.
Once the game plays, write the rules on a small card propped against the box, and decide how scoring gets exchanged. The classic arcade model gives each player a fixed number of tickets or points and swaps them for a prize at the end, which is what turns one game into a small carnival.
If you are picking only one phase to start from, make it the scoring areas, because they decide whether the game feels fair. Bands that are too narrow turn every shot into a near miss, and a game like that gets abandoned at the second round.
Common Mistakes
Most cardboard arcade failures are structural, and they show up in a predictable order. Fix them as you hit them rather than at the end of the build.
- The ramp is too shallow and the ball stalls. Raise the launcher or shorten the channel. A visible wobble in the ramp when you tap the box means the base is flexing, which eats the ball’s momentum, so wedge that corner solid.
- The ball falls out the side. Side rails are missing or too low. Add card strips along both edges of the channel and glue them on the outside of the fold, where they are easier to align.
- Cardboard tears when you cut a slot. You are cutting against the flute direction. Make two shallow passes with the blade instead of forcing one deep cut, and score the line first.
- The back wall bows outward. Double-box it, or run a strip of tape across the middle of the face. A bowed wall changes the rebound angle and quietly ruins scoring accuracy.
- Glue joints release after a few weeks. Single-wall cardboard delaminates fastest at the corners. Hot glue plus tape, or craft glue left to dry fully under a rubber band clamp, lasts far longer.
- The game is too easy or too hard. Change one variable at a time, and test ten shots between changes so you know the adjustment worked rather than guessing.
A few habits keep a cardboard arcade playable for months rather than afternoons. Store it flat with nothing resting on the scoring wall, keep the box somewhere dry, and inspect the ramp joint every few weeks. If you expect it to survive regular use, reinforce from the start with a second layer of card on the ramp and the back wall rather than patching later. At the end of its life, everything goes back into the recycling, and the offcuts make good packing material for the next delivery.
Frequently Asked Questions
What materials do I need to make a cardboard arcade game?
You need one medium shipping box, card offcuts for the ramp and target, tape, craft glue or a hot glue gun, a ruler, a paint marker, a small ball and a few popsicle sticks. Everything else is optional. A cereal box or two taped together works, and paper plates or bottle caps can replace popsicle sticks for a lever arm.
Can I make a cardboard arcade game without glue or hot glue?
Yes, and it works well if you design for it. Tape alone is enough for flat panels, and split paper straws pushed through slots and fanned out make sturdy frame corners that need no adhesive at all. Expect the joints to flex more, so reinforce each corner with a folded card tab and tape the seams on both sides.
What kind of small ball should I use for the game?
A ping pong ball is the easiest start because it is light and rolls predictably down a short ramp. A marble gives you better speed and a satisfying clatter, which suits older kids. Skip anything soft or bouncy for the first version, since bounce makes scoring unpredictable, and check the ball fits through your launch slot with room to spare.
How do I make the game easier or harder for different ages?
For younger players, widen the top scoring band, move the drop-out hole closer to the centre and reduce the ramp angle so the ball lands in a scoring zone most of the time. For older players, shrink the bands, move the hole to the corner and steepen the ramp. Test ten shots after each change and keep notes on the spread.
How can I make the cardboard arcade game more durable?
Double-box the two load-bearing areas, which are the back wall and the base of the ramp, and tape every inside corner. Glue and tape together rather than choosing one. Wedge the ramp so it holds its angle instead of sagging, and store the game flat in a dry place with nothing leaning on the scoring wall.
Can I use a cereal box instead of a large cardboard box?
You can, and for a marble maze or a tabletop launcher a cereal box is the better size. The limitation is playfield width, so keep the scoring bands small and use a marble rather than a larger ball. Tape two cereal boxes together as a cross shape if you want more room without a bigger shopping box.
Start With the Launcher
Open a box, mark the layout, cut the access slot and build the ramp first. That one phase takes about half an hour and tells you everything you need to know about the rest, because a launcher that returns a consistent shot is the hardest part of how to make a cardboard arcade game that people keep playing.