If you’re searching for what to make for fathers day with kids, the short answer is that the best projects are the ones your child genuinely makes, not the ones you quietly finish for them. Ten crafts below use paper, cardboard, paint and jar lids you probably already own, and each one lists honest prep time plus whether an adult needs to step in.
Most of these take under half an hour. A few need overnight drying, so they work better as a weekend project than a Saturday morning surprise. I’ve kept the mess honest, because the biggest reason craft plans fail is a table you can’t wipe down afterward.
You’ll also notice each project names a best age range. A three-year-old and an eight-year-old can sit at the same table and work on the same idea with different jobs, which is what happens in most families with more than one kid.
Table of Contents
- 1What to Make for Fathers Day With Kids at a Glance
- 2What to Make for Fathers Day With Kids When You Have Nothing in the Craft Box
- 31. Handprint Word Art Keepsake
- 4Materials for one handprint piece
- 5How to get a clean print
- 6A framing example that holds up
- 72. Decorated Dad Shirt Card
- 8Putting the card together
- 93. Cardboard Tool or Gadget Organizer
- 10Reinforcing and finishing
- 114. Memory Jar for Dad
- 12What to put inside
- 135. Personalized Photo Frame Craft
- 146. Reasons Dad Is Great Puzzle
- 157. Father’s Day Treasure Hunt Box
- 16Indoor and outdoor versions
- 178. Handmade Bookmark or Book Wedge
- 189. Mini Portrait or Collage of Dad
- 1910. Dad’s Choice Jar of Family Activities
- 20Frequently Asked Questions
- 21What is the easiest thing to make for fathers day with kids?
- 22What crafts can children make for Father’s Day without glue?
- 23How much time should I allow for a Father’s Day craft with kids?
- 24What inexpensive materials work best for homemade Father’s Day gifts?
- 25How can I personalize a craft for a grandfather or stepdad?
- 26Start With the Handprint Keepsake
What to Make for Fathers Day With Kids at a Glance
| Project | Main materials | Best ages | Prep time | Adult help |
|---|---|---|---|---|
| 1. Handprint word art | Cardstock, washable paint, markers | 2 and up | 20 min plus drying | Yes, for painting |
| 2. Decorated Dad shirt card | Construction paper, glue, paint pens | 3 and up | 20 min | Cutting and gluing |
| 3. Cardboard tool organizer | Shallow box, cardboard, paint | 6 and up | 40 min | Yes, for cutting |
| 4. Memory jar for Dad | Glass jar, paper strips, lid | 4 and up | 30 min | Only for the lid |
| 5. Personalized photo frame | Cardboard, craft sticks, bottle caps | 4 and up | 25 min | Cutting and assembly |
| 6. Reasons Dad is great puzzle | Printed sheets, cardstock, markers | 7 and up | 45 min | Printing and cutting |
| 7. Treasure hunt box | Small box, paper, five to eight notes | 5 and up | 35 min plus hiding | Yes, for hiding clues |
| 8. Bookmark and book wedge | Cardstock, corrugated cardboard, glue | 4 and up | 15 min | Cutting only |
| 9. Mini portrait or collage | Paper, magazine scraps, glue | 5 and up | 30 min | Help with shapes |
| 10. Dad’s choice activity jar | Jar, folded slips, pen | 5 and up | 25 min | Writing the slips |
What to Make for Fathers Day With Kids When You Have Nothing in the Craft Box
Before you pick a project, check what is already within reach. Most of the ten ideas run on a core kit: cardstock, a few sheets of construction paper, a shallow cardboard box, washable tempera or acrylic paint, a glue stick, scissors, and markers.
Add a paper plate, a handful of popsicle sticks, a clean jar and some corrugated cardboard and you can make anything on this list. When you are missing something, the swap is usually obvious: cereal boxes stand in for cardboard, and a butter knife scores cardboard lines where scissors would tear it.
Skip anything requiring a hot glue gun with young children. Low-temp glue sticks hold paper, cardstock and craft foam, and a five-year-old can do it themselves once the glue is spread for them.
1. Handprint Word Art Keepsake
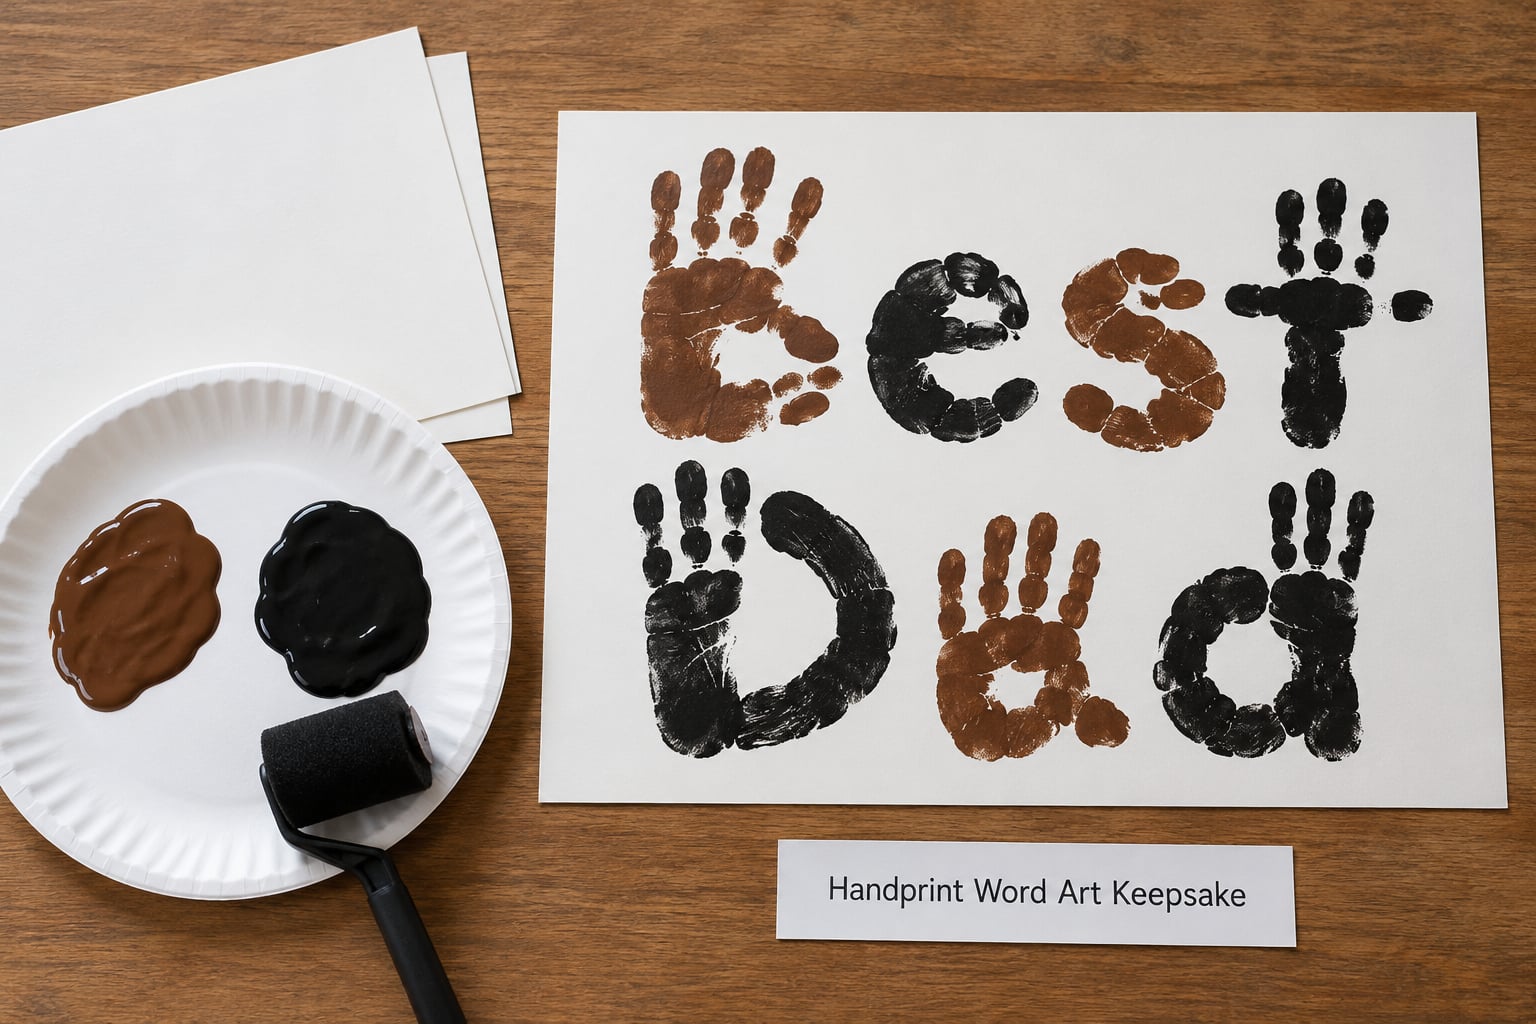
This is the project I fall back on every year. It works for a toddler who can press a palm into paint and a ten-year-old who wants the lettering to look sharp, and the finished piece is the kind of thing that stays on a hallway wall for a decade. If you are sorting through what to make for fathers day with kids and want one idea that survives any age and any budget, start here.
Materials for one handprint piece
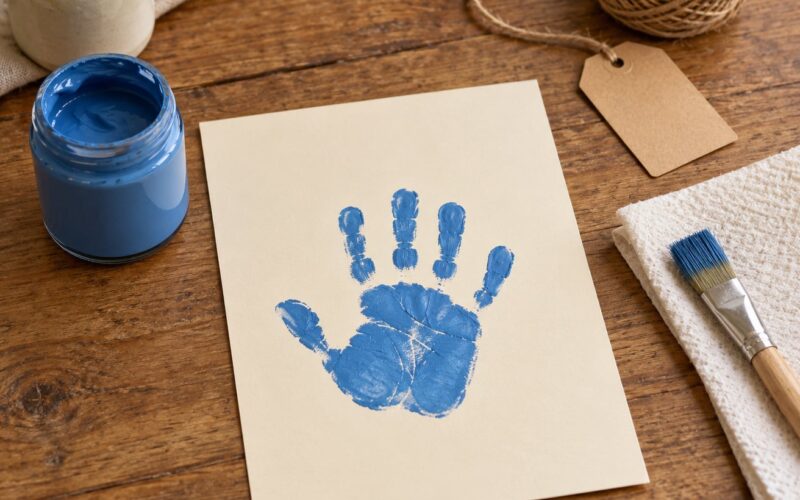
You need one sheet of cardstock roughly 11 by 14 inches, washable brown or black tempera paint, a paper plate for the palette, a wide flat brush or a foam roller, a black or dark brown marker, and a photo of your child for tracing. A damp cloth matters too, because tempera paint on a child’s palm takes more scrubbing than most parents expect.
How to get a clean print
Trace first if your child’s hand is still small and growing quickly. Lay the hand palm-down on cardstock, trace around it with a pencil, then cut the traced shape out and have your child color it in. Painting the hand directly gives a bolder result but the smudging risk goes way up.
For the painted version, have your child rest their palm on the paper plate first, then press the hand onto the cardstock and hold it there for a slow count of ten. Lifting too early drags the paint and leaves a thumb hole in the middle of the palm.
Let the print dry flat for two to three hours, or overnight if the cardstock is thick. Once it is dry, write Best Dad in block letters beside the print with a thick marker. Add the year underneath in a smaller size.
A framing example that holds up
Mount the finished piece on a sheet of colored construction paper cut slightly larger on all sides, then pop both into a standard discount-store photo frame. The border hides any trimming wobble and gives you a mat without buying one. Date the corner lightly in pencil so the handwriting stays discreet.
2. Decorated Dad Shirt Card
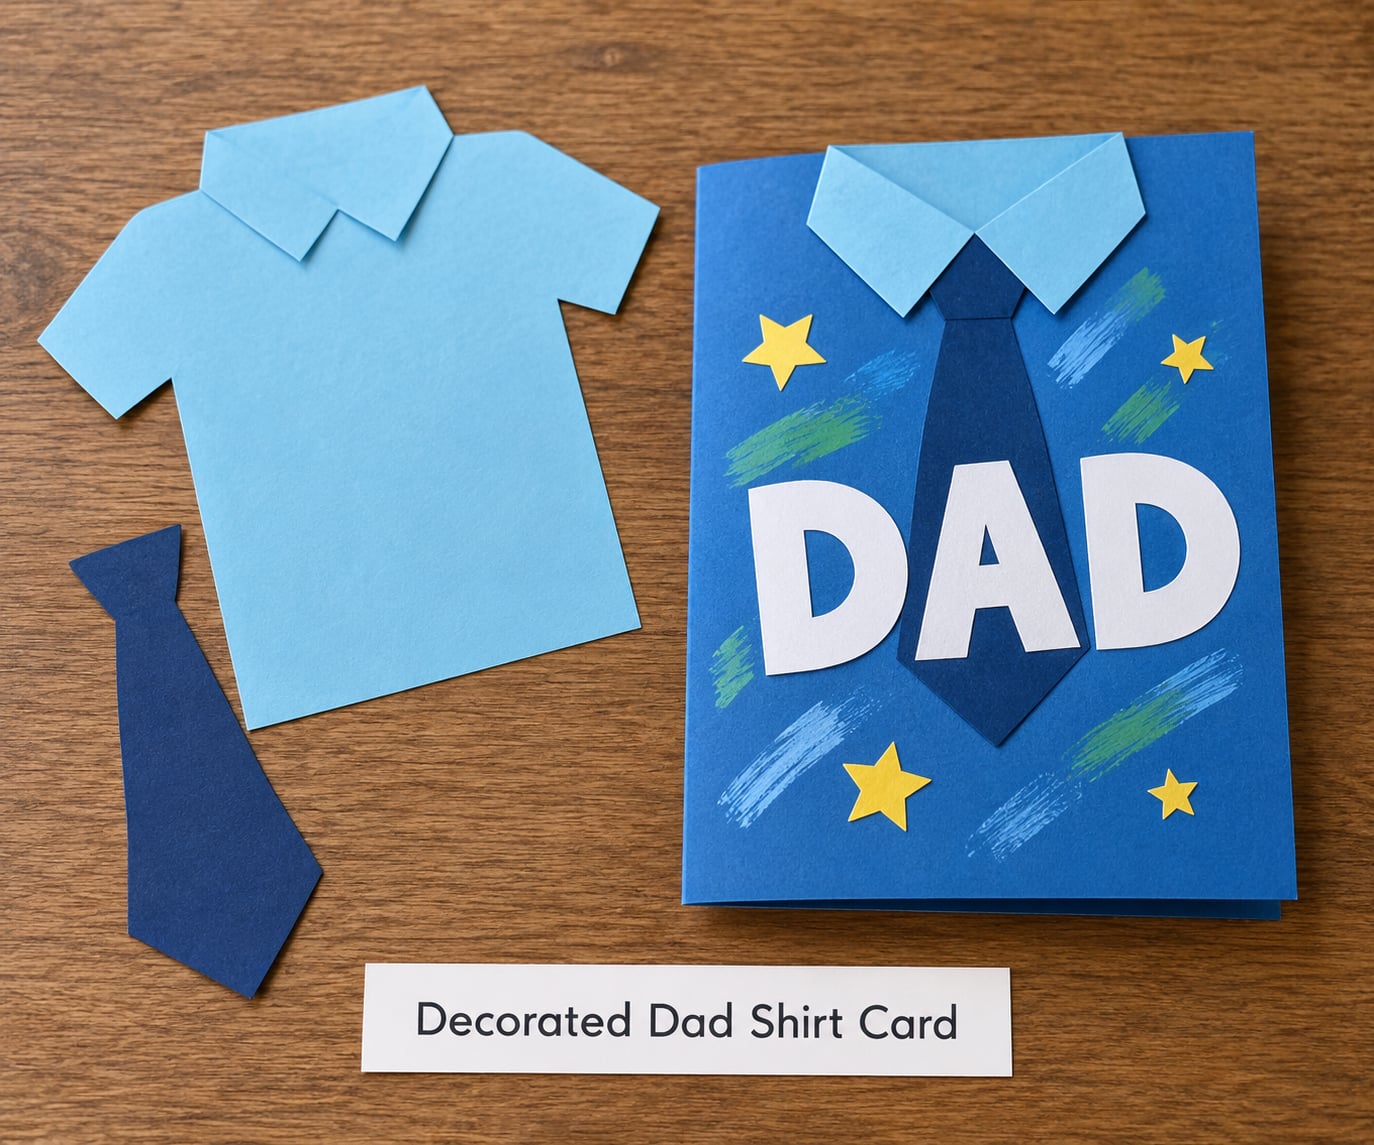
Kids love this one because the shirt shape does the decorating for them. A child who is not confident with drawing can still produce something that looks deliberate, which matters when the recipient is watching him open it.
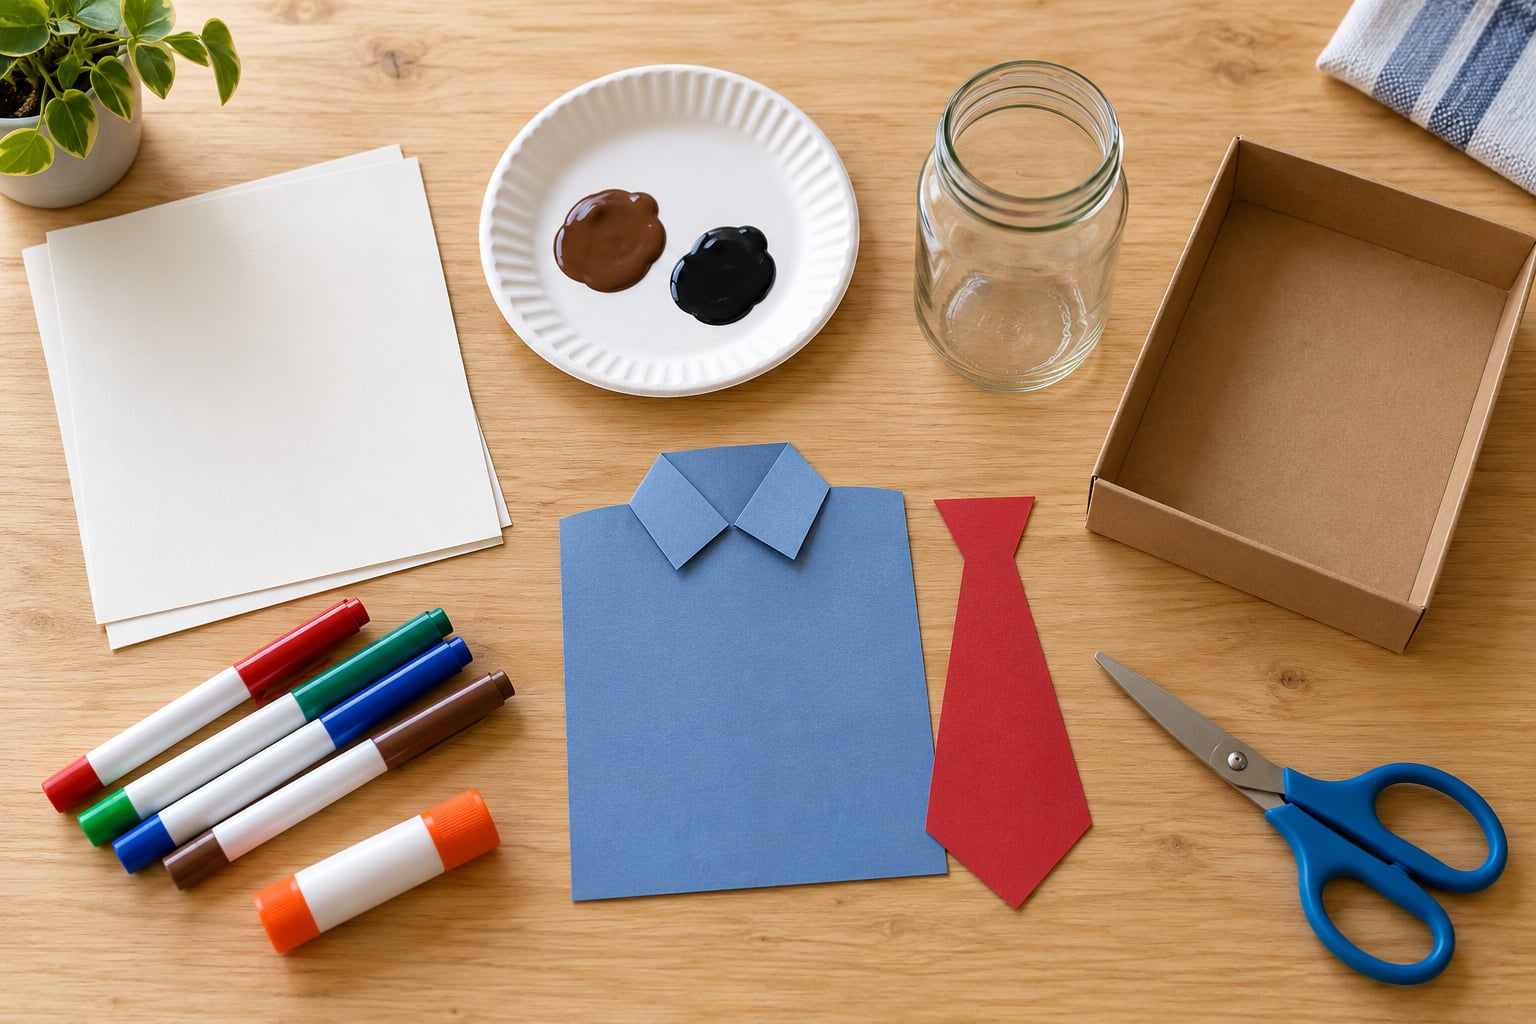
Fold a sheet of cardstock in half for the card base. Cut a shirt shape from a second sheet in a color your child picks, then let them decorate it with paint pens, crayons, stickers or cut paper shapes before anything is glued down.
Make the tie from a strip of paper in a completely different color. A triangle with a rectangle at the top reads instantly as a tie, and even a three-year-old can cut one with a grown-up holding the paper still.
Putting the card together
Glue the shirt onto the front of the folded card, leaving about half an inch of cardstock showing around the edges. Add the word DAD in large block letters below it. Cut the card’s inner half in half again so a child can write or draw one message inside.
A blue card with a green shirt, a red tie, big white DAD letters and a scatter of paper stars is a realistic version my kids made one year. It took twenty minutes including drying, and it has never been thrown away.
If your child wants to skip the shirt entirely, a plain folded card with a big handprint in the middle and the words To Dad, With Love underneath takes half the time.
3. Cardboard Tool or Gadget Organizer
Skip the homemade version if your dad owns a real socket set, because cardboard will lose that comparison. This works far better for a garage dad whose tools are the small everyday ones: keys, coins, a screwdriver, a tape measure, fishing lures, garden hand tools.
Find a shallow box, the kind that shoes or a keyboard arrives in. Turn it so the open side faces up and measure where the dividers should go. Two thirds of the width across the middle, then one short divider splitting that section in half, gives three compartments.
Cut divider pieces from corrugated cardboard and score a line along the fold before slotting them in. Glue the seam along the bottom edge so they do not shift when things get dropped in.
Reinforcing and finishing
Cover the outside with wrapping paper, painted butcher paper, or strips of colored construction paper. Painter’s tape along the top edges keeps the cardboard from fraying, and it makes the whole thing look finished rather than recycled.
For labels, have your child write short words like KEYS, COINS or TOOLS on small paper strips with a glue stick. A six-year-old can manage that, and it doubles as fine motor practice.
Fill the compartments with something real so Dad can use it on Monday morning. An organizer that stays empty on the shelf is a craft that quietly dies.
4. Memory Jar for Dad
This one gets emptied out, which is exactly the point. It works best with a family that reads aloud or enjoys jokes, since the contents become a running reference for the next several years.
Wash a jar and remove the label completely, then let it dry overnight so paint will stick. Cover the outside with paper strips, dots of paint, or a band of contact paper with the words Dad’s Memory Jar across it.
What to put inside
Write short memories on paper strips and roll them: the day he lost his keys and we found them in the fridge, the time he let the kids choose dinner for a whole month, a joke he tells badly on purpose. Add a few date ideas, small drawings, and printed photos if you have them.
Include at least one hand-drawn coupon. I Love You, I Will Water The Plants, One Free Hug, No Homework Question For Twenty Minutes. Those get pulled out first, usually within the week.
Decorate the lid with construction paper, a strip of tape and a date, then tighten it with an adult hand if the lid is metal. Small slips do not need to be perfectly rolled; crumpled paper fills gaps and stops everything shifting.
5. Personalized Photo Frame Craft
Any of four materials makes a workable frame, and the mess level drops as the glue requirement drops. Cardstock and corrugated cardboard need glue. Popsicle sticks and bottle caps can be arranged first and glued only if they keep sliding.
For a cardboard frame, cut a rectangle, then cut a slightly smaller rectangle out of the center. Two pieces of the same size sandwiching a photo work fine. To skip glue entirely, cut a single strip of cardstock into a long band and notch the corners with small slits, then fold the flaps around the photo like a paper wallet.
Have your child paint the cardboard frame with a single color and add one repeated motif, such as fingerprints along the bottom edge. Paint outside or on a newspaper sheet, because the texture holds a lot more paint than cardstock does.
A rustic version worth copying: corrugated cardboard painted a warm brown, stamped with bottle caps dipped in paint to make a dotted border, with a photo placeholder in the center and the words Dad’s Guy added in the bottom corner. It looks handmade in the good way.
6. Reasons Dad Is Great Puzzle
Turn this into a family brainstorm rather than a craft. Sit down with everyone and write reasons until you have more than ten, then pick the best ones. School-age kids do the writing; a four-year-old dictates and you write.
Keep the piece count manageable. A nine-piece puzzle with three by three squares is large enough to be satisfying and small enough to finish in one sitting. Thirty pieces frustrates a seven-year-old, and one giant piece is not a puzzle.
Print each piece on cardstock, or have your child draw a small icon for each reason before you cut the squares apart. Number the back of every piece in pencil so an argument about who lost what stops immediately.
Laminating is optional and worth it for younger siblings who plan to handle it often. If you skip a laminator, cover each finished square with clear packing tape, keeping the tape slightly smaller than the piece.
Finish with a clue your child draws on the box lid, such as a picture of a wrench with the words The piece that says he always helps. That detail is what makes a puzzle feel like a gift instead of homework.
7. Father’s Day Treasure Hunt Box
Here the crafting is the small part. The fun is in the setup, and this one converts a long morning into something that feels like an event.
Decorate a small shoebox or hinged craft box with wrapping paper and a label that says Open Me First. Cut five to eight slips of paper and write one clue per slip, keeping each one walkable.
Indoor and outdoor versions
Indoors, clues can be things like check the top shelf of the pantry, look inside the shoes by the door, or ask Dad what he packed for work today. Outdoors, use locations such as under the garden bench, behind the outdoor cushions, or at the end of the driveway.
Hide them in order and put the box at the start. The last slip directs Dad to the box itself, where you place a small gift, a printed certificate, or an activity like a pancake breakfast he does not have to cook.
With two kids, older children write clues and younger children hide them with an adult. With three or more, number the slips so nobody follows the same paper twice.
8. Handmade Bookmark or Book Wedge
The bookmark takes about fifteen minutes and works on plain cardstock. Cut a strip about two inches wide and eight inches tall, let your child decorate one side, then cover both sides with clear packing tape so it survives a lunchbox.
The wedge is the version for a dad who reads in an armchair with a heavy hardback. Cut two triangles from corrugated cardboard, roughly three inches on each side. Score a fold line along the base of each, then glue them back to back so the flat edges match.
Let the glue set under a stack of books for an hour before testing. If it slides, add a strip of tape along the base seam.
A layered bookmark made from two sheets of cardstock with a handprint between them reads Best Dad and Happy Reading in small lettering. Add a strip of ribbon or a hole punched at the top with yarn threaded through if you want it to feel finished.
9. Mini Portrait or Collage of Dad
Telling a child to draw Dad realistically ends in frustration for everyone. Framing it as a collage removes the problem, because the child selects features instead of inventing them.
Sketch a simple head shape with a neck and shoulders in pencil. Your child fills the hair with pencil scribbles, torn paper, or strokes of crayon, then cuts clothing shapes from magazine pages they like. Real fabric scraps, a saved receipt, or a piece of an old team shirt work well too.
Add one detail from real life. A glasses shape, a moustache, a hat, or the pattern of a favorite shirt gives the portrait its personality without asking for drawing skill.
One version worth copying is titled Dad’s Favorite Day, with a collage of Dad, a sun, a barbecue grate made from black pen hatching, and a handwritten sentence beneath it that the child dictates: He lets me choose the music in the car. That sentence is the actual gift.
10. Dad’s Choice Jar of Family Activities
Fold slips of paper and fill a jar, and Dad gets to pick an experience rather than receive an object. That distinction is what makes this one work for kids too young to make anything physical.
Write or have your child dictate one activity per slip. A picnic on the back step, a board-game evening, a bedtime story he does not get to skip, a sidewalk chalk session, letting a child cook one dinner, a walk with ice cream, a car wash he supervises, a dance-off in the kitchen.
Fold each slip into a narrow rectangle and drop them in. Wider slips look better in the jar, so folding twice is better than once. A strip of tape around the neck with the words Dad Picks keeps the purpose obvious.
Age adjustments are simple. A two-year-old’s version holds three slips with very short activities. A ten-year-old’s version can hold ten, including things like choose the movie or plan Saturday yourself.
Frequently Asked Questions
What is the easiest thing to make for fathers day with kids?
The handprint word art project takes about twenty minutes of active time. Your child presses one painted palm onto cardstock, you write Best Dad beside it once the paint dries, and both layers go onto a sheet of colored paper for a photo frame. It needs no scissors, no glue and nothing bought beyond paper and paint.
What crafts can children make for Father’s Day without glue?
Several of the ten projects here avoid glue entirely. A layered bookmark works, since clear packing tape holds the cardstock together and can be applied by a child. A photo frame can be assembled from a single notched strip of cardstock folded around the picture. Handprint word art, memory jar slips and activity slips also need no glue at all.
How much time should I allow for a Father’s Day craft with kids?
Budget thirty minutes for most projects, and allow overnight drying for anything painted on cardstock or thick paper. The cardboard organizer and the puzzle are the exceptions at around forty-five minutes each, and the treasure hunt box needs extra time for hiding clues once the crafts are done.
What inexpensive materials work best for homemade Father’s Day gifts?
Cardstock, construction paper, corrugated cardboard from shipping boxes, washable paint, glue sticks, markers and clean jars cover every project in this list. Swap cereal boxes for cardboard, and use packing tape in place of glue when a child is doing the sticking. Cheap frames from a discount store turn handprint art into something displayable for very little.
How can I personalize a craft for a grandfather or stepdad?
Change the wording rather than the project. Best Dad becomes Best Grandpa or Best Pop, and a memory jar can hold childhood stories instead of recent ones. For a stepdad, write his first name on the card and pick a shared memory the child can describe out loud. When in doubt, a handprint plus a specific memory lands better than a generic label.
Start With the Handprint Keepsake
If you only have time for one, make the handprint word art. It takes twenty minutes, needs almost nothing from a craft store, works for a two-year-old and a twelve-year-old in the same family, and the result looks intentional rather than homemade in a bad way. Start it the night before if you can, because paint on cardstock dries slowly.
Beyond that, pick by what you want the morning to feel like. Choose the treasure hunt box or the activity jar if you want Dad to spend time with the kids. Choose the bookmark, the organizer or the frame if he is practical and you would rather he use something every day. Choose the memory jar or the puzzle if your family enjoys talking to each other, since both depend on what your child says more than what they make.
One thing worth adding to every project: the year, written small somewhere your child can reach. Ten years from now that date turns a nice craft into something he will not throw away.