How to make heart shaped crafts for kids is easier than most parents expect, and the best ten projects here cost almost nothing. Most use paper, felt, salt dough or things already in the recycling bin, and each one takes under an hour. Start with the summary table below to match a project to your child’s age, your afternoon, and how much mess you can handle.
I have run heart crafts with three-year-olds and with eight-year-olds in the same room, and the difference is almost entirely in how much of the cutting you do yourself. Everything below lists a suitable age, active time, and mess level so you can pick before the glue comes out.
Table of Contents
- 1How to Make Heart Shaped Crafts for Kids at a Glance
- 2How to Make Heart Shaped Crafts for Kids: Choose by Age and Skill
- 31. Paper Heart Collage
- 42. Folded Cardstock Heart Bookmark
- 53. Salt Dough Keepsake Hearts
- 64. Handprint Heart Keepsake
- 75. Paper Plate Heart Mask
- 86. Felt Heart Ornament
- 97. Heart Shaped Card with a Pom-Pom Center
- 108. Bottle Cap Heart Mosaic
- 119. Heart Shape Mobile for the Classroom
- 1210. Papier-Mache Treasure Box
- 13Frequently Asked Questions
- 14What is the easiest heart craft for toddlers?
- 15How do you make a heart shape without a template?
- 16What materials can I use to make heart crafts at home?
- 17Can children make these heart crafts for a Valentine’s Day card?
- 18How can I keep a heart craft project low-mess?
- 19What craft supplies need adult supervision?
- 20Conclusion
How to Make Heart Shaped Crafts for Kids at a Glance
This table compares all ten projects by age, preparation time, difficulty and mess level.
| Project | Best age | Prep time | Difficulty | Mess level |
|---|---|---|---|---|
| 1. Paper Heart Collage | 3+ | 5 min | Easy | Low |
| 2. Folded Cardstock Heart Bookmark | 5+ | 2 min | Easy | None |
| 3. Salt Dough Keepsake Hearts | 3+ | 10 min | Easy | Medium |
| 4. Handprint Heart Keepsake | 2+ | 5 min | Easy | Medium |
| 5. Paper Plate Heart Mask | 6+ | 10 min | Medium | Medium |
| 6. Felt Heart Ornament | 6+ | 5 min | Medium | Low |
| 7. Heart Card with Pom-Pom Center | 3+ | 5 min | Easy | Low |
| 8. Bottle Cap Heart Mosaic | 4+ | 10 min plus drying | Medium | Medium |
| 9. Heart Shape Mobile | 5+ group | 15 min | Medium | Low |
| 10. Papier-Mache Treasure Box | 7+ | 20 min | Hard | High |
How to Make Heart Shaped Crafts for Kids: Choose by Age and Skill
For children under five, pick projects built on tearing, pressing and stamping rather than cutting. Paper collage, handprint hearts and pom-pom cards all work because the only tool involved is a glue stick.
Preschoolers can handle cutting with blunt scissors if you cut the heart outline yourself and leave the shapes for them to trim. Round shapes come out uneven at that age, and the uneven edges are the charm rather than a mistake.
From about six upward, kids can manage a full fold-and-cut heart, sew felt with a blunt needle, or thread beads. Threading with a shoelace instead of a needle is the easier route and works just as well for a hanging ornament.
1. Paper Heart Collage
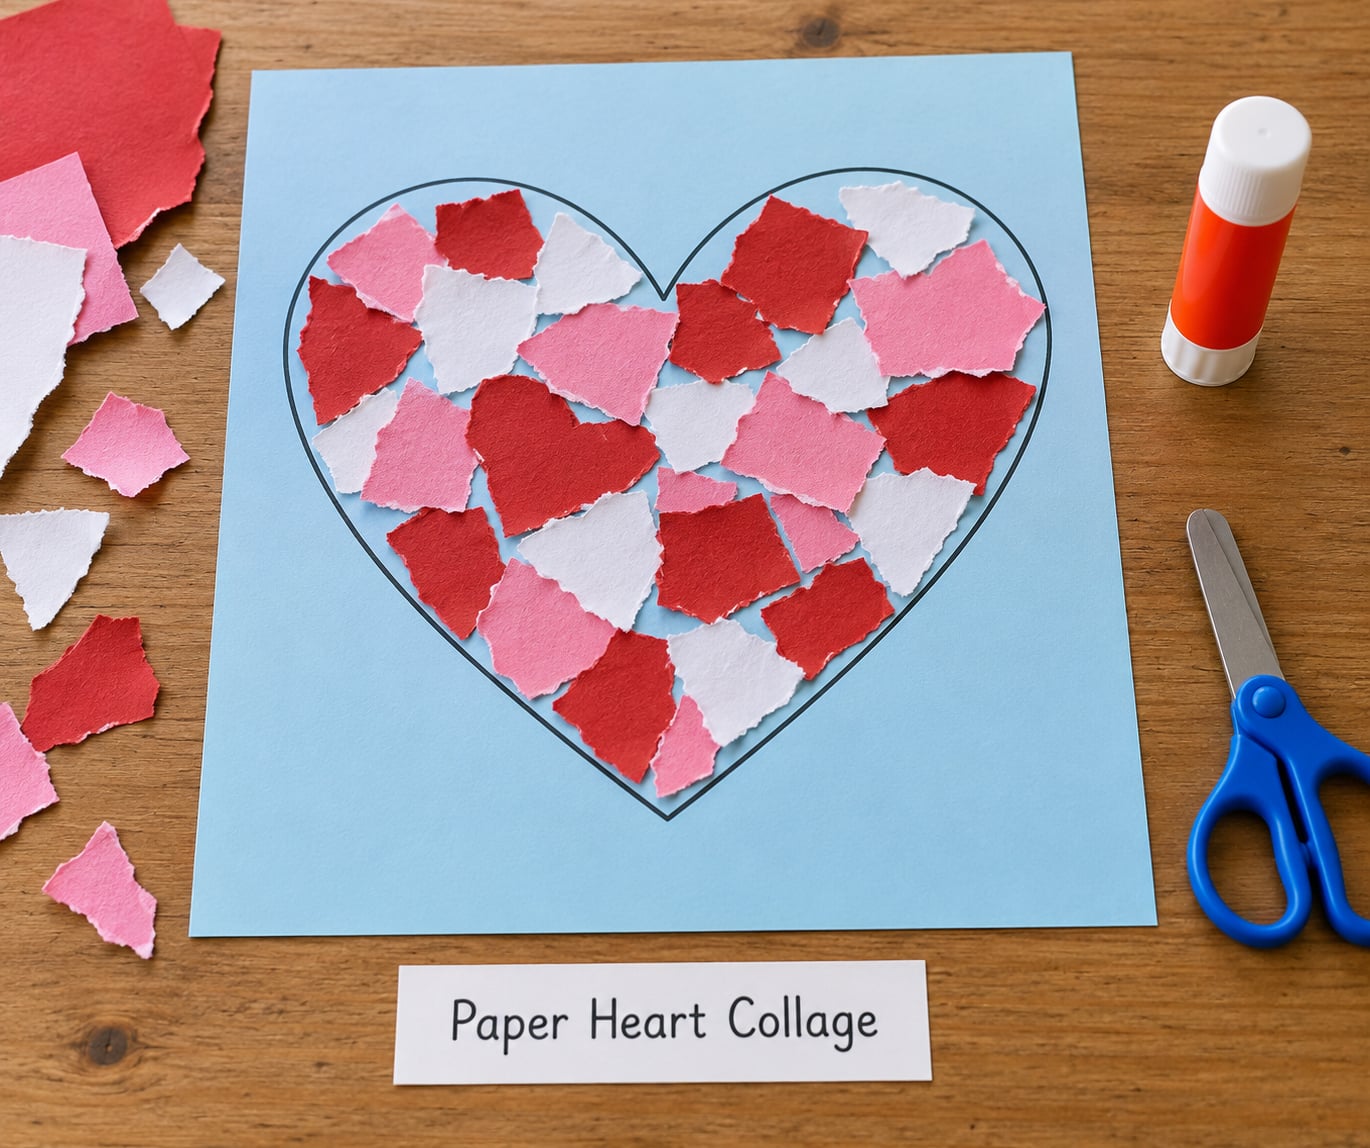
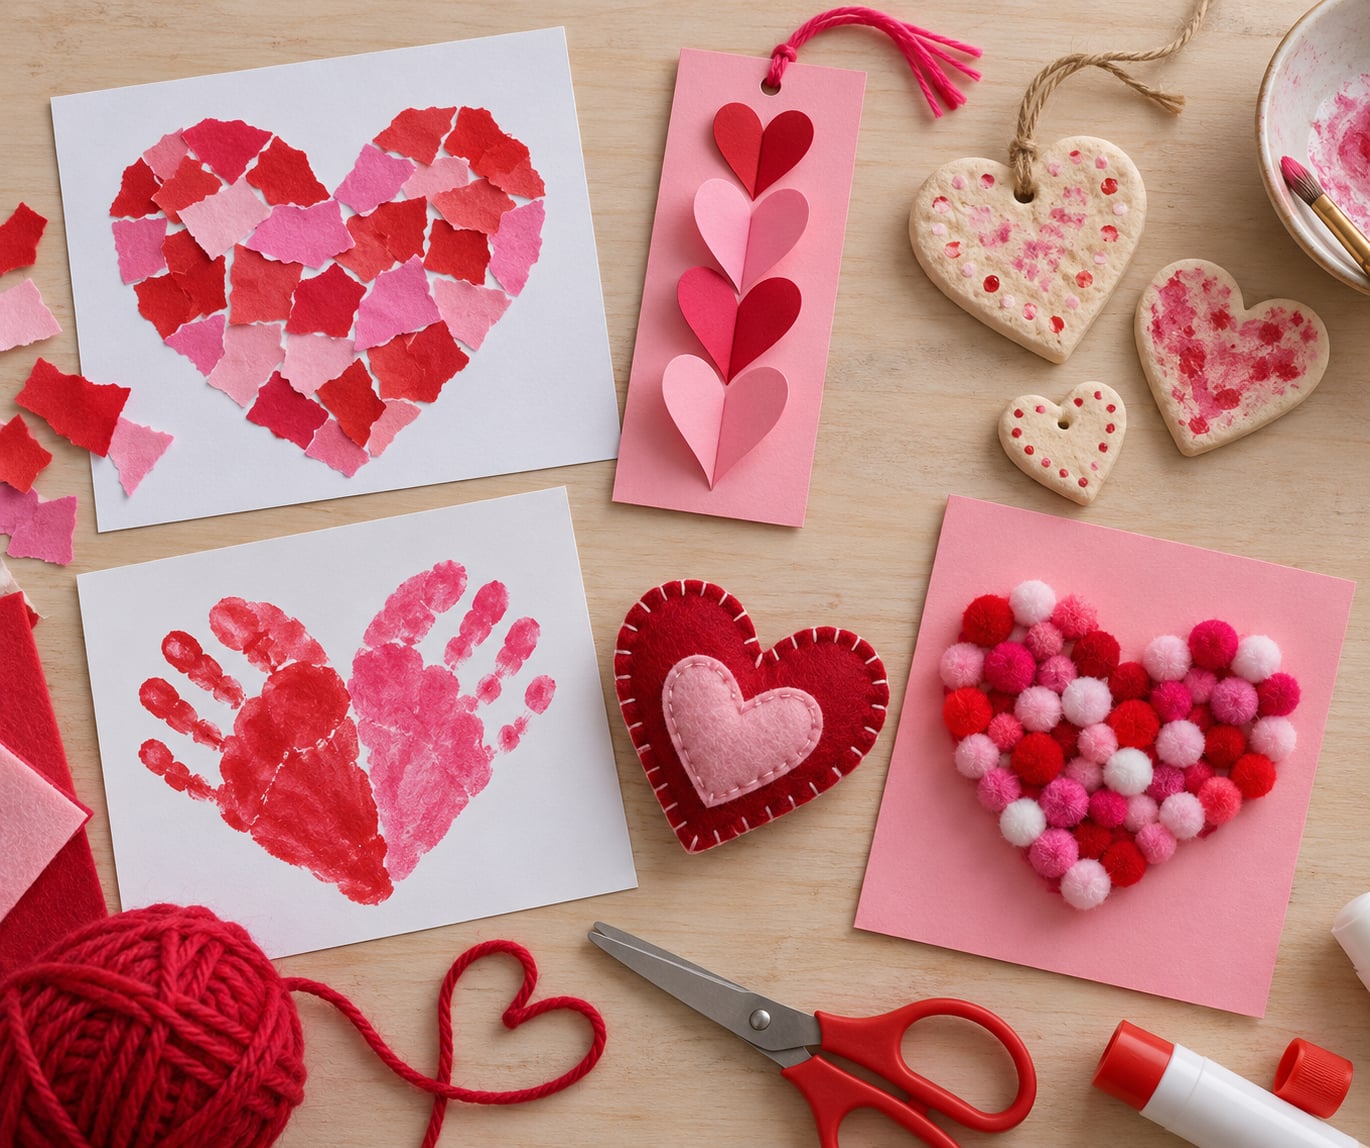
This is the project I hand to almost anyone starting out. It works because the outline does the hard part and the child only fills it in.
You need construction paper in three or four colours, a glue stick, blunt-tip scissors and one heart outline. Draw the outline on a full sheet of paper, or print one at whatever size fits the page.
Cut the heart shapes into small pieces first, or let your child tear them. Tearing takes longer and gives a softer, more textured result, which I prefer.
Children glue the pieces inside the outline, overlapping them slightly. Filling right to the edge matters more than neatness here.
Allow about 20 minutes for a three-year-old, and put a sheet of scrap paper underneath to catch stray glue.
2. Folded Cardstock Heart Bookmark
Cardstock bends without creasing, so this bookmark opens flat and closes on itself. That single fold is the whole trick.
Cut a heart shape from cardstock, then cut it in half from the top dip to the bottom point. Take the top half and glue it to the bottom half with the curved edges aligned, and you have a pocket that slips over a book page.
Decorate before gluing if you want a cleaner finish, using markers, stickers or small paper shapes.
Children under five should not do the cutting here. Paper is thick enough that it takes real force, and slips happen.
Yarn and a needle are optional additions. Stitched along the outer edge with big holes, a bookmark like this lasts longer than the book it lives in.
3. Salt Dough Keepsake Hearts
Salt dough is flour, salt and water, and it keeps for months if you wrap it well. The hearts come out pale and chalky, so kids can paint them or leave them as they are.
Mix two cups plain flour with half a cup table salt. Add water a spoonful at a time until the dough holds together in a ball and stops sticking to your palm.
Children press beads, small leaves or the ends of pasta into the dough before it bakes. Those impressions stay after baking, which surprises most of them.
Press the shapes out onto a lined baking tray. An adult removes the parchment and bakes them at 180°C or 350°F for about 30 minutes, then lets them cool fully on the tray.
The oven step is never a child’s job, at any age. Expect crumbs and a flour hand-washing session afterwards.
4. Handprint Heart Keepsake
Two painted handprints arranged so the thumbs meet make a heart you can see immediately. That is why it works so well for children too young to plan a design.
Use washable tempera paint and thick cardstock or heavy drawing paper. Put a drop of paint on each palm, have your child press both hands down side by side, then lift straight up rather than sliding.
The most common mistake is a smudged print. Waiting until the paint feels dry to the touch, rather than just shiny, fixes it.
Add a name and a date once the paint has dried for an hour. Grandparents tend to keep these longer than anything else on the fridge.
Painter’s tape across the wrists keeps paint off sleeves, and a shallow tray of water for cleaning hands saves the carpet.
5. Paper Plate Heart Mask
A paper plate mask is a good dress-up project for a child who has outgrown stickers but is not ready for papier-mache. Cut the heart from the plate and build a plain face mask around it.
You need a paper plate, a blank felt or cardstock face mask, paint, yarn and a hole punch. For a quicker route, tape the heart straight onto a simple cardstock band instead of making a full mask.
Paint the heart after cutting so the outline stays crisp. A base coat first, then a second colour on top, gives a two-tone finish in one session.
Eye holes need to line up with the wearer’s actual eyes. Test the spacing by having your child put the blank mask on before you cut anything.
Skip loose glitter and dangling pom-poms here. Anything that can swing or fall off sits too close to the eyes.
Adults should cut the heart for younger children. Paper plates resist blunt scissors and produce an edge with real give.
6. Felt Heart Ornament
Felt hearts survive being handled, which makes them good for small children and for ornaments that come out of a cupboard every February. Sewing is optional; fabric glue works well for anyone who cannot yet manage a needle.
You need two felt sheets, a heart template, yarn or embroidery thread, stuffing, fabric glue as an alternative, and buttons or sequins to decorate. Trace and cut two identical hearts, or ask an adult to cut both while a child traces one.
Older children can sew with a blunt needle and doubled yarn, leaving a small gap at the bottom for the stuffing. Younger children glue the two halves together and press under a book for ten minutes.
Every step before the sewing or gluing should be adult prep for children under six, including the template cutting.
Thread yarn through the gap for hanging. Add a name written in permanent marker on the back and it becomes a labelled ornament.
7. Heart Shaped Card with a Pom-Pom Center
This is my pick for a rainy afternoon when the energy is high but the attention span is short. The pom-pom stage takes under five minutes and children keep picking the pieces off the paper.
Cut a heart-shaped card base from cardstock and fold it in half so it opens like a greeting card. Give the child two pom-poms or a small mound of tissue paper and let them glue it inside the centre of the front half.
Colour choice is the fun part. Two pom-poms in clashing colours get more attention than three matching ones, in my experience.
Glue the base closed and let it press under a stack of books for about ten minutes so the card sits flat.
Twenty minutes start to finish, and nothing in this one goes anywhere near the floor.
8. Bottle Cap Heart Mosaic
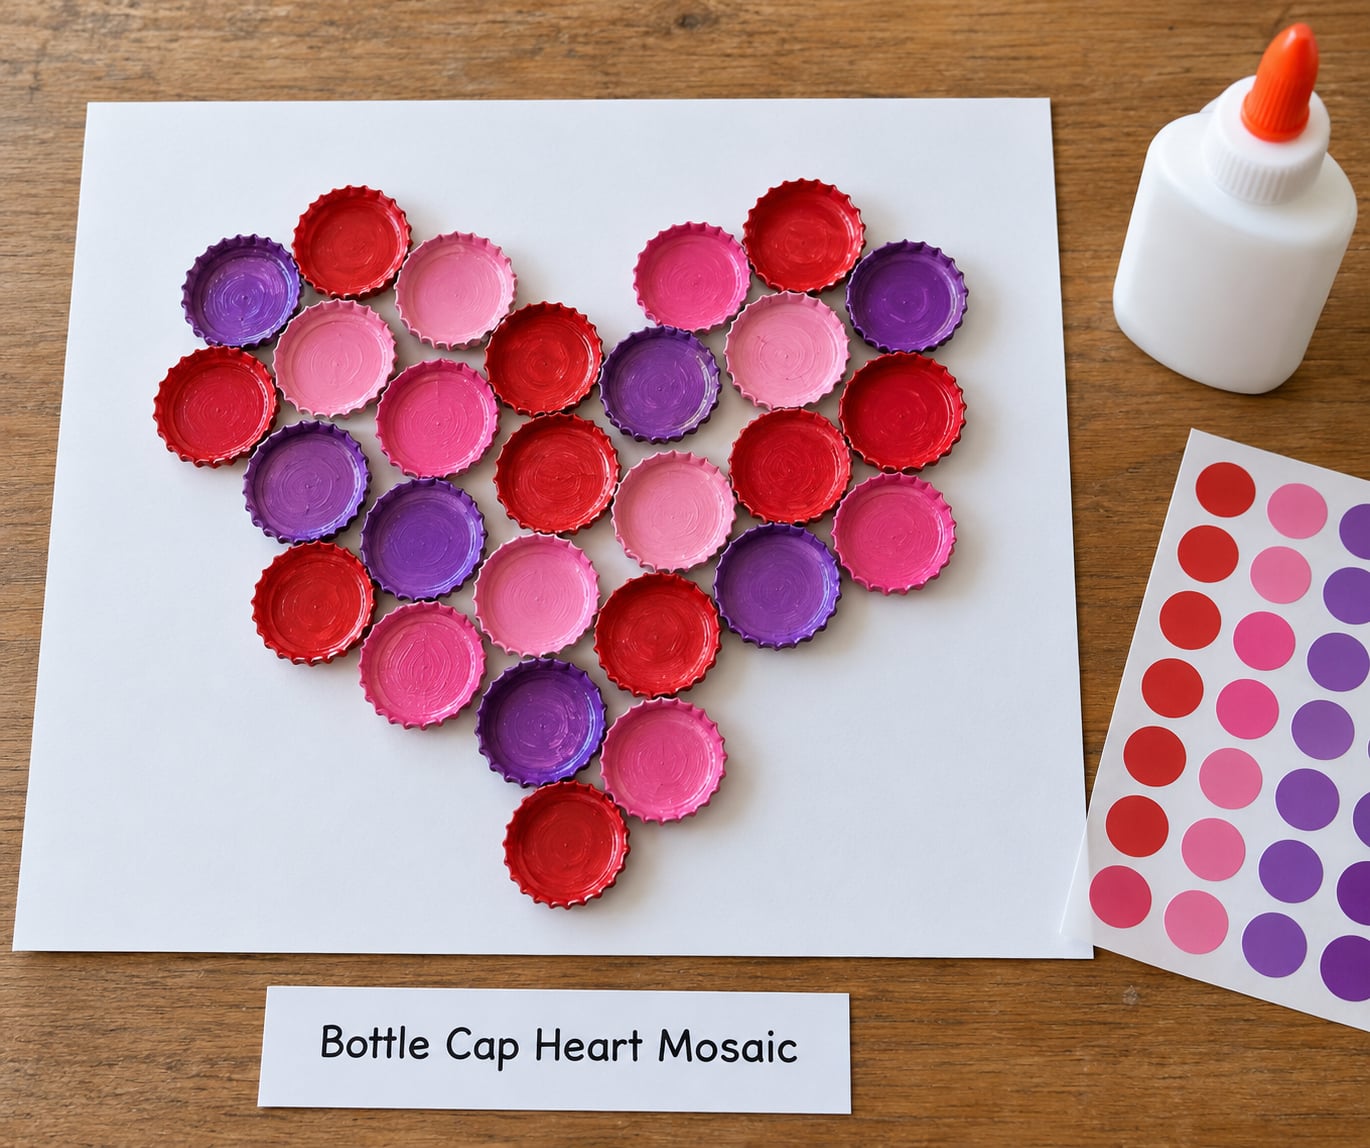
A mosaic heart built from bottle caps looks like a mosaic because each cap is a single tile. Recycling jars you were about to bin gives you the raw material for free.
Paint the caps in whichever colours your child picks, then leave them to dry fully overnight. Wet paint under a mosaic is the one way this project fails.
Draw a large heart on cardstock and have the children place caps inside it, edge first, working from the outline inward until the gaps fill in. Then glue them down.
Small caps are a choking hazard for children under three. For that age, cut large paper circles instead and get the same mosaic effect.
Forty minutes of active work spread over a drying day. The paint stage is medium mess; the gluing stage is low.
9. Heart Shape Mobile for the Classroom
A heart mobile works as a group activity because each child decorates one heart and the group assembles one mobile at the end. That also solves the display problem in a single afternoon.
Give every child a paper heart cut from cardstock and let them decorate it with paint, stamps or paper shapes. Line the finished hearts up to dry on a tray so nothing gets stepped on.
An adult then threads the hearts onto a long piece of yarn or a thin branch, spacing them so they do not overlap. Paper hearts curl in a warm room, so space them a little wider than you think.
String short pieces of tissue paper beneath each heart to catch air and make the whole thing turn. Blunt tack or command hooks hold the branch to the ceiling.
For twenty-plus children, skip the threading entirely. Tape the dried hearts in a row on a wall strip or a classroom door instead. Same display, no supervision needed.
Budget quantities for a class of 25: 30 hearts cut from about 40 sheets of cardstock, four bottles of glue, and one tray of shared paint.
10. Papier-Mache Treasure Box
This is the project to save for an older child who has already finished the simpler ones. It is the messiest of the ten and the only one that takes most of a day.
Build the heart shape first from cardboard strips taped in a heart outline, then cover it in strips of newspaper dipped in paste. Dry it fully, usually overnight, then add a second layer and dry again.
A box needs one more stage on top of that. Cut a slot in the top of the dried shell, or make the box from two heart halves taped back to back and cut the opening once the shell is hard.
Mix paste from one part flour to one part water. It sours if you keep the leftovers, so make only what you need and bin it the same day.
Decorate with paint, tissue paper squares or sequins once the shell is completely dry. Paper mache painted too early goes soft and dents.
Put a plastic sheet or shower curtain under the work area and expect at least two hours plus drying time. This one is genuinely satisfying to finish, so it is worth the set-up.
Frequently Asked Questions
What is the easiest heart craft for toddlers?
The paper heart collage is the easiest by a wide margin. Your child tears coloured paper into small pieces and presses them inside a heart outline you have already drawn. There is no cutting, no measuring and no glue that will stick to clothes. Expect around twenty minutes and put a scrap sheet underneath to catch stray glue.
How do you make a heart shape without a template?
Fold a sheet of paper in half, draw a half-heart along the fold with the straight edge of the heart on the crease, then cut along your line and unfold. You get a symmetrical heart every time, which is why this fold-and-cut method is the one to teach first. Draw a shape, do not measure, and let the fold make the two halves match.
What materials can I use to make heart crafts at home?
Construction paper, cardstock, felt sheets, tissue paper, salt dough and cardboard tubes cover most of the list, and every one is ordinary household material. For adhesives, a glue stick suits small hands and white glue holds heavier pieces. Paint, markers, yarn, pom-poms and bottle caps from the bin cover the decorating side.
Can children make these heart crafts for a Valentine’s Day card?
Yes, and most of them were designed with that in mind. The pom-pom card and the folded bookmark both fold flat enough to fit inside a school Valentine envelope, and the collage can be trimmed down to card size. Check your school’s rules early, since many set a deadline for bringing cards home.
How can I keep a heart craft project low-mess?
Choose projects where glue replaces paint or glitter, which rules out the mosaic, the handprints and papier-mache. Put a sheet of scrap paper or a plastic table cover under the work area, keep glue sticks rather than liquid glue, and do not open glitter at all. Have a damp cloth in reach so sticky hands get wiped rather than washed ten times.
What craft supplies need adult supervision?
Anything sharp or hot needs an adult: scissors for children under five, needles for sewing, and the oven for salt dough. Small parts matter too, since bottle caps, beads and pom-poms are choking hazards under three. For that age, swap in large paper circles or torn tissue paper instead of anything small enough to swallow.
Conclusion
Pick the row in the table that matches your child and your afternoon, then gather only those few materials before starting. Kids finish faster and complain less when there is one tray of supplies instead of the whole cupboard on the table.
Let them choose the colours and the decorations. On these crafts, the part they picked is the part they remember, and a slightly lopsided heart with their fingerprints beats a perfect one every time.