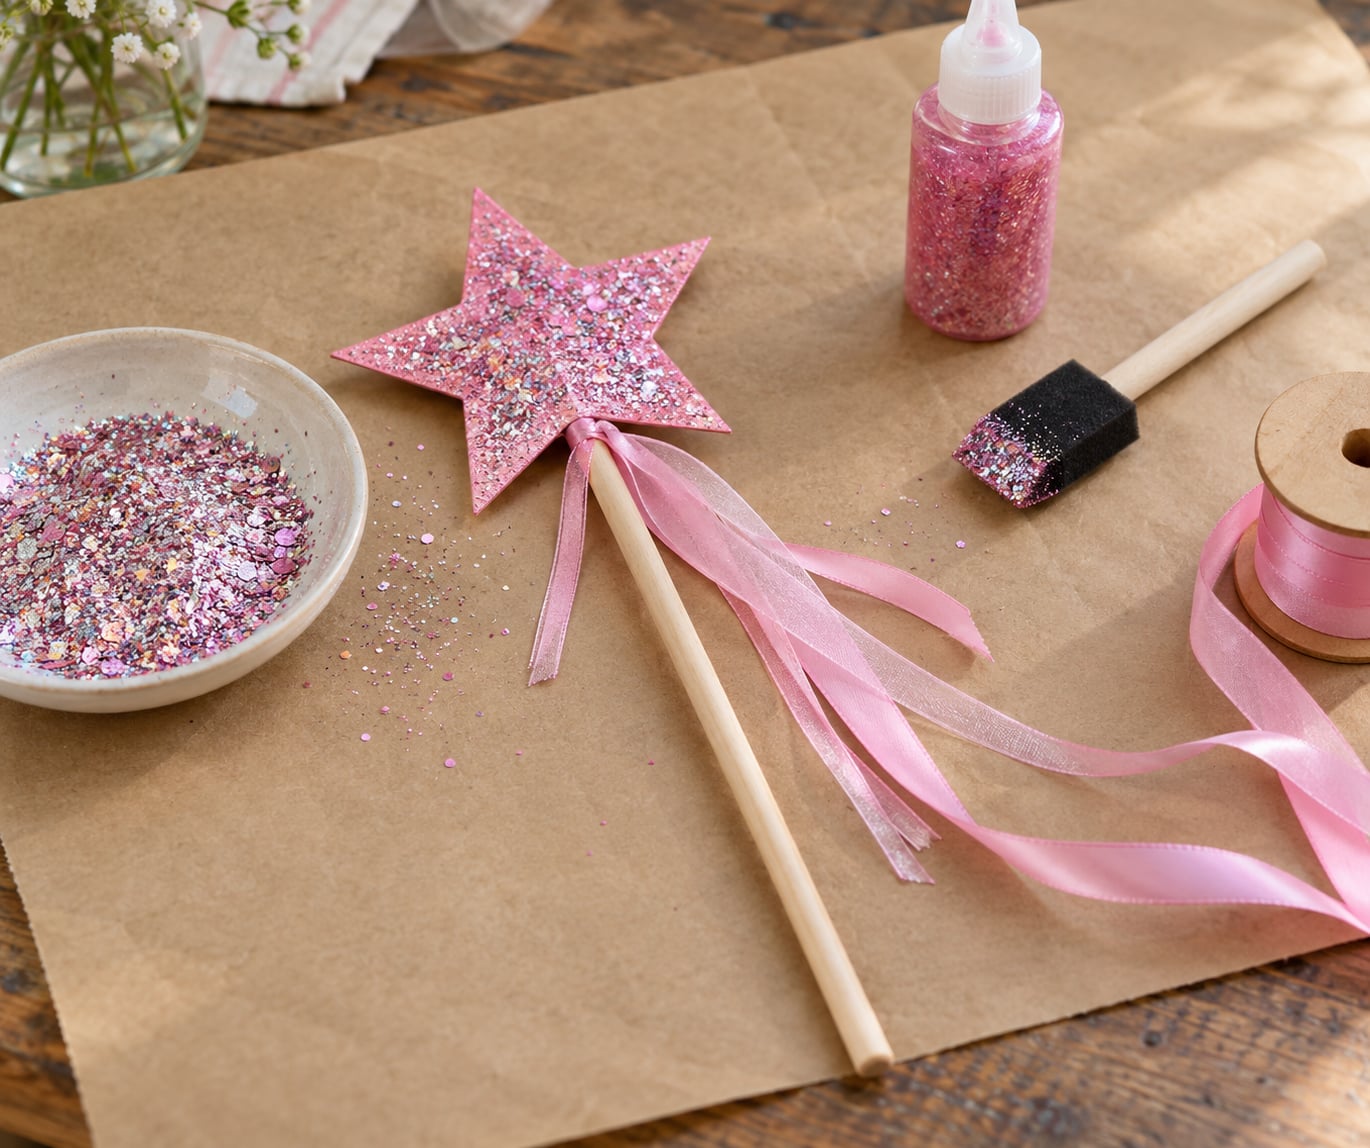
A magic wand with glitter takes about 20 minutes to make and needs a stick, a paper star, washable glue and some glitter. Cut out a five-point star, glue it to the top of a chopstick or dowel, then brush on a thin coat of glue and tap loose glitter over it before it dries.
This is the beginner version of how to make a magic wand with glitter, using things most homes already have. It suits kids roughly age three and up, works for a Halloween costume or a rainy Tuesday, and cleans up if you work over a tray.
Table of Contents
- 1What You Need
- 2Step-by-Step: How to Make a Magic Wand with Glitter
- 3Make the Wand Handle
- 4Cut Out the Magic Star
- 5Attach the Star and Add Glue
- 6Add the Glitter Finish
- 7Let the Magic Wand Dry
- 8Common Mistakes
- 9Safety Tips for Making a Magic Wand
- 10Fun Ways to Play with the Finished Wand
- 11Frequently Asked Questions
- 12What materials can I use to make a magic wand with glitter?
- 13How long does a glitter magic wand need to dry before children use it?
- 14Can I make a magic wand without using a star shape?
- 15What glitter is safest for a children’s craft?
- 16How can I make the magic wand handle stronger?
- 17How can I keep glitter from spreading all over the table?
What You Need
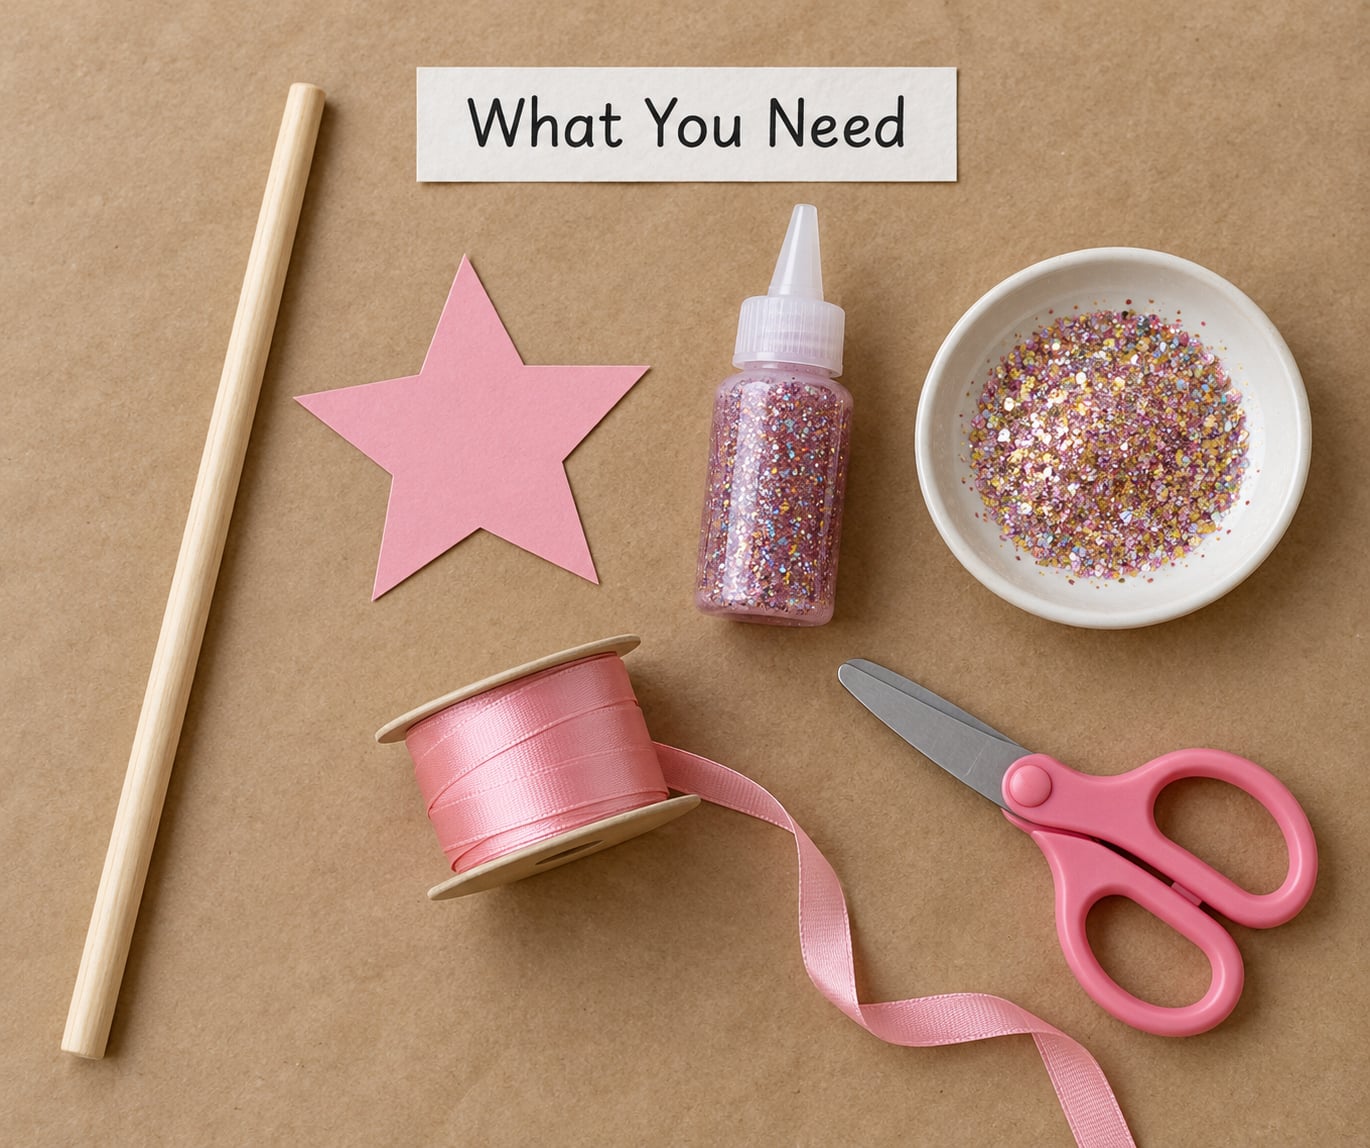
You can make a DIY magic wand with almost nothing bought in advance. A quick trip to a dollar store for a dowel and a bottle of glitter glue covers the rest.
- A handle: a 10 to 12 inch wooden dowel, a chopstick, a large craft stick, a wooden spoon handle, or a smooth stick from outside. A pencil works in a pinch.
- Star material: cardstock, thin craft foam or felt, cut two identical stars for a stiffer wand.
- Glue: washable craft glue or a school glue stick for young children; a hot glue gun for older kids and adults; Mod Podge or glitter glue for the sparkly coat.
- Glitter: fine glitter, chunky glitter, or a bottle of premixed glitter glue that needs no loose glitter at all.
- Decorations: ribbon, yarn, pipe cleaners, felt scraps, larger gems or rhinestones, and a strip of tape.
- Tools: child-safe scissors, a pencil, a sponge brush or cotton swab, and a baking sheet or shallow tray to work over.
Pick washable, non-toxic glitter and washable glue, and use a blunt-tipped pair of scissors. If anyone in the house is under three, skip loose glitter, small beads and hot glue entirely.
Step-by-Step: How to Make a Magic Wand with Glitter
Make the Wand Handle
Choose a handle that fits comfortably in a child’s fist, then check it over for splinters and sand any rough spots with fine sandpaper. A dowel gives the steadiest grip and a chopstick gives you a tapered end that reads as a wand rather than a paddle.
Wrap ribbon or yarn around the top third of the handle and finish it off with a dab of glue or a strip of tape. Leave the very top bare, because that is the joint that has to hold the weight.
Cut Out the Magic Star
Draw a five-point star by sketching five long straight pencil lines that cross each other, then cut along them with scissors. Cardstock gives the crispest sparkle because it is flat and holds glue well.
For younger children, skip the cutting: give them a pre-cut foam star and let them decorate it, or trace a paper template so the point lines are already there. Tracing also makes a set of matching wands possible for a party.
Attach the Star and Add Glue
Center the star on the top of the handle and press it into place. A hot glue gun gives the strongest joint in seconds, but an adult should do that part and the glue should be kept away from small hands.
No hot glue gun? Run a bead of craft glue along the top of the handle, press the star on, and tape it upright against a cup or a jar while it cures. Wipe any squeeze-out with a damp cloth so the grip stays smooth and no hard glue blobs are left where a hand touches.
To strengthen the spot where play will hit hardest, add a second small dab on the back of the star or wrap the joint once with a strip of clear tape.
Add the Glitter Finish
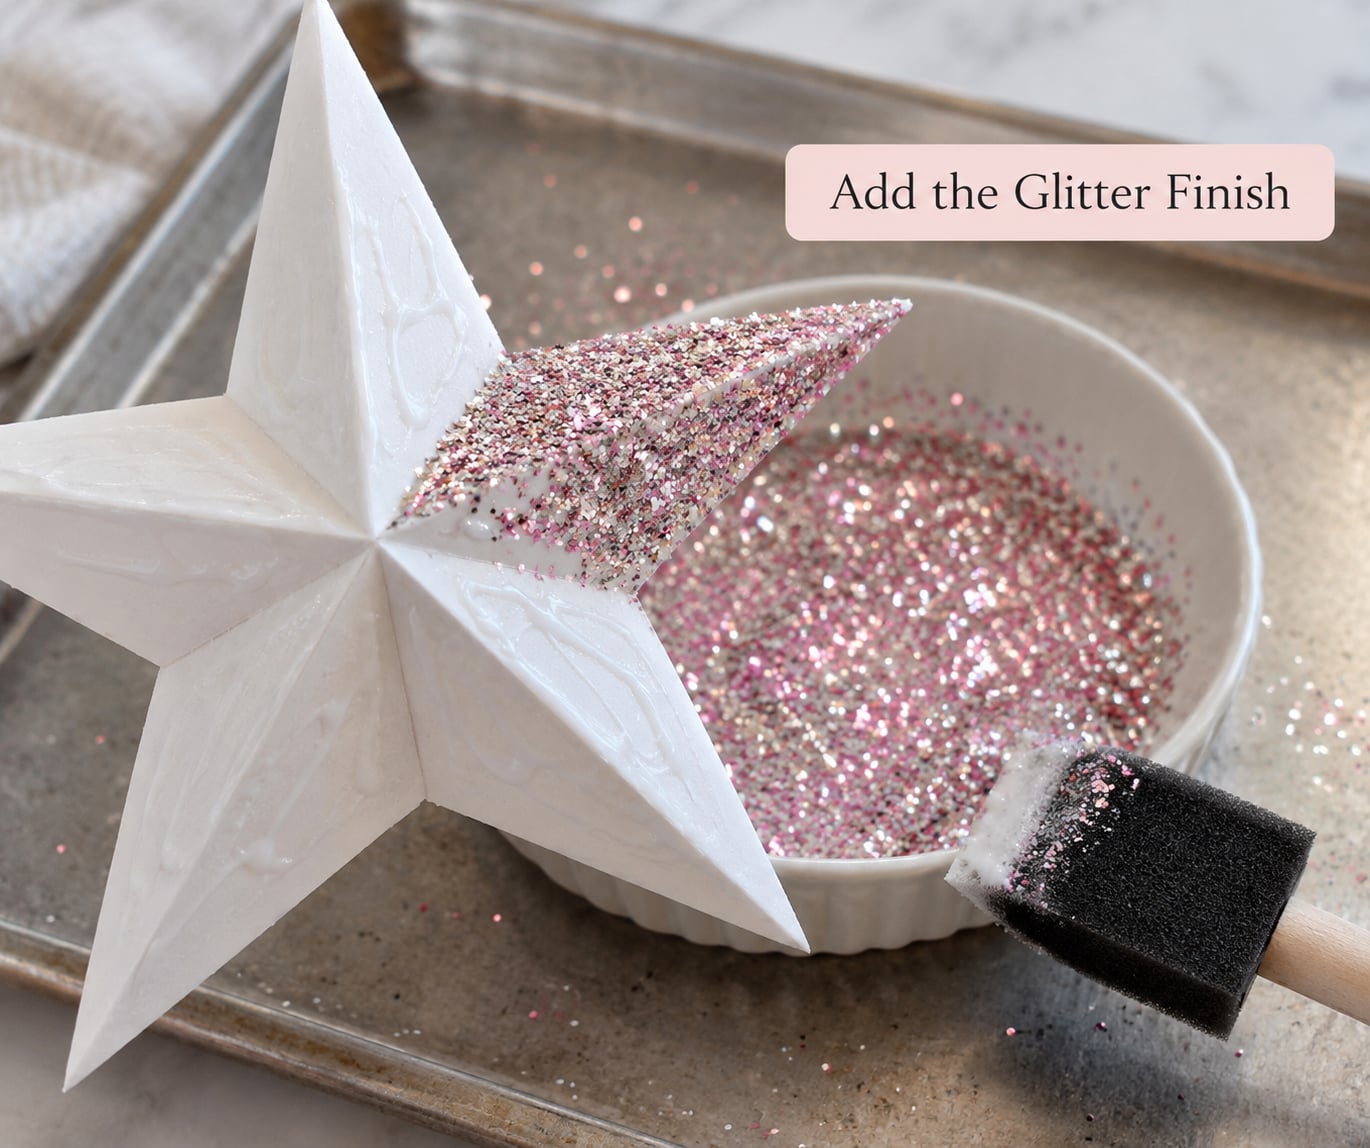
Set a baking sheet or a sheet of paper on the table. It catches the glitter that would otherwise end up in the carpet fibers, and it lets you tip the wand to pour off the excess.
Brush a thin coat of glitter glue or Mod Podge over the star. Thin is the operative word, because a thick coat stays tacky for days and peels off in sheets.
While the glue is still wet, hold the star over a shallow dish of loose glitter and tap the side of it with a fingertip. The glitter drops straight onto the wet glue, and tapping beats sprinkling because the loose grains fall past instead of bouncing off.
Let it sit for about 20 minutes, then tip the wand upside down over the tray and tap again to knock off anything not bonded. A premixed glitter glue squeezes straight onto the star in a spiral, which is the tidiest option for small children.
Let the Magic Wand Dry
Hot glue grips the star in three to five minutes. Craft glue needs about an hour, and Mod Podge or a thick glitter coat wants two hours or more before it stops feeling tacky.
Lay the wand flat on paper while it cures, not propped against something, so the glitter does not smudge or press into the surface. A dry touch on the edge of the star tells you it is ready; a soft mark means give it longer.
Add ribbons, yarn wraps, gems or a fabric paint finish only after the glitter has set, so the decoration presses on rather than into wet glue.
Common Mistakes
The glitter peels off in a few days. Almost always one of three things: too thick a glue coat, glitter added after the glue dried, or extra loose glitter left on top with nothing holding it. Thin coat, apply while tacky, tap off the excess.
The star wobbles. It is usually off-center or the glue has not fully cured. Center it on the handle, tape it upright, and give the joint the full drying time before the first wave of pretend spells.
The joint splits during play. The weak point is always where the star meets the stick. Reinforce it with a second dab of hot glue, or a wrap of tape with craft glue around the base of the star, and check it every few weeks of heavy use.
Glitter ends up in hair and on the sofa. Work over a baking sheet every time, and skip loose glitter entirely if the wand will be waved around indoors. For a floor, put a nylon stocking over the vacuum hose nozzle; for a fabric sofa, a lint roller catches what settles.
The wand looks flat and cheap. Fine glitter over a wet coat reads brighter than glitter sprinkled on a dry one, and a second color on just the star points looks deliberate. Chunky glitter over fine gives depth, and a fabric paint base coat underneath stops the paper showing through.
Safety Tips for Making a Magic Wand
Hot glue burns, and the nozzle stays hot long after you put it down. An adult handles the gun, the sticks stay on the shelf, and the wand cools on a heat-safe surface before a child picks it up.
Loose glitter, small beads and glued-on gems are choking hazards for children under three, so skip that age range for small parts or choose oversized decorations that cannot be swallowed. Keep glitter away from eyes and mouths, and remember that no glitter is edible.
Use non-toxic, washable glitter and washable glue, and supervise the whole build rather than just the gluing part. For a child who avoids glitter texture, swap it for felt, sequins, foil stars or glitter gel, which stays put and does not shed.
If a hot glue gun is not allowed in your space, craft glue plus a taped clamp works well enough. Add a little extra drying time before the wand is handled roughly.
Fun Ways to Play with the Finished Wand
Give the wand a name and a set of words. A three-letter sound invented by your child turns every wave into a spell, and a pretend spell jar of buttons and ribbon makes the casting ritual part of the play.
Pair it with a costume: a pointed hat and a cape for a wizard, a flower crown for a fairy wand, a long dress and a tiara for a princess. For Halloween, the wand finishes a costume the child made themselves, which tends to be worn with more conviction than a bought one.
Change the topper and the wand becomes a different toy. A heart for a love spell, a crown for a royal, a folded foil crystal or a bundle of pipe cleaners bent into a star for a crystal wand.
It works for quiet indoor play too. A rainy afternoon, a long car trip or a slow Sunday, one wand and a few invented spells fill about twenty minutes on their own.
Frequently Asked Questions
What materials can I use to make a magic wand with glitter?
You need a stick, a star and glitter. A wooden dowel, chopstick, large craft stick, wooden spoon handle or smooth stick works for the handle. Cut the star from cardstock, craft foam or felt, ideally two identical pieces for strength. For the sparkle, use washable glitter glue or Mod Podge over the star, or premixed glitter glue on its own. Add ribbon or yarn to wrap the grip.
How long does a glitter magic wand need to dry before children use it?
Hot glue holds the star in three to five minutes, but the glitter coat needs longer. Washable craft glue is dry to the touch in about an hour, while Mod Podge or a thick layer of glitter glue wants two hours or more. Lay the wand flat while it cures, and wait until a light fingertip press on the edge of the star leaves no mark before a child waves it around.
Can I make a magic wand without using a star shape?
Yes, and the topper is where most of the variety comes from. Cut a heart, a moon, a crown, a leaf or a lightning bolt from the same cardstock and glue it to the handle the same way. Other options include a foil-wrapped cardboard crystal, a felt circle with a rune drawn on it, or pipe cleaners bent into a star and bound with ribbon. Younger children can also decorate a pre-cut foam shape.
What glitter is safest for a children’s craft?
Non-toxic, washable glitter paired with washable glue is the safest pick for a kids’ craft. Avoid loose glitter, small beads and glued gems for children under three, since those are choking hazards, and keep glitter away from eyes and mouths. If a child dislikes the texture, use glitter gel, sequins, foil or felt instead. Premixed glitter glue also reduces loose glitter in the air.
How can I make the magic wand handle stronger?
Strength comes down to the joint, because the stick itself rarely breaks. Sandwich the handle between two cardstock stars and run hot glue around the base of the top star, or wrap the joint once with clear tape and a layer of craft glue over it. Choose a dowel rather than a thin craft stick if rough play is expected, and check the joint every few weeks for cracks.
How can I keep glitter from spreading all over the table?
Work over a baking sheet or a sheet of paper and treat it as a catch-all for the whole build. Tip the wand upside down over the tray to pour off unbonded glitter instead of brushing it off. A shallow dish of glitter keeps the pile contained. For a low-shed wand, skip loose glitter entirely and use premixed glitter glue squeezed straight onto the star, then wipe the tray with a damp cloth when you are done.
Start with the handle and the star, since that joint decides whether the wand survives a week of play, then add the glitter last over a baking sheet while the glue is still wet. A wooden dowel, a cardstock star, washable glitter glue and about 20 minutes is the whole project.