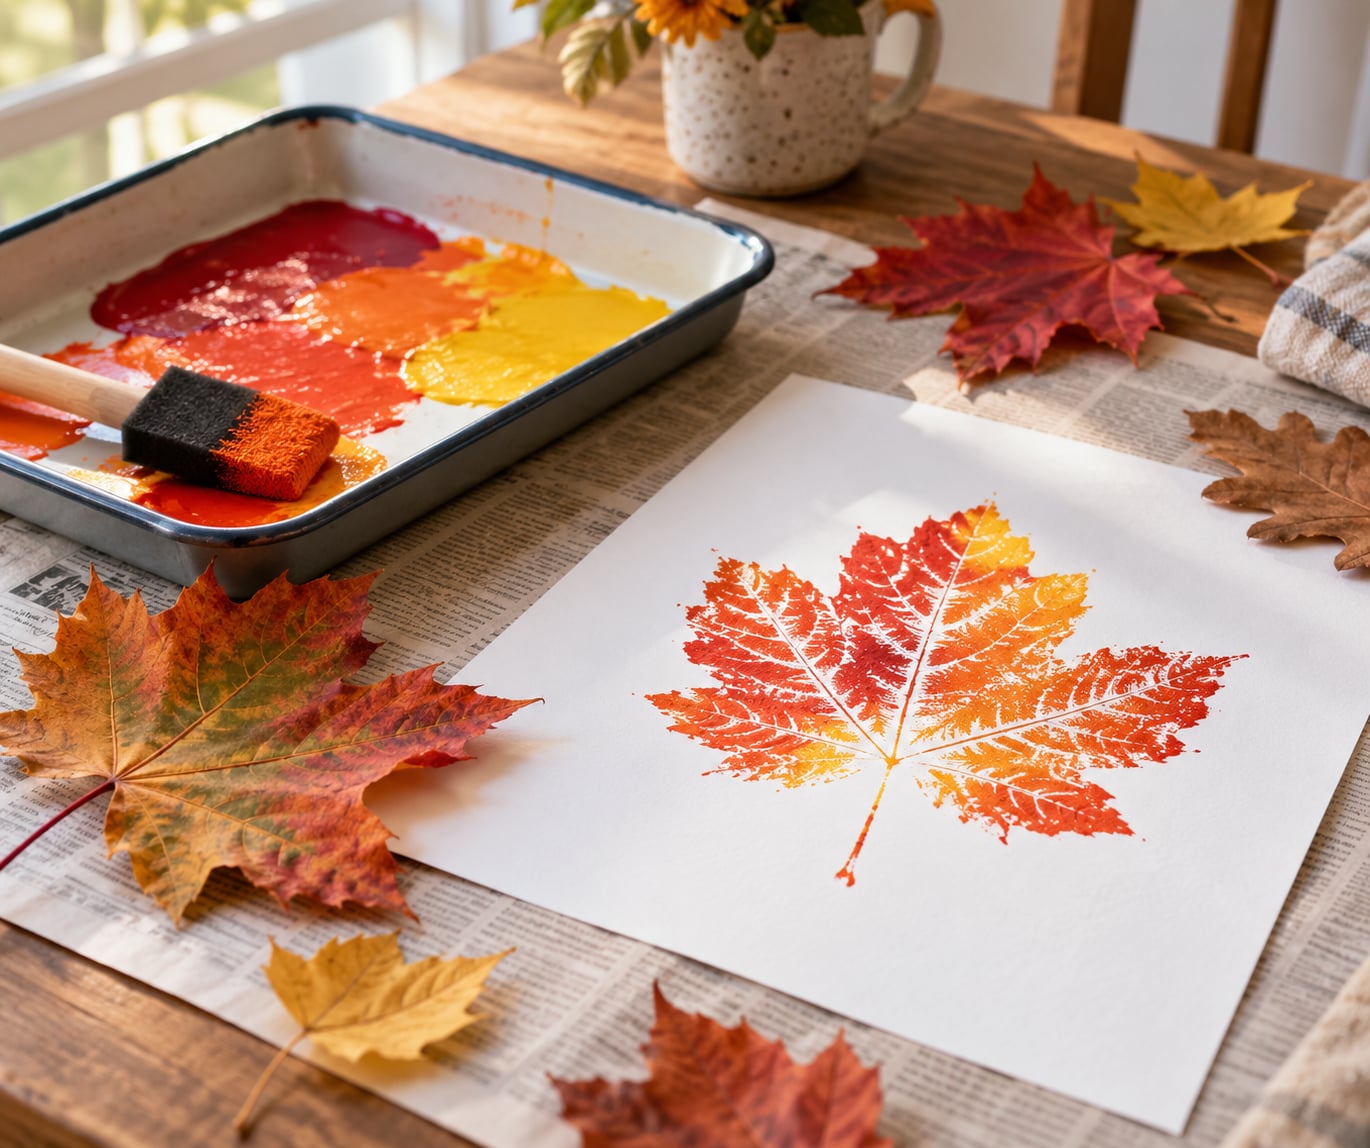
To print with leaves and paint, you coat one side of a real leaf with a thin layer of paint, press it paint-side down onto paper, and lift it away to leave a detailed impression of the shape and veins. Flat leaves with pronounced veins work best, and thin paint plus firm, even pressure is what transfers the detail. Allow 10 minutes for the first print and about 20 minutes for a small batch, and expect the paint drying on your hands to take longer than the art.
It is the cheapest autumn craft I know, because the main ingredient falls off a tree for free. Everything else comes from a craft drawer or a kitchen drawer, which is exactly why it survives contact with a preschool classroom.
Table of Contents
- 1What You Need
- 2Step-by-Step: How to Print with Leaves and Paint
- 3Step 1: Prepare the Leaves
- 4Step 2: Set Up Your Work Surface
- 5Step 3: Paint One Side of a Leaf
- 6Step 4: Press the Leaf onto the Paper
- 7Step 5: Lift the Leaf and Check the Print
- 8Step 6: Repeat, Dry, and Display
- 9Common Mistakes and Easy Fixes
- 10Tips for Cleaner and More Interesting Leaf Prints
- 11How to Print with Leaves and Paint Without the Mess
- 12Pressure and Tools
- 13Colour and Layering
- 14Adjusting for Age
- 15Collecting and Preparing Leaves
- 16Frequently Asked Questions
- 17How can I print using leaves?
- 18What paint is best for leaf printing?
- 19How do I get a crisp leaf imprint instead of a coloured blob?
- 20How do I keep the leaf from shifting or smudging?
- 21What can I do with the finished leaf prints?
- 22Can you make leaf prints without fresh leaves?
- 23Conclusion
What You Need
Collect these before the leaves come inside, because once you start painting you will not want to stop to find the sponge.
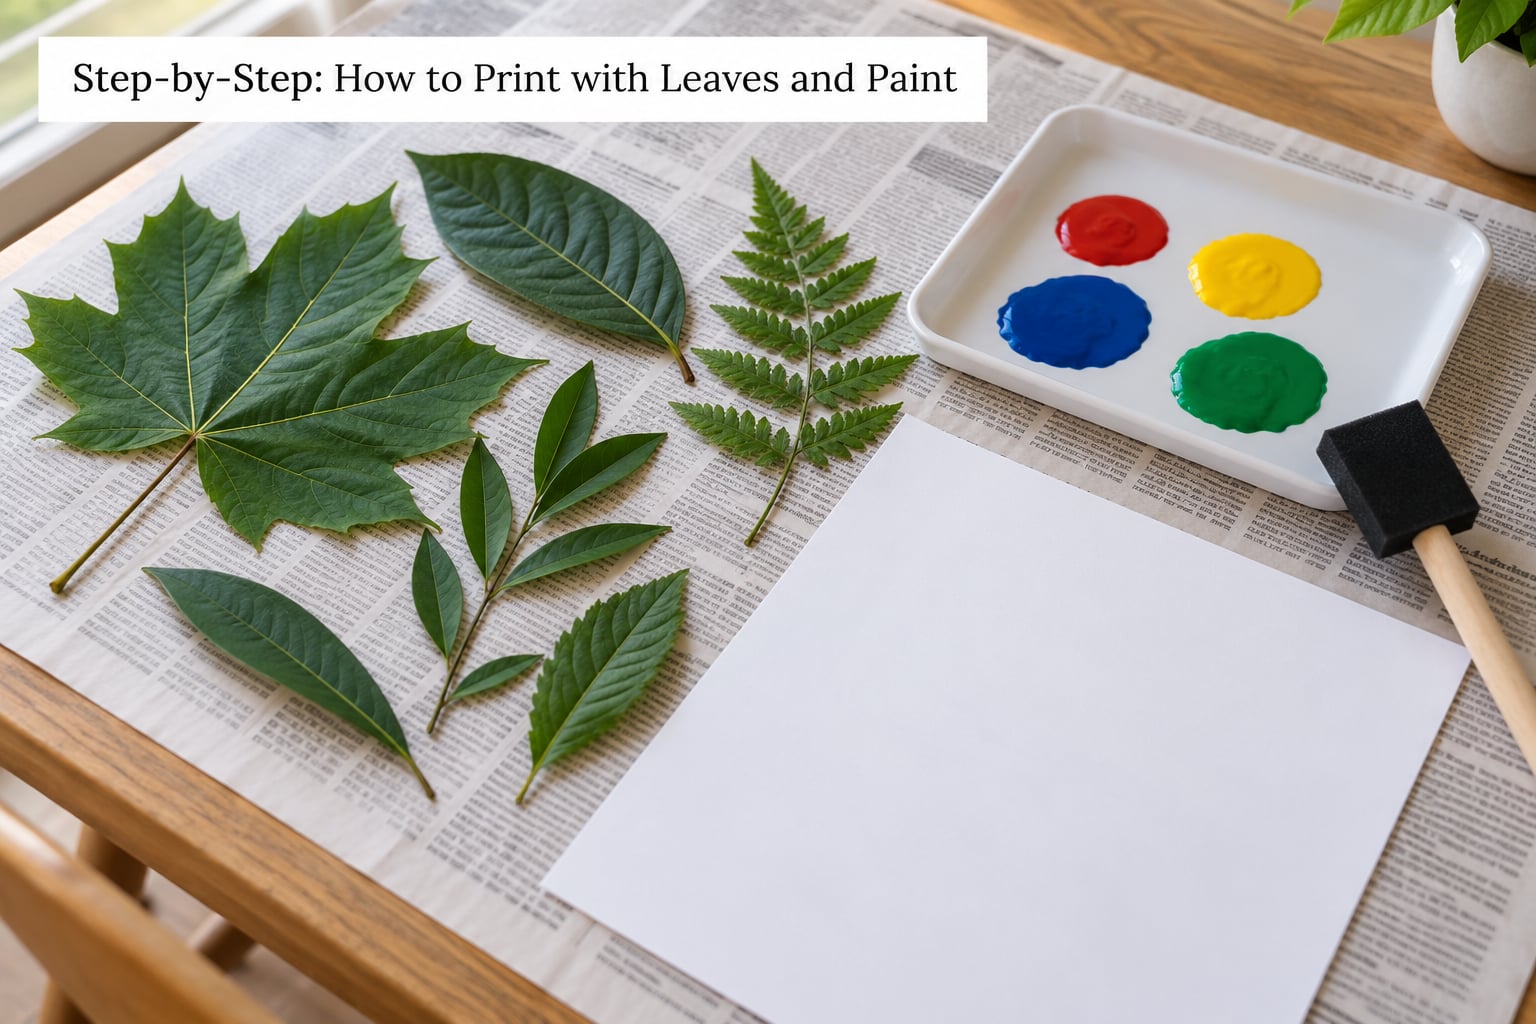
- Leaves: flat, freshly fallen ones with visible veins. Maple, oak, beech, elm and sweetgum all print well. Skip anything curled, brittle or spotted.
- Washable, non-toxic paint: liquid tempera for toddlers and classrooms, acrylic for the brightest prints, tempera or gouache for the easiest cleanup.
- Sturdy paper: cardstock or heavy drawing paper holds up best. Standard printer paper works, but it tears if you press hard.
- A brush or foam sponge: a flat brush gives an even coat, a sponge gives texture.
- A shallow tray or plate: for pouring a puddle of paint to dab into.
- Newspaper or a plastic sheet: to protect the table. Painting directly on a table is how a craft turns into a chore.
- A damp rag or paper towel: for hands, and for wiping the table before it dries.
- A drying rack: a sheet of printer paper, a clipboard, or the edge of a bookshelf. Prints must dry flat and undisturbed.
Useful extras: a brayer or small rubber roller for even pressure, a spray bottle for dampening paper, a rolling pin, and a cup of water for rinsing brushes between colours.
If you have no fresh leaves, a set of printable leaf templates traced onto cardstock works as a stand-in, though a real leaf gives you vein depth a printed outline never will.
Step-by-Step: How to Print with Leaves and Paint
Step 1: Prepare the Leaves
Choose leaves that are flat and flexible, with veins you can see and feel on the underside. Wipe off dirt and let surface moisture dry, because a wet leaf dilutes the paint and a dirty leaf prints the dirt too.
Nothing needs more than that for a fresh leaf. If you are collecting ahead of time, press the leaves flat between sheets of newspaper with a heavy book on top for a week or two, then keep them dry and use them promptly. Leaves that are too fresh snap when you press them, and leaves that have gone crumbly break into pieces mid-print, so timing matters more than technique here.
You will know a leaf is ready when it lies flat without curling and bends without creasing.
Step 2: Set Up Your Work Surface
Cover the table with newspaper or a plastic sheet and put a damp rag nearby before you open the paint. Lay your paper where the finished print will sit, because moving a sheet with a wet print on it is how prints smudge.
Pour one colour into a shallow tray and keep spare scrap paper within reach for testing the paint load. Working one colour at a time also lets you stack prints into a drying pile without the colours bleeding into each other.
Do your first print on scrap paper. Everyone’s first attempt is a test.
Step 3: Paint One Side of a Leaf
Turn the leaf over and paint the underside, where the veins stand proud. The top of a leaf is smooth and waxy, so it transfers a silhouette; the underside carries the texture that makes a print interesting.
Aim for a thin, even layer, roughly the thickness of a coat of nail polish. Paint should be about as thick as ketchup, not cream and not water. Thick paint fills in the gaps between veins and gives you a coloured blob, while very watery paint runs off the edges and leaves white patches in the middle of the leaf.
You will know the coat is right when the veins still read as raised lines through the paint and no thick paint pools near the stem.
Step 4: Press the Leaf onto the Paper
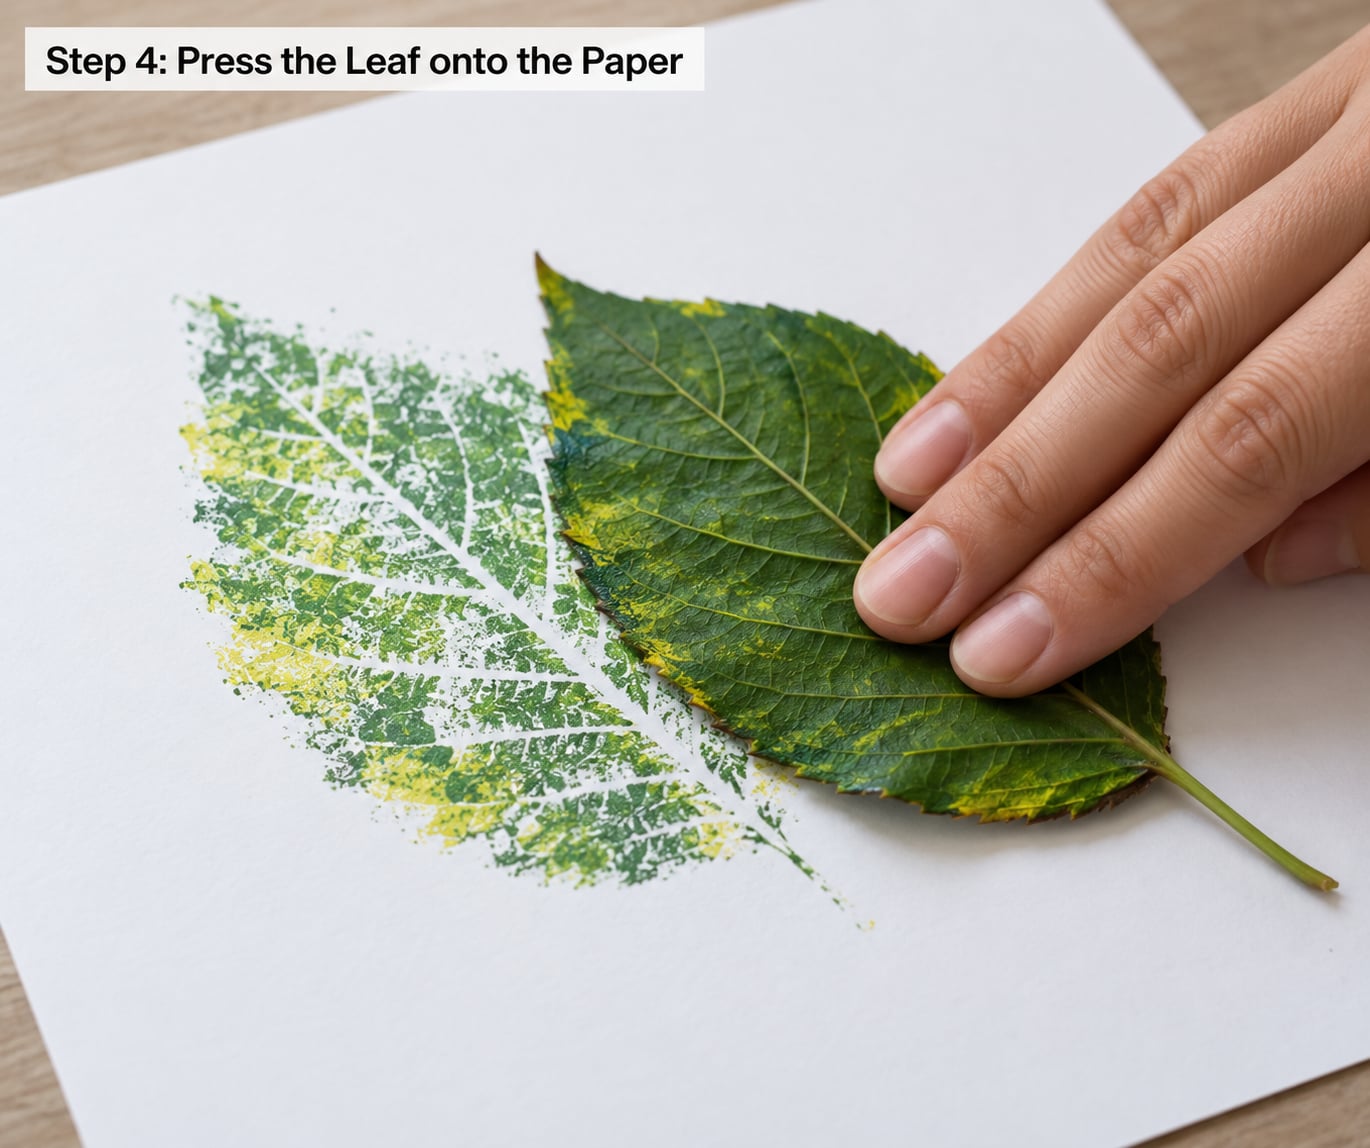
Turn the painted leaf over so the wet side faces down, place it on the paper, and press gently from the stem toward the tip. Hold every area long enough for the colour to transfer, moving your hand rather than jabbing straight down, which is what causes the leaf to shift.
Use the palm of your hand for a small leaf, a brayer or rolling pin for a bigger one, and a piece of cardboard for an even, flat press. Rock the roller across the whole leaf once, stem to tip, then once across the width. If the leaf moves at any point, lift it, repaint it, and start that print again rather than trying to fix a smeared one.
The print is ready to lift when the paper underneath the leaf has gone matte everywhere it was touched.
Step 5: Lift the Leaf and Check the Print
Peel the leaf away slowly from one edge, almost rolling it back rather than pulling straight up, and set it aside on scrap paper. Look at the result: you want visible veins, an even colour field and no areas where the leaf lifted before the paint released.
If the print has white gaps, the coat was too thin. If the veins have disappeared into solid colour, the coat was too thick. The same leaf usually gives a better second impression, because a little paint always stays behind in the veins, so re-press it before you rinse it under the tap.
You will know the print worked when the vein pattern is readable at arm’s length.
Step 6: Repeat, Dry, and Display
Make prints in several colours and a range of leaf sizes, keeping one colour per sheet while you work. Rinse brushes between colours and return leaves to the newspaper until they are dry to the touch.
Leave each sheet completely flat until the paint is dry to a light touch, usually a few hours; thicker paint takes overnight. Write the leaf’s name and the date in a corner while the paint is still slightly damp if you are making a nature journal page or identification sheet.
Finished prints go three ways: taped in rows for a wall display, trimmed and mounted for greeting cards, or mounted on cardstock for a seasonal collage.
Common Mistakes and Easy Fixes
Almost every disappointing leaf print comes down to paint thickness, pressure, or timing. Find the symptom below and fix that one thing.
- Blank or nearly blank print: the coat was too thin or the leaf was lifted before the paint released. Press longer and hold the whole leaf down for a count of five before lifting.
- Solid blob with no vein detail: too much paint. Wipe the brush, load less, and dab off the excess on the edge of the tray.
- Smudged or streaked print: the leaf shifted while you pressed, or you moved the paper. Anchor the paper with your free hand and press from the stem outward instead of straight down.
- Torn paper: you pressed too hard on thin stock. Use cardstock, or lighten the pressure and use a brayer instead of your fingertips.
- Leaf sticks to the paper: the paint was left too thick, or the leaf was lifted before the paint had set. Thin the coat, and wait until the sheet is fully dry before trying to peel a leaf off it.
- Watery, chalky paint: water-based paint thins as you rinse the brush, and dried paint mid-project makes it lumpy. Keep a second rinse cup of clean water, and mist the brush when it starts dragging.
- Paint sitting on brushes: acrylics dry fast and ruin a brush quickly. Rinse immediately after each colour, and keep a damp cloth in your non-painting hand.
- Messy hands and table: paint goes on thinner than you think. A damp rag on the table edge plus sleeves rolled up beats a cleanup session afterwards.
Tips for Cleaner and More Interesting Leaf Prints
How to Print with Leaves and Paint Without the Mess
Put a sheet of newspaper under the finished print before it dries, then lift the whole thing and move it. Paint only one side of each leaf, keep the paint puddle small, and set out fewer colours than you think you need. Teachers and parents running this activity with a group generally find that three colours and one brush per child keeps the noise and the cleanup down.
Process art, by the way, is the goal rather than a tidy row of identical prints. Kids learn more from the ones that smudged.
Pressure and Tools
Your palm is enough for small leaves and nothing more. A brayer, a small rubber roller or a silicone rolling pin gives the even, all-over pressure that lifts the midrib and secondary veins cleanly, and it is faster on a batch of forty prints. Rocks and clean pebbles work too, and children enjoy them, which is a fair trade.
Colour and Layering
Contrast beats subtlety. A red maple reads better in bright green than in pale orange. For a layered look, let the first colour dry completely, then press the same leaf or a different one in a second colour so the shapes overlap without bleeding.
Lightly dampen thicker cardstock with a spray bottle and let it settle before printing. Damp paper takes paint more evenly and reduces the white gaps that show up in the middle of a leaf.
Adjusting for Age
Toddlers can do this with liquid tempera, a sponge and large simple leaves, and the mess is the activity. Preschoolers can manage the press-and-lift step with help. School-age kids can try layered prints, multicolor arrangements, printing on kraft paper or fabric, and gelli plate printing, where a thin layer of acrylic on a gel plate picks up a single crisp impression of the leaf and pulls cleanly.
Fabric works well with acrylic paint plus a fabric medium, which helps the colour bind to the fibre instead of sitting on top.
Collecting and Preparing Leaves
Take only what you need and leave the rest where it fell. Skip leaves from trees treated for disease, avoid anything you suspect is irritant, and rinse gently if the leaf is grubby. If you are collecting in the colder months when fresh leaves are scarce, pressed leaves kept in an envelope stay usable for months, or you can fall back on printed leaf templates.
A print and a rubbing are different techniques worth teaching side by side: the print transfers paint and shows shape and vein texture, while a rubbing uses a crayon under the leaf and shows the surface pattern only.
Frequently Asked Questions
How can I print using leaves?
Paint the underside of a flat leaf with a thin, even coat of washable paint, turn it paint-side down onto paper, press it down from the stem to the tip, and peel it away slowly. Leave the print flat until it dries, then label it if you want a nature journal page. Practice on scrap paper first.
What paint is best for leaf printing?
Liquid tempera is the easiest choice for toddlers and classrooms because it washes out of clothes. Acrylic gives the brightest, most vivid prints and works on fabric and kraft paper, but it needs rinsing off brushes immediately. Gouache sits in between, with opaque colour and washable cleanup. Watercolor works but tends to run and leave white gaps.
How do I get a crisp leaf imprint instead of a coloured blob?
Thin the paint. Load a flat brush, dab the excess on the edge of the tray, and apply only enough paint to make the veins show through as raised lines. Then press firmly and evenly with a brayer or your palm and hold for a count of five before lifting. Blobs come from thick paint, not from the leaf itself.
How do I keep the leaf from shifting or smudging?
Anchor the paper with your free hand, place the leaf once, and press from the stem outward instead of straight down. If it slides at any point, lift it, repaint it and start that print again. Let each sheet dry completely flat before moving it, and never stack a wet print against another sheet.
What can I do with the finished leaf prints?
Mount them on cardstock as a seasonal wall display, trim them into greeting cards or bookmarks, or tape them into a nature journal next to a rubbing of the same leaf. Prints also work well as wrapping paper, collage pieces and identification sheets when you write the tree’s name in the corner. Leftover paint on paper backs makes small bookmarks.
Can you make leaf prints without fresh leaves?
Yes. Pressed leaves stored dry in an envelope stay usable for months, though older leaves are more fragile and need a gentler press. When no leaves are available at all, trace a printable leaf template onto cardstock, cut it out, and print from that. Real leaves still give you the raised vein depth a template cannot.
Conclusion
For the easiest first attempt, pick one broad leaf with strong veins, use a thin coat of washable tempera or acrylic, lay it paint-side down on white paper, and press gently from the stem to the tip for a slow count of five. Peel it away slowly, let the sheet dry flat, and check that you can read the vein pattern.
Once that one works, the fun is in the experiments: a second colour pressed over a dry first print, a brayer instead of a thumb, kraft paper instead of printer paper, or a gelli plate for a cleaner single impression. Collect a few different leaf shapes, and how to print with leaves and paint stops being a chore and becomes the thing your child asks for on the first warm afternoon of autumn.