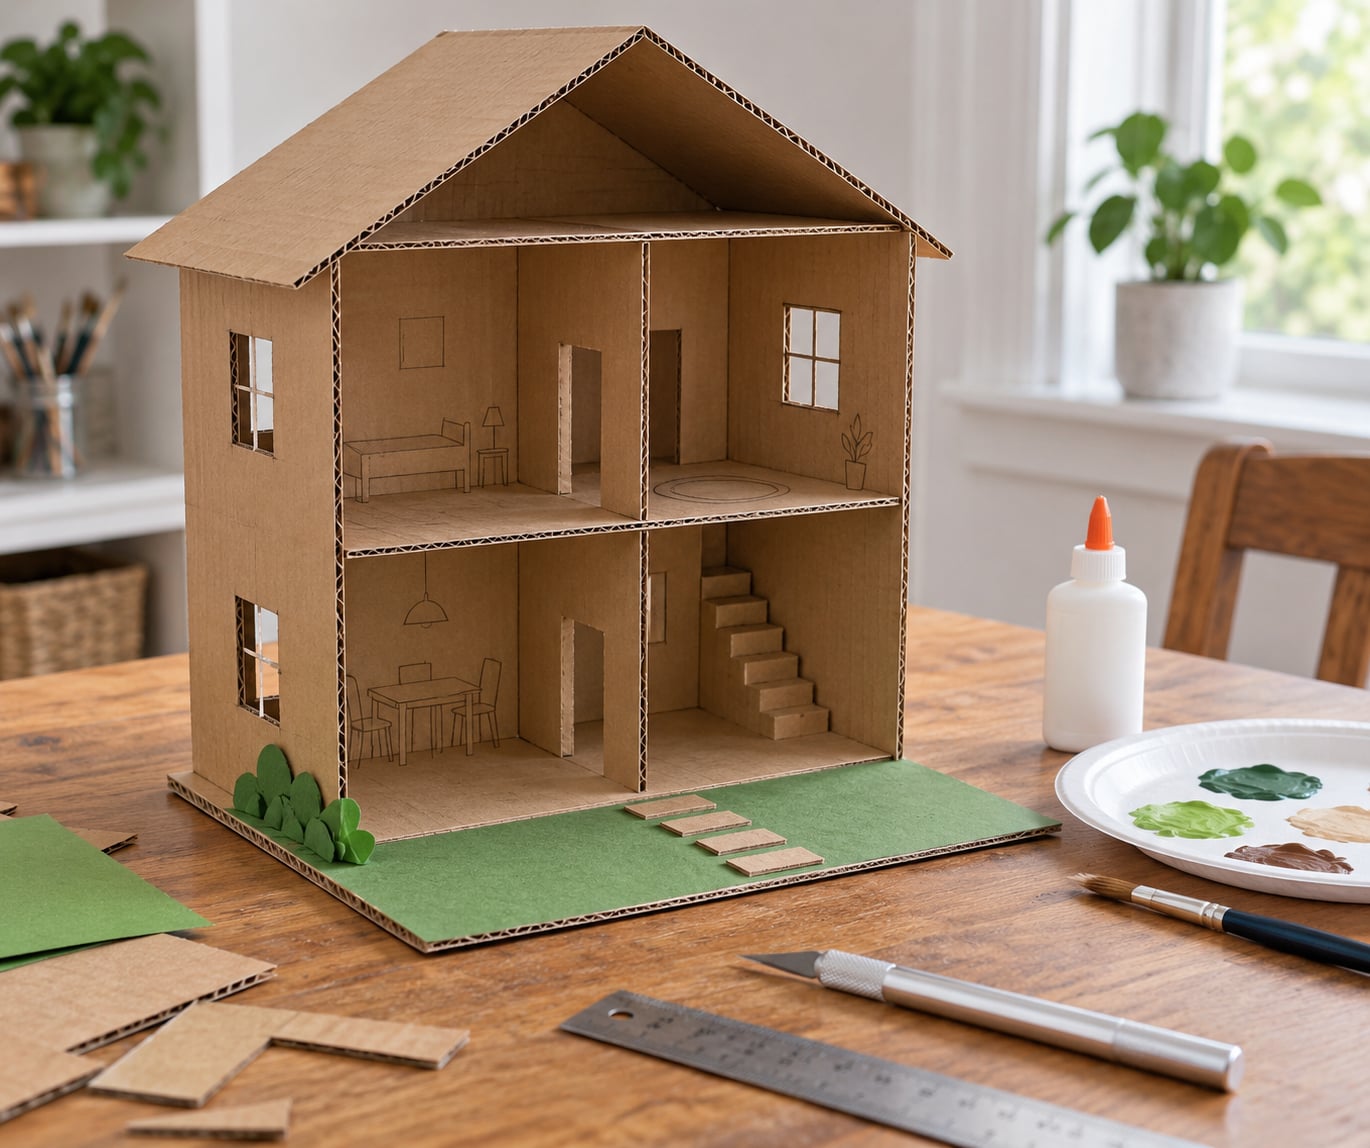
A cardboard dollhouse is a miniature or child-sized playhouse built from recycled shipping boxes or corrugated cardboard, cut into rooms, then painted or papered and filled with handmade furniture. To make one, you cut a large box into a base and walls, open the door and window holes, add floors and a roof, glue everything down, and decorate. A single-box build takes about two hours for a first-timer and costs almost nothing.
I’ve built three of these with my kids, and the one that survived longest came down to three things: a wide base, craft-stick floors, and glue allowed to dry fully before play. Skip any of those and the walls bow out by week two.
Table of Contents
- 1What You Need
- 2Tools and supplies
- 3Prep checklist before crafting
- 4Step-by-Step
- 51. Plan the Cardboard Dollhouse Layout
- 62. Cut the Doors and Windows
- 73. Add the Floors and Stairs
- 84. Build and Attach the Roof
- 95. Make the Dollhouse Stand
- 106. Decorate the Rooms and Exterior
- 117. Add Finishing Details
- 128. Let It Dry and Check Its Stability
- 13Common Mistakes
- 14Frequently Asked Questions
- 15What is the best cardboard box for a dollhouse?
- 16How do I make a cardboard dollhouse smaller or larger?
- 17What age is appropriate for making a cardboard dollhouse?
- 18Which paints and glues are safe for a kids’ craft?
- 19How can I reuse a cardboard dollhouse after it is made?
- 20Conclusion
What You Need
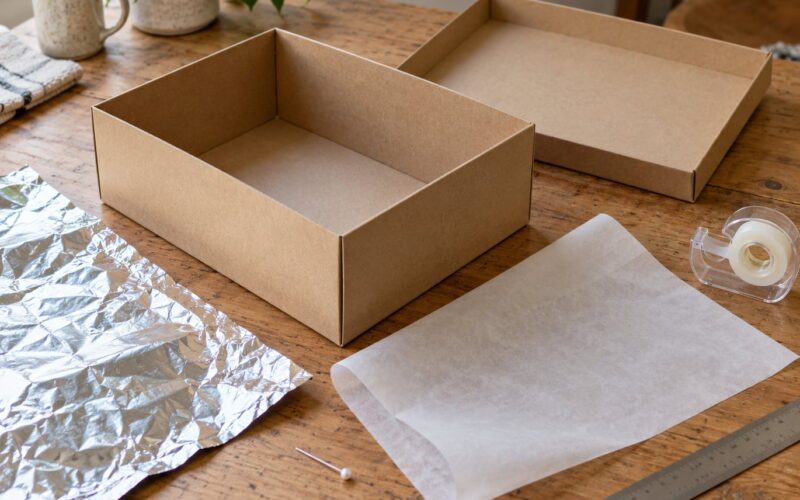
Start with the box, because the box sets the finished size. A large single-wall box roughly 18 by 14 by 16 inches gives a dollhouse about 16 inches wide that sits on a shelf. A medium shipping box gives you something closer to 12 inches wide, which works for 11-inch or smaller dolls. Double-wall or heavy-duty corrugated board is stiffer and holds cuts better, but it also makes small windows harder to open.
Save every scrap as you cut. Those offcuts become the furniture later.
Tools and supplies
- One large corrugated cardboard box, flaps folded flat
- A craft knife or box cutter with fresh blades, for adults
- Metal ruler or straightedge, for straight scoring lines
- Pencil and eraser, for marking before you cut
- Masking tape, to hold pieces in place while you work
- PVA craft glue, for walls, floors, and furniture
- Hot glue gun, for attaching small furniture and trim
- Wooden craft sticks, to reinforce floors
- Acrylic or tempera paint, plus a paper plate used as a palette
- Paintbrush, medium size
- Scissors, for curved or detail cuts a knife would tear
- Paper, felt, or fabric scraps, for rugs and curtains
- Fine sandpaper or an emery board, for smoothing cut edges
- Toothpick or skewer, to score fold lines
The knife work stays with an adult. Children can do every other stage: scoring, gluing, painting, papering, and furniture.
Prep checklist before crafting
An adult should handle these five items before anyone starts. Flatten every flap and tape them down so nothing springs back later. Check the walls for soft spots or split corners, and reinforce any weak area with a strip of tape. Confirm that your cutting surface is clear, and keep the craft knife within adult reach only. Finally, check the box for anything a child might chew or swallow, and remove staples, loose packing peanuts, and plastic handles.
Step-by-Step
1. Plan the Cardboard Dollhouse Layout
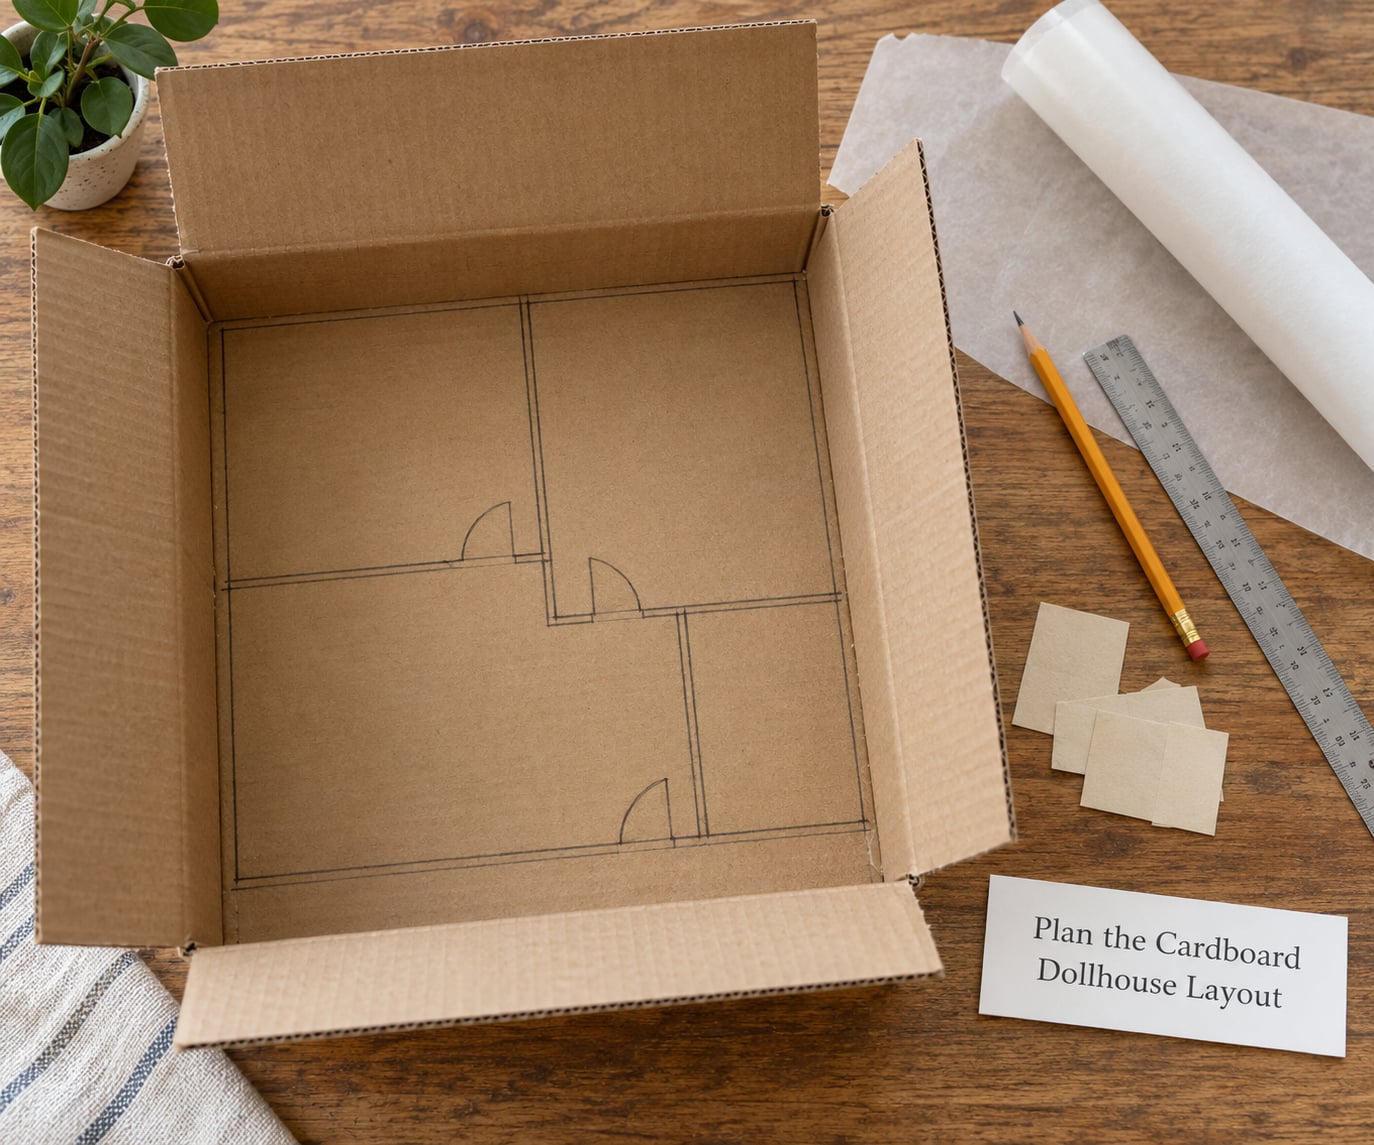
Decide which side of the box becomes the open back, then mark your rooms on the remaining three walls with a pencil. Most people start with four rooms across two floors, but a two-room, single-floor house is easier for small hands and still plays well.
A simple planning method works better than guessing. Cut a paper template at the size of each wall, draw the rooms on it, and cut the template into separate pieces. Tape the pieces to the wall inside the box and trace around them. The paper version lets you move rooms around before you commit a single cut to the cardboard.
Measure before you mark anything. The internal width of your box minus a quarter inch on each side is your usable wall span, and that number decides how many rooms fit. Rooms narrower than four inches look cramped once furniture goes in. The finished house will match the box dimensions almost exactly, with the open back and the roof adding the only extra height.
2. Cut the Doors and Windows
Mark each opening with a pencil and a ruler, then score the line several times with a knife before cutting through. Scoring weakens the surface so the blade passes cleanly instead of tearing the corrugation. Work from a scrap piece of cardboard first if you have never cut a window before.
Leave a border of at least half an inch of cardboard around every opening. Narrow borders sag once the glue and paint go on. Cut windows before the front door, and cut the front-most window out of the door panel while leaving one edge attached, so it folds open like a real shutter rather than sitting as a loose square.
To make a door that swings, cut only three sides and score the fourth rather than cutting it. A score line bends without splitting, so the door opens and stays attached. Sand every opening with fine sandpaper after cutting. Cardboard edges that feel fuzzy or sharp will soften further under tape or glue, but a quick sanding now keeps fingers safe during play.
3. Add the Floors and Stairs
Cut floor pieces from flat cardboard to fit the internal width and depth of the box. Slide each piece in so it rests on the inner fold lines rather than floating in the middle, then run a bead of craft glue along the edges and press it into place.
Reinforce before you decorate. Glue two or three wooden craft sticks across the underside of each floor, running them the short direction, and cap the ends with small cardboard squares. That sandwich is what keeps a floor from bowing when a child leans on the wall or drops a plastic plate on it. Let it set flat under something heavy for an hour.
For stairs, cut a strip of cardboard wide enough for a doll’s foot, score it into a zigzag, and glue the folds into a staircase shape, then glue it to the floor and the wall it meets. The ladder alternative takes less space: a flat cardboard strip with craft-stick rungs across it, leaning against the upper floor at a shallow angle.
4. Build and Attach the Roof
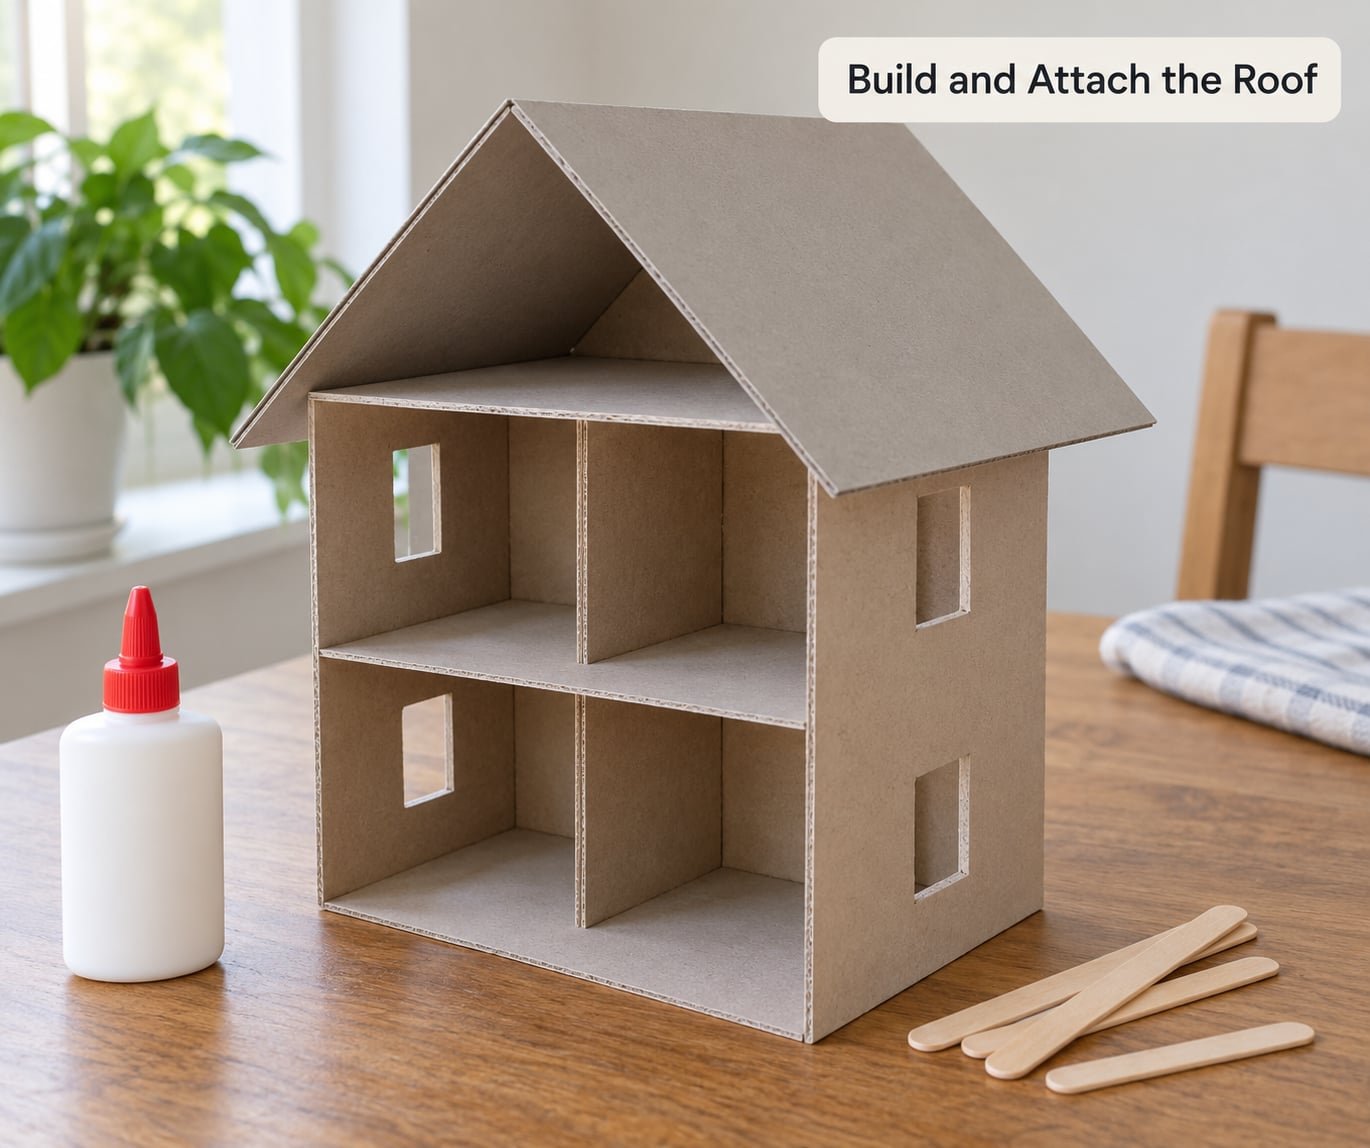
The easiest roof uses two flat panels. Cut two rectangles slightly wider than the box and deep enough to meet at a peak along the centre line. Sandwich the two panels face to face with a thin layer of craft glue, then wrap them in masking tape to hold them square while the glue grabs. A glue-and-scrap sandwich like this stops the panels from curling, which is the usual reason a cardboard roof fails.
Score a hinge line along the bottom edge of each panel, stopping short of both ends. Leave that gap unbroken so the roof can fold open for access to the top floor.
Attach the roof with hot glue along the ridge and both eaves, working from the centre outward. Hot glue grabs quickly, which keeps the panels from sliding, but it stays flexible, so the roof can still open. If you are working with a child, do this stage yourself. Let the roof sit untouched for two hours so the joints cure rather than only skin over.
5. Make the Dollhouse Stand
Cut a base from cardboard laid flat, making it four inches wider and two inches deeper than the box on every side. That margin is what stops the house tipping when a child pushes a wall or moves a room. Lay the box on the base, trace the outline in pencil, then run craft glue around the trace and set the box down inside it.
Reinforce the corners, because that is where houses twist. Cut four small cardboard triangles from scrap and glue one inside each corner where two walls meet the base. Add a strip of tape along the outside bottom edge on all four sides.
Test it now rather than after decorating. Set the base on a flat surface, push gently on each wall in turn, and confirm nothing shifts or rocks. A house that passes this test stays upright through normal play.
6. Decorate the Rooms and Exterior
Raw cardboard drinks paint and goes blotchy, so prime first. A thin coat of white acrylic paint, or a layer of masking tape pressed into the corrugation, gives you a surface that takes color evenly. Two thin coats beat one heavy coat every time.
Fill each room with a purpose. Bedrooms get a bed built from a cardboard rectangle on four toothpick legs. The kitchen takes a counter made from a scrap strip with a paper-plate sink. A living room works with a sofa from folded cardboard and a felt rug. Add wallpaper by cutting squares of patterned paper and gluing them wall to wall, but keep them thin so the room still reads as a room.
Outside, paint the lawn green and add a path from small cut circles of brown cardboard. Glue a few flat stones or wooden discs along it. For lighting, tape a battery tea light in a juice box housing, or run a strand of battery-operated micro lights along the inside top edge. Both stay cool and need no wiring.
Stick to water-based acrylics or tempera, PVA craft glue, and paper fasteners. Skip solvent-based spray paint, superglue, and anything with a strong odor near a child’s work area.
7. Add Finishing Details
The details that add play value are the light ones. A chimney cut from a cardboard tube taped to the roof peak, a porch built from two craft sticks and a strip of card, and curtains made from felt squares pressed into the top corners of each window all cost nothing.
Rugs, a scattering of paper gravel, and a small sign over the door finish the scene without touching the structure. Skip anything heavy or glued to the main walls. Pendants hanging from the ceiling and furniture set on the floors can be removed, which keeps the house usable as the play changes.
To learn what else fits inside, browse our kids craft project printables and our miniature learning printables for furniture cut-outs you can glue onto cardstock.
8. Let It Dry and Check Its Stability
Craft glue needs six hours at room temperature to reach full strength, and a full night is better. Hot glue sets in seconds but cures fully over the same few hours. Paint needs its own time, usually a couple of thin coats with an hour between them and overnight before handling.
Inspect every seam while you wait. Run a fingertip along the inside of each wall-floor joint and look for gaps, then push gently on the roof panels and the stairs. A joint that moves needs more glue or a strip of tape, not pressure.
Give the whole house a slow stability check before play. Push each wall in turn, press the roof at the ridge, and set the base on a flat table to check for rocking. Then set a small doll inside and walk around the house looking at it from every angle. If you can push a wall without the house shifting and no floor bows when weight lands on it, it is ready.
Common Mistakes
Walls that bow outward. The base margin is too small, or the walls are unglued at the corners. Cut a wider base and glue the triangle corner braces described in step 5.
Torn cuts around windows and doors. You cut in one pass with a dull blade. Score the line repeatedly first, use a fresh blade, and keep a scrap piece underneath.
Glue that clogs or won’t grab. Craft glue that has skinned over needs a shake and a squeeze of the bottle, and hot glue strands from a leaky gun should be lifted while soft, not left to cool on the surface.
Blotchy paint. The cardboard was not primed. Add a thin base coat, or cover the surface with tape before painting.
Floors that sag under a doll. Plain cardboard between two walls cannot carry load. Add the craft-stick sandwich underneath and let it cure flat.
A roof that sags or curls. Single-layer panels were too thin. Glue two panels together with a scrap layer between them, and score the hinge rather than cutting it.
Sharp edges at the openings. Sand every cut edge, then cover the window frames with a thin strip of tape or painted trim.
Furniture that is too heavy. Thick card, glued-on bottles, and clay details all pull the floor down. Use thin cardboard, paper, and felt, and glue furniture to the floor rather than resting it on top.
A few habits smooth out most of these problems. Mark everything before cutting, change your blade often, glue in thin layers instead of thick ones, and give the house a full night before the first play session.
Frequently Asked Questions
What is the best cardboard box for a dollhouse?
A large single-wall box about 18 by 14 by 16 inches gives you a finished house roughly 16 inches wide, which suits most 11-inch or smaller dolls. Pick a box with straight, undented walls and no split corners. Double-wall board is stiffer and more durable, but it makes small window openings much harder to cut. Avoid boxes with deep moisture damage, soft corners, or printed surfaces that flake when you paint over them.
How do I make a cardboard dollhouse smaller or larger?
To make it smaller, work from a medium box and cut only two rooms with one floor. To make it larger, build from two boxes taped side by side for a wide house, or stack a second box on top for a two-storey version. The same method and the same tools apply, only the pieces get bigger, so allow extra dry time on large glue joints and reinforce every floor with craft sticks.
What age is appropriate for making a cardboard dollhouse?
Around age five is a good starting point for the measuring, gluing, painting, and decorating stages, with an adult nearby. Children under five enjoy decorating a house an adult has cut. Every craft knife, box cutter, and hot glue gun step belongs to an adult. Kids can handle scissors for soft paper, brush paint inside the rooms, glue felt rugs, and place handmade furniture, which covers most of the build.
Which paints and glues are safe for a kids’ craft?
Use water-based acrylic or tempera paint and PVA craft glue. Both are non-toxic, water-soluble, and easy to clean from skin and fabric, and PVA dries clear. Skip solvent-based spray paint, superglue, and epoxy, which give off strong fumes and bond skin instantly. Hot glue from a low-temperature gun is workable for older children, though an adult should handle the gun itself because the nozzle stays hot long after the glue cools.
How can I reuse a cardboard dollhouse after it is made?
Take the removable pieces apart first: lift the furniture, unfasten the roof panels, and pull the walls free of the base. Flatten the scored panels and glue them into flat sheets, then cut them into new pieces for a group of small houses, a bookmark set, or storage boxes. Untaped corrugated board recycles as curbside cardboard; anything with glue, paint, or tape on it goes in the bin rather than the paper recycling.
Conclusion
A cardboard dollhouse is one afternoon of cutting and glue, then months of play. Choose a sturdy box, mark the rooms, complete every cut as an adult, and hold off on paint and furniture until the structure is solid and the glue has had a full night to cure.
Start by flattening the flaps and checking the box for weak corners. Everything else follows from there.