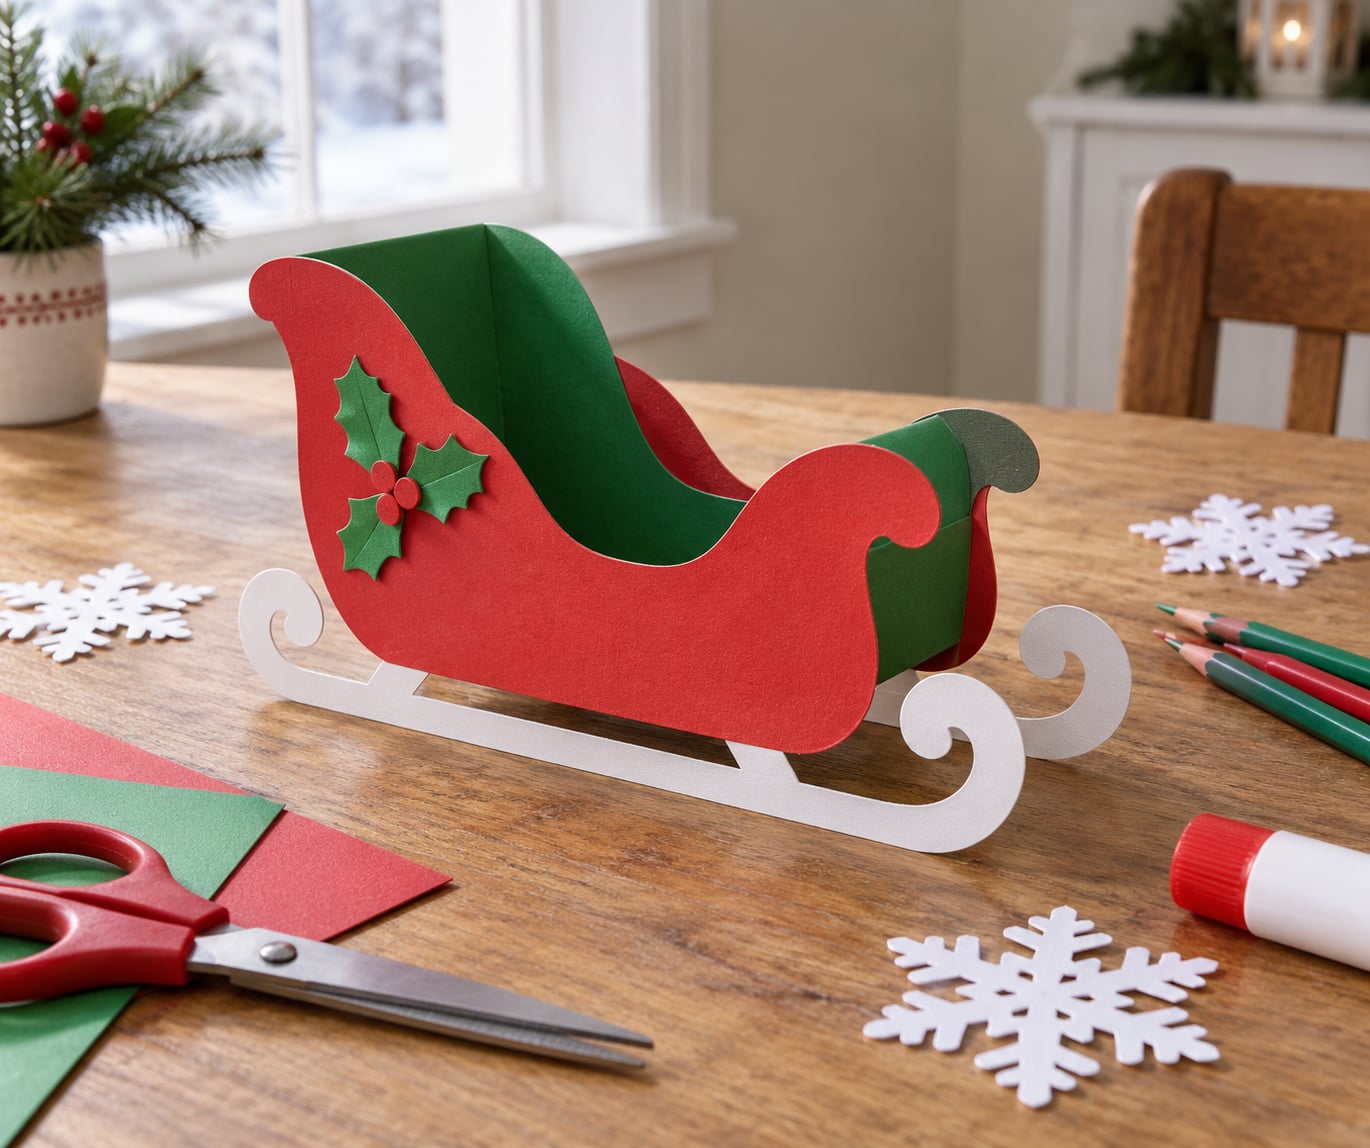
A paper Santa sleigh is made by cutting a sleigh outline from cardstock, folding and gluing the tabs, then adding runners and a seat before you decorate it. This craft takes about 30 minutes and costs almost nothing beyond two sheets of paper, so learning how to make a paper Santa sleigh is a good rainy December afternoon project for kids or a quick decor piece for the mantle.
The trick is that beginners rush the base. Get the shape cut, folded and glued flat first, and everything after that — runners, seat, glitter — falls into place. Skip ahead to decorating and you end up with something that folds flat the second you pick it up.
Table of Contents
- 1What You Need
- 2Step-by-Step: How to Make a Paper Santa Sleigh
- 3How to Make a Paper Santa Sleigh Base
- 4Add the Sleigh Runners and Details
- 5Decorate the Sleigh
- 6Common Mistakes
- 7Frequently Asked Questions
- 8What kind of paper is best for making a paper Santa sleigh?
- 9Can I make the sleigh from cardboard instead of paper?
- 10How do I keep the paper sleigh standing upright?
- 11How long does it take to make a paper Santa sleigh?
- 12What age group is this craft suitable for?
- 13How can I make the sleigh easier for younger children?
- 14Conclusion
What You Need
- Cardstock, 160 to 200 gsm — this is the single most important choice. It holds a fold without snapping.
- Printer paper — fine for a flat decoration or a card, too flimsy for anything you plan to stand up.
- Scissors or a craft knife with a cutting mat for the long curves.
- Glue stick for children and low-mess work, or PVA school glue for a stronger hold.
- Ruler and pencil for drawing the long straight edges of the body.
- Markers, crayons or glitter glue for decorating.
- Optional: a craft knife, a brown paper bag for a sleigh bag, a paper plate, pom-poms, a bottle cap for a cup, a small stick for a rein.
An adult should handle any cutting with a knife, and any step involving small cut pieces, because those are the parts that get swallowed. For a toddler, tear the sleigh shape out with your own hands first and hand over a pre-cut piece to decorate.
Nothing here is hard to find. If you have no cardstock, a flattened cereal box works, and a glue stick can stand in for PVA glue. Brown kraft paper is a good stand-in for cardstock too — just fold it the same way.
Step-by-Step: How to Make a Paper Santa Sleigh
How to Make a Paper Santa Sleigh Base
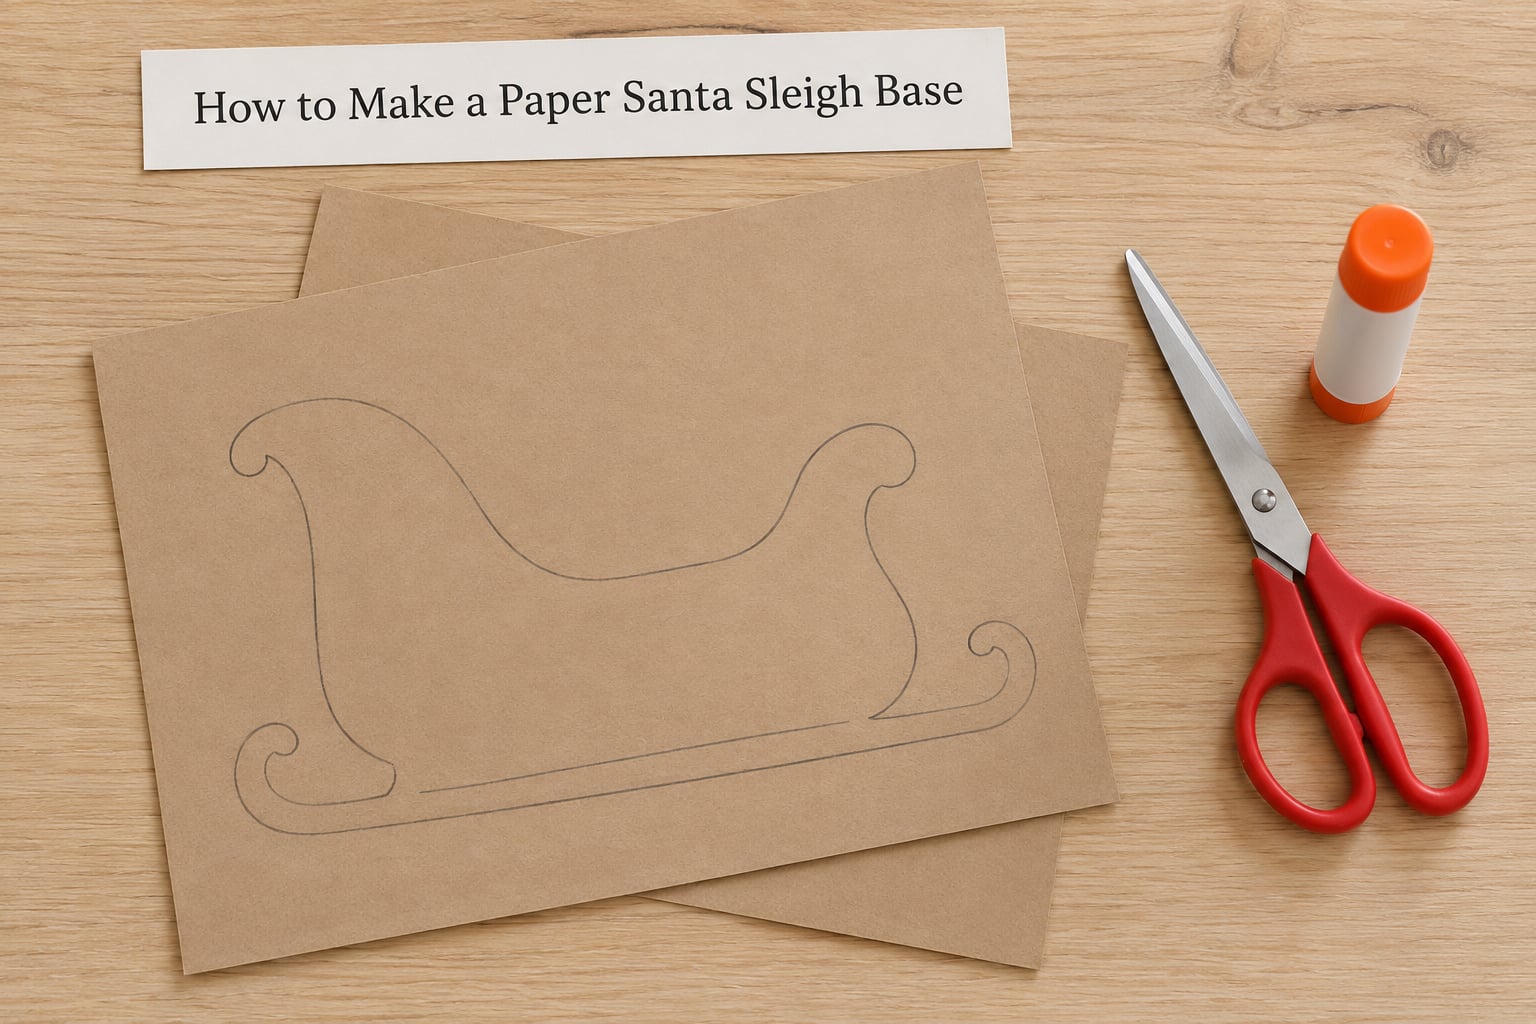
Lay a sheet of cardstock on its long side and draw a long rectangle for the sleigh body — roughly 28 cm by 10 cm works well for a table-top sleigh. Along one long edge, add a narrow strip and mark it with a dashed line; that strip is the glue tab.
Draw the front of the sleigh curling upward into a hood, and the back rising into a low seat back. Rounded curves are friendlier to cut and less likely to tear than sharp corners.
Cut along the outline first, then make the folds. Score each fold line with the back of a knife or the edge of a ruler, then fold firmly along it. Scoring is what stops the paper splitting when it bends.
Fold the tab inward, run glue along it and press the body down. Before you decorate anything, the base should sit flat, hold its shape when you lift one edge, and show a clean seam along the tab. If it rocks, the seam needs another minute of glue.
Add the Sleigh Runners and Details
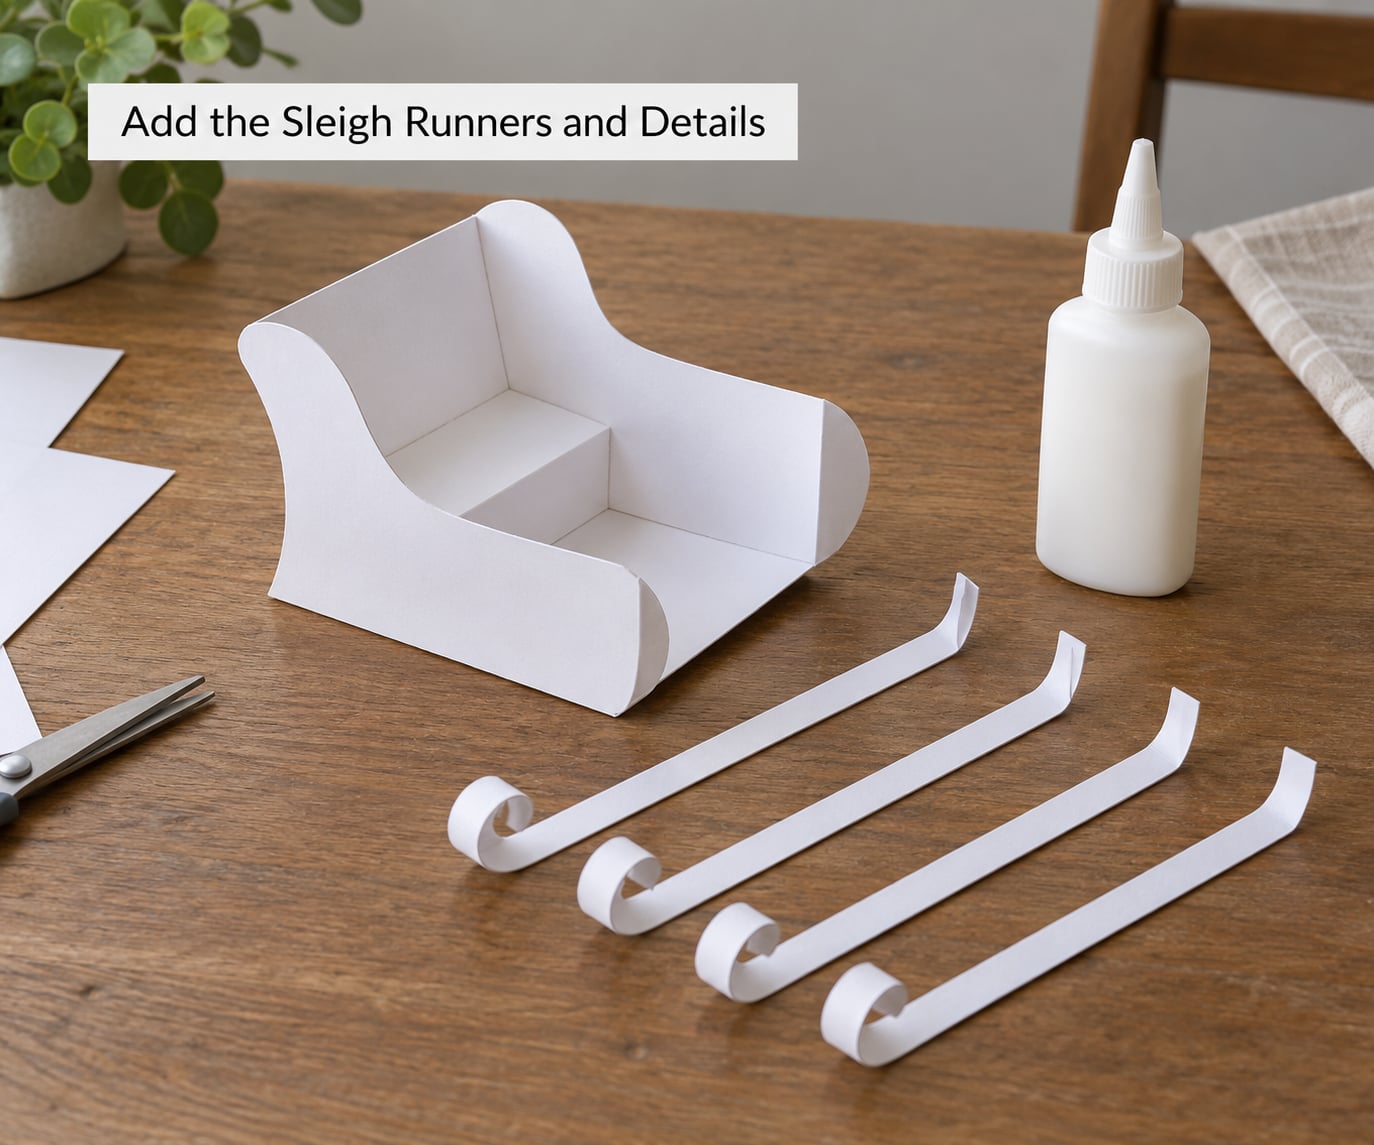
Cut four runners from a second sheet — two long, two short. The long ones are the front and back skids that run the length of the sleigh, the short ones bridge them at each end.
Slide the long runners under the base so their front ends stick out past the hood. That overhang is what makes it read as a sleigh rather than a wagon. Glue them from underneath with PVA, then clamp the short runners across the two ends and let them dry.
Make the runners the same length on both sides. A mismatch of even a few millimetres is the fastest way to make a finished sleigh look crooked on a shelf, so measure before you glue.
Add a seat by cutting a small rectangle, folding a lip along the bottom edge and gluing it to the middle of the base. A back panel behind it turns the seat into something a figure can actually sit against. Both pieces are optional, but a sleigh without a seat looks unfinished.
Decorate the Sleigh
Everything here works with markers, crayons, stickers or cut paper. Keep the decorations light and the sleigh stays rigid; pile on the glitter glue and the card sags under its own weight.
- Classic red and green — fill the body with red markers, add a green seat and white trim along the top edge.
- White paper snowflakes — punch or cut small flakes and glue them along the runners for a frosted look.
- Santa and Rudolph — cut two simple figures from scrap paper, a red one with a white beard circle and a brown one with a red nose, and slot them into the seat with a paper tab.
- Pom-pom trim — glue a row of small pom-poms along the front hood for a furry edge that a marker cannot fake.
- A sleigh bag — flatten a brown paper bag, cut off the top and glue it to the back of the seat to look like a present.
- Gold accents — gold pen on the runners and the seat edge makes plain white card look far more finished.
Common Mistakes
The sleigh is too flimsy. Printer paper will not hold a shape. Switch to cardstock, or glue two sheets together and treat them as one piece. Scoring every fold line also stiffens thin paper more than people expect.
The runners sit unevenly. Measure them before gluing, and mark both sides of the base with a pencil before you attach anything. If they already look wrong while dry, the fix costs nothing yet.
Glue bleeds through the paper. PVA soaks into thin stock and leaves a blotchy patch. A glue stick is the safe choice on coloured card, or use a glue pen for small tabs and keep liquid glue for hidden seams.
Paper tears at the curves. Cut slowly with sharp scissors and turn the paper rather than forcing the blades around the bend. Tear at the tight curl of the front hood and you will get a ragged edge that no amount of covering hides.
Decorations make it top-heavy. Test the sleigh by resting it on the two front runners. If it tips back, the back of the body has picked up too much weight — trim the pom-poms or glue the heavy piece closer to the base.
The finished sleigh curls. Flat card bows in damp rooms. Press it under a stack of books for an hour, or glue it directly onto a card base while it is still flat.
For younger children, cut everything yourself beforehand and leave only the decorating. That keeps the same craft in the room but removes the two steps most likely to end in frustration.
Frequently Asked Questions
What kind of paper is best for making a paper Santa sleigh?
Cardstock between 160 and 200 gsm is the best choice, because it holds a fold without tearing and stands up on its own. Ordinary printer paper around 80 gsm works only for a flat decoration or a greeting card. If you want a sleigh that survives being picked up and put down all December, skip the printer paper entirely. Kraft paper is a good low-cost substitute if you fold the score lines firmly.
Can I make the sleigh from cardboard instead of paper?
Yes, and for a full-size prop cardboard is better. A flattened delivery box gives you two layers, which keeps a large sleigh rigid without needing internal supports. Scale the same pattern up by about eight times and cut with a craft knife rather than scissors. Cardboard suits an outdoor display or a classroom showpiece far more than a small cardstock sleigh does.
How do I keep the paper sleigh standing upright?
The base needs to be genuinely flat before you decorate, so glue the tab and let it press under something heavy for a few minutes. Runners glued underneath at equal lengths act as feet and stop it rocking. For a slimmer sleigh, glue the whole body onto a card base or a strip of cardstock. Hanging it on clear thread works just as well if you have no flat surface.
How long does it take to make a paper Santa sleigh?
A table-top cardstock sleigh takes about 30 minutes from cutting to finished, plus drying time. Adding a seat, runners and decorations pushes it closer to 45 minutes. A full-size cardboard prop is a different project entirely — allow a couple of hours and let the glue set overnight. Set out the glue and paper in advance and the family version finishes faster than you would think.
What age group is this craft suitable for?
School-age children from about five upwards can handle cutting, folding and gluing with an adult nearby. Three and four year olds can join in safely if you pre-cut the sleigh body and leave only the decorating. Under threes should stay away from small pom-poms, glued paper figures and any craft knife. One sheet of paper per child is plenty for a group of six.
How can I make the sleigh easier for younger children?
Cut the sleigh shape, the runners and the seat yourself before they start, then put everything on a tray. Give them markers, a glue stick and a pot of pom-poms and let them go. Pre-folding the score lines is the other shortcut — a fold that is already creased survives small hands far better than one they have to make. Keep the same sleigh, just remove the tricky parts.
Conclusion
Start with the base. Cut the sleigh shape, score every fold and glue the tab, then check that it sits flat before anything else goes near it. Attach the runners next and test the balance by resting it on the front two.
Once it stands, decorate it. That is how to make a paper Santa sleigh that survives being handled rather than spending December folded in a drawer.
The same pattern scales up easily — trace it onto a flattened cardboard box for a mantle or doorstep prop, cut a smaller version for a tree ornament, or print one per child for a classroom table. Whatever the size, the order stays the same: base, runners, then paint.