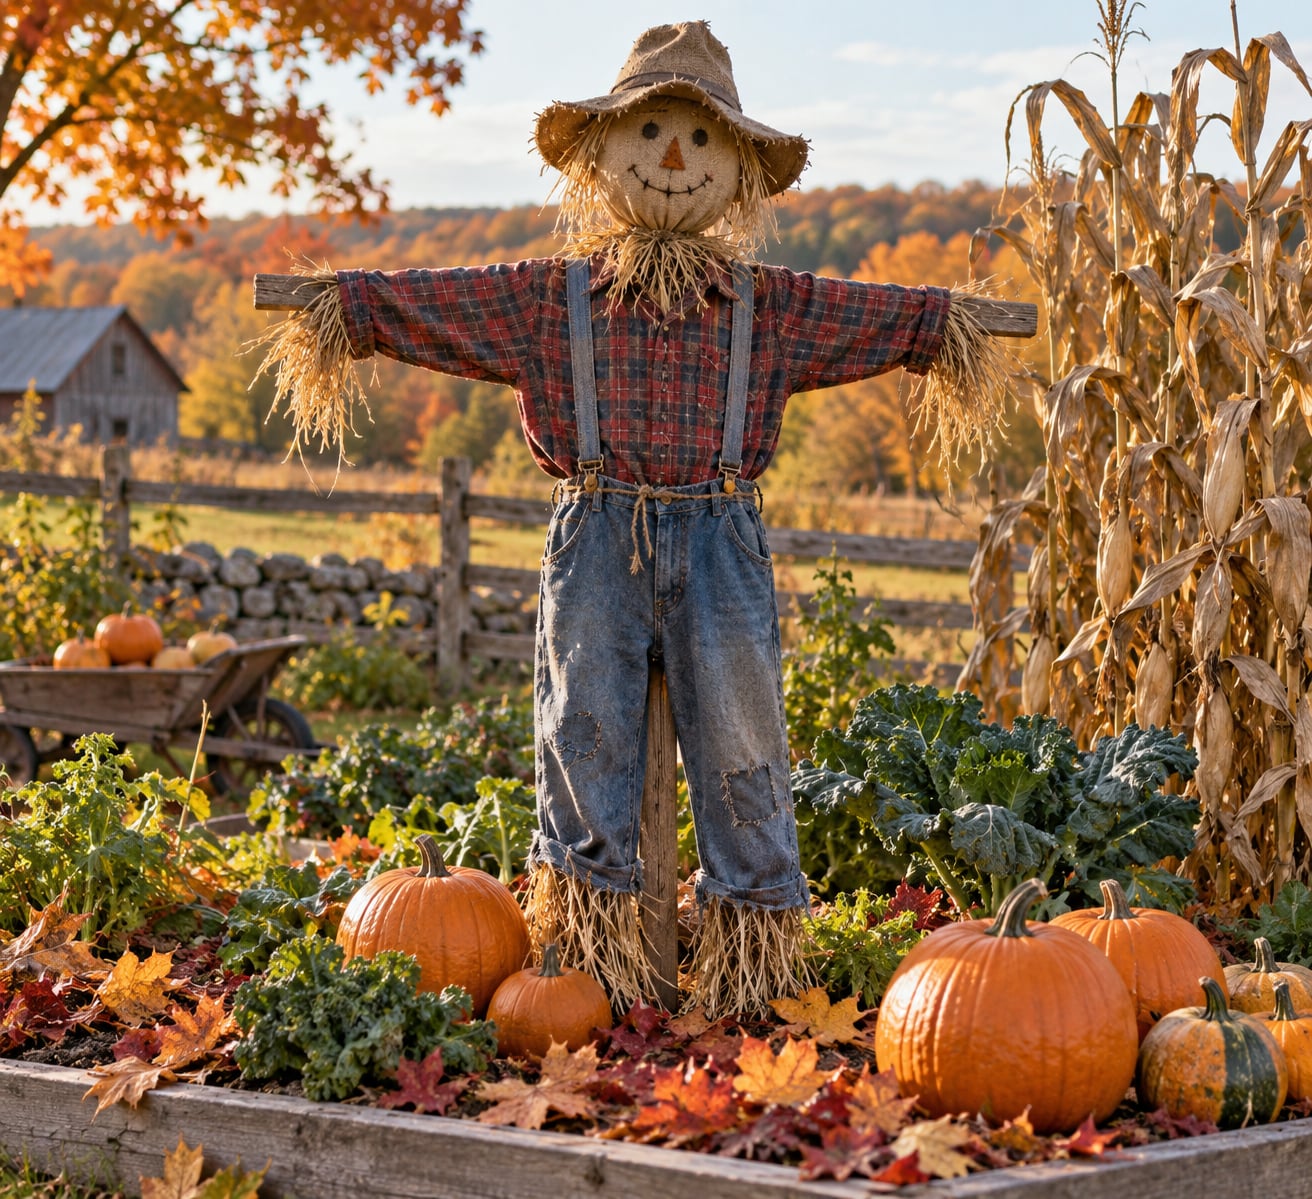
You can make a classic garden scarecrow with two wooden stakes, an old shirt and pair of pants, a stuffed sack for a head, and straw or a substitute to fill it out. The whole build takes about an hour once the frame is cut, and it costs very little because most of what you need is already in a closet and a garden bed.
The version that holds up in wind is the simple one: a 5 to 6 foot vertical stake with a 3 to 4 foot crossbar nailed across the top at a 90-degree angle. Dress it, stuff it, give it a face, and bury the bottom 12 to 18 inches of the stake in the soil. Everything else is decoration.
If you are building with kids, sort the jobs before you start. Someone cuts the stakes, someone dresses the frame, someone makes the head. That division keeps the arguing down and gets a finished scarecrow in about an afternoon.
Table of Contents
- 1What You Need
- 2Step-by-Step: How to Make a Scarecrow for the Yard
- 3Build the Scarecrow Frame
- 4Make the Head and Face: How to Make a Scarecrow Head
- 5Add the Shirt and Arms
- 6Stuff and Shape the Body
- 7Decorate and Finish
- 8Common Mistakes
- 9Tips for a Sturdy Yard Display
- 10Frequently Asked Questions
- 11What are some creative ideas for making a scarecrow head?
- 12How do I make a scarecrow without straw?
- 13Do scarecrows actually work in a garden?
- 14What do farmers use instead of scarecrows?
- 15How long does a homemade scarecrow last outdoors?
- 16Conclusion
What You Need
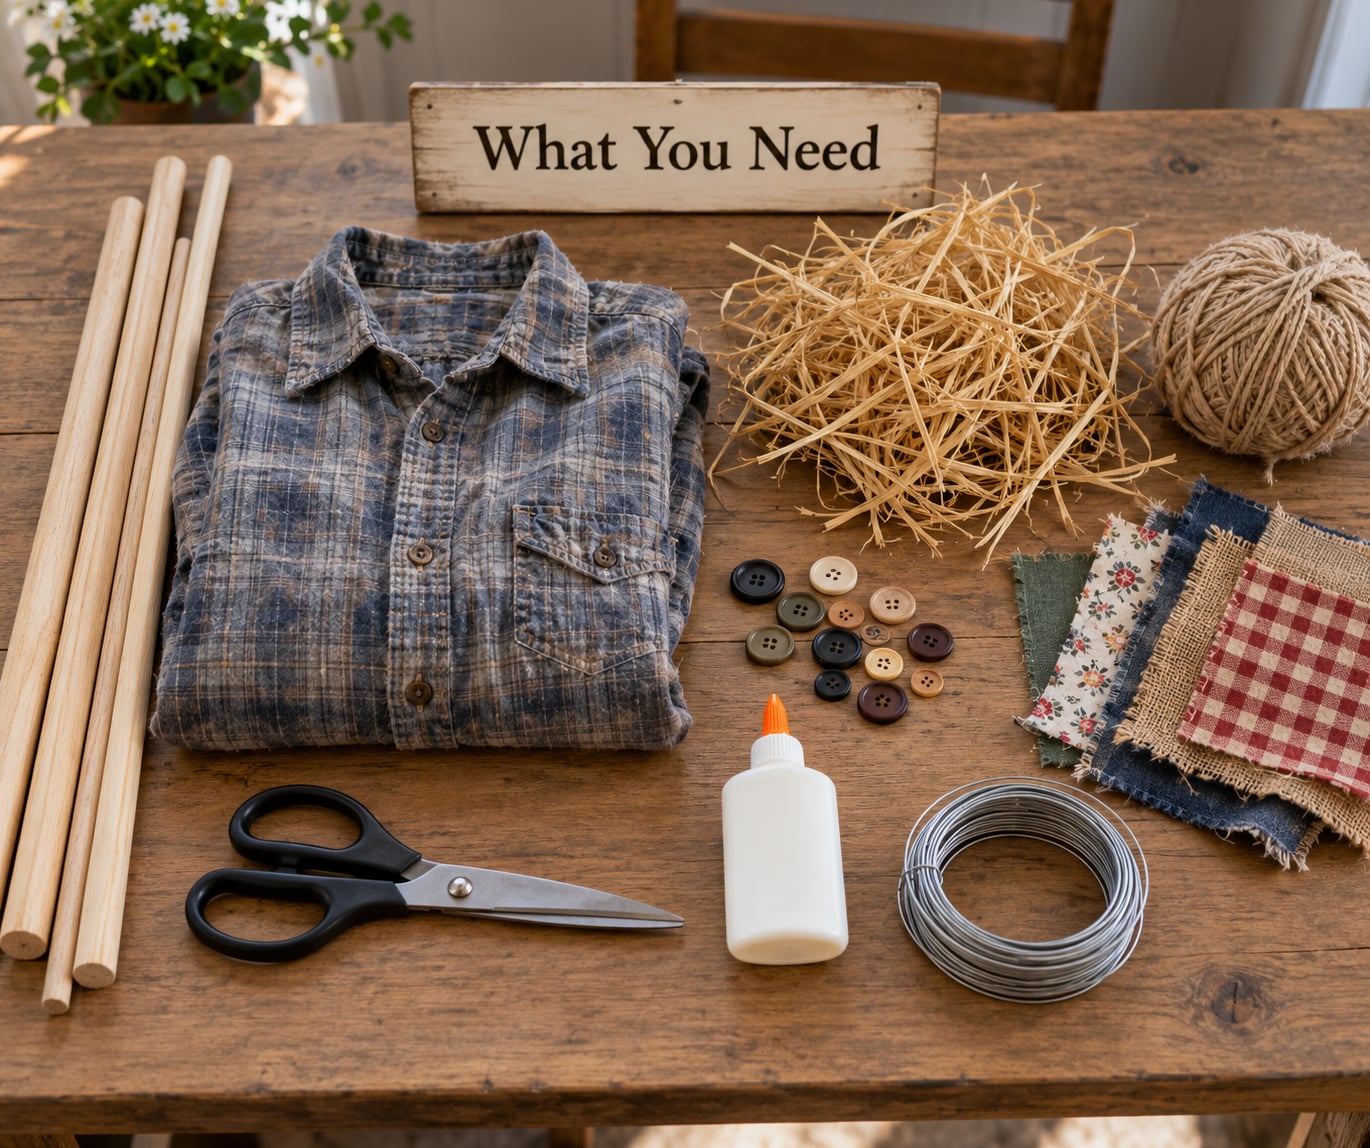
Everything below is either something you already own or a short trip to a hardware store for two lengths of wood. Quantities are for one scarecrow about 5 to 6 feet tall.
| Item | Quantity | Size or detail | Substitute |
|---|---|---|---|
| Vertical stake | 1 | 5 to 6 ft long, 1.5 to 2 inches thick | A thick fence picket or a trimmed sapling |
| Crossbar | 1 | 3 to 4 ft long, 1 to 1.5 inches thick | A broom handle, a length of PVC pipe, or a sturdy branch |
| Shirt | 1 | Button-down with sleeves, adult or child size | A flannel, a denim work shirt, or a sweatshirt with the cuffs rolled |
| Pants | 1 pair | Jeans or overalls with legs wide enough to fill | Cut from a burlap feed sack, or one pair of sweatpants |
| Head material | 1 | Paper bag, burlap sack, pillowcase, or ball of yarn | A carved pumpkin for a Halloween version |
| Stuffing | 2 to 3 large handfuls | Straw, hay, or poly fill | Raffia, crumpled newspaper, old socks, packing peanuts, dried leaves |
| Fasteners | As needed | Twine, zip ties, safety pins, 2 screws | Heavy-duty clear tape in a pinch |
| Face and accessories | 1 set | Buttons, googly eyes, marker, felt scraps, a hat and a bandana | Paint and an old coffee can hat |
Two details in that table decide whether the scarecrow looks right. A button-down shirt hangs better than a t-shirt because the buttons give you something to fasten the fabric closed over the frame, and a pair of loose jeans hides the leg structure more honestly than leggings do.
Wooden dowels from a craft store work for a small scarecrow, but they snap in a stiff breeze. If your scarecrow is going to live outside through fall, spend the extra few minutes on a proper stake.
Step-by-Step: How to Make a Scarecrow for the Yard
Six steps, in this order. Do not dress the frame until the crossbar is secure, because a shifting frame makes the clothing sit crooked and there is no fixing that later.
Build the Scarecrow Frame
Lay the vertical stake on a flat surface and mark a line across it 12 to 14 inches down from the top. Screw or nail the crossbar through that line so the two pieces make a clean 90-degree angle, which is what gives the scarecrow its shoulders.
Place the crossbar 10 to 14 inches below the top of the stake. That gap becomes the neck. If you drive it flush with the top, the head sits directly on the shoulders and the whole thing looks like a mannequin.
There are two frame shapes and people mix them up constantly. The cross frame has one vertical spine with a single crossbar and reads as a classic farming scarecrow. The upside-down V puts the two stakes into the ground at an angle with a short crossbar between them, which looks more like a person walking and needs less stuffing in the legs. Use the cross frame for a porch or contest entry, and the V when you want something that survives being moved around.
Test it before you dress it. Hold the frame upright with the base on the floor and press down on both ends of the crossbar. If it rocks or the joint flexes, add a second screw. A wobbling frame is the single biggest reason finished scarecrows end up leaning by Halloween.
Make the Head and Face: How to Make a Scarecrow Head
A paper bag, a burlap sack, or a pillowcase all work. Stuff the bottom two-thirds with straw, poly fill, or crumpled socks so the shape holds instead of collapsing into a sad droop. Leave the mouth end open so you can gather and tie it around the neck of the stake.
Pull the neck opening down over the top of the stake and tie it on with twine or a zip tie. Tie it snugly. A loose neck is the second most common failure, and it is why so many scarecrow heads hang sideways by November.
For the face, use two buttons or googly eyes for eyes, a triangle of black felt or a thick marker line for the mouth, and a square patch of orange or tan felt for the nose. Yarn tied in short pieces and glued to the top reads as hair, and a floppy hat hides most of the seam where the head meets the stake.
If you want a head that lasts the full season, a pumpkin is hard to beat. Cut the top off, hollow it, and hang it over the stake. It takes a minute in the yard to go soft after a rain, so keep it for early fall and swap in a sack head for November.
Add the Shirt and Arms
Slide the shirt onto the cross frame the way you would put it on a person, arms out along the bar. Pull the collar up over the neck tie so the fabric covers the joint where the head sits, which is the part that makes a scarecrow look assembled instead of finished.
Fasten the front buttons, or tie the hem closed with twine if the shirt is a size or two large. Oversized adult clothing is the most common sizing mistake. If the shirt swallows the frame and the cuffs hang past the hands, hem it up or roll the sleeves twice instead of piling straw into a sleeve that has nowhere to go.
Bunch straw, raffia, or yarn into the cuffs and tie it off with twine. Do the same at the collar so a little straw pokes out at the neck. Those two tie-offs are what separate a scarecrow that reads as a stuffed figure from one that reads as a laundry pile on a stick.
Stuff and Shape the Body
Fill the torso through the bottom hem until the shirt is firm but the frame still moves a little inside it. Tight is good. Loose is not.
For the legs, either thread the waistband of the jeans over a divider board on a V frame, or slide each leg of the pants onto its own length of dowel and let the two dangle from the crossbar. Stuff each leg with straw and tie the ankles if you want hands and feet to show.
Fill lightly. Overstuffed scarecrows tip forward because all that weight sits above a single narrow stake, and a shape that looks great on the workbench can end up face down in the flower bed after the first gust. If the scarecrow leans when you hold it upright, take some filling out rather than burying the stake deeper to compensate.
Decorate and Finish
Add a hat, a bandana, a scarf, gloves, and old boots if you have them. For a contest entry, a theme beats a pile of accessories. Pick one idea and commit to it.
If the scarecrow is working as a bird deterrent, not just decor, add movement and reflection. Ribbon or yarn strips tied at the cuffs, aluminum pie pans, old CDs, and reflective tape on the hat all catch light and swing in a breeze, which is what makes the figure read as alive to a crow circling overhead.
Walk the whole thing before it goes outside. Pull gently on the head, the cuffs, and the hem. Anything that moves more than an inch needs another tie. Then place the base 12 to 18 inches into the soil and pack the dirt down firmly around it.
Common Mistakes
A frame that leans. The joint moved while the clothes went on. Take the clothing off, add a second screw or a length of tape across the back of the joint, and dress it again. Pushing the stake deeper will not fix a crooked crossbar.
A head that sags or tips. The neck was tied loosely or the head was understuffed. Pull the tie down a few inches, cinch it again, and add filling to the crown so the weight sits over the stake rather than beside it.
Clothes that swallow the frame. Oversized shirts and adult jeans hide the structure and leave a lumpy silhouette. Pick clothing a size down from what you would wear, or hem the extra length.
A scarecrow that tips over in wind. Too much filling above one stake. Remove stuffing, and brace the base with two wooden stakes driven in at a 45-degree angle on the windward side, tied to the main stake with wire.
Clothing that tears or fades after two weeks of rain. Cotton holds water and the seams at the cuffs give first. Stuff with paper or leaves instead of straw in wet months, and bring the scarecrow in when you get a stretch of heavy rain.
A sixth one worth naming: birds land on it anyway and stop caring. That is habituation, not a build failure. More on that below.
Tips for a Sturdy Yard Display
Anchor it deeper than feels necessary. Twelve inches is the floor for a calm autumn day, and 18 inches plus backfill is what survives an open yard with wind. Water the soil around the stake after you pack it down so the dirt settles tight against the wood.
Move it every one to two weeks. Birds learn a stationary scarecrow quickly and then treat it as scenery. Carrying it to the other end of the garden, or turning it to face a different direction, resets their memory. Swapping in a shiny element or a wind chime at the same time helps.
Watch how it points the head. Scarecrows that work in practice lean slightly toward the crop they are meant to protect, which is why the most effective ones face the vegetable beds rather than the sidewalk.
For a classroom or a table-top version, skip the tall stake entirely. A craft-stick frame with a paper bag head and yarn hair assembles in about twenty minutes, needs no tools, and stands up safely indoors. If kids are involved, adults handle any cutting, drilling, or staples, and the sharp point of the stake gets a cap or stays indoors until it is installed.
No straw on hand is not a problem. Raffia, dried leaves, crumpled newspaper, old socks, and packing peanuts all fill a torso and hold a shape. Newspapers are the best of those for a wet climate since they do not mat into a solid lump the way straw does.
At the end of the season, pull the stake, undress the frame, and store the clothing indoors if you want to reuse it. Straw will not survive winter in a damp shed; a hollow frame and a clean shirt will.
Frequently Asked Questions
What are some creative ideas for making a scarecrow head?
A stuffed paper bag, burlap sack, or pillowcase is the easiest head and takes five minutes. A jack-o-lantern gives you a Halloween version that works well before the rain softens it. Other options include a ball of yarn wrapped in netting, a wooden board painted with a face, a terracotta pot turned upside down, or a straw bundle bound in the middle. Whatever you choose, stuff it firmly and tie it tightly to the top of the stake.
How do I make a scarecrow without straw?
Skip the straw entirely and fill with raffia, dried leaves, crumpled newspaper, old socks, or packing peanuts. Newspaper is the best substitute in wet weather because it will not mat into a hard lump, and it is free. Raffia and yarn give the best shape hold for wrists and cuffs. Stuff the torso firmly but leave the frame free to move, or the added weight will tip the finished scarecrow over.
Do scarecrows actually work in a garden?
They help, but only if you keep them fresh. Birds get used to a stationary figure within a few days, so move the scarecrow to a different spot or face a new direction every one to two weeks. Adding movement and reflection helps more than a better face. A straw hat, pie pans, old CDs, and reflective ribbon all shift in the wind and catch light. For heavy pressure on fruiting plants, pair it with netting or row cover.
What do farmers use instead of scarecrows?
Most growers layer methods rather than choosing one. Bird netting over the rows is the most reliable option, and lightweight row cover protects seedlings early in the season. Plastic owls, reflective tape, and hanging pie pans add movement without a frame. Wind chimes and other noisemakers startle birds by sound. Planting a row of sunflowers or a tall trellis between the crop and open sky also breaks up the approach birds use.
How long does a homemade scarecrow last outdoors?
A straw-stuffed scarecrow in cotton clothing usually holds up from early fall through about six weeks of dry weather. Rain is the deciding factor: soaked straw mats down, burlap sags, and seams at the cuffs tear. Bring it in during heavy rain, or dress it in polyester and stuff with newspaper to stretch the life. A screw joint on the frame outlasts a nail joint by a wide margin.
Conclusion
Start by cutting the two pieces of wood and driving the crossbar in at a right angle. That joint is the whole project. Everything after it is clothing, straw, and a face.
Then make it yours. A plaid shirt and a floppy hat read as classic, a denim jacket and sunglasses read as modern, and whatever you pick will look better than anything off a shelf. Give the head a firm stuffing and a tight neck tie, check every attachment by tugging it once, and carry it out to the yard with the stake going in 12 to 18 inches deep.