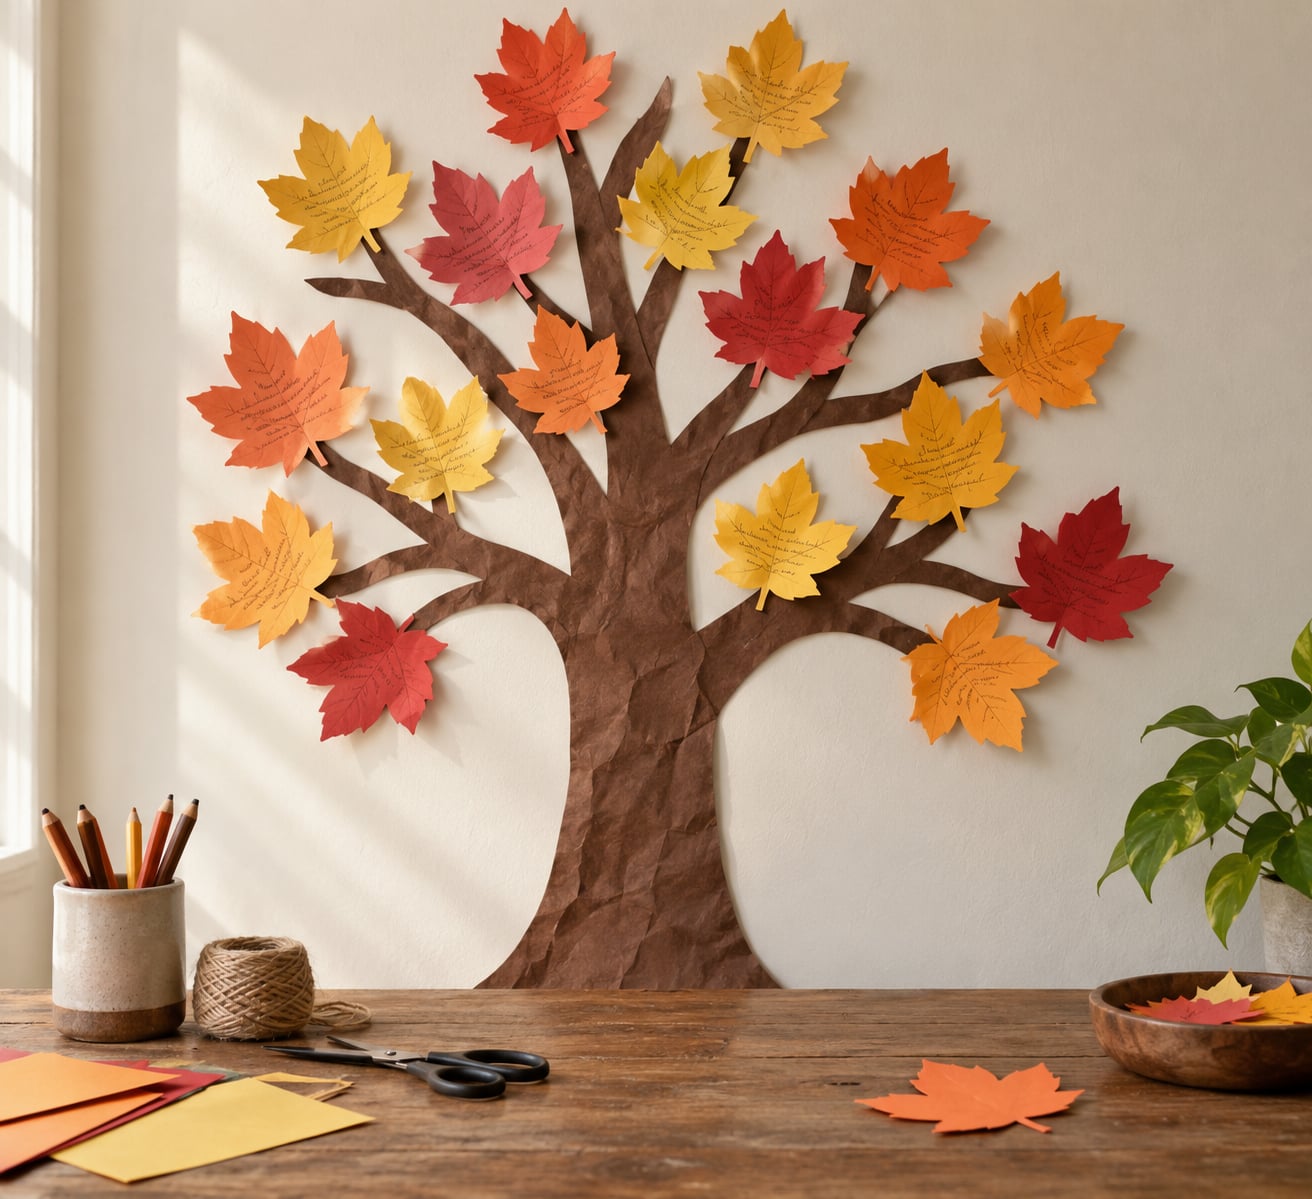
A gratitude tree is a bare branch or a paper trunk where children hang paper leaves, each one naming something they are thankful for, adding one leaf a day in the weeks before Thanksgiving. To make a gratitude tree with kids, all you need is paper, a stick or a cardboard trunk, and a few minutes a day. Most families put the whole thing together in about half an hour, then let the tree fill over three or four weeks.
I like this one because it takes about five minutes of actual attention per day and the kids do nearly all of it. You hand over a leaf, they write, draw or tell you something, and it goes on the branch. By the time the tree is full you have a record of what your kids actually noticed that month, which is more interesting than the same three answers every dinner.
A word on language: some families call this a thankful tree, and plenty of parents prefer it because it sounds less formal. Use whichever word fits your household. The structure does not change.
Table of Contents
- 1What You Need
- 2Step-by-Step: How to Make a Gratitude Tree with Kids
- 3Step 1: Prepare the Tree Trunk and Branches
- 4Step 2: Cut and Decorate the Leaves
- 5Step 3: Write Gratitude Notes
- 6Step 4: Attach the Leaves and Finish the Tree
- 7Common Mistakes
- 8Frequently Asked Questions
- 9What age is appropriate for making a gratitude tree with kids?
- 10What materials do I need for a paper gratitude tree?
- 11How long does a gratitude tree activity take?
- 12Can toddlers make a gratitude tree without writing?
- 13What can I use instead of a real branch for the tree trunk?
- 14How can I display a gratitude tree at school or at home?
- 15Conclusion
What You Need
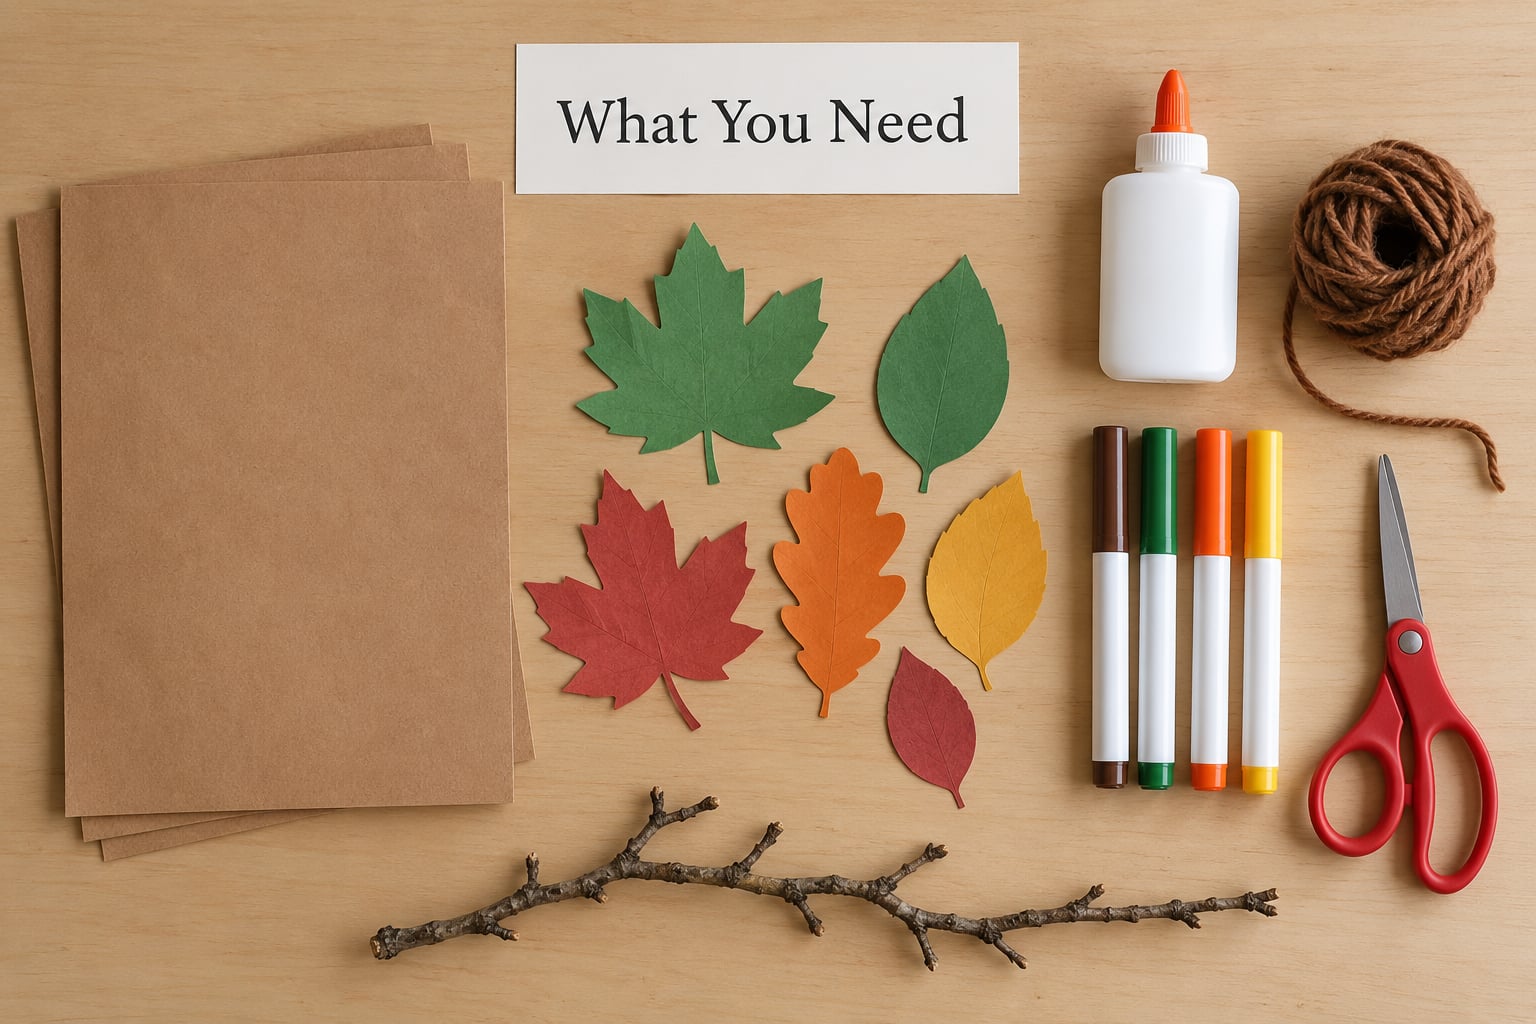
Start with what is already in the house. Most of this list is paper and glue, and the versions below cost nothing.
- A branch or trunk. A real fallen branch about two feet tall with a few offshoots is ideal. A clean craft stick, a length of wooden dowel, or three toilet-paper tubes taped into a fork all work.
- A base. A mason jar, a jam jar, a small flowerpot, or a heavy mug. Add pebbles, sand, or coins so it cannot tip.
- Paper for leaves. Construction paper, card stock, plain printer paper, old magazine pages, or the brown paper from a grocery bag. Card stock holds up better when the tree gets handled a lot.
- Something to cut with. Scissors for adults and older children, and for toddlers, tear the leaves by hand or use a leaf punch instead of a blade.
- Something to write with. Crayons, pencils, fine-tip markers, or a black pen. Colored pencils help pre-writers draw instead of forming letters.
- Something to attach them. A glue stick or craft glue, masking or painter’s tape, a hole punch, and yarn or jute string if you want the leaves to hang loose.
Substitutions are easy. Skip the branch entirely and draw a wide trunk and branches on brown paper taped to a wall. Cut leaves from flattened cardboard boxes instead of paper. If your child has limited hand control, use a hole punch to shape the leaves and let her decorate them with stickers instead of writing.
Plan on roughly 40 to 60 leaves for a three-to-four-week run, which is about twelve sheets of card stock cut into doubles.
Step-by-Step: How to Make a Gratitude Tree with Kids
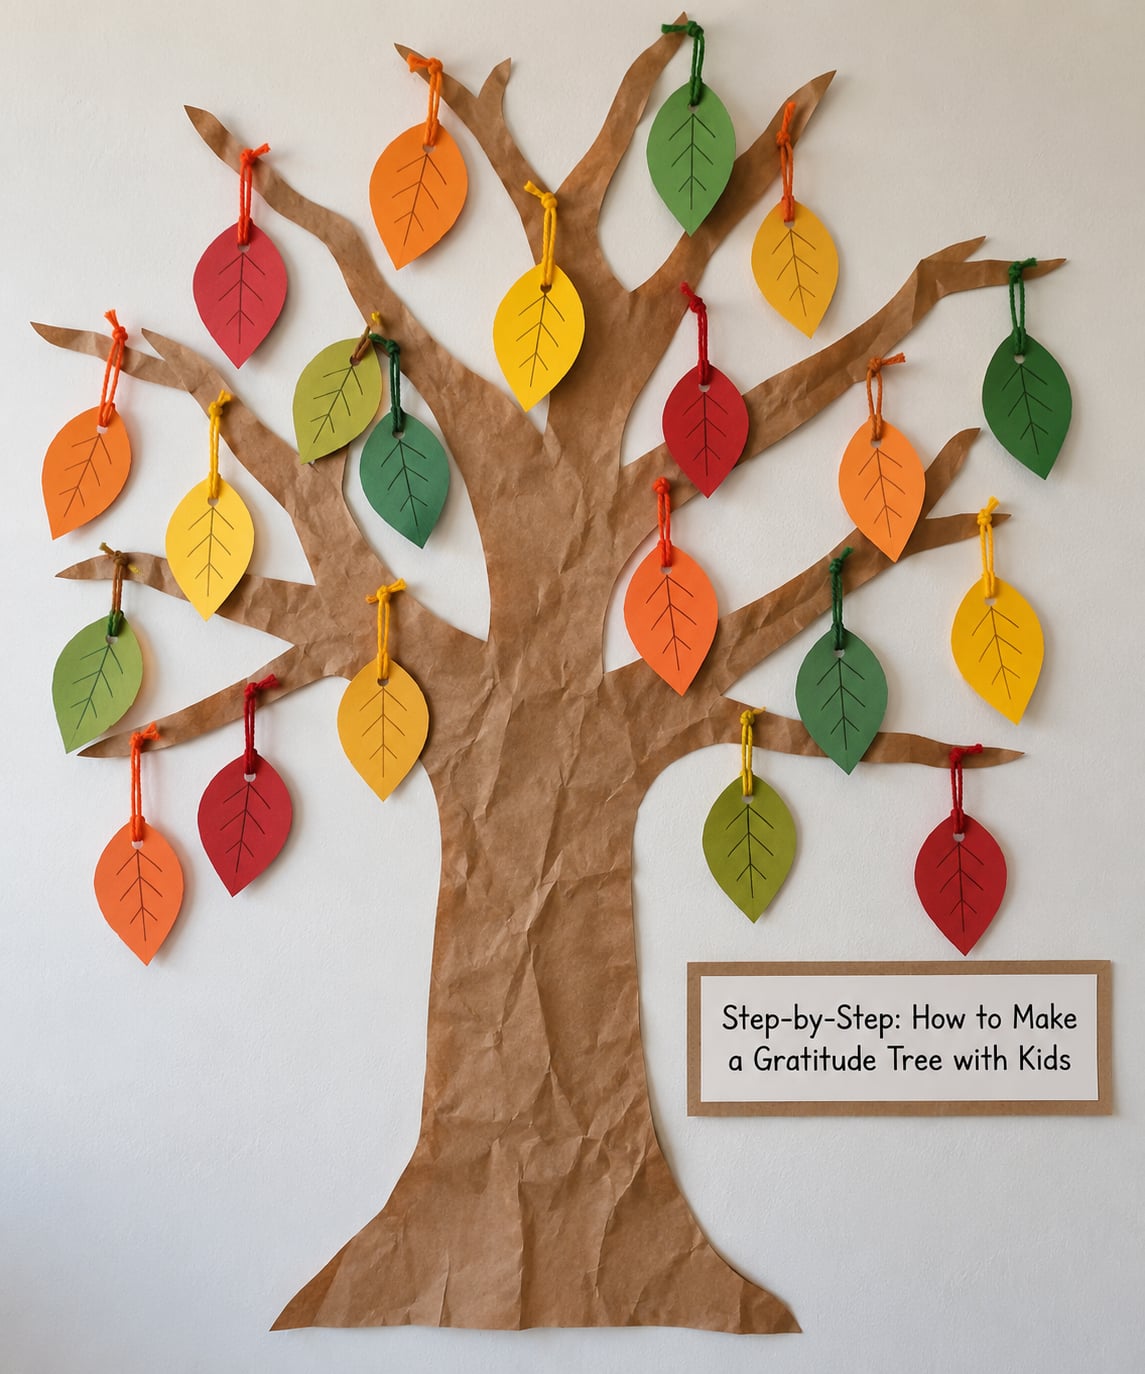
The whole build takes half an hour. Everything after that is one leaf a day. Do it the same way as these four steps and the tree holds up.
Step 1: Prepare the Tree Trunk and Branches
Wash a real branch with water and let it dry fully. Trim the ends with pruning shears or heavy scissors so the cuts are clean rather than splintered, and snip off any low side shoots that would catch a sleeve.
For the stand-up version, fill the jar with a layer of pebbles or play sand, then push the branch down until about an inch of it sits below the fill line. That weight at the bottom is what stops it tipping when a toddler pulls. Check it by nudging the base of the jar with one finger. It should rock slightly and settle, not slide.
For the wall version, roll brown paper grocery bags into a trunk, cut long strips for branches, and tape them to a wall with painter’s tape. This is the safer choice under three, because nothing hangs at head height and there is nothing to pull over.
You will know it is ready when the trunk sits upright on its own and at least three branch points reach out far enough to hold a leaf.
Step 2: Cut and Decorate the Leaves
Fold a sheet of paper in half and cut a half-leaf along the fold. Unfolding gives you a symmetrical leaf in half the time. Make them in three sizes: small ones for the edge, medium for the middle, a few large for the base of the trunk. Mixed sizes look far less mechanical than a set of identical leaves.
Age matters here. A three-year-old tears paper and does not need a template. A five-year-old can follow a hand-drawn outline with scissors. From about seven, let them draw their own leaf shape and add veins with a marker. For a two-year-old, use a hole punch and hand over a glue stick.
If you would rather not cut at all, old magazine pages work well. Punch or tear shapes from anywhere with strong color, and flip a few over to the blank side so there is writing space on both faces.
Check before moving on: you should have a stack of leaves, most with a clear center area where a child can write without running out of paper.
Step 3: Write Gratitude Notes
This is where a gratitude tree with kids stalls for most families, usually because the prompts are too abstract. “What are you thankful for?” gets you a shrug at six and “pizza” at four. Give them something narrower.
Match the prompt to the age:
- Ages 2 to 3. Offer choices. “Was the best part today the bubbles or the toast?” Then draw the answer or stamp it with a sticker.
- Ages 4 to 5. Use people and routines. “Who helped you today?” “What is your favorite thing we do together?” Most four-year-olds can manage three or four words.
- Ages 6 to 8. Ask about feelings, not objects. “What made you laugh today?” “What was hard, and how did somebody help?”
- Ages 9 and up. Ask for specifics. “What is one thing that went better this week?” “Who do you want to say thanks to, and what would you say?” Older kids notice that answers repeat, and specificity fixes that faster than nagging.
Let any child dictate. You write exactly what they say, which turns the leaf into genuine fine-motor and handwriting practice instead of an adult’s handwriting.
Step 4: Attach the Leaves and Finish the Tree
Attach with whichever method suits the child. Tape is fastest and leaves the paper flat. A dot of craft glue on the stem end holds a leaf on a branch but takes a few minutes to set, so keep the tree out of reach until the glue dries. Punch a hole at the stem and tie on a short length of yarn for a leaf that actually hangs and moves.
Spread the leaves out as they go on. Filling one spot until it looks dense and then starting again reads as a bare tree with a lump in it.
Finish with a title. A strip of kraft paper tied to the trunk with yarn reading “Our November Tree” finishes it off, and dating it matters more than the words because it turns the display into something you will want again next year.
Display it out of reach of toddlers and away from walkways, particularly if you used a freestanding branch. A wall tree is the low-risk option for small children.
Common Mistakes
Nearly every frustration with this craft has a simple fix, and most of them show up in the first ten minutes.
The tree will not stand. Add more pebbles or sand, widen the base, or shorten the trunk above the fill line. A tall thin branch in a light jar always tips. Tape a heavy round base to the outside if you want the jar to look decorative.
Leaves tear when you move the tree. Use card stock instead of printer paper, and attach with tape or yarn rather than glue alone. Glue grips paper and releases with it when the leaf swings.
Glue has not dried and the leaves slide off. Give the glue five minutes on the branch before the tree goes back on display, or use a glue stick, which sets almost immediately.
Handwriting is unreadable. Ask for a drawing, a few large printed letters, or a sticker label instead. A leaf with a smiley face and two words counts the same as one with a paragraph.
The leaves cluster in one spot. Deal them out one at a time across the branch instead of letting children pile them wherever they like, and remind them there is space on the empty side.
Two tips I would not skip: date about a third of the leaves so you can see the arc across the month, and keep a jar of blank leaves and a pen next to the tree so anyone can add one without finding the supplies. That second one is the difference between a two-week project and a two-month one.
Frequently Asked Questions
What age is appropriate for making a gratitude tree with kids?
Anywhere from about two years old up works, with the format changing by age. Two- and three-year-olds tear leaves, stamp them with stickers, or pick from two choices you offer. From about six, they can write their own answer and add vein lines. Tweens and teens often write longer entries, so give them bigger leaves or a wall tree with room for detail.
What materials do I need for a paper gratitude tree?
A branch, craft stick, or cardboard tubes for the trunk, a jar or pot weighted with pebbles for the base, and paper for forty to sixty leaves. Add scissors or a hole punch, crayons or markers, and glue or painter’s tape to attach them. Every item can be swapped for a recycled equivalent, including brown grocery bag paper for the leaves and yarn for hanging them.
How long does a gratitude tree activity take?
The initial build takes about thirty minutes. After that, expect five minutes a day to hand over a leaf, read what was written, and hang it up. Three to four weeks of daily leaves is the usual window before Thanksgiving. If you prefer fewer, more substantial leaves, one per week over a month works just as well.
Can toddlers make a gratitude tree without writing?
Yes. Use a hole punch for the leaf shape, let your child stamp it with a washable ink pad or decorate it with stickers, and write their words yourself as they dictate. Drawing counts as fully as writing here, and the tree still builds the habit of naming something good. Tape leaves to the wall rather than hanging them, so nothing can be pulled down.
What can I use instead of a real branch for the tree trunk?
A wooden craft stick, a length of dowel, or three or four toilet-paper tubes taped together in a branching shape all substitute well. Wall versions skip the trunk question entirely by taping a brown-paper trunk and branch strips directly to the wall. This is the easiest route in a classroom, where you want a flat surface every child can reach.
How can I display a gratitude tree at school or at home?
At home, put a freestanding branch tree on the kitchen table or the entryway console where people pass daily, and keep blank leaves beside it. In a classroom, tape the trunk to a wall at child height and add a basket of pre-cut leaves and pencils underneath. For a keepsake, date many leaves and slip them into a scrapbook page once the month ends.
Conclusion
A gratitude tree is a half hour of building and then a small daily ritual that keeps going until the branches fill up. Start by making the trunk and weighting the base so it will not tip, cut a stack of leaves in mixed sizes, and let each child add one specific thing they noticed today before hanging it.
That last detail matters. “Something you noticed today” gets better answers than “something you are thankful for,” and a year from now the finished tree is the record.