To make a pinhole camera with a shoebox, you line the box with black paper, cut a tiny pinhole in one end, and tape a sheet of tracing paper inside the opposite end to act as a screen. Point the hole at a bright object and an upside-down picture appears on the screen. The build takes about half an hour, and the only tricky part is making a clean, small pinhole.
That is the whole trick. There is no lens, no shutter and nothing to buy. Kids get a real optics lesson without a textbook: light goes in one end, crosses the box and lands on the far wall the wrong way up, exactly like the old camera obscura rooms artists used to trace their drawings.
I built one with my own two kids last winter, which is how I know the two things that trip people up. The first is light leaking in around the lid, which fogs the whole image. The second is a pinhole made with a fat screwdriver, which produces a soft, smeared picture instead of a crisp one.
One safety note before you start, and it is the only serious rule in this project: never look through a pinhole camera at the sun, and never aim the box at the sun with your eye to the opening. Point the camera at ordinary bright things. A sunny window, a lit lamp, a candle, a bright sky.
Table of Contents
- 1What You Need
- 2Step-by-Step: Make a Pinhole Camera with a Shoebox
- 3How to Use the Pinhole Camera
- 4Why Does a Pinhole Camera Work?
- 5Common Mistakes and Tips
- 6Frequently Asked Questions
- 7What is the best material to use for the screen of a shoebox pinhole camera?
- 8Do I need aluminum foil to make a pinhole camera with a shoebox?
- 9How can I make the image from my shoebox pinhole camera sharper?
- 10Can a pinhole camera made from a shoebox work in daylight?
- 11How long does it take to make a pinhole camera with a shoebox?
- 12How can an adult help a young child make a pinhole camera safely?
- 13Conclusion
What You Need
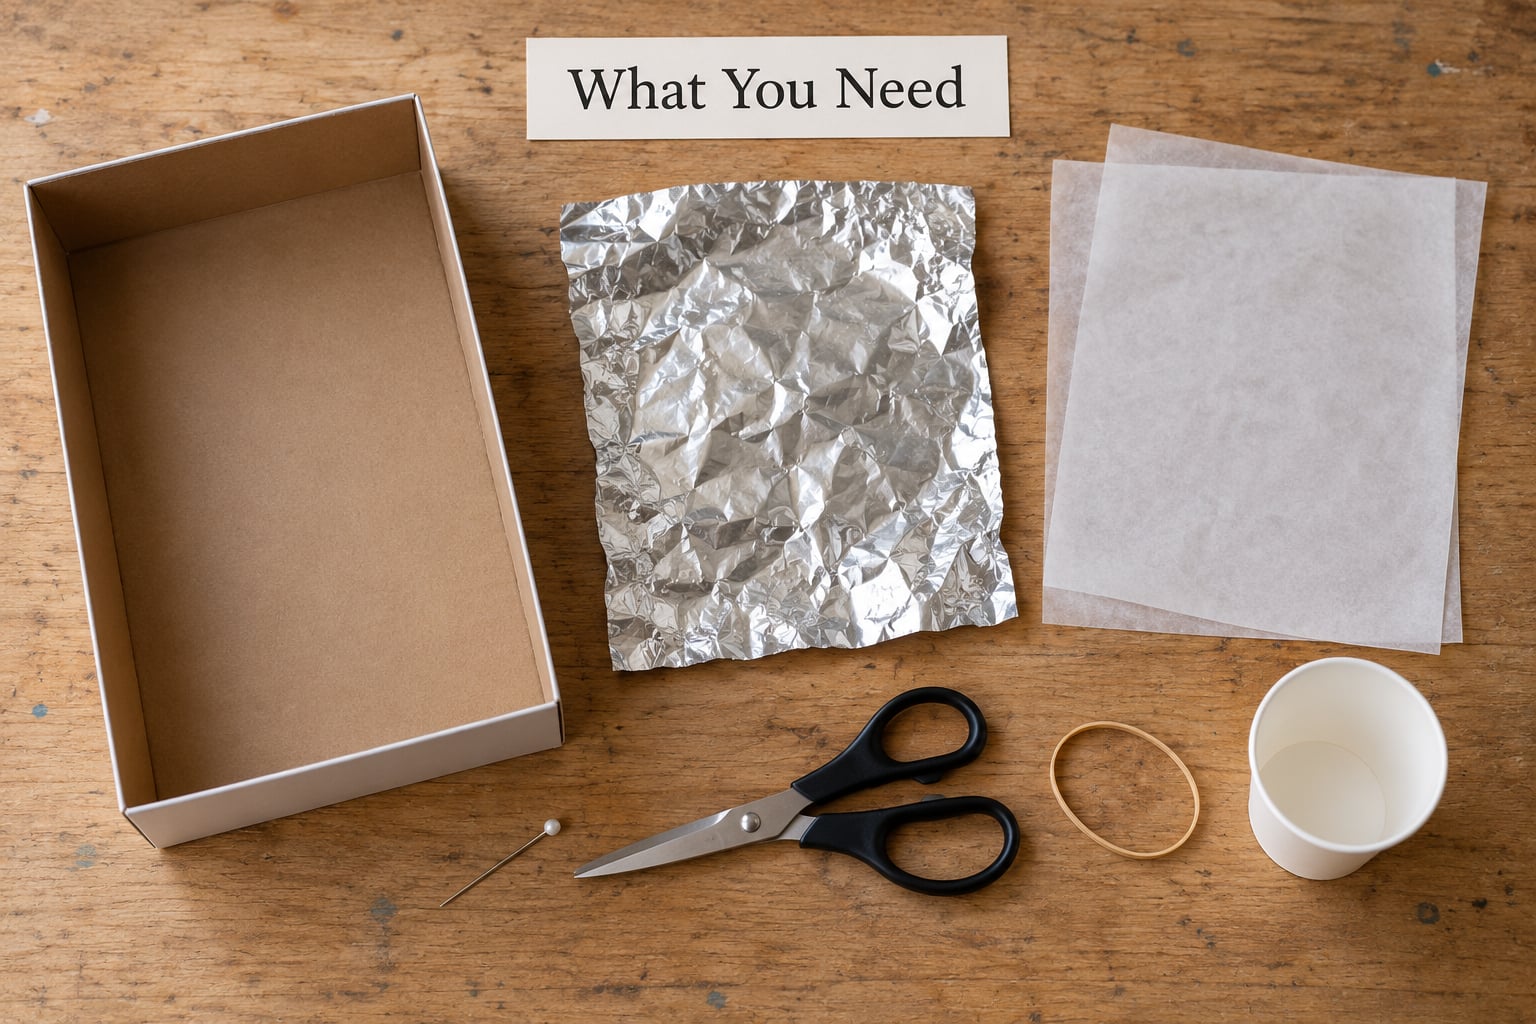
Gather everything before you cut anything. Having the tape and foil open on the table saves you from stopping halfway through with glue on your fingers.
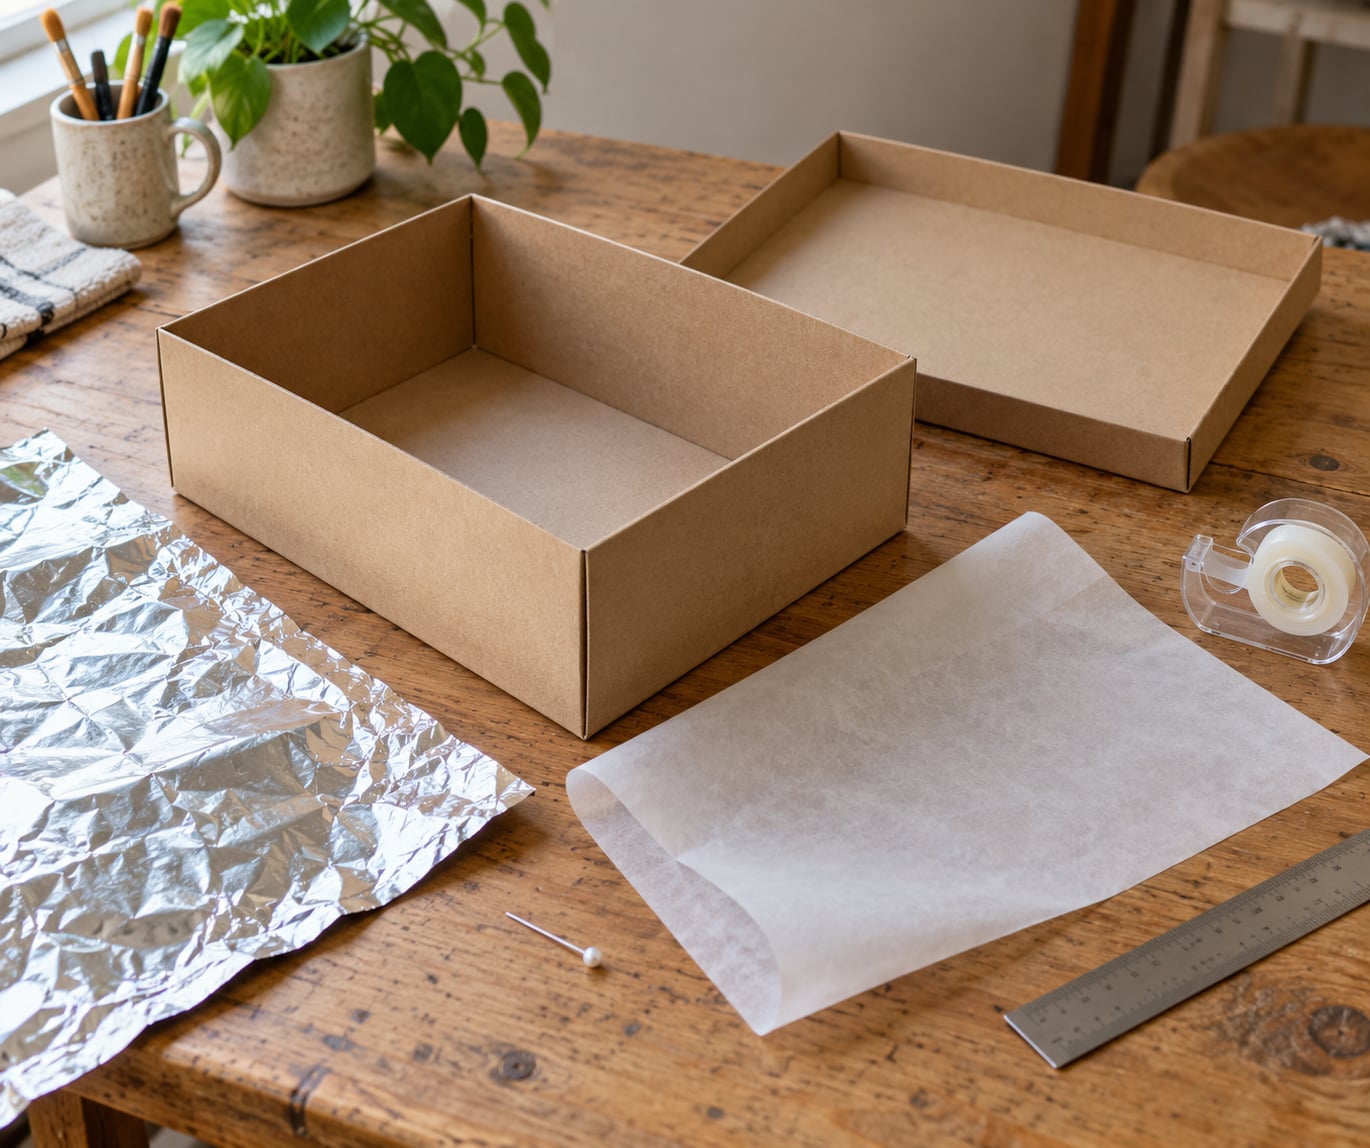
- A shoebox — a standard shoe box works well. Any sturdy cardboard box of similar depth will do, and a cereal box makes a smaller, lighter version.
- Black paper or black acrylic paint — for the interior. This is the item people skip and then regret when the image looks grey and washed out.
- Aluminum foil — a small sheet from the kitchen drawer is enough.
- Tracing paper, wax paper or thin white paper — this is your projection screen. Thin matters, because light has to pass through it.
- A sewing pin or fine needle — a thick nail or screwdriver makes a hole that is far too big for a sharp image.
- Clear tape or masking tape — for the screen, the foil and every light leak you find.
- Scissors and a craft knife — scissors for paper, a knife for the box. A ruler helps you keep the viewing window square.
- A rubber band — optional, but it holds the screen flat against the end of the box.
- Markers, stickers or washi tape — optional, for decorating the finished camera.
Measure the distance from one short end of the box to the other before you cut. That number is your focal length, and a longer box gives you a bigger, dimmer image on the screen. Most men’s shoe boxes are about 12 inches deep, which is a comfortable middle ground for a first build.
Adult job, kid job: cutting the viewing window and piercing the pinhole are the two steps worth doing yourself. Everything else, including taping the screen and decorating, is genuinely better with small hands involved.
Step-by-Step: Make a Pinhole Camera with a Shoebox
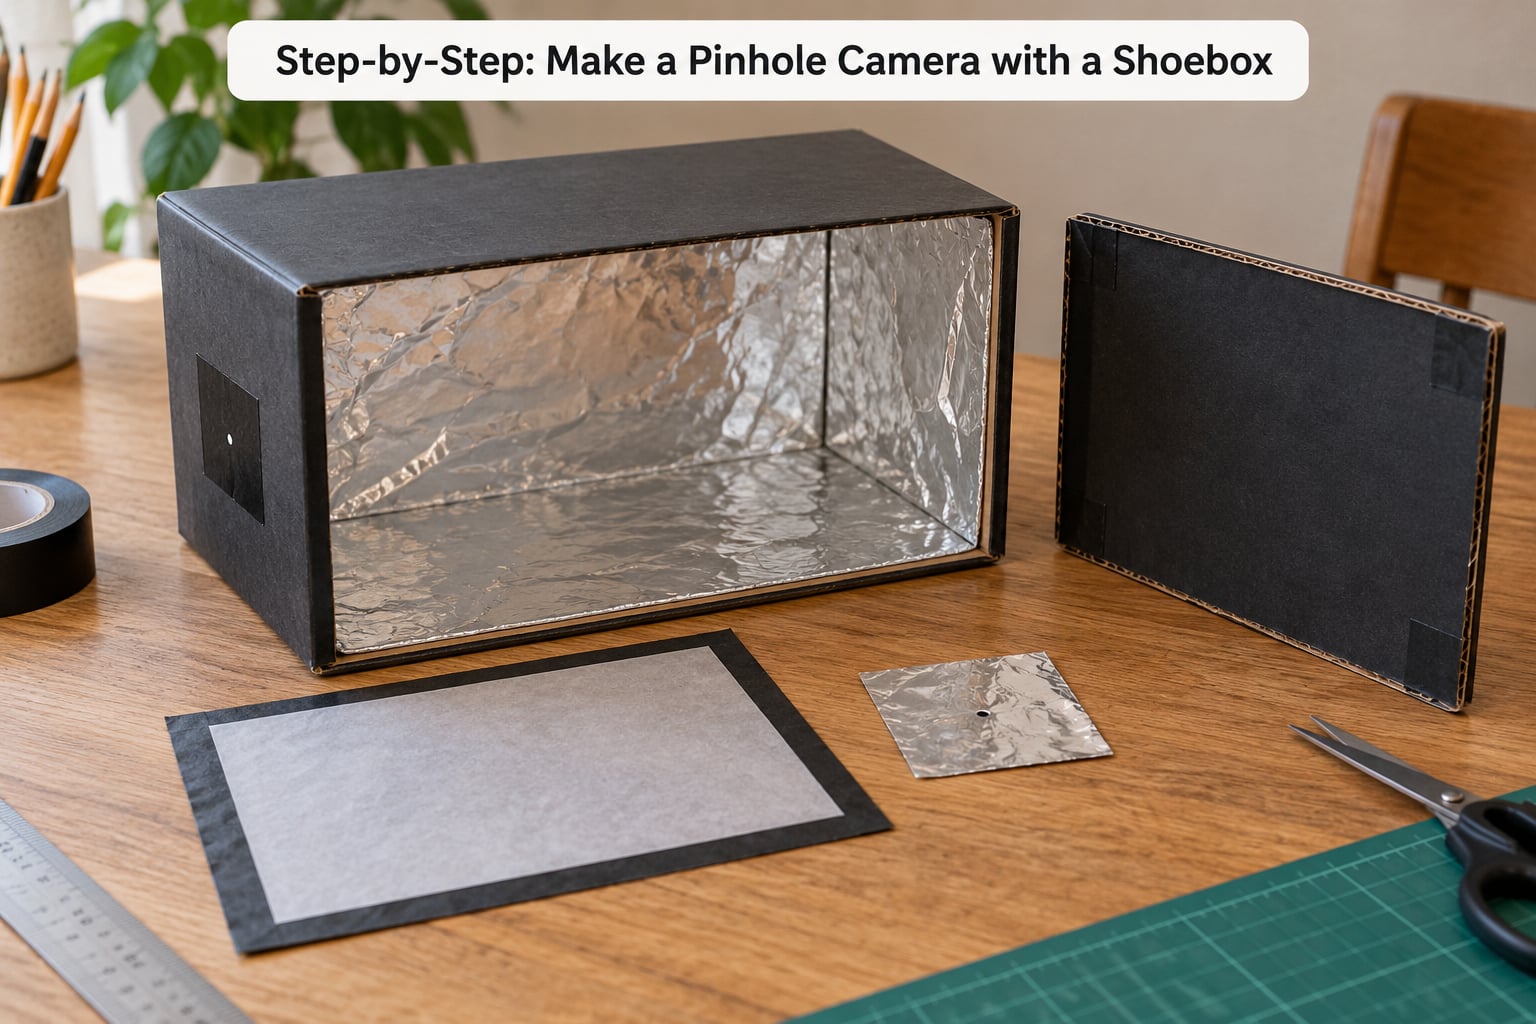
- Prepare the box. Remove the lid and set it aside, and trim off any manufacturer’s label so no printing competes with your image. Fold the flaps flat so nothing blocks the interior. You want an empty, unprinted cardboard tube with a lid you can lift.
- Paint or line the interior black. Cut black paper to fit the inside of all four walls and the base, then tape it in place. If you have black acrylic paint, two thin coats on bare cardboard work better than one thick coat, which cracks when the box flexes. Let it dry fully.
- Make the screen. Cut a piece of tracing paper a little smaller than the opening of one short end, so a half-inch of black wall shows on each side. Tape it to the inside of that end, pulling it flat and smoothing out every wrinkle. The image forms on this end.
- Cut the viewing opening. On the opposite short end, cut a rectangle roughly 2 inches by 2 inches and remove the flap completely. A square hole is easier to aim than a round one. Set that cut-out panel aside; you will use it as a shutter or a lens cap.
- Line the interior with foil. Cover the inside of the end with the viewing opening, pressing the foil around the edges and over the cut edges so no light finds a gap. Trim the foil so the opening is completely clear. This panel should look like a flat, shiny black mirror when you look into the box.
- Pierce the pinhole. Push the sewing pin straight through the center of the foil, from the inside out, and twist as you push to make a clean round hole. Aim for roughly 1/32 inch, about the width of a pencil line drawn with a fine tip. A hole you can barely see is the right size.
- Reassemble the back. Put the lid on. To kill the biggest light leak, slide a rubber band around the box, or run a strip of tape along the lid seam and down the short ends. Now stand in a dark room and look through the viewing opening. You should see almost nothing but a soft grey glow.
- Test and decorate. Point the pinhole end at a bright object, look into the viewing opening, and let your eyes adjust for about 30 seconds. When a faint image appears on the tracing paper, the camera works. Then decorate the outside with markers or washi tape.
How do you know each step worked? Step 2 is right when the inside reads as pure black with no printed cardboard showing. Step 3 is right when the paper is flat with no bubbles. Step 6 is right when the hole is a small clean dot, not a ragged tear. Step 7 is right when the inside of the closed box looks dark, not grey.
How to Use the Pinhole Camera
Cover the pinhole with your palm or the cut-out panel you saved, walk to a bright object, then uncover the hole and hold still. A sunny window works better than anything, and a lit lamp or a television gives a good image indoors after a minute in a dark room.
Look into the 2-inch viewing opening and let your eyes adjust. The picture takes roughly 20 to 60 seconds to become visible, and it sharpens as your pupils open. Expect it upside down and left to right reversed, which is normal and actually the point: turn the whole box upside down and the text in your view flips the right way around.
Keep the box as still as you can. Rest your elbows on the table or rest the box on a stack of books at the height of your subject, because even a small wobble softens everything. And stay away from the sun with your eye; the camera is a viewing tool for bright indoor objects, not for looking at the sun.
Why Does a Pinhole Camera Work?
A pinhole camera works because light travels in straight lines. Every point on a bright object throws light in every direction, and the pinhole acts as a single narrow gate. Rays from the top of the object pass through the gate and spread out to land at the bottom of the screen, while rays from the bottom land at the top. Cross them over and the picture flips. No lens is needed because the geometry does the focusing for you.
That is the camera obscura, the dark room or box that existed long before photography. The hole has to be small for the picture to be sharp, and the screen has to be far enough from the hole to gather enough light. The classic rule is that a hole one twenty-fifth the distance between the pinhole and the screen gives a workable starting size, so on a 12-inch box that is about half a millimeter.
For older kids, the sharper rule photographers use is a formula based on the box length and the wavelength of light, which gives a pinhole diameter around 0.04 millimeters for a 12-inch box. Fine sewing needles usually land in that neighborhood, which is why they work better than nails.
Common Mistakes and Tips
Almost every disappointing pinhole image comes down to a light leak, a hole that is too big, or camera movement. Match the symptom in the table below, then make one change at a time so you know what fixed it.
| Problem | Why it happens | Fix |
|---|---|---|
| Image is blurry or smeared | Pinhole is too large, or the box moved | Repierce the foil with a finer needle for a smaller hole, and brace the camera on books instead of holding it |
| Image is very dark or hard to see | Hole too small, or the room is too bright | Widen the pinhole a touch and move to a darker room with the lights off |
| Image is grey and washed out | Printed cardboard bounces light around the inside | Cover every interior wall with black paper or black paint, and check for bare cardboard |
| Nothing shows at all | Foil was never pierced, or tape covers the hole | Look into the open box and confirm the hole is clear, then re-tape the foil at the edges only |
| Whole screen glows evenly | Light leaking around the lid or the screen seam | Run tape along the lid seam and over the screen edges, and add a rubber band around the box |
| Screen bubbles or sags | Paper taped over a curved surface | Re-tape the screen flat on the flat end panel, then secure it with a rubber band |
| Only part of the view is captured | Field of view is limited by the viewing opening | Widen the opening to 3 inches and cut it closer to the corners |
Four habits fix most problems. Darken the room, because contrast is everything. Hold still, and give it a full minute before you decide the image is not there. Keep the pinhole small but make sure it is fully clear, since a partly blocked hole is dimmer and softer. And make two cameras if you can, then compare them, since small differences in pinhole size become obvious side by side.
Two variations worth trying once the basic build works. A cereal box gives a smaller, brighter image, which is easier for younger children to aim. A cylindrical container such as an oatmeal tub works too, with the same principle, as long as the inside is dark and the pinhole is small.
Frequently Asked Questions
What is the best material to use for the screen of a shoebox pinhole camera?
Tracing paper or wax paper works best, because both are thin enough for light to pass through while still scattering it into a viewable image. Thin white printer paper also works, though the image is fainter. Avoid card stock and construction paper, which are too opaque to see anything. Tape the paper flat to the end panel of the box, leaving a small black border on each side.
Do I need aluminum foil to make a pinhole camera with a shoebox?
No, but it makes the job easier. Foil makes a flat, opaque, light-blocking plate that is easy to pierce and easy to seal around the edges with tape, so you get a clean round hole and no stray light. Black card stock or a small square of black poster board works just as well. Whatever you use, the surface must block light except at the pinhole itself.
How can I make the image from my shoebox pinhole camera sharper?
Make the pinhole smaller with a finer needle, and push it through foil rather than cardboard for a cleaner edge. Keep the screen as far from the hole as your box allows, since a longer distance gathers more light and stays sharper. Brace the box on a stack of books instead of holding it, and give your eyes a full minute to adjust in a darkened room.
Can a pinhole camera made from a shoebox work in daylight?
Yes, daylight gives the brightest and sharpest image, and the easiest setup is a darkened room with a sunny window as your subject. Stand a few feet back from the glass and cover the window to darken the room, then uncover it and watch the image appear on the screen. Never aim the box at the sun or look through the opening toward it, and never use eclipse glasses or solar film on a pinhole camera.
How long does it take to make a pinhole camera with a shoebox?
Allow about 30 minutes for the build, plus drying time if you paint the interior with black acrylic paint. Card lining and tape need nothing more than ten minutes to set. The first successful image can appear within a minute of pointing the camera at a bright object, and it continues sharpening for the next minute as your eyes adjust. Most of the time goes into cutting the viewing opening cleanly.
How can an adult help a young child make a pinhole camera safely?
Take over the two sharp steps yourself: cutting the viewing opening with a craft knife and piercing the pinhole with a needle. Children usually love tapping foil, taping the screen, and decorating the box, so hand them those jobs and let them choose the colors. Keep the project indoors on a clear table, and set the ground rule early that the camera is pointed at windows and lamps, never at the sun.
Conclusion
Start with the box itself. Wipe off the label, cover the inside with black, and give it one clean, small pinhole made with a fine needle. Those three things decide whether the camera works, and everything after that is decoration.
Then take it into a dark room, point it at a sunny window or a lit lamp, and give the image a full minute to appear. Once your child sees an upside-down version of a familiar object appear out of a cardboard box, the physics tends to explain itself. Put their name on it, hang it on the wall, and build a second one to compare.