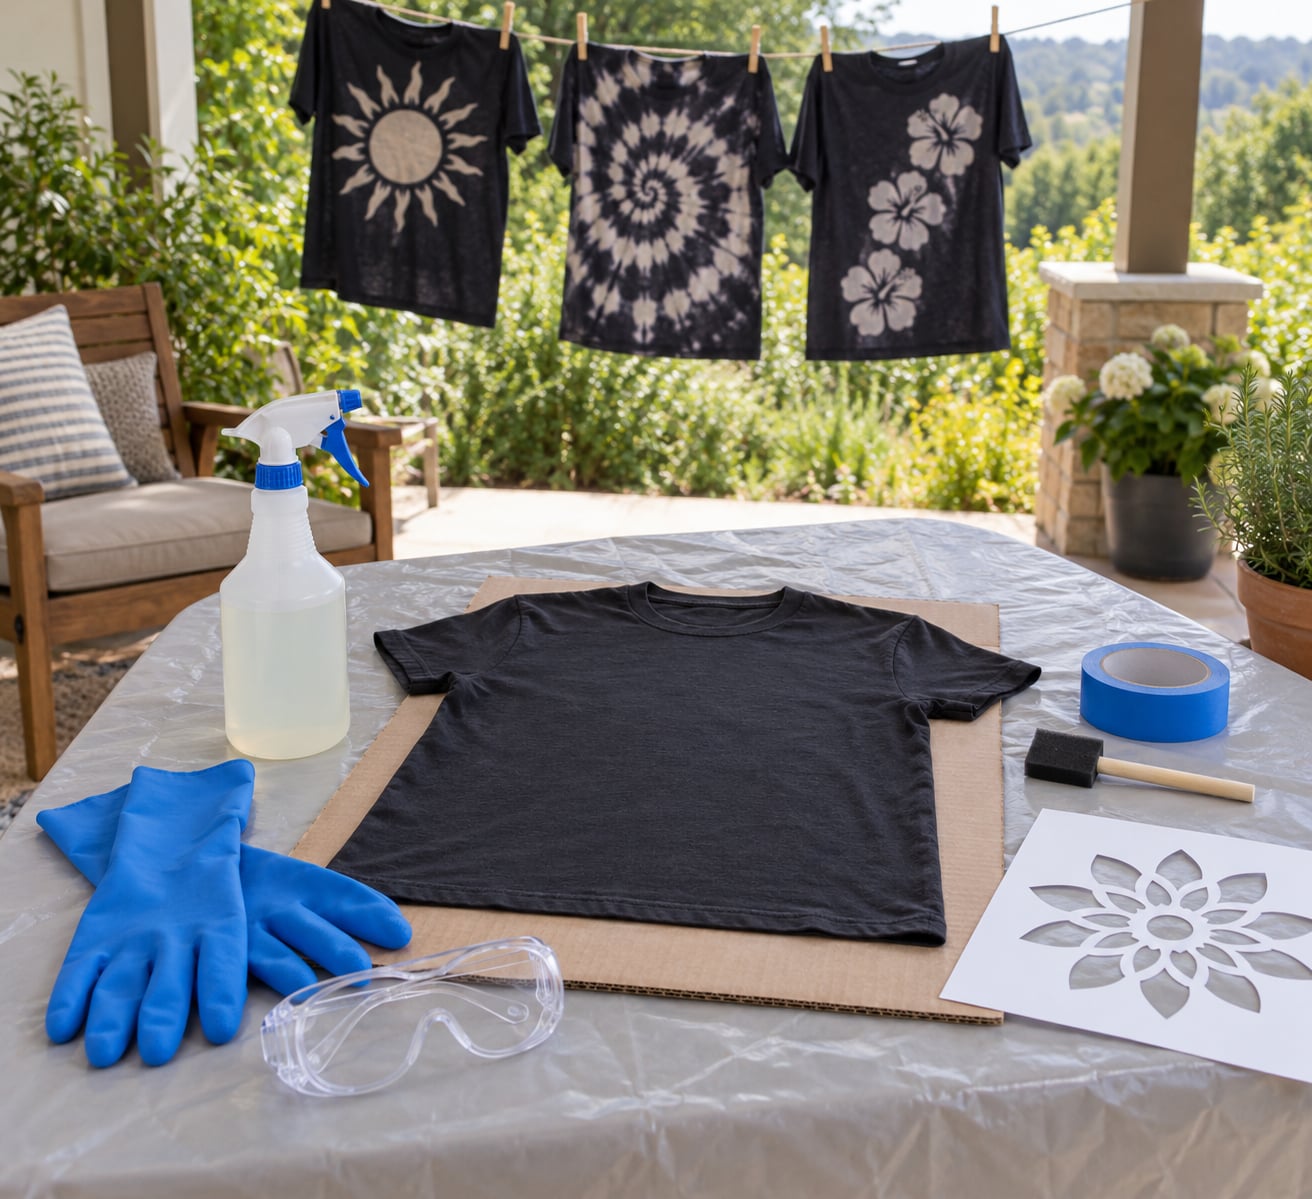
How to make a bleach shirt safely with kids comes down to one split: an adult handles every drop of bleach, and the child handles the design. You spray or dab a diluted bleach solution onto a dark cotton t-shirt, usually through a stencil, let it dry, rinse, and the dye vanishes wherever the bleach landed.
The finished effect is called reverse tie dye, because bleach removes colour instead of adding it. It takes about 20 minutes of active work plus drying time, and it is one of the few crafts where kids genuinely help without getting anywhere near the chemical.
The safety side deserves the same attention as the technique. Bleach is a corrosive product that will eat synthetics, and mixing it with the wrong cleaner releases a toxic gas. Read the rules below once and the whole thing becomes easy.
Table of Contents
- 1What You Need
- 2The core supplies
- 3Fabrics to skip entirely
- 4Who does what
- 5Step-by-Step: How to Make a Bleach Shirt Safely with Kids
- 61. Prepare a Safe, Covered Workspace
- 72. Check the Shirt and Make a Small Test
- 83. Mix the Bleach Solution Carefully
- 94. Create the Design with Applicators
- 105. Let the Bleach Work and Watch the Change
- 116. Rinse, Dry and Finish the Shirt
- 12Common Mistakes
- 13Using bleach on a synthetic or blended fabric
- 14Pouring water into the bleach bottle
- 15Applying undiluted bleach
- 16Leaving children near the open bottle
- 17Rinsing too early, or hanging the shirt wet
- 18Forgetting the cardboard backing
- 19Skipping the test patch
- 20Frequently Asked Questions
- 21Do you dilute bleach when making a bleach shirt?
- 22How do I stop bleach from spreading on clothes?
- 23Do you wet a shirt before bleach dyeing it?
- 24Can I bleach a polyester shirt?
- 25What happens if bleach gets on skin or in eyes?
- 26Is bleach safe for kids’ crafts, and how old should they be?
- 27Conclusion
What You Need
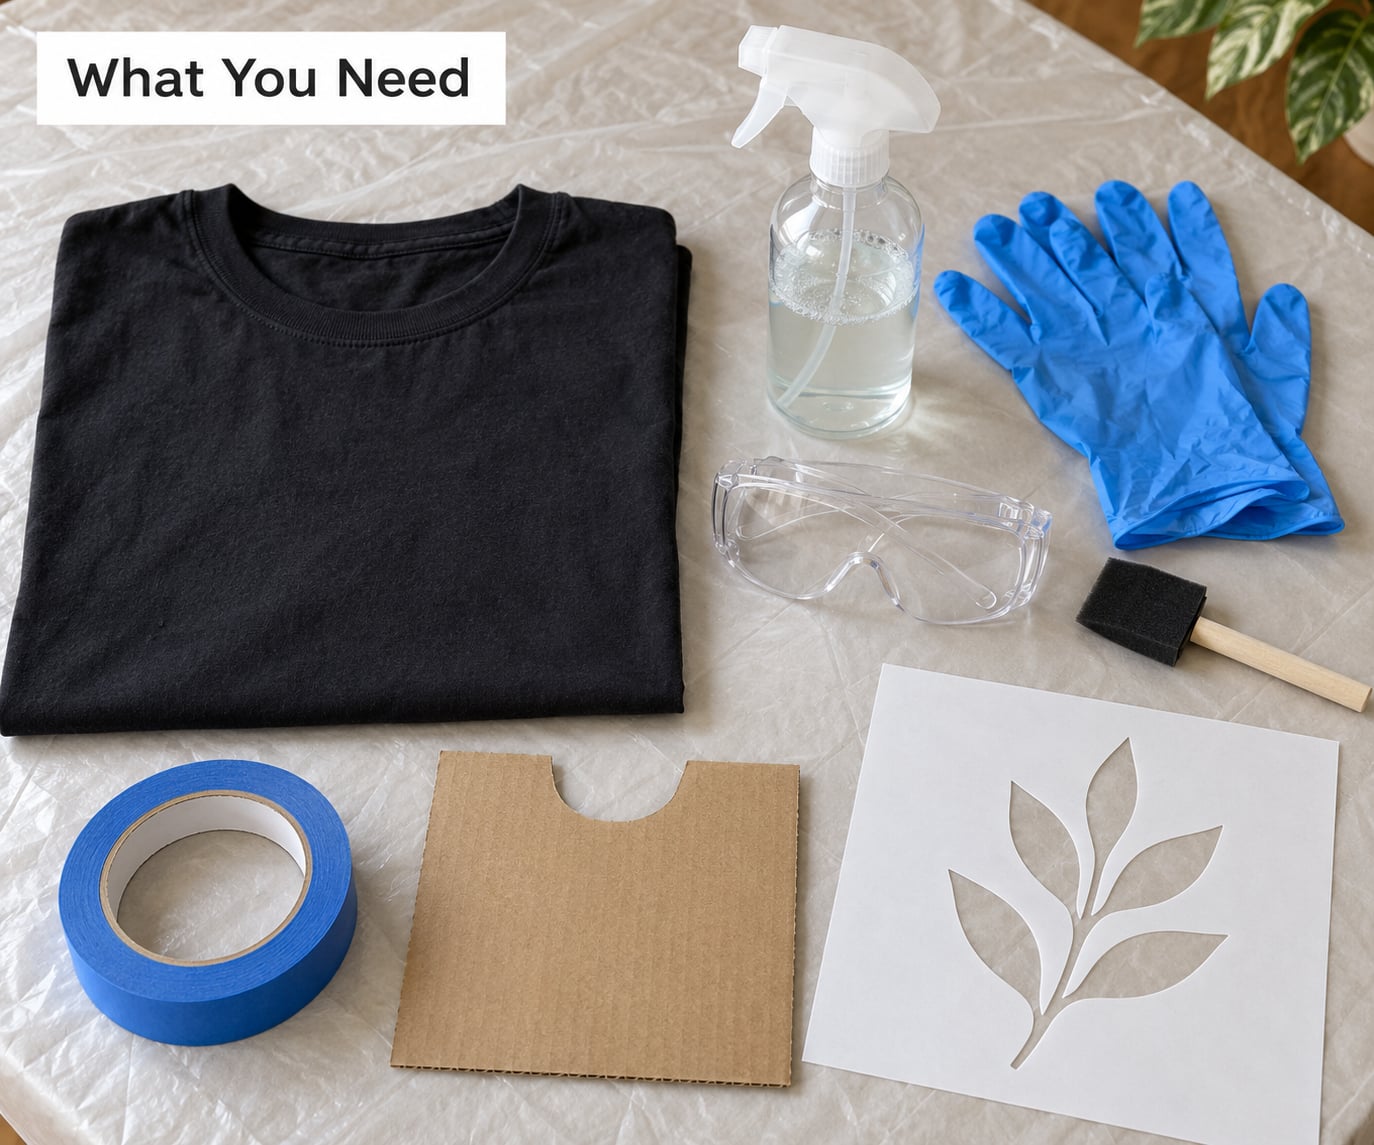
Gather everything before anyone opens the bottle. Scrambling for tape with wet hands is how spills happen.
The core supplies
- A dark cotton or cotton-blend t-shirt. Solid colour, no design, no printed logo. Black, navy, dark brown, forest green and burgundy all work; dark shirts give the cleanest contrast.
- Standard household chlorine bleach (sodium hypochlorite), the same kind you use for laundry.
- Cool water and a measuring cup or funnel.
- A spray bottle for wide, even coverage. Plastic is fine; a fresh empty bottle with a mist setting works best.
- A foam brush or wide paintbrush for precision work and for smaller children who find triggers tiring.
- Cardboard or newspaper to slide inside the shirt so bleach cannot bleed through to the back.
- Painter’s tape or a cut paper stencil for stripes, shapes and letters.
- A plastic sheet, old tablecloth or garbage bag to protect the work surface.
- Rubber gloves and clear goggles. Gloves are standard; goggles are the step most people skip and the one that protects a child’s eyes from a fine mist.
- A bowl or bucket for rinse water, plus a laundry bag or something to mark the shirt as a separate first wash.
Fabrics to skip entirely
Check the care label first and skip anything marked with a crossed-out triangle, the do-not-bleach symbol. Polyester, rayon, viscose, silk, spandex and any fabric with elastane can yellow, melt, or turn brittle, and dark synthetic blends often just go patchy and dull.
Colours also behave differently. Black, navy, brown and green usually bleach to white or cream. Purple tends to land on pink rather than white, and reds move toward orange or coral. If you want a surprise, test first; if you want reliability, stick to black and navy.
Who does what
Sort the jobs by age, and keep the bleach steps adult-only no matter how capable the child seems.
- Under 5: tearing newspaper strips, choosing tape colours, holding stencils, and watching the colour change happen. No bleach handling at all.
- Ages 6 to 8: the same, plus brushing on a very diluted solution while an adult holds the bottle and gloves open, and dipping fabric in glue resist.
- Ages 9 and up: spraying from a distance under direct supervision, peeling stencils, and rinsing their own shirt.
If a child should not touch bleach at all, the same designs work with fabric paint, spray chalk or washable markers, and the results are just as good for a costume.
Step-by-Step: How to Make a Bleach Shirt Safely with Kids
1. Prepare a Safe, Covered Workspace
Work outdoors if you possibly can. Outdoors is the best ventilation and the least chance of a whiff of chlorine in a small room. If you must work inside, open every window, switch on an extractor fan, and keep the door closed so the mist stays away from other rooms.
Lay the plastic sheet or old tablecloth on a table or the floor, then put a layer of newspaper on top of that. Set the bleach bottle and the measuring cup at one end, away from the child’s end of the table.
Position seats so children sit on the opposite side from the bottle, and keep the spray bottle closed until step 3. This last detail matters more than it sounds. A capped bottle cannot mist.
2. Check the Shirt and Make a Small Test
Prewash the shirt and let it dry fully. Bleach applied to a shirt that already carries detergent or fabric softener can behave oddly, and a damp shirt bleeds in a way a dry one does not.
Turn the shirt inside out or use the inside hem and find a corner you will not see. Dab a little of your mixed solution on it and wait five minutes. If the fabric thins, smells strongly of chlorine, or feels different under your finger, stop and use a different shirt.
This habit also tells you what your colour does. A navy shirt that tests pale blue at five minutes may reach white at fifteen; a purple one may test pink and stay pink. That knowledge saves a redo.
3. Mix the Bleach Solution Carefully
Always add bleach to water, never water to bleach. Pouring water into a concentrated bottle can splash concentrated solution out of the top, and a fast reaction in a narrow bottle is what makes that dangerous.
| Technique | Mix ratio | What you get |
|---|---|---|
| Spray bottle, bold contrast | 1 part bleach to 1 part cool water | The most commonly cited working mix in craft forums. Strong and fast. |
| Spray bottle, subtle fade | 1 part bleach to 4 parts water | Gentler on the fabric and easier for a child to handle under supervision. |
| Very soft wash of colour | 1 part bleach to 9 parts water | For a vintage, sun-faded look rather than a white design. |
| Foam brush or sponge | 1 part bleach to 2 parts water | Control in tight spots and along taped edges. |
| Bleach gel pen | Undiluted, straight from the tube | Precise lines and lettering. Use a new pen; dried-out ones do nothing. |
Mix in a labelled container, write the ratio on it with a marker, and put the lid on. Never reuse a spray bottle for juice or water afterwards, and never mix bleach into a bottle that has held vinegar, ammonia, or any acidic cleaner. That combination produces chlorine gas, which is exactly what child-care infection-control guidance tells you to prevent.
4. Create the Design with Applicators
Slide the cardboard inside the shirt so the back is protected. This is the single tip that appears in nearly every craft forum thread, and it works: without a backing, the spray soaks straight through and you get a mirror-image mess on the other side.
Put your shirt on a flat surface, tape or pin your stencil down, and press the tape along its edges so no gap lets mist creep underneath.
For design ideas that suit kids, stripes need nothing but tape. Spirals come from tying or twisting the shirt and clipping bands, then unfolding before the bleach dries. Shapes come from a cut paper or freezer-paper stencil held with tape, peeled off once the shirt is dry. Colour blocks come from masking half the shirt and spraying one side only. Lettering works best with a bleach gel pen, which stays where you put it instead of spreading.
Have the child choose the colour scheme or hold the stencil flat while you spray. Participation without proximity is the whole trick.
5. Let the Bleach Work and Watch the Change
Spray from about 20 to 30 centimetres away, in even passes, rather than soaking one spot. Hold a folded newspaper outside the stencil edge as a guard, because overspray fades the shirt well beyond your design.
Then stop and wait. Bleach works as the shirt dries, so do not rinse early, do not hang a soaking wet shirt on a line, and do not pile other laundry on top of it. Most shirts reach the result you want between five and fifteen minutes, and you can watch the fabric shift from black to grey to off-white.
Stay in the room the whole time. A child should never be the one deciding when the process is finished.
6. Rinse, Dry and Finish the Shirt
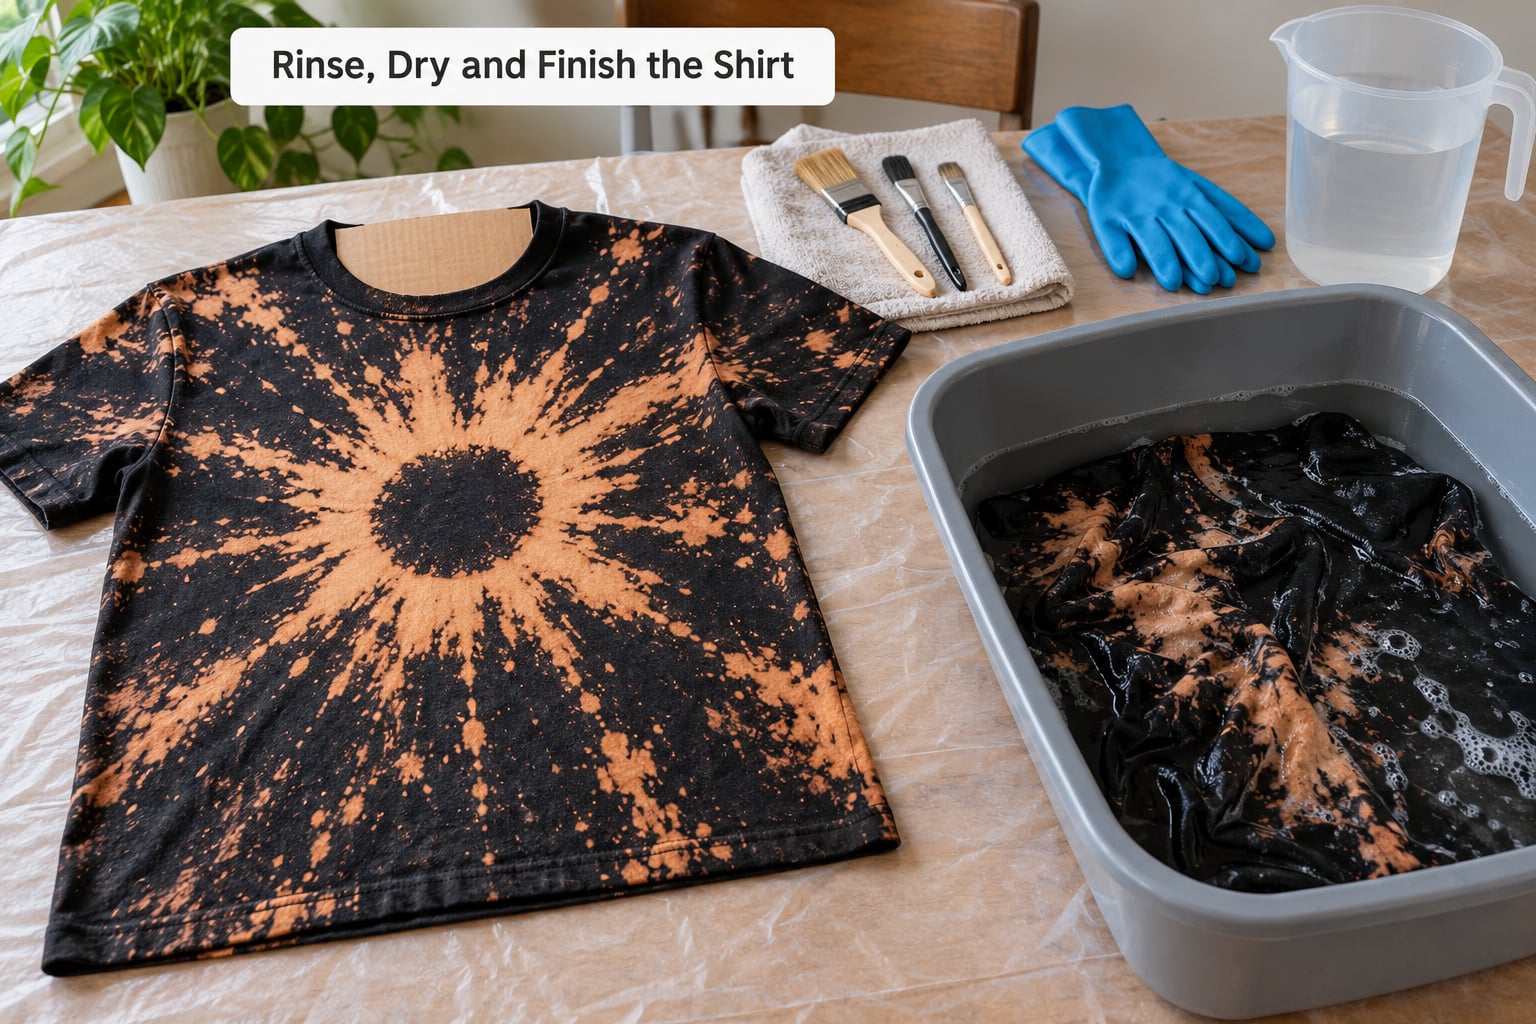
Rinse under cold running water until the water runs clear and the shirt stops smelling of chlorine. That smell is a reliable signal, and if it lingers, rinse again rather than hoping a wash will fix it.
Wash the shirt alone for the first cycle, cold water, on the label-recommended setting. Skip the fabric softener, and do not tumble dry until the shirt has air dried fully. Bleach-weakened cotton dries brittle, and heat adds to that.
For the cleanup, rinse the spray bottle out with cold water, pour the leftover solution down the drain followed by plenty of cold water, and wash your gloves and the brushes separately from your regular laundry.
Let the shirt dry flat or on a hanger in the shade. Once it is dry, it is an ordinary washable shirt and safe to wear.
Common Mistakes
Nearly every disappointing bleach shirt traces back to one of these.
Using bleach on a synthetic or blended fabric
Check the care label and skip anything with the do-not-bleach symbol. Polyester, rayon, silk and spandex can yellow, warp or turn to pulp. Correction: 100 percent cotton is the safe and reliable choice.
Pouring water into the bleach bottle
Always bleach into water, never water into bleach. Add water first, then the bleach, slowly. Correction: if you have been doing it backwards, that is the first thing to change.
Applying undiluted bleach
Straight bleach on fabric removes colour faster than it removes dye, and leaves weak, brittle fibres behind. Correction: dilute according to the table in step 3, and use the gel pen for anything needing pure bleach.
Leaving children near the open bottle
A capped bottle on the far side of the table is the whole precaution. Correction: keep the bottle capped and out of reach until the moment you mix, then cap it again immediately.
Rinsing too early, or hanging the shirt wet
Both push the design into a run. Correction: wait until the shirt is fully dry and the colour change has happened, then rinse, then dry flat before washing.
Forgetting the cardboard backing
Bleach soaks through fabric in seconds. Correction: slide a piece of cardboard or newspaper inside the shirt every single time, and rotate it as you go so one side does not take the full load.
Skipping the test patch
Every colour reacts differently, which is why purple often lands on pink. Correction: dab a hidden corner first and wait five minutes before committing to the whole shirt.
Frequently Asked Questions
Do you dilute bleach when making a bleach shirt?
Yes, unless you are using a bleach gel pen, which is applied undiluted. For a spray bottle, most people mix 1 part household bleach with 1 part cool water for a strong design, or 1 part bleach to 4 parts water for a softer fade. Always pour bleach into water rather than water into bleach, and never mix bleach with vinegar, ammonia or acidic cleaners, because that combination can release a toxic gas.
How do I stop bleach from spreading on clothes?
Work on a dry shirt, use a dilute solution, and spray from 20 to 30 centimetres away instead of soaking one area. Slide cardboard or newspaper inside the shirt so the bleach cannot bleed through to the back, and hold a folded newspaper just outside the stencil edge to catch overspray. Press tape down firmly along every edge so no gap lets mist creep underneath, and let the shirt dry before rinsing.
Do you wet a shirt before bleach dyeing it?
No, start with a dry shirt. Damp fabric lets the solution travel, which softens the edges of your design and causes it to run. Many people also prewash and fully dry the shirt first, because leftover detergent and fabric softener can change how the bleach reacts. If you want a softer, faded look rather than a sharp white design, you can pre-wet the fabric deliberately and accept the softer edges.
Can I bleach a polyester shirt?
No, not safely. Polyester, rayon, viscose, silk and spandex are damaged by chlorine bleach. They can yellow, melt, or turn brittle, and blends often come out patchy rather than cleanly faded. If the care label shows a crossed-out triangle, skip that garment entirely. Plain 100 percent cotton in a dark solid colour is the reliable choice, and black and navy give the cleanest white result.
What happens if bleach gets on skin or in eyes?
Move to fresh running water straight away and rinse for at least 15 minutes, then remove any contaminated clothing. For eyes, rinse gently with water for the full 15 minutes. If bleach has been swallowed, contact Poison Control in the US on 1-800-222-1222 or your local poison centre, and do not give anything by mouth. Follow the first-aid instructions printed on your bleach bottle, and get medical help for any persistent irritation.
Is bleach safe for kids’ crafts, and how old should they be?
Bleach is a chemical, so the craft is safe when an adult controls it. Keep children away from the open bottle, wear gloves and eye protection, work outdoors or in a well-ventilated room, and never mix bleach with other cleaners. Under-fives can tear paper, choose tape and watch the colour change. Ages six to eight can brush on a dilute solution under your hands. Nine and up can spray under direct supervision.
Conclusion
If you take five things from this guide, take these. Set the workspace up first, outdoors or with real ventilation, with the surface covered and the bottle capped. Keep the bleach in adult hands and let the child own the design. Test a hidden corner before you commit. Mix bleach into cool water, never the other way around, and dilute it properly. Rinse only once the shirt has dried, then wash it cold and alone.
Do those five things well and the rest is just spray, wait, rinse. That is a perfectly good afternoon.