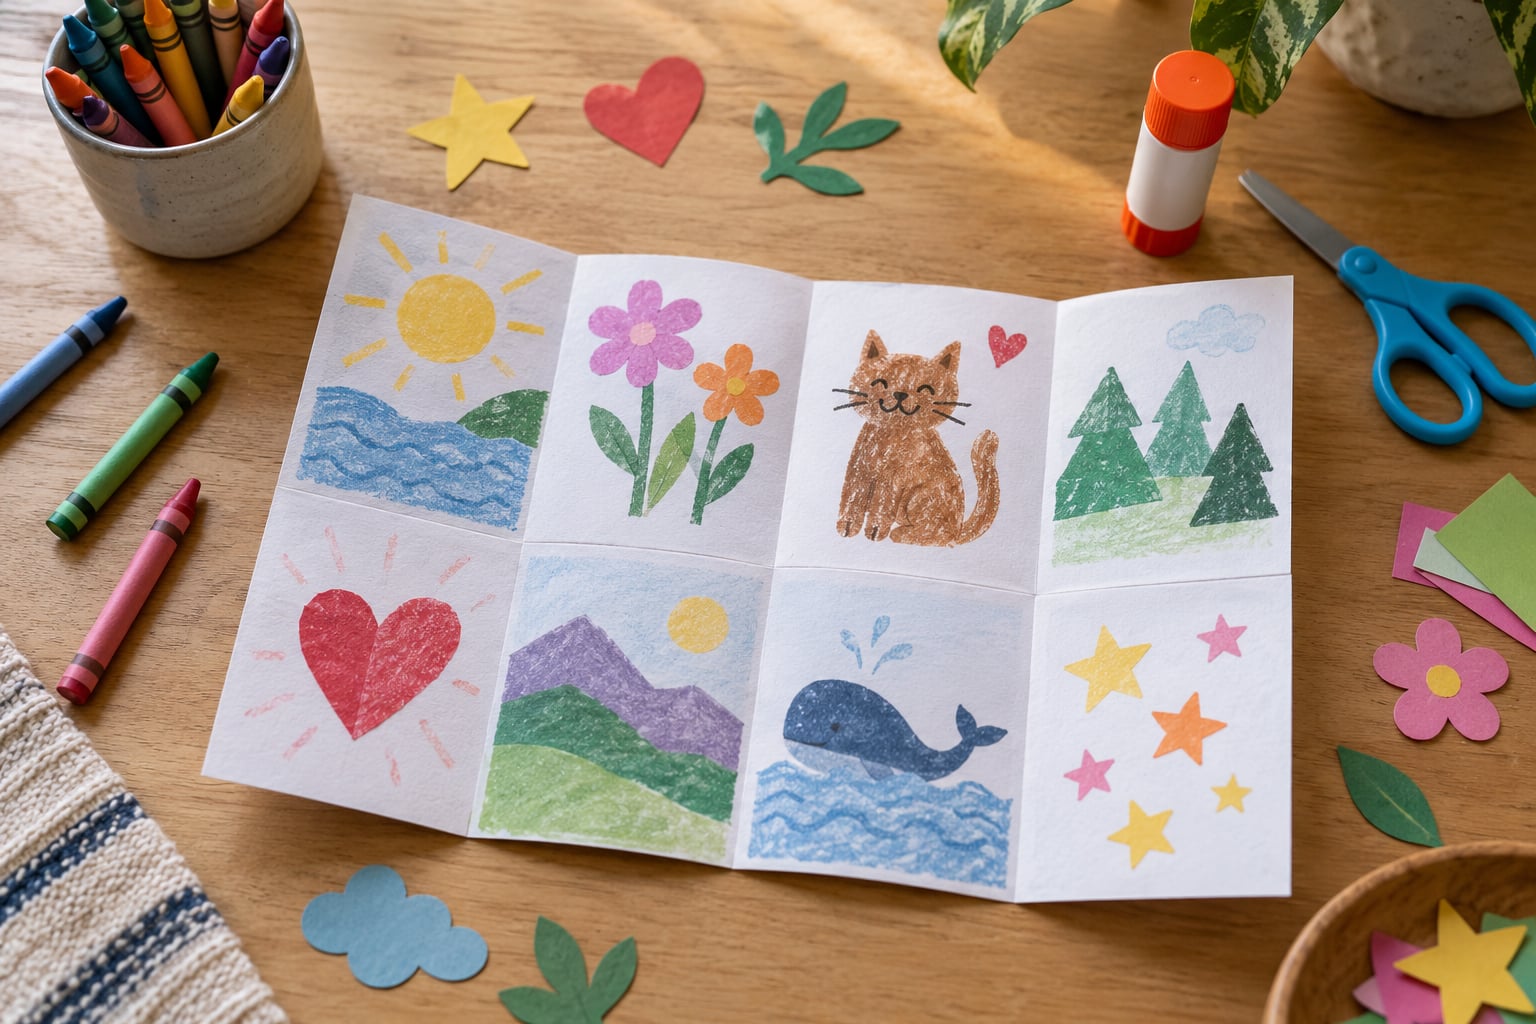
How to make a zine with kids takes one sheet of paper, about twenty minutes of folding and cutting, and a willingness to let go of perfect. You fold the paper into eighths, cut one slit across the middle crease, push the ends together, and the sheet collapses into an eight-page mini magazine. The kids fill it with whatever they want to say, draw or glue down. It is the rare craft that costs nothing, cleans up in seconds and still feels like a real publication at the end.
A zine (pronounced zeen) is a homemade mini magazine. No printer, no special paper, no craft store. If you have a sheet of A4 or Letter paper, scissors and a pen, you can start right now.
Table of Contents
- 1What You Need
- 2Preparing the eight-page template
- 3Step-by-Step: How to Make a Zine with Kids
- 4Step 1: Choose a Theme
- 5Step 2: Fold the Paper
- 6Step 3: Plan the Pages
- 7Step 4: Cut the Folded Sheet
- 8Step 5: Make the Pages
- 9Step 6: Arrange and Check the Zine
- 10Step 7: Fold and Share the Finished Zine
- 11Common Zine-Making Mistakes and Easy Fixes
- 12The cut went along the wrong edge
- 13The pages come out in the wrong order
- 14Too much on one page
- 15Writing too small to read
- 16Smudged decoration and glue disasters
- 17Loose folds that spring shut
- 18Nobody knows what to put on the page
- 19Frequently Asked Questions
- 20What age can children make a zine?
- 21Do I need special paper or templates to make a zine?
- 22How long does it take to make a zine with kids?
- 23How do I keep the pages in the correct order?
- 24Can children make a zine without writing?
- 25What can we do if a child wants more than eight pages?
What You Need
You can start a zine project with almost nothing. The full list is short.
- One sheet of paper per zine, standard A4 or 8.5 x 11 inches
- Safety scissors (a parent’s hand for children under 6)
- Pencil, pen, crayons, coloured pencils or markers
- A ruler, optional, for finding the exact centre
Any ordinary printer paper works. Card stock is too stiff for a clean first fold, and recycled envelopes are wonderful for the collage pages later. Just avoid paper that has already been creased, because the folds will fight you.
The extras are what turn a plain booklet into a good one: glue sticks, stickers, washi tape, old magazines for cutting up, scraps of wrapping paper, rubber stamps, a bit of string, photos from the fridge. Set them out in a shallow box on the table and let the kids help themselves. Half of zine making is deciding what to cut out.
Preparing the eight-page template
You do not need a printable template. The single-sheet method makes eight pages from one piece of paper, and it works the same for every sheet size because you only ever use the creases. If you do want printed pages to photocopy, print your kid’s artwork on plain paper rather than glossy stock; ink sits better and the fold stays clean.
Lay the paper flat in landscape orientation, long edge facing you, and have a pencil and ruler nearby. That is your whole setup, and it is worth saying: the reason to make a zine with kids rather than a folded poster is that the format forces a decision about what goes on a page, and small pages are forgiving.
Step-by-Step: How to Make a Zine with Kids
Step 1: Choose a Theme
Pick one subject and let it be the whole zine. A single idea is easier than a general one, because eight pages is not many.
Themes that work well with children: all about me, my invented creature, a guide to the best playground in town, a four-panel comic, a collection of ten things I love, a how-to zine explaining how to care for a pet. Some are writing-heavy, some are pure collage, and that is the point — the theme decides what tools go on the table.
Checkpoint: your child can say the topic in a short title of four words or fewer, for example “Best Rainy Day Activities” or “My Robot Friend”. If the title needs a full sentence, narrow it down.
Step 2: Fold the Paper
Turn the sheet so the short edge is toward you, like a book lying closed on a table. Then fold in half, short edge to short edge, and press the crease flat with the heel of your hand.
Fold it in half again, making quarters. Then fold it one more time so the paper is a small rectangle, roughly the size of a playing card, with eight layers. Keep folding the same direction each time; alternating directions is the number one reason the finished booklet has pages out of order.
Checkpoint: unfold it once and you should see three crease lines dividing the sheet into eight equal strips running the short way. Eight little rectangles, and one of them will be the back cover.
Step 3: Plan the Pages
Have your child sketch rough boxes on the unfolded sheet, one per page, with a pencil before anything gets coloured. It takes two minutes and it saves the most common zine problem, which is doing too much on page two and running out of room on page seven.
Spread the story across the pages: a beginning on the first two, the middle on pages three to six, and the ending on the last two. Keep writing large enough to read from arm’s length, which is roughly the distance you hold a zine when you read it.
Checkpoint: hold the sheet up in the window light and ask what each page is for. Every one of the eight has a job.
Step 4: Cut the Folded Sheet
Fold the paper back into the small eight-layer rectangle. Turn it so the fold you are looking at is the closed side, and find the folded edge that runs along the short side of the rectangle, the edge opposite the open flapping edges.
Cut straight through that folded edge, from one corner to the other, along the crease that crosses the middle of the little rectangle. You are cutting across the short dimension. Stop at the corners; do not carry the scissors around the outside edge, or the booklet falls apart in your hands.
This is the step that makes the whole thing work, and it is the one children most often do wrong. The cut travels across the folded edge in the middle, not along the flap edge and not from the open side.
Checkpoint: open the sheet flat again and you should see one long slit running across the centre of the page from the top edge to the bottom edge. One slit. If you see two, or a T-shape, start over with a fresh sheet.
Children under about 6 should have an adult hold the paper and do the cutting, or use a craft knife with close supervision.
Step 5: Make the Pages
This is the long part, and it should be. Some children work fast, some dawdle, and the difference is usually about how small the decision is. Offer one decision at a time: today we do pages one and two.
Adjust the plan to the age. Around 4 to 6, keep it to cutting, gluing and drawing — one collage picture per page with a title, no dense writing. From 7 to 10, add a comic strip with speech bubbles, a how-to page with numbered steps, or short captions on every image. From 11 upwards, they can handle a full written page, a small essay, an interview with a pet, or a zine with real opinions in it, which is exactly the kind of thing zines are good for.
Encourage them to use both sides of the paper. There is no rule that a page has to be tidy, and blank-looking pages can be rescued later with stickers, tape or a row of stamps down the edge.
Checkpoint: each finished page has something on it, even if that something is a single drawing and three words.
Step 6: Arrange and Check the Zine
Before the final fold, lay all eight pages out in the order you plan to read them. The order of a single-sheet zine runs: back cover, front cover, then pages two and one, then pages four and three, then six and five, then the back page.
Read the sequence quickly as if you were a stranger. Does the title match the contents? Is anything upside down or squeezed into a corner? Is there one page with almost nothing on it, and one page with too much?
Now fix it while the pages are still flat. Reversing two pages is a two-second fix on the table and an hour of misery once the zine is folded, because the order becomes hard to see.
Checkpoint: you can read the whole thing in order with nothing missing.
Step 7: Fold and Share the Finished Zine
Fold the sheet into the small rectangle again, same direction as before. Hold it with the slit facing you and the open flap edge at the bottom. Push the two ends of the rectangle toward each other, and the paper collapses inward into a small booklet.
Do not force it and do not flatten it in a vice. If it resists, open it out and run a thumbnail along the creases, then try again. A zine that springs shut is a sign of tight folds, and a light press along the spine will fix it.
Then let your child open it. That moment, when eight flat rectangles turn into a booklet in their hands, is the whole reason for the project. Hand copies to family, or read one aloud at bedtime. If you want a class set, photocopy the finished zine on a school copier or a home printer — a small pile of A5 pages costs less than the ink cartridges, and you should only ever copy art your own family made.
Common Zine-Making Mistakes and Easy Fixes
Everybody gets the fold wrong the first time. These are the six problems I see most often and what to do about them.
The cut went along the wrong edge
The cut needs to cross the closed folded edge at the middle of the small rectangle. Cutting along the flap edge gives you two separate pieces and a very confused child. Unfold, check for one straight slit across the centre, and if the sheet is already damaged, start with a new one. It is a two-minute reset that saves twenty minutes of troubleshooting.
The pages come out in the wrong order
Almost always caused by folding in alternating directions. Lay the finished pages out flat, number them one to eight in pencil, then restack according to the order: back cover, front cover, then pairs. Another cause is a flipped page drawn on upside down, which looks like an ordering problem but is really a drawing problem.
Too much on one page
Small pages punish anything crowded. Set a limit before starting: one drawing, one caption, or one collage plus a title. Extra ideas go in a spare sheet and become zine number two, which is a better outcome than a cramped page.
Writing too small to read
Fillers and fineliners look lovely and shrink to nothing. For primary ages, use chunky crayons, thick markers or pencil, and have them write a test line before filling the page. If the test line reads at arm’s length, the rest will too.
Smudged decoration and glue disasters
Glue stick, not liquid glue, and press each piece down with a clean sheet of scrap paper rather than your fingers. Let each page dry flat while they work on the next one, and keep felt-tip markers away from wet glue and fresh crayon. Oil pastels and coloured pencil do not smudge at all, which is why they suit younger children.
Loose folds that spring shut
Creases need a proper press, not a light pinch. Run a wooden spoon or the edge of a ruler firmly along each fold, both ways, before the final collapse. If the zine still closes on its own, add a small dab of glue stick or a strip of tape at the spine.
Nobody knows what to put on the page
The blank-page freeze is the most common reason a zine project stalls. Fill half the page with collage from old magazines, a receipt, a leaf or a torn paper bag, then add a title and a sticker. Once something is on the page, most children will keep going on their own. Prompt the story with questions rather than assignments: what does your creature eat, what happens next, who is in this panel.
Frequently Asked Questions
What age can children make a zine?
Children from about age 4 can make a zine with adult help, mostly cutting, gluing and drawing. From 7 upwards they can manage the folding and cutting independently and start adding written pages and captions. With teenagers it becomes a real writing and design task, where the format suits short pieces, strong opinions and self-expression.
Do I need special paper or templates to make a zine?
No. One sheet of ordinary A4 or Letter printer paper per zine is all you need, and no printed template is required. The single-sheet method makes eight pages using only the creases, so it works on any paper size. Card stock and glossy photo paper fold less cleanly, so keep to everyday printer paper.
How long does it take to make a zine with kids?
Folding, cutting and collapsing takes about ten minutes. Filling the pages takes anywhere from twenty minutes to a full afternoon, depending on the age and how much the child wants to fuss. A five-year-old usually finishes in half an hour if the theme is narrow. Older children happily work on it across several sittings.
How do I keep the pages in the correct order?
Write the reading order on a spare sheet before folding: back cover, front cover, then pages two and one, four and three, six and five, then the back page. Always fold the sheet the same direction each time, and lay all eight pages out flat in order before the final fold so any swap takes seconds to fix.
Can children make a zine without writing?
Yes. A collage zine works beautifully: tear images from old magazines, add a title, stickers, washi tape and drawings. Half the fun for many children is cutting and arranging rather than writing. A title and one short caption per page is plenty, and pre-printed letters or stickers can help if writing is the sticking point.
What can we do if a child wants more than eight pages?
Fold a second sheet the same way for eight more pages and nest one inside the other, which gives a sixteen-page zine. Two sheets also make a twelve-page zine if you trim the edges, and cutting pages off the outside gives a six-page version. Each sheet is printed, filled and folded separately before nesting, in the reverse order.
If you only remember one thing, make the theme small and let them cut the pictures. A narrow theme, a single sheet of paper and a box of scraps will give you a finished zine in under an hour, and it will be the one thing on the fridge that nobody else in the house made.