Yes, you can absolutely make a gingerbread house without a kit. Roll out a sturdy no-leavening gingerbread dough, cut your own house panels with cardboard templates, bake them, then glue the structure together with thick royal icing and decorate with whatever candy you already have in the cupboard. Give yourself a full afternoon, plus a dry, cool spot to display it for the next week or so.
The reason most kit houses slump on the table by Boxing Day is thin, brittle walls and glue that never quite sets. Rolling your own dough solves both problems in about twenty minutes of extra work. You also get to choose the thickness, which means a house that survives being picked up by a six-year-old.
Below is the whole process, from mixing to the last candy cane on the path. Metric and US measurements are both included, and there are swaps listed for anyone avoiding molasses, dairy or gluten.
Table of Contents
- 1What You Need to Make a Gingerbread House Without a Kit
- 2For the dough
- 3For the icing glue
- 4Equipment and decorations
- 5Step-by-Step: From Dough to Finished House
- 6Prepare the Gingerbread Dough
- 7Make the House Templates
- 8Cut and Bake the House Pieces
- 9Assemble the Gingerbread House
- 10Add the Finishing Touches and Decorating Ideas
- 11Common Mistakes to Avoid
- 12Frequently Asked Questions
- 13Can I make a gingerbread house without buying the pre-made pieces?
- 14What can I use instead of royal icing to hold the house together?
- 15How do I keep the walls from sliding while I decorate the house?
- 16Can children make a gingerbread house without a kit?
- 17How long should I bake the gingerbread pieces?
- 18How do I store a gingerbread house after decorating it?
- 19Where to Start if You Only Have an Afternoon
What You Need to Make a Gingerbread House Without a Kit
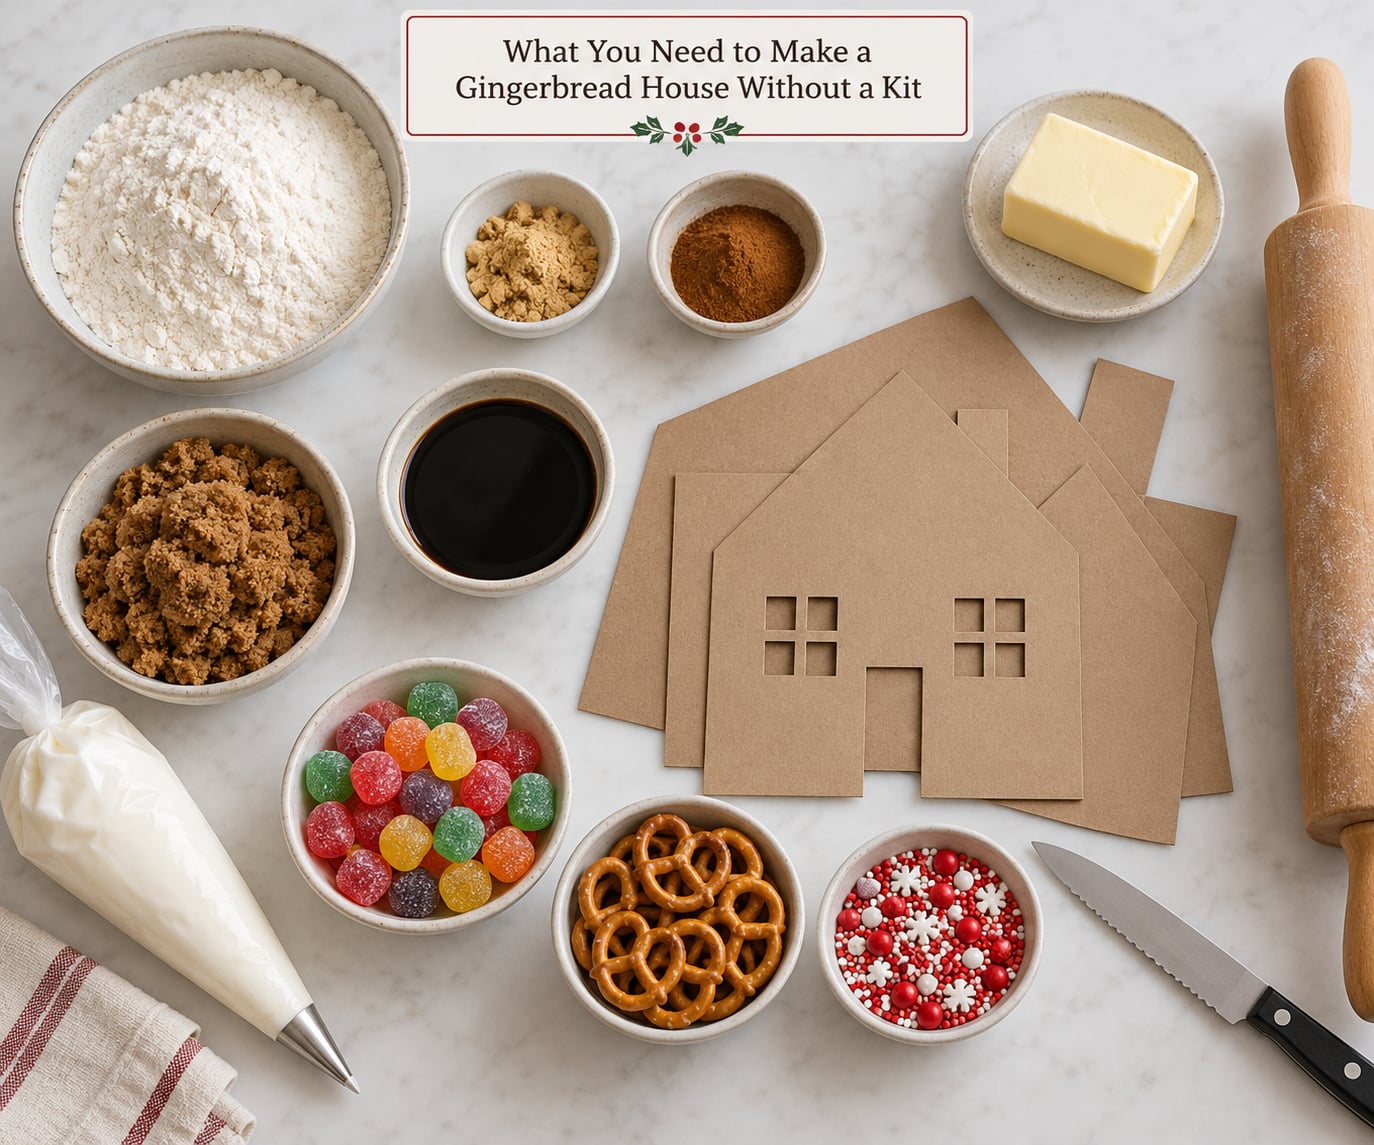
You need three things: a structural dough, an adhesive thick enough to bear weight, and something to hold the walls steady while that adhesive dries. Everything else on this list is a substitute for something that normally comes in a kit box.
For the dough
- 225 g (1 3/4 cups) plain/all-purpose flour, plus extra for dusting
- 1 teaspoon baking soda
- 1 tablespoon ground ginger
- 2 teaspoons ground cinnamon
- 1/4 teaspoon ground cloves
- 1/2 teaspoon ground nutmeg
- 1/2 teaspoon fine salt
- 175 g (3/4 cup) unsalted butter, softened
- 140 g (3/4 cup) dark brown sugar
- 1 large egg
- 60 ml (1/4 cup) dark molasses or golden syrup
For the icing glue
- 500 g (4 cups / 16 oz) icing sugar
- 2 large egg whites, or 4 teaspoons meringue powder plus cold water
- 1 teaspoon vanilla extract
- 1 teaspoon lemon juice
Equipment and decorations
- Baking parchment or silicone mats, two trays
- A rolling pin and a ruler
- Thick cardboard or cereal box panels for templates, plus a pair of scissors
- A serrated knife or a small paring knife for clean cuts
- A cooling rack
- A piping bag or a zip-lock bag with one corner snipped off
- A baking sheet and two heavy tins or glasses to use as weights
- Candy: gumdrops, hard candies, pretzels, mini marshmallows, sprinkles
Missing a tool is rarely a problem. No piping bag means a zip-lock bag with one corner cut off works identically. No rolling pin means a bottle filled with rice does the job. And if you have no cardboard, trace the house shapes onto parchment paper and lay that directly on the dough.
Step-by-Step: From Dough to Finished House
Work in this order and the whole thing takes three to four hours of active time, most of which is waiting for dough to chill and icing to set. Rushing any of those waiting stages is what turns a house into a pile of panels.
Prepare the Gingerbread Dough
Structural gingerbread is not cookie dough. The difference is what you leave out: no baking powder, no rise, and only enough sugar to bind the dough without making it fragile. Dough made with baking powder puffs up and then cracks, and thin cookie dough snaps as soon as a roof leans on it.
Beat the butter and brown sugar together until pale, about 2 minutes. Mix in the egg and molasses, then fold in the flour, baking soda, spices and salt until no dry patches remain.
Wrap the dough and chill it for at least 30 minutes, or up to 3 days in the fridge. Properly chilled dough rolls out without springing back and cracks far less than room-temperature dough.
To check thickness, hold a ruler against the edge: you want 6 mm (about 1/4 inch). Any thinner and the walls will not carry a roof; much thicker and the pieces bake unevenly.
Make the House Templates
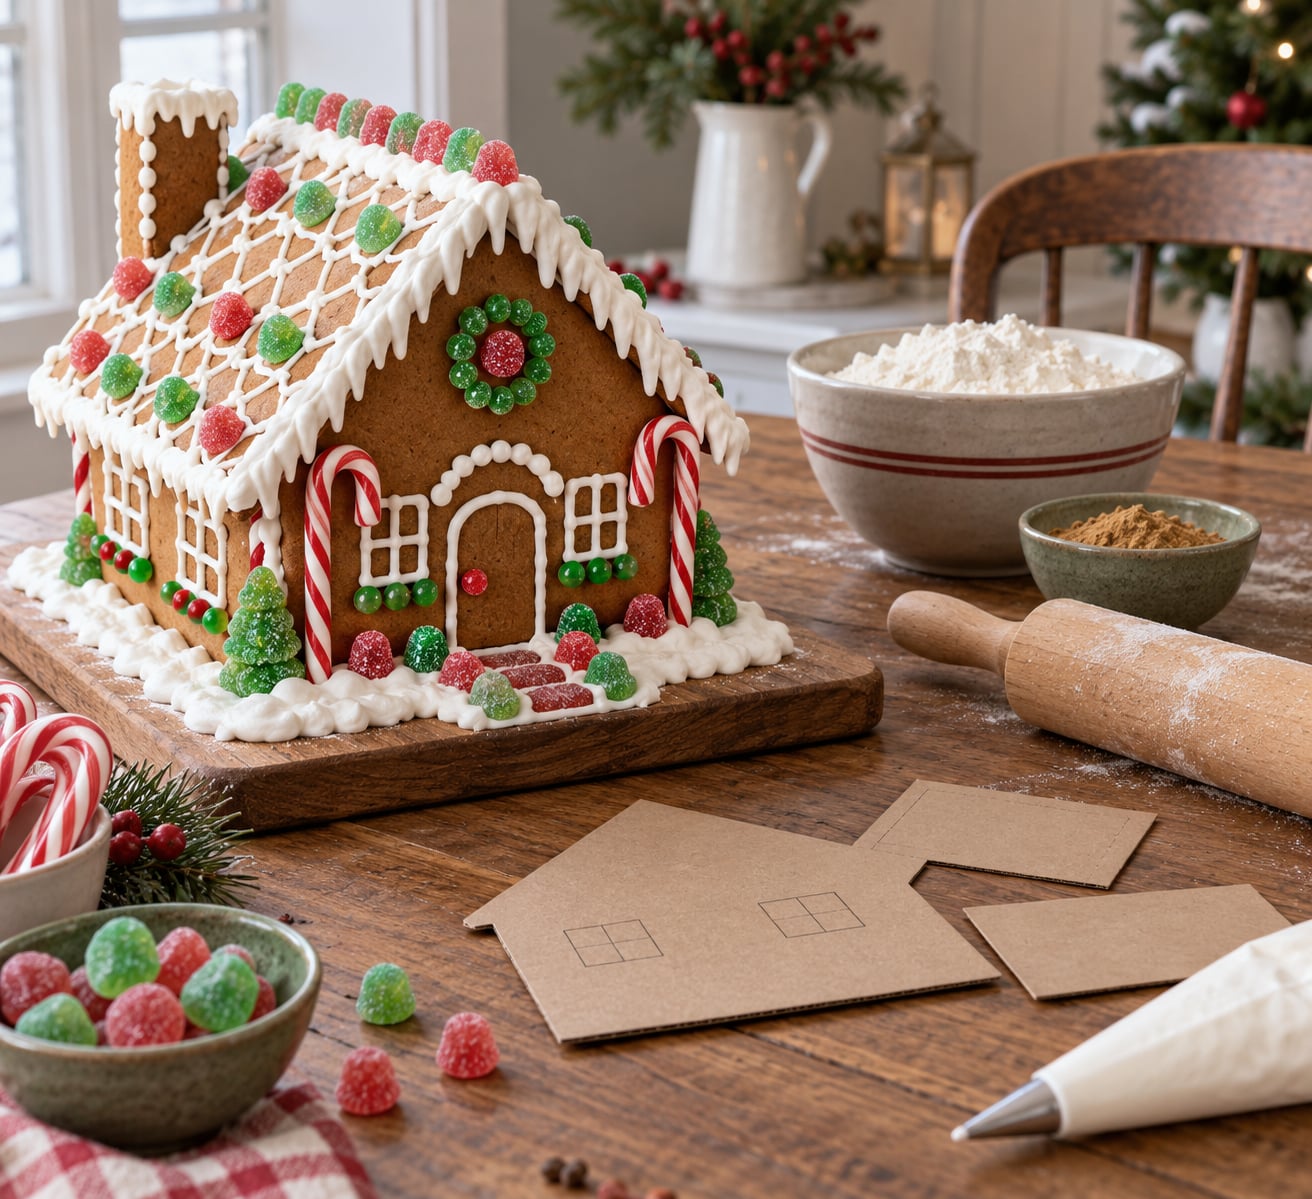
Cut your house panels from cardboard first. A simple design uses four rectangles for the walls, two rectangles for the roof, one square for the base and a small rectangle for the chimney.
- Walls: 4 pieces, each 15 cm (6 inches) tall by 20 cm (8 inches) wide
- Roof: 2 pieces, each 15 cm (6 inches) wide by 22 cm (9 inches) long
- Base: 1 piece, 30 cm (12 inches) by 32 cm (12 1/2 inches)
- Chimney: 1 piece, 4 cm (1 1/2 inches) square
To scale the design up or down, scale every measurement by the same factor. Double it for a 40 cm (16 inch) wall and you will also need double the dough; halve it and the panels get fragile below about 8 cm (3 inches) tall.
Sketch door and window shapes straight onto the cardboard before you cut the dough, so every panel matches. Draw them in pencil at least 8 mm (1/3 inch) from any edge, because that border is what holds the joint together.
Cut and Bake the House Pieces
Roll the dough on a lightly floured surface to 6 mm (1/4 inch). Lay the cardboard template on top, run a sharp knife around the edge, and lift the piece away with a thin metal spatula.
There is a second method that wastes less dough: roll one full sheet, bake it flat, then cut the templates out of the baked sheet while it is still slightly warm. Several families on Mumsnet build this way and call it the easiest from-scratch route, because a warm sheet is far more forgiving to cut than raw dough that springs back.
Freeze the cut shapes for 15 to 30 minutes before baking. Cold dough keeps its outline in the oven, which is the single fix for pieces that warp or spread.
Bake at 160°C / 325°F on the middle shelf for 12 to 16 minutes depending on thickness. They are done when the edges look dry and the centres no longer feel soft when you lift one with a spatula. Cool completely on a rack before touching them; warm gingerbread bends and snaps.
A house this size needs three or four batches. Rotate trays halfway through, and bake one batch of panels the night before if you want a calmer build day.
Assemble the Gingerbread House
Glue a flat base onto a board or the back of a baking sheet so the finished house can be moved without bending it. Then work through the walls in a specific order, holding each joint until the icing grabs.
- Stand the first wall on the base and pipe a thick bead of icing along the base edge.
- Stand the second wall at a right angle, press the corner joint gently, and hold it with your fingers for 5 to 10 minutes until the icing starts to set.
- Add the third wall, then the fourth, re-checking the corners every time.
- Rest two soup tins or heavy glasses inside the house against the walls as weights while the adhesive firms up.
- Let the box stand for at least 30 minutes, longer if your kitchen is cool.
- Pipe icing along the top edges and rest one roof panel on, sloping it from the ridge to the eaves. Add skewers or cocktail sticks through the panel into the wall to pin it while it sets.
- Attach the second roof panel, then the chimney, using the same pinning trick.
The single most important ingredient for holding the house together is thick royal icing. Mix it to the consistency of soft modeling clay, far thicker than anything you would pipe on a cake. It should stand up in the bag without flowing when you squeeze.
Follow the same recipe for decorative piping, then thin a spoonful with a few drops of water when you want a fine line for piping shells or snow.
Add the Finishing Touches and Decorating Ideas
Decorating goes far faster if you do the panels while they are flat, before the house is standing. Let children frost windows and scatter sprinkles on the roof pieces on the cooling rack, then assemble after the icing dries.
For a stained-glass effect, set small hard candies or boiled sweets in each window opening, put the panel in the oven at 160°C / 325°F for 5 minutes, and let them melt into a coloured pane once cooled.
Use gumdrops as roof shingles and shrubs, pretzels for fences and trees, mini marshmallows for snow drifts, and round candies for a path from the door to the gate. Piped white icing along the roof edge gives you a frosting snow cap that looks intentional even when the join underneath is uneven.
Reuse the dough offcuts. Trees cut freehand from scraps, a row of small gingerbread men on the lawn, or a string of iced pretzels as a fence all cost nothing extra.
Display the house somewhere cool and dry with good airflow, away from radiators, kettles and damp rooms. A house stored in a humid space absorbs moisture from the air and goes soft at the joints within a couple of days.
Store the whole thing in a large clear storage tub with a folded sheet of parchment between the roof and any container lid. In a dry room at room temperature it stays crisp for two to three weeks. If it has a soft base, return it to a 160°C / 325°F oven for 5 minutes to drive off moisture, then cool before covering.
Common Mistakes to Avoid
1. Cookie dough instead of structural dough. Baking powder and rising agents puff the walls and give you cracks. Use baking soda in small quantity and skip baking powder entirely.
2. Thin walls. Anything under 5 mm (about 3/16 inch) cracks under a roof. Roll to 6 mm (1/4 inch) and check with a ruler rather than by eye.
3. Pieces warping in the oven. Chill or freeze the cut shapes before baking, and press the back of each piece with a second tray for the first 8 minutes.
4. Glue that stays soft. Icing thinned to spreading consistency never sets hard enough to carry a load. Beat in more icing sugar until the bag holds its shape, and use the jar that says royal icing rather than a tub you add water to.
5. Walls sliding out of square. Hold every corner by hand for 5 to 10 minutes, then brace with tins or glasses. Removing the supports before the icing has whitened and hardened is the usual cause of leaning walls.
6. Roof collapse or a roof that slides down. Pipe icing onto the wall tops generously, rest the panel at the correct angle, and pin it with cocktail sticks through the panel into the wall below. Trim the visible ends with scissors once set.
One more worth knowing: if a piece snaps as you are assembling, don’t cry it off. Most cracks sit along a bottom edge that ends up hidden in icing anyway. Glue the piece in place and move on.
Frequently Asked Questions
Can I make a gingerbread house without buying the pre-made pieces?
Yes, and the pieces will be better. Make your own structural gingerbread dough, roll it 6 mm (1/4 inch) thick, cut the panels using cardboard templates you draw yourself, and bake them at 160 C / 325 F. Rolling your own dough is also faster than people expect, because you can bake full sheets and cut the templates from the baked sheet.
What can I use instead of royal icing to hold the house together?
Boiled sugar is the strongest substitute. Melt equal weights of sugar and water, boil to 300 F / 150 C, add lemon juice, let it cool until thick, then pipe or spread it on. Melted white chocolate also works well and sets firm. A packet of edible baking glue is a reliable fallback, while a cool-melt gun works only for non-edible decorations.
How do I keep the walls from sliding while I decorate the house?
Build the wall box first, hold each corner with your fingers for 5 to 10 minutes, then brace the inside with soup tins or heavy glasses for at least 30 minutes. Add the roof only once the walls are standing square on their own. While you decorate, keep an eye on the icing colour: once it has whitened and hardened, the joints will not move.
Can children make a gingerbread house without a kit?
Yes, and the from-scratch route is actually calmer for young children because you control the pace. Give each child their own template and a small panel to cut, let them decorate the flat panels before assembly, and keep spare pieces on the tray so a cracked wall is not the end of the afternoon. Several parents build smaller houses, one per child, for the same reason.
How long should I bake the gingerbread pieces?
Bake at 160 C / 325 F on the middle shelf for 12 to 16 minutes, depending on thickness. Panels cut at the full 6 mm (1/4 inch) need closer to 16 minutes; thinner doors and windows need less. They are ready when the edges look dry and lifting a piece with a spatula no longer feels soft in the centre.
How do I store a gingerbread house after decorating it?
Keep it in a dry, cool room with airflow, away from radiators and damp kitchens, or inside a large clear storage tub with parchment protecting the roof. Stored this way at room temperature it stays crisp for two to three weeks. Humidity is what softens the icing joints, so a cold garage or shed will outlast a warm living room.
Where to Start if You Only Have an Afternoon
Mix and chill the dough first, since that is the one step that cannot be hurried. While it chills, cut your cardboard templates and sketch the door and window shapes onto them. Everything after that — rolling, cutting, baking, assembling — is faster than it sounds, and the whole thing comes together in one sitting if you start early in the day.
If a piece snaps, glue it in place and keep going. My advice is to do one small practice house from a quarter of the dough first, so the big one gets your best hands. Most families who make a gingerbread house without a kit end up making it every year in 2026.