
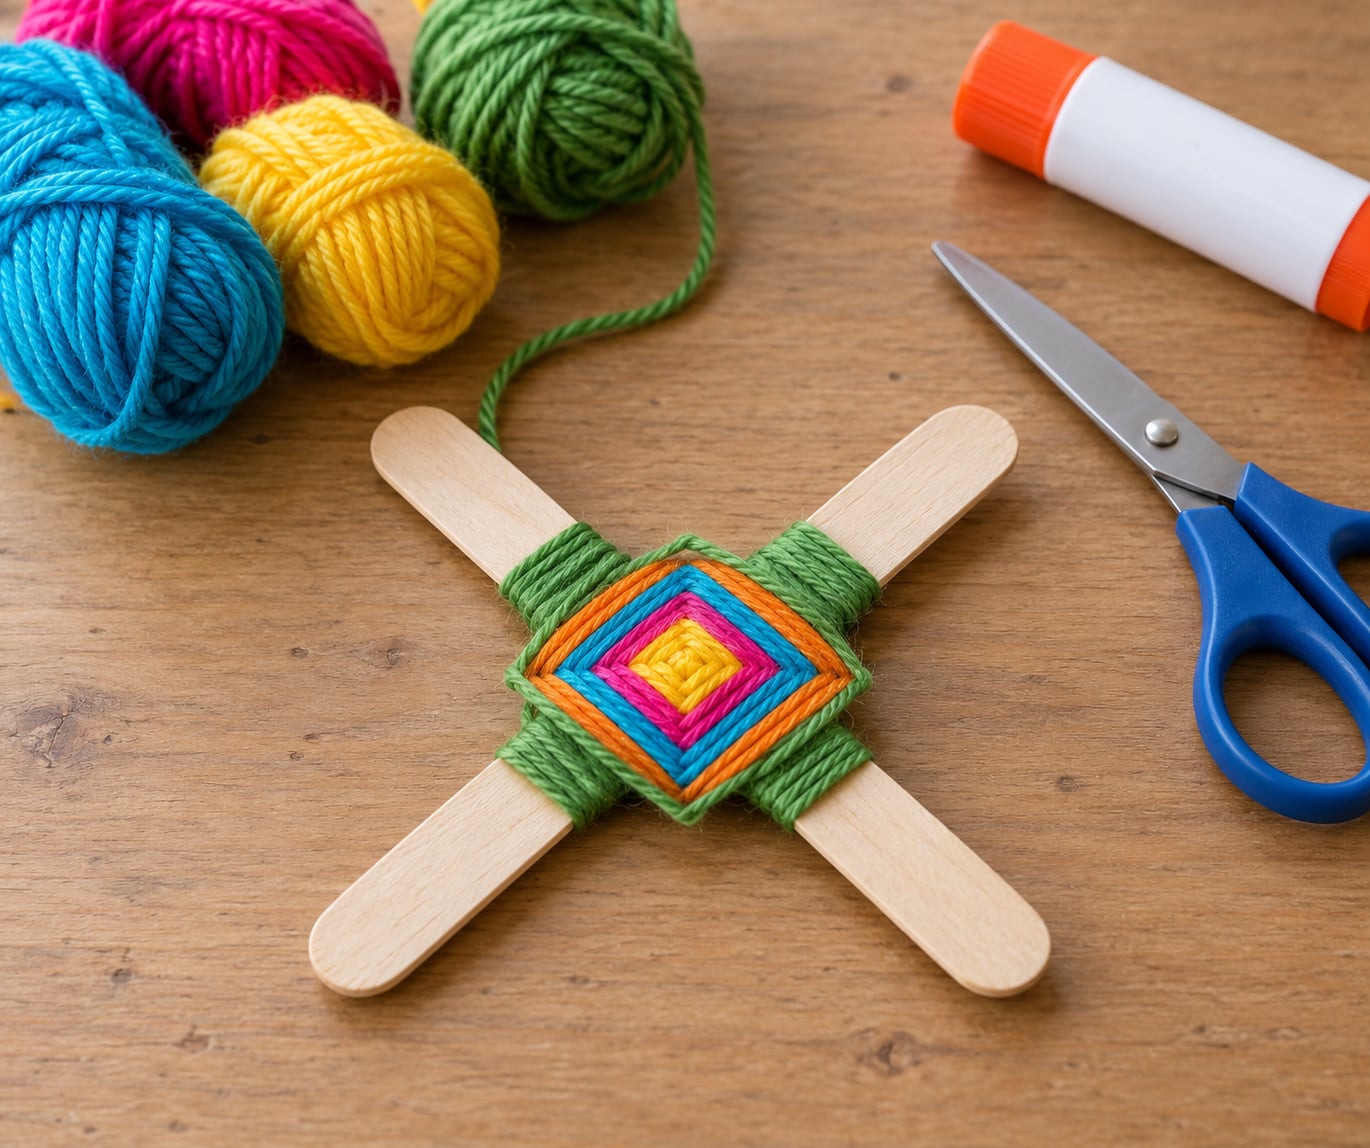
To make a god’s eye yarn craft, cross two sticks into an X, lash the middle with 4 or 5 wraps in each direction, then wrap yarn around one stick and across to the next until both sticks are covered. Budget about 20 minutes for the first one and less after that. The only tricky part is keeping the yarn snug and the small hole in the centre open.
The craft is called a God’s eye, or Ojo de Dios, in Spanish. It comes from the Pueblo people of Mexico, where the four points stand for earth, fire, air and water, and a version is traditionally given to a newborn to offer protection. The name stuck even though most of the versions made today are just a yarn-and-stick kids craft.
If you have a yarn stash and two sticks lying around, you already have everything. I have made these with my own kids and with groups of five and eight year olds, and the version below is the one that survives contact with children, not the tidiest-looking version in a photo.
Table of Contents
- 1What You Need
- 2Step-by-Step
- 3Step 1: Make the Yarn Bundle
- 4Step 2: Attach the Yarn to the Sticks
- 5Step 3: Wrap the First Side
- 6Step 4: Turn and Wrap the Other Side
- 7Step 5: Build the Full Yarn Layers
- 8Step 6: Tie and Secure the Ends
- 9Step 7: Shape and Finish the Craft
- 10Common Mistakes
- 11Frequently Asked Questions
- 12What materials do I need to make a god’s eye yarn craft?
- 13Can children make a god’s eye yarn craft without glue?
- 14What type of yarn works best for a beginner god’s eye craft?
- 15How many layers of yarn should I wrap around the sticks?
- 16How do I keep the center of the god’s eye from closing up?
- 17What is a good age for making a god’s eye yarn craft?
- 18Conclusion
What You Need
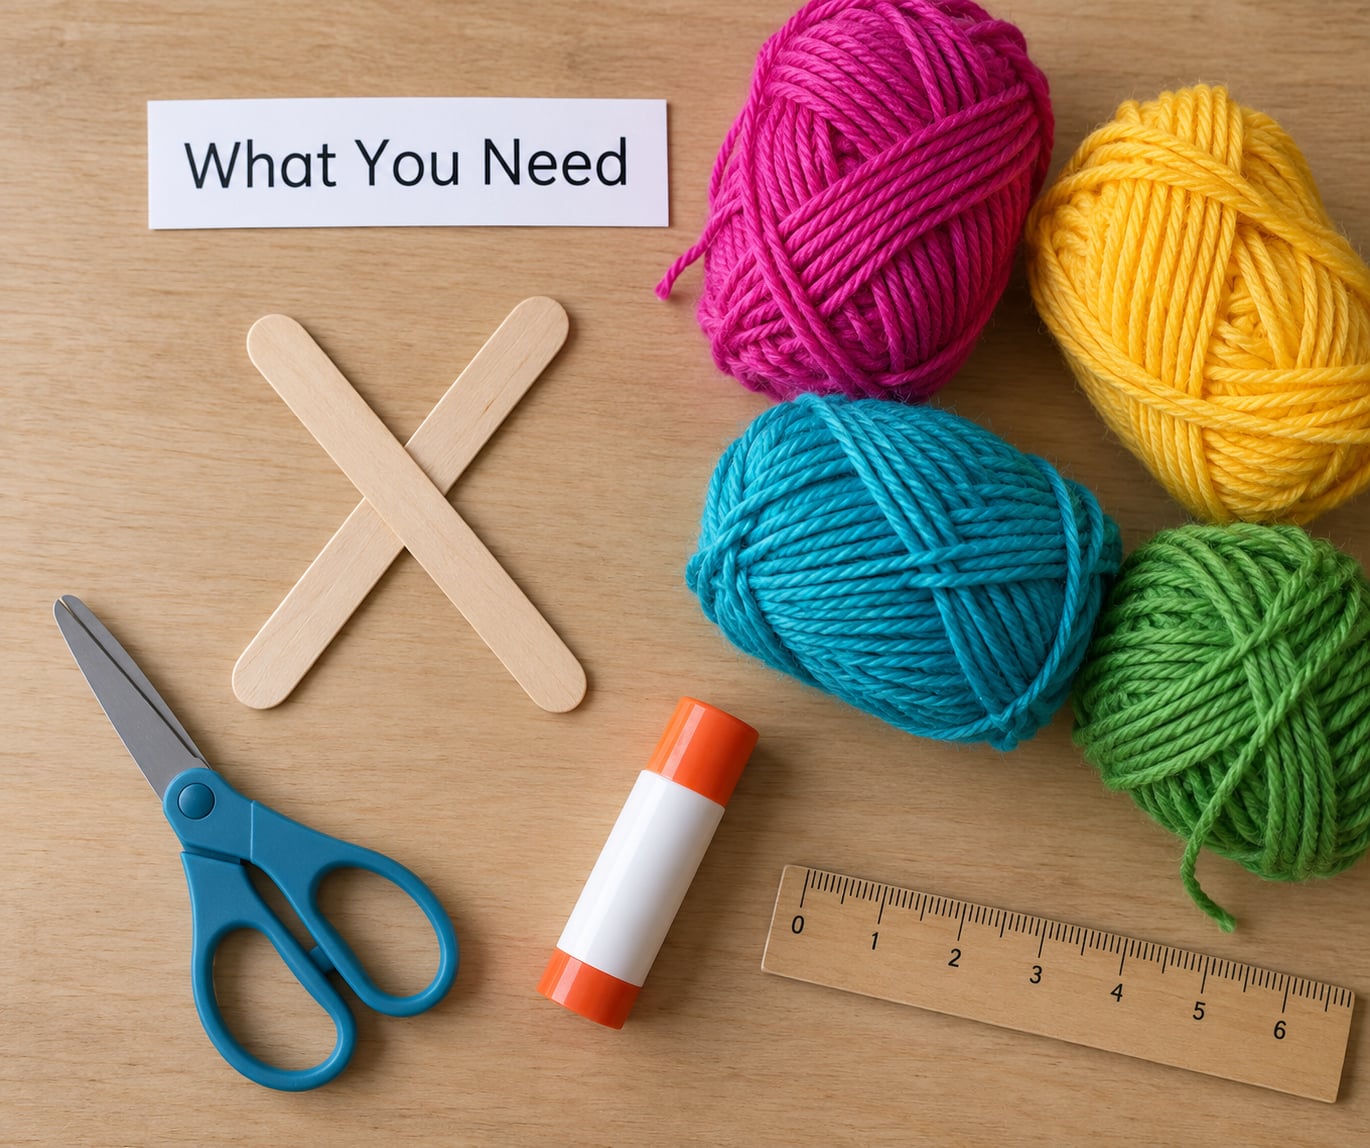
You need two sticks of the same length, two or three yarn colours, scissors, and a way to secure the centre. That is the whole list. Everything else is optional.
- Two sticks of equal length. Craft sticks, wooden dowels, chopsticks, skewers or two twigs from the yard all work. Equal length is the only thing that matters, because uneven arms give you a lopsided piece.
- Two to three yarn colours. Anything from a leftover scrap ball to a full skein. A variegated yarn does the work of three colours on its own.
- Scissors for cutting yarn.
- A short piece of yarn to tie the bundle together at the centre.
- Glue, optional. A glue stick or a few dots of hot glue from an adult’s hand keeps the sticks from shifting. It is not needed once the yarn is dense enough to hold the frame itself.
- A ruler or tape measure, only if you are sizing a large version.
On yarn quantity, the honest answer is that a standard 12 inch craft stick takes roughly 17 feet of yarn in total, worked out in a comment on a r/girlscouts thread that has been passed around for years. Scale from there. Short sticks such as coffee stirrers need about 6 feet, 24 inch dowels need closer to 40 feet, and thick worsted yarn uses less length than thin yarn of the same weight because each wrap covers more surface.
No craft sticks? Chopsticks work well and are usually free. Skewers work for small versions, coffee stirrers make a mini God’s eye, a sturdy yard branch gives you a large one, and even a wooden ruler has been used. Anything rough and splintery is worth smoothing first with a bit of sandpaper, because rough bark snags the yarn as you pull it around, and that snagging is what makes kids give up.
Step-by-Step
Step 1: Make the Yarn Bundle
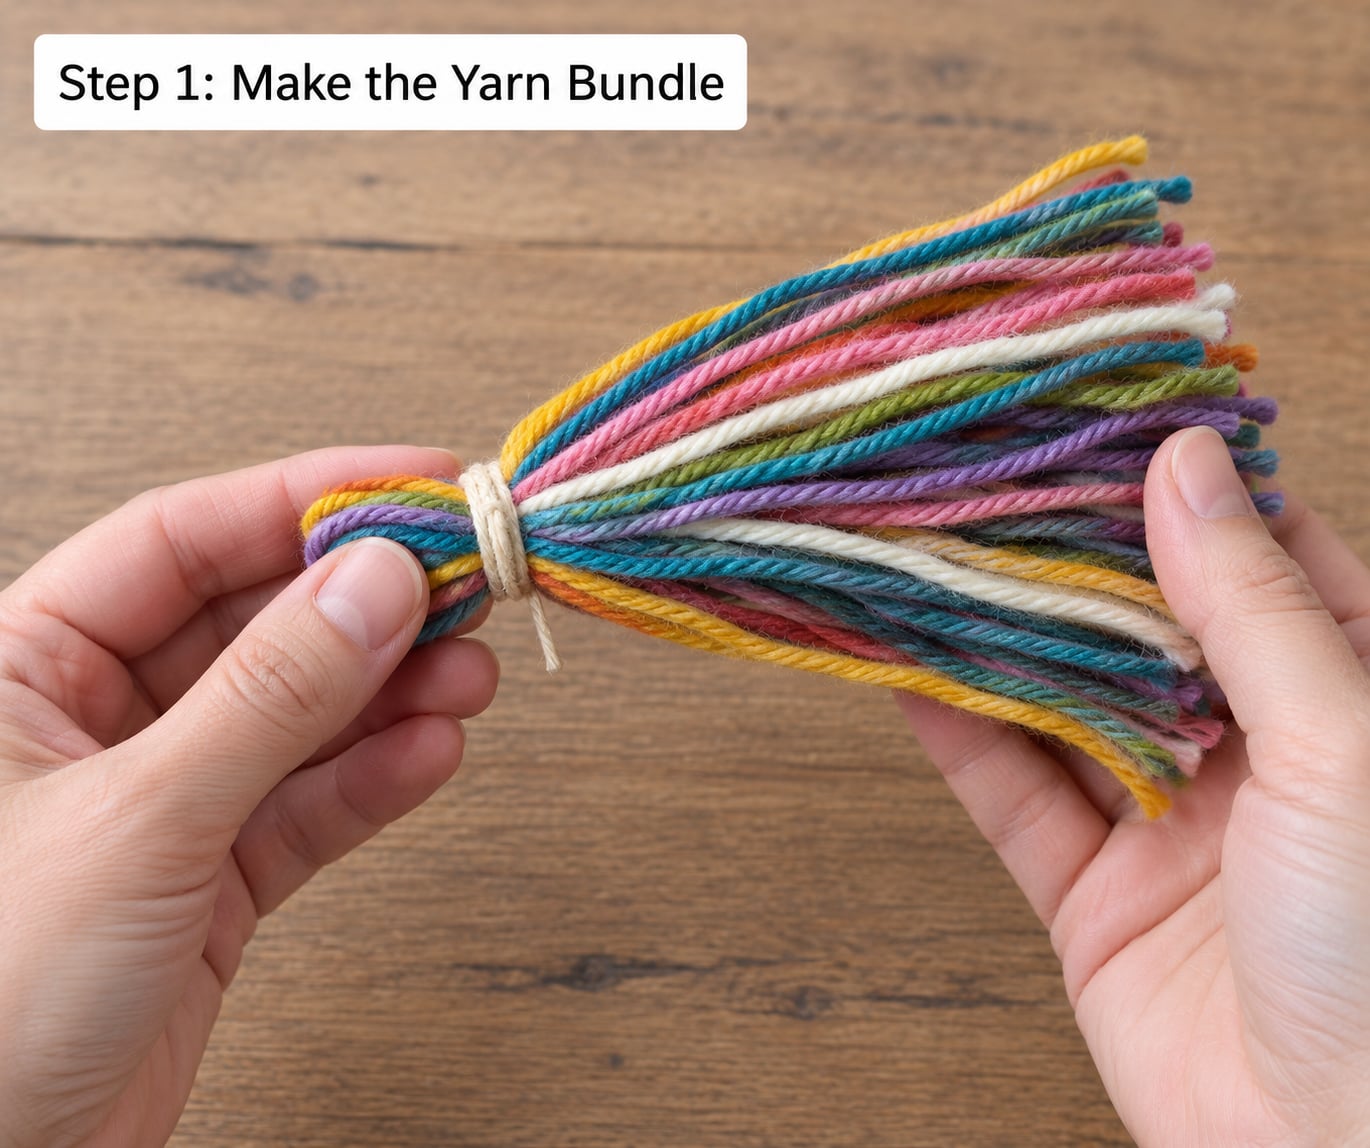
Lay two or three yarn strands on top of each other with their ends level, then tie a short piece of yarn around the bundle about an inch from the ends. The tie keeps the strands together so they stay centred instead of drifting apart as you wrap.
How you can tell it worked: the bundle should feel solid in the middle and the strands should all run the same length. If one colour hangs short, trim it even now rather than after the yarn is wrapped thirty times around a stick.
Step 2: Attach the Yarn to the Sticks
Cross the two sticks into an X and tape or glue them so they hold. Sit the tied yarn bundle into the crossing, with the tie hidden underneath and the loose ends pointing out.
Wrap the first strand around both sticks four or five times, snug, right on top of the tie. This is the centre wrap, and it is the structural heart of the whole piece. Too loose and the sticks pivot as you weave; too tight and the yarn bunches and refuses to sit flat.
Step 3: Wrap the First Side
Hold the frame steady and wrap the yarn around one stick above the centre, then diagonally across the front to the next stick, then behind, and back to the first stick. Keep going in one direction, pulling each pass snugly toward the centre.
Small space at the middle is what you are aiming for, not a fully sealed core. Check that you can still see a pinhole at the centre after the first arm is covered. If the hole has closed up, pull a couple of wraps outward and it reopens.
Step 4: Turn and Wrap the Other Side
Rotate the frame a quarter turn and repeat the same over-under wraps on the second arm, moving away from the centre in the same way. The centre wrap you made in step 2 tells the two arms where to stop and start, which is why the hole stays the same size on all four sides.
You want the two woven halves to end up the same length. If one arm fills faster, slow down on the next pass and pull that yarn a touch tighter.
Step 5: Build the Full Yarn Layers
Keep wrapping, rotating a quarter turn each time you finish an arm, until the sticks disappear under the yarn. The woven part should be thick enough that no wood shows, and the edge of the weave should stay flat rather than bulging.
On a 12 inch stick, most people land between 25 and 40 wraps per arm for a small, tight one, and up to 70 for a fuller, more traditional look. Four sticks makes a six-pointed star and is the version most camp programmes use with young children, because the wraps are shorter and easier to keep even. Eight sticks makes a much denser star that takes twice as long and rewards older makers. For a bigger piece, longer sticks need more yarn, not thicker yarn.
How you know you are finished: turn the piece over and the back should show the same woven bars as the front. If you can see daylight between the bars, add another round.
Step 6: Tie and Secure the Ends
Turn the piece over, tie off the working yarn underneath the sticks with a small double knot, and tuck the tail into the back of the weave. If the ends feel loose, a dot of glue on the back holds them without showing on the front.
An adult should handle the scissors and the tight knots for anyone under about six. Cutting yarn is the part where fingers get unexpected, not the weaving itself.
Step 7: Shape and Finish the Craft
Pull each stick outward slightly so the frame opens into a shallow diamond rather than a flat cross, then fluff the yarn with your fingers so the bars separate and the colour shows. Trim any uneven tails, with adult help for younger children.
For hanging, tie a loop of yarn or twine to the top stick. A row of them at different heights makes a wall display, and a small tassel on the bottom point finishes the look.
Common Mistakes
The centre hole closes up. The wraps are too tight or too close to the tie. Leave a visible pinhole after the centre wrap, and every few rounds pull the weave gently outward from the middle.
Yarn slips off the sticks or unwinds. The wrap count is too low, so the frame is loose. Add several more wraps per arm, and put a small dot of glue on the crossing before you start.
The sticks cross out of alignment. Nothing is holding them. A piece of tape or a rubber band across the crossing for the first few rounds fixes it, and once the yarn is dense the sticks hold each other on their own.
The weaving looks lopsided. One arm has more wraps than the other. Count them out loud every few rounds, or mark the stick with a pencil at the halfway point of the finished arm and wrap to that mark on each new one.
Yarn bunches and tangles. Usually rough sticks catching a thin yarn. Smooth the wood, and pull from the ball rather than wrapping straight off a skein, so the yarn feeds freely instead of twisting around itself.
Colour-change knots show on the front. Tuck the old end under the wrap before you start the new colour, and start the new colour on the back of the piece. It also helps to tie the two ends together on the reverse rather than knotting each one separately.
On yarn choice, worsted weight acrylic is the most forgiving for beginners because it grips without stretching. Cotton and wool stretch more, which shows up as gaps once the piece hangs. Jute twine works but is stiff and takes practice.
Frequently Asked Questions
What materials do I need to make a god’s eye yarn craft?
You need two sticks of the same length, two or three yarn colours, scissors, and a short piece of yarn to tie the centre. Glue is optional but helps hold the sticks in an X while you work. Chopsticks, skewers, coffee stirrers, dowels and yard twigs all work as sticks. A standard 12 inch craft stick takes roughly 17 feet of yarn in total.
Can children make a god’s eye yarn craft without glue?
Yes. Lashing the centre with 4 or 5 tight wraps holds the two sticks together on its own once the yarn is dense, so glue is only a shortcut for the first few minutes. A rubber band or a strip of tape across the crossing works the same way. For a classroom table, that keeps the craft glue-free and wipe-clean.
What type of yarn works best for a beginner god’s eye craft?
Worsted weight acrylic is the easiest for beginners because it grips the sticks without stretching or splitting. Cotton, wool and cotton blends work but relax over time, which can open gaps in the finished piece. A variegated yarn gives you several colours from one strand, and thicker yarn needs less length than thin yarn for the same stick.
How many layers of yarn should I wrap around the sticks?
Wrap until no wood shows and the back of the piece looks as woven as the front. On a 12 inch craft stick that is usually 25 to 40 wraps per arm for a small, tight piece, and up to 70 for a fuller traditional look. Going over 70 rarely improves the result because the edge starts to bulge.
How do I keep the center of the god’s eye from closing up?
Leave a small pinhole visible after the centre wrap, and check it again after each arm is covered. If the hole closes, pull the weave gently outward from the middle. The centre wrap is what sets the size of that opening, so make those first 4 or 5 wraps snug but not jammed.
What is a good age for making a god’s eye yarn craft?
Most children from about six up can complete one with a little help, and art programmes have run it successfully with four year olds using short sticks and four in the group. Three to five year olds usually manage the wrapping while an adult handles the centre lashing, the tight knots and the scissors. The coordination demand, not the age, is the limit.
Conclusion
Start by crossing two sticks and wrapping the centre five times, then add one arm and see how it feels. That first arm is the whole craft, and once it is done the rest is repetition.
How to make a god’s eye yarn craft stays interesting because the same method scales: coffee stirrers for a bag clip, chopsticks for a keepsake, four sticks for a six-pointed star, a long branch for a wall piece. Change the colour story each time and hang the finished ones where someone will see them.


