To make an advent calendar at home, you build 24 small numbered compartments out of things you already own, then fill each one with a treat, a note or an activity for December 1 through December 24. Paper bags, cardboard tubes and plain envelopes all work, and the whole thing can be finished in an afternoon once the glue is dry.
I started making these because the shop-bought ones felt like a lot of money for 24 pieces of chocolate. Now we refill the same fabric one every year, and my kids genuinely don’t notice that it’s handmade.
Table of Contents
- 1What You Need
- 2How to Make an Advent Calendar at Home Step by Step
- 3Step 1: Choose a Simple Advent Calendar Design
- 4Step 2: Prepare and Number the Calendar
- 5Step 3: Add the Doors, Pockets, or Tags
- 6Step 4: Fill the Days with Small Surprises
- 7Step 5: Display and Use the Calendar
- 8Common Mistakes
- 9Frequently Asked Questions
- 10What to put inside a homemade advent calendar?
- 11Do you open 1 or 24 first on an advent calendar?
- 12What are the rules of an advent calendar?
- 13How many pockets should an advent calendar have?
- 14What is a reverse advent?
- 15Can you make an advent calendar without sewing or a craft machine?
- 16A Simple Advent Calendar Is Ready to Make
What You Need
The supply list is shorter than most craft projects. Everything below is either free, already in a drawer, or cheap at any stationery shop.
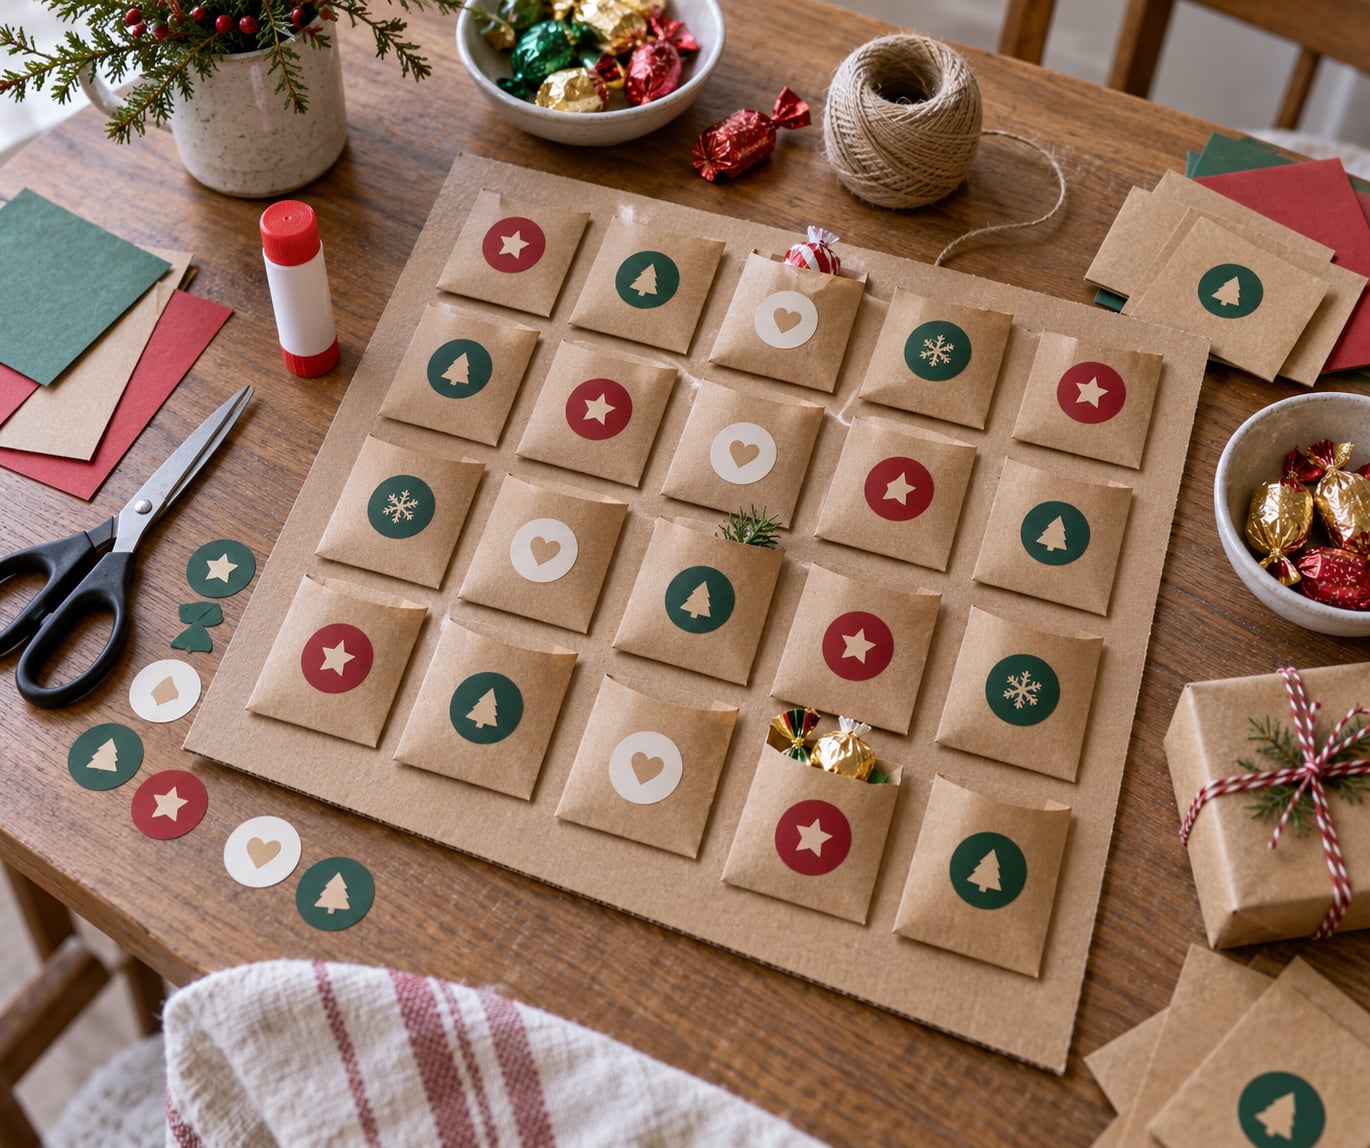
- 24 compartments. Paper bags, 24 envelopes, 24 cardboard tubes, 24 small boxes, or folded cardstock pockets.
- A base. Stiff card, a piece of cardboard cut roughly 50 by 60 cm, a length of thin wire, or a length of string.
- Adhesive. Craft glue for paper, fabric glue for felt, or a hot glue gun if an adult is handling it.
- Numbering. Stick-on numbers, a marker pen, or a printed number sheet cut into individual digits.
- Filler items. Notes, activity cards, small toys, coins or tokens, and treats.
You do not need 24 separate presents. Families I’ve seen get a long way by filling 8 to 12 pockets with something real and using folded paper notes for the rest.
Start a fortnight before December 1 if you can. Paper glue grabs within an hour but stays genuinely set overnight, and a calendar that falls apart on the 3rd is a sad start to the month.
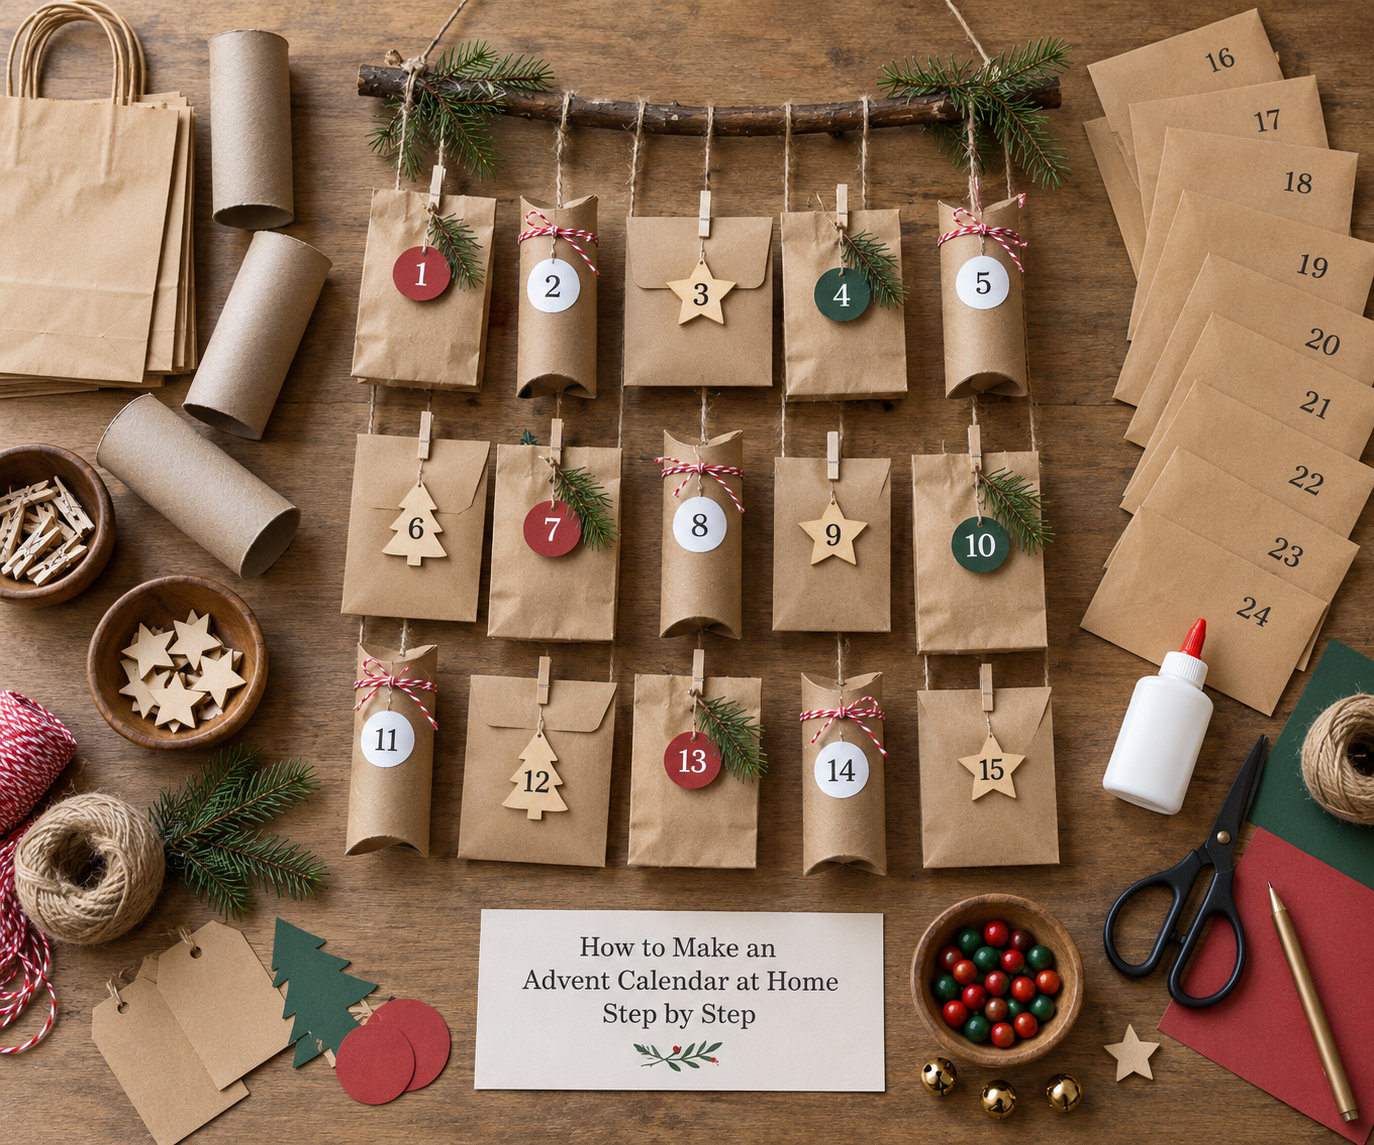
How to Make an Advent Calendar at Home Step by Step
Step 1: Choose a Simple Advent Calendar Design
Pick the design based on the space you have, the supplies you already own and whether the children will help. A toddler can glue on stickers but will not fold card accurately, so choose a design with fewer moving parts for younger kids.
| Base material | Difficulty | Time to build | Best for |
|---|---|---|---|
| Paper bags or envelopes | Easy | 45 to 60 minutes | No sewing and the cheapest version |
| Cardboard tubes | Easy | 60 to 75 minutes | Young children who like grabbing handles |
| Small boxes or a cereal-box grid | Medium | About 90 minutes | A sturdy calendar you can refill |
| Felt pockets on wire | Medium | 2 hours plus overnight drying | A keepsake for many years |
| Printed wall chart | Easy | 30 minutes | Late starts or very small rooms |
For cardboard, the tube version is the one that survives small hands. For paper, glued-on envelopes or bag pockets beat folded cardstock because nothing hinges and nothing tears.
Step 2: Prepare and Number the Calendar
Lay your 24 compartments out in reading order, left to right and top to bottom, before you glue anything down. Lay out all 24 even if you only plan to fill some of them, because the empty ones still need numbers.
Mark the dates in pencil first, then write or stick on the numbers in ink. Leave the pocket area about a third wider than the item going inside it, and use numbers at least two centimetres tall so a five-year-old can find her own day without asking.
Work out your numbering direction once. The convention is that number 1 is December 1 and number 24 is December 24, and the biggest or best surprise belongs in 24, not 1.
Step 3: Add the Doors, Pockets, or Tags
For paper bags and envelopes, run a bead of glue along one long edge, press it flat with your thumb, and weight the whole thing under a stack of books overnight. For cardboard tubes, stand them in rows on the base and glue only the bottom rim so the top stays open.
For tags, punch one hole near the top of each card, thread it, and hang them in date order along a length of string or wire. Space them about eight centimetres apart so the calendar spans roughly two metres of wall, or wind them onto a wire hoop to make a wreath shape.
Check every flap opens with a thumb. A pocket that only opens for an adult’s thumbnail defeats the point.
Step 4: Fill the Days with Small Surprises
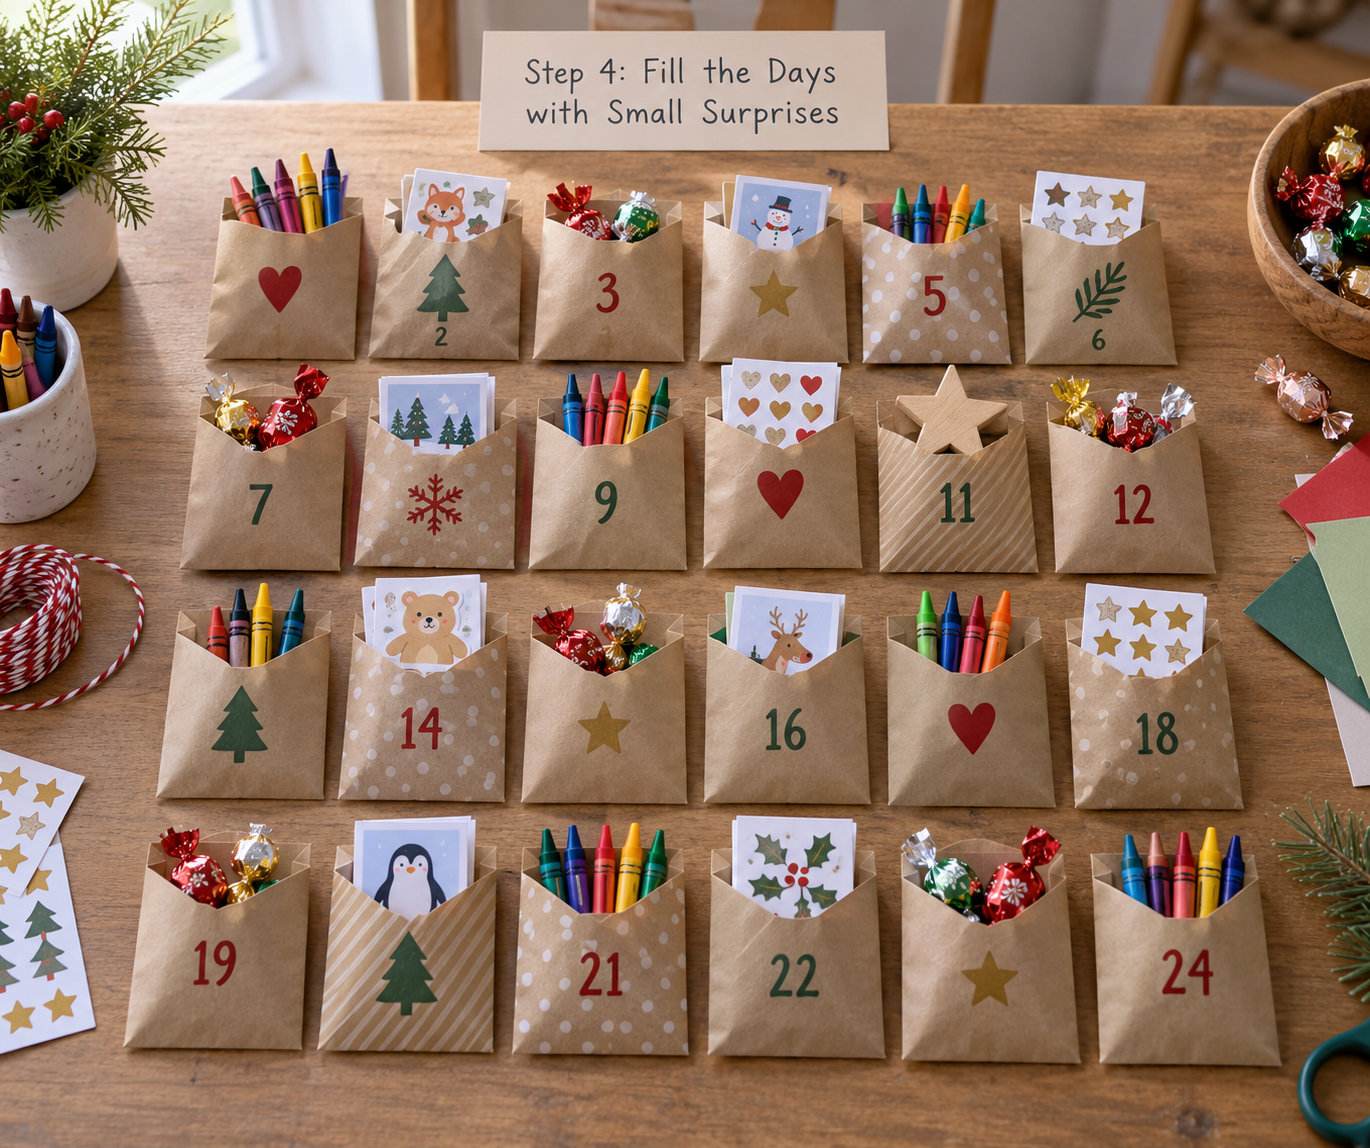
A good mix beats twenty-four identical treats. I aim for roughly a third activities, a third small objects, and a third edible treats or notes, then spread them so no two sweet days sit next to each other.
- Toddlers to 3: A sticker, a plastic animal, a shaped biscuit, a simple finger-paint card. Nothing small enough to swallow.
- Preschool and school age: A puzzle piece, a bouncy ball, a magnifier, a new crayon colour, a library-due-date stamp.
- Teens: A hair tie, a sleep mask, a phone grip, a bookmark, a small donation to something they care about.
- Adults or a partner: A coffee voucher, a bookshop voucher, a “your choice of dinner” note, a chore-free morning pass.
- All ages: One chore coupon, one kindness task, one silly challenge such as wearing the wrong shoes for breakfast.
If you’re avoiding a month of sugar, swap the edible fillers for folded notes and activity cards. Written prompts work well: bake something together, walk somewhere new, read a chapter aloud, send someone you haven’t spoken to a message.
On food, keep it simple: anything perishable goes in later, and anything that sits out for three weeks in a warm room goes in on the 20th or not at all.
Step 5: Display and Use the Calendar
Hang the calendar where the morning routine already happens, ideally at child height so they can reach it without help. Open one compartment per day, starting on December 1, and resist the urge to sneak early openings.
When Christmas is over, store the pockets flat in a box with the notes and any undated spares. That is the whole reason a refillable one is worth the extra glue time: next December you refill the same calendar and skip the build entirely.
Common Mistakes
- Uneven numbering. Always lay out all 24 compartments in pencil before the first drop of glue. If a number is wrong, peel it off while the glue is still soft rather than covering it with a new one.
- Openings that are too small. Make the pocket opening a good centimetre wider than the widest item going in it. Test with the biggest filler, not the smallest.
- Paper tearing at the flap. Score the fold line with a blunt knife before bending, and reinforce it with a strip of tape on the inside.
- Dates revealed early. Number the closed side of tags, or put numbers on the back of flap doors. Children are better at finding hidden things than adults expect.
- Activities that run too long. Keep each day’s activity under about fifteen minutes. Anything longer stops feeling like a countdown and starts feeling like a project.
- Small parts and under-fives. Skip beads, loose buttons, coins and anything smaller than a small bead. Anything that fits through the hole in a toilet paper roll is a choking risk for that age group, and adults should always be the ones opening those pockets first.
One more timing note worth repeating: glue on paper, felt and thick card needs a full night under weight before it goes on the wall.
Frequently Asked Questions
What to put inside a homemade advent calendar?
Mix activities, small objects and treats rather than filling all 24 pockets the same way. Good non-edible fillers include stickers, crayons, bouncy balls, puzzle pieces, sleep masks, coffee vouchers and chore coupons. Activity cards with short prompts work well too. Parents often fill 8 to 12 pockets with something real and use folded notes for the rest, which keeps the cost down and the calendar easy to refill next year.
Do you open 1 or 24 first on an advent calendar?
You open 1 first, on December 1, and 24 last, on December 24. That is the standard numbering and the reverse of how the days actually run through the month. Put your biggest or most thoughtful surprise in number 24, not number 1, and keep the small daily treats in the early numbers so the calendar builds toward Christmas Eve.
What are the rules of an advent calendar?
There are no official rules, only a strong convention. An advent calendar counts down to Christmas Day, usually over 24 days starting on December 1, with one compartment opened each day in order. Some families start on the first Sunday of December instead, which stretches the calendar to 25 or more days. Others skip a compartment on busy days rather than opening two at once.
How many pockets should an advent calendar have?
Twenty-four is the most common number and matches December 1 through 24. A first Sunday in December start means you need 25 or more. You do not need 24 pockets for 24 gifts, though. A calendar with 8 to 12 filled pockets and the rest holding folded notes works perfectly well and is far easier on a budget.
What is a reverse advent?
A reverse advent calendar runs the countdown in the opposite direction, from December 24 back to December 1, and the contents are acts of kindness rather than treats. Each day holds a small task such as donating a food item, sending a card to someone, doing an unexpected chore or setting out a neighbour’s bins. It works well as a family project and uses up well-wrapped gifts instead of adding to them.
Can you make an advent calendar without sewing or a craft machine?
Yes. Paper bags, envelopes and cardboard tubes all attach with craft glue or double-sided tape, so no sewing is needed. Felt pockets can also be glued with fabric glue, though they need a long overnight set. The printed wall chart version uses only a printer, a pair of scissors and some tape, which makes it the fastest option when you are starting in the last week of November.
A Simple Advent Calendar Is Ready to Make
Three things to do first: collect 24 compartments from whatever is already in the kitchen cupboard, lay them out in pencil and number them 1 to 24, then glue and weight the whole thing overnight so it’s ready to hang on December 1.
That’s genuinely all it takes to learn how to make an advent calendar at home. If you’re unsure which design suits your space, start with paper bags or envelopes on a strip of card, since it needs no sewing, no measuring and dries fastest. Once it survives one December you’ll have a calendar you refill every year, and the neighbours will ask for their own.