Here is how to make a popsicle stick snowflake ornament the easy way: it takes about half an hour and a handful of supplies you probably already own. Cross four craft sticks into a six-pointed shape, glue the crossings, paint or glue on glitter, then add a loop of twine. It is the kind of craft a five-year-old can finish with an adult nearby.
I make these with my kids every December, and the version below is the one that survives being hung on a real tree rather than falling apart by New Year’s. The three things that matter: a flat work surface, glue you let fully dry, and decorations that are heavier than they look. Those details are where most homemade versions go wrong, so I’ve built the steps around them.
Table of Contents
- 1What You Need
- 2Which glue to reach for
- 3Step-by-Step: How to Make a Popsicle Stick Snowflake Ornament
- 4Build the Snowflake Shape
- 5Secure the Craft Sticks
- 6Add Decorations
- 7Attach the Hanging String
- 8Display or Gift the Ornament
- 9Common Mistakes
- 10Frequently Asked Questions
- 11What is the best glue to use for popsicle stick crafts?
- 12Can you make a popsicle stick snowflake without a hot glue gun?
- 13How many popsicle sticks do I need for one snowflake ornament?
- 14How long does it take for a popsicle stick snowflake to dry?
- 15What can I use instead of craft sticks?
- 16How do I stop glitter from shedding all over the tree?
- 17Conclusion
What You Need
For one ornament, gather the following. Most of it is craft cupboard basics, and the total cost across a batch of ten ornaments works out to a few dollars.
- Craft sticks (popsicle sticks) — 4 per ornament for the standard version, 8 for a fuller design. Jumbo kitchen stir sticks work too and give you a bigger snowflake without a different pattern.
- Glue — see the glue notes below for choosing by age.
- Twine, yarn, or thin ribbon — a 12 inch length for the hanging loop.
- Decorations — glitter and school glue, or paint, plus buttons, pom-poms, gems, or pipe cleaners.
- Optional tools — scissors, ruler, and a sheet of wax paper or parchment to work on.
- Optional hanger — a metal ornament hook if you want it to sit at a consistent height on the branch.
Which glue to reach for
Elmer’s-style craft glue and a low-temperature glue gun are the two workhorses here. They behave very differently, and the right one depends on who’s holding the sticks.
- School or craft glue — works on the crossed joints, dries clear, and safe for any age. Give it overnight on thicker sticks or it can let go at the crossing.
- Tacky glue — sticks faster and grips better than standard craft glue, still kid-safe. A good pick when you want to decorate the same day.
- Low-temperature glue gun — the fastest strong bond, and the best choice if the ornament will hang outdoors or get handled a lot. An adult should run the gun; a hot glue burn is the most common complaint I hear from other parents doing this.
- Mod Podge or decoupage glue — not for the joints, but a sealer. Brushed over a finished glittered snowflake, it locks the glitter down.
If you’re doing this with a toddler, skip the glue gun entirely. Craft glue plus a longer dry time is the safer route.
Step-by-Step: How to Make a Popsicle Stick Snowflake Ornament
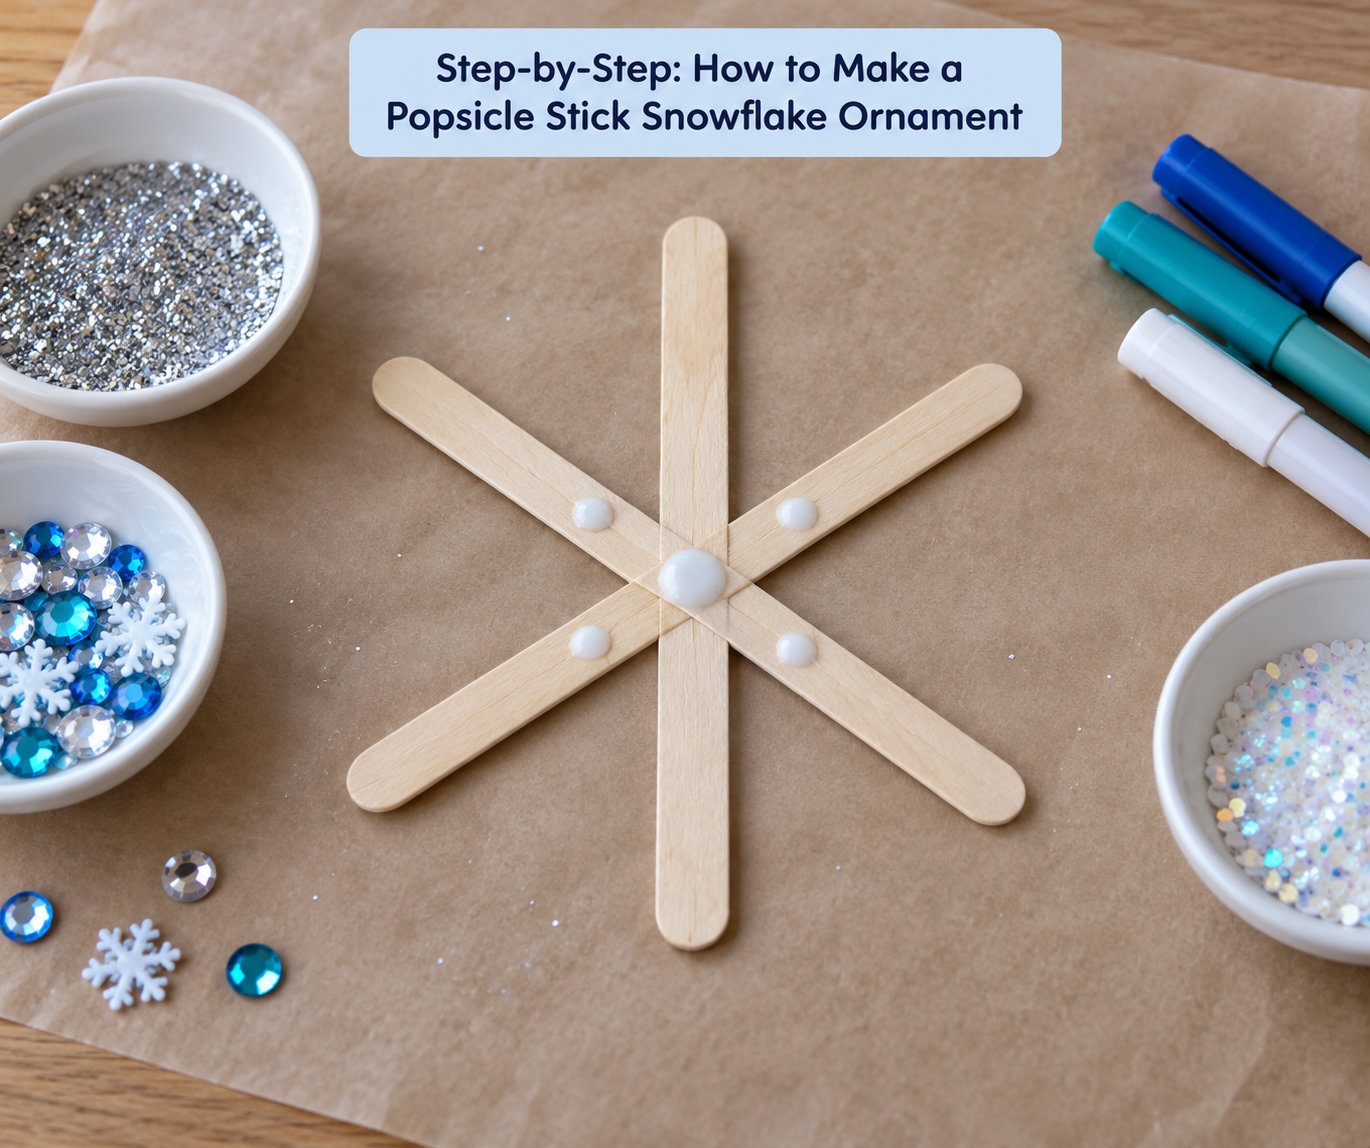
Build the Snowflake Shape
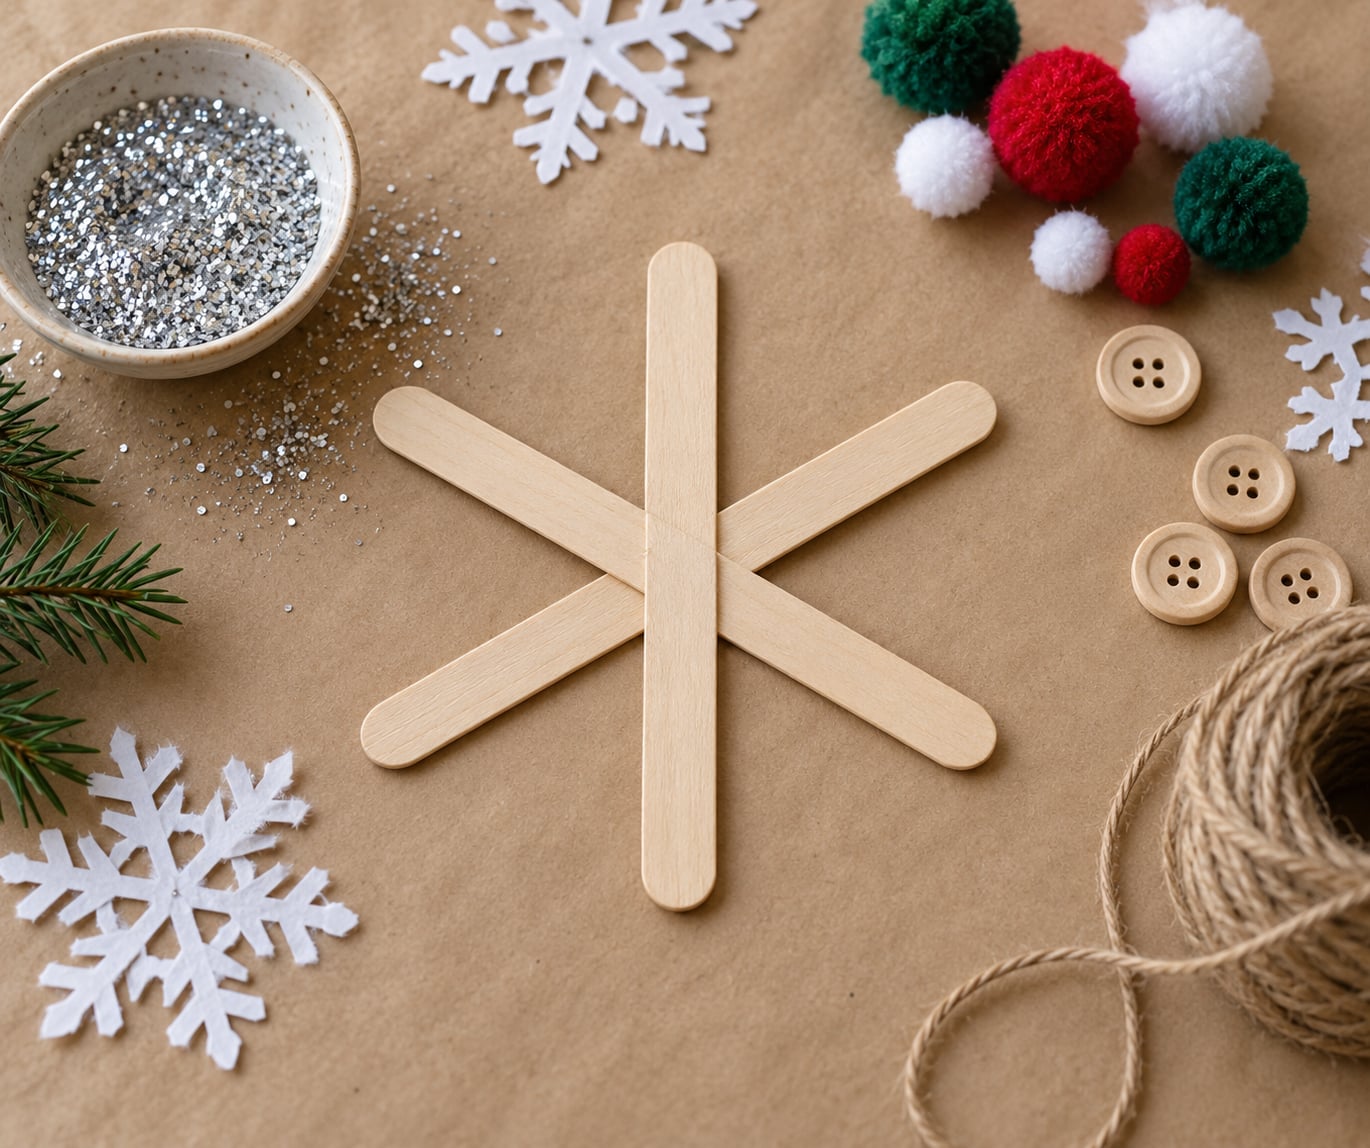
Lay one stick flat, then lay a second across the middle of it at a right angle, crossing near the top end rather than the center. That off-center crossing is what creates the snowflake arms instead of a plain plus sign.
Add a third stick parallel to the first and a fourth parallel to the second, so you have a small square of crossings in the middle with two arms poking out. You’ve now got a six-point shape. Check it before you glue: hold the middle and tilt it, and if any arm sits at a different angle than its opposite, nudge it now. A wobbly snowflake becomes a wobbly snowflake forever once the glue sets.
Secure the Craft Sticks
Put a small dot of glue at each crossing, then press the sticks together with your fingers for about fifteen seconds. Do one crossing at a time so the whole frame doesn’t shift while you’re working on the next one.
You’ll know a joint has set when you can press on it hard with a fingertip and it doesn’t flex or slide. Flatten the finished frame under a book for twenty minutes if the arms keep drifting, then check again. Paint on before the glue is fully dry will slide off the narrow sticks and smear — that’s the single most common frustration I see.
Add Decorations
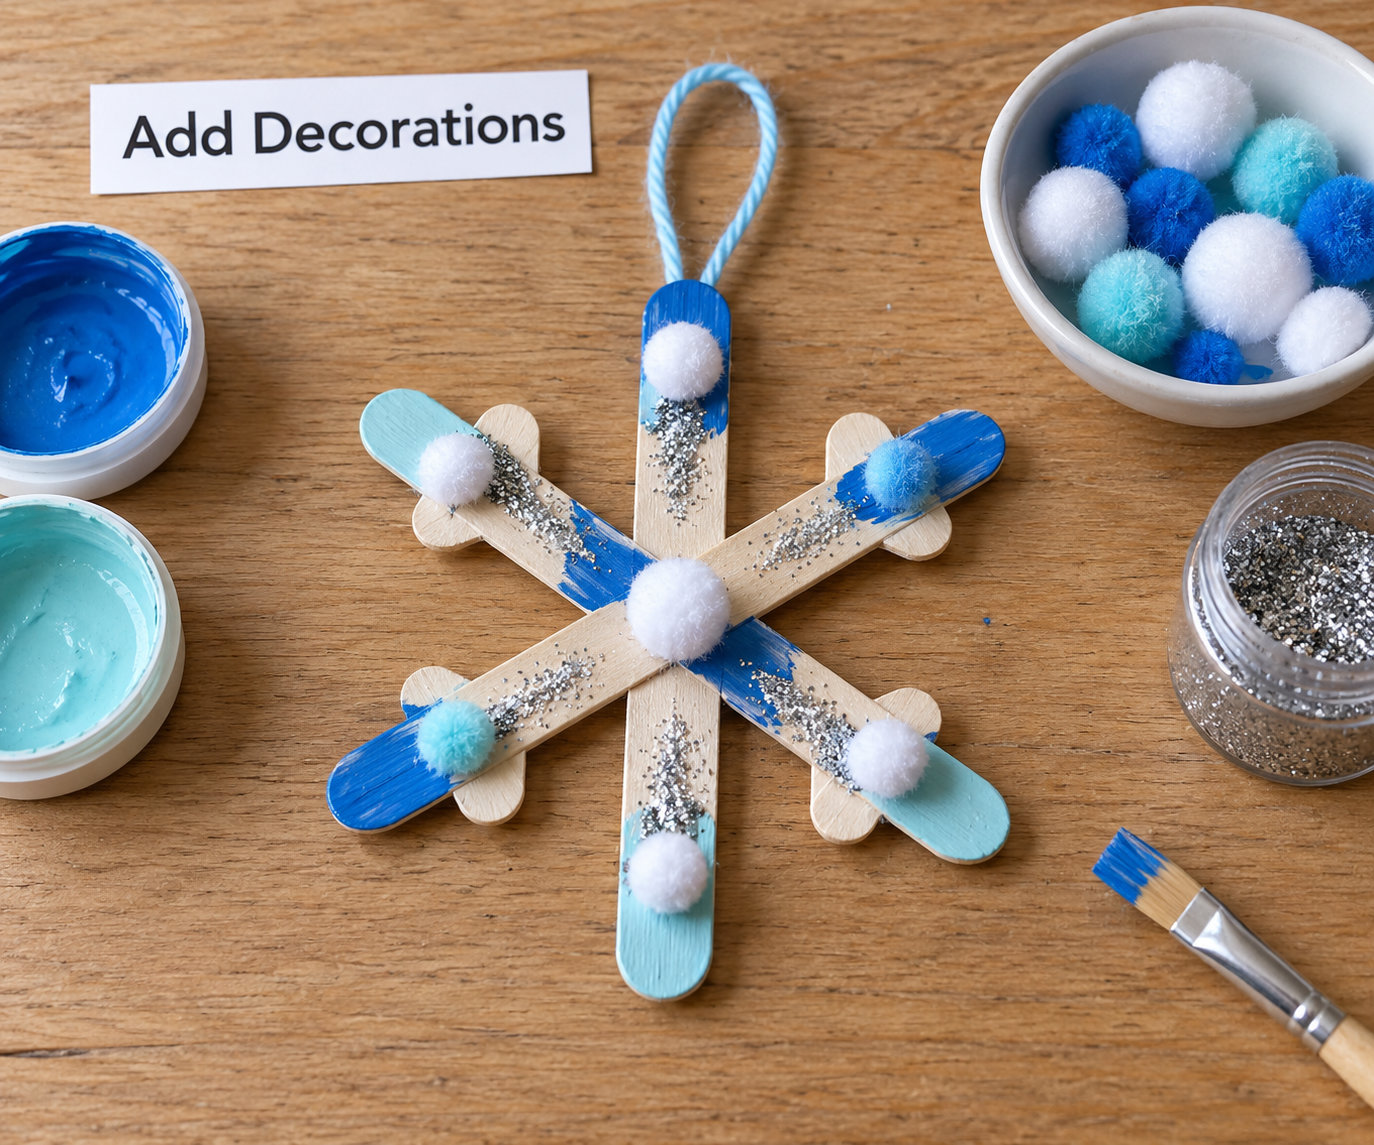
Paint first, glitter second. Paint the sticks while they’re still flat on the work surface, then let it dry before anything else touches them.
Several decorating routes work well. For glitter, brush school glue over the painted areas, sprinkle glitter on, and tap off the excess into a tray an hour later. For a no-mess option, sprinkle glitter onto wet paint and let it dry together. A shallow spice container with a perforated lid gives kids much better control than shaking a jar.
For a less glittery finish, glue buttons or pom-poms along the arms, press self-adhesive gems at each crossing point, or wind sparkle pipe cleaners around the frame before gluing them down. Whatever you choose, keep the middle crossings visible so the shape still reads as a snowflake from across the room.
Attach the Hanging String
Cut a 12 inch length of twine or thin ribbon and fold it into a loop. Glue the two loose ends to the back of one arm, right where it meets the crossing, rather than to the very tip.
Hang it from your hand and check that the ornament hangs flat and level. If it tilts, you’ve likely put the loop off-center or added heavier decorations to one side. Move the loop a quarter inch and test again. Heavier ornaments — pom-poms especially — need a dot of extra glue and a full overnight dry before they go on a tree.
Display or Gift the Ornament
Let the finished ornament dry completely, ideally overnight, before it touches a branch. Once it’s dry you can brush a thin coat of Mod Podge over any bare wood to keep it from absorbing moisture and going soft in a warm room.
Thread the loop onto a tree branch, or use an ornament hook so it hangs at the same depth as everything else. A cardboard gift tag works just as well if it’s going on a present instead. Made with a picture or a school photo, these get kept in boxes for years.
Common Mistakes
Crooked intersections. Almost always from gluing too early. Arrange the whole frame first, check that the arms are symmetrical, and only then add glue. Fix it before the glue sets and it’s a two-minute job; after, it’s a soak-and-pry job.
Uneven arms. Measure the overlap instead of eyeballing it. Put the first two sticks down, mark the crossing point with a pencil, then line up the third and fourth against that mark.
Weak glue joints. Both craft glue and hot glue need full dry time on wood. Glue that feels tacky to the touch will still let go on the tree in January. Overnight flat is the safe answer.
Decorating before the glue dries. Paint and glitter won’t grip a damp joint, and they’ll slide down the narrow stick. Wait until the frame is hard, then decorate.
A top-heavy ornament. Extra weight on a single arm tips the whole thing. Distribute the heavier bits — pom-poms, layered gems — evenly around the frame instead.
Glitter everywhere, forever. Paint and let it fully dry before adding a coat of Mod Podge or clear sealant. Loose glitter on an ornament ends up on your tree, your floor, and eventually your vacuum.
Frequently Asked Questions
What is the best glue to use for popsicle stick crafts?
A low-temperature glue gun gives the strongest, fastest bond and the ornament holds up best outdoors. For young children, school glue or tacky glue is safer and works fine as long as you give it overnight to dry. Whichever you pick, put the glue at the crossing points rather than along the sticks, since the joints take all the stress.
Can you make a popsicle stick snowflake without a hot glue gun?
Yes, and it’s the version most families end up preferring. Craft glue or tacky glue holds the crossed joints without any heat, which keeps it comfortable for kids. Build the frame, glue the four crossings, then leave it flat overnight before decorating. The finished ornament is slightly less rigid than a hot-glued one, so hang it indoors or from a window.
How many popsicle sticks do I need for one snowflake ornament?
Four sticks make the standard six-point snowflake, and that’s the size most people want on a tree. Using eight sticks gives you a fuller double-frame design with a thicker centre. Four sticks also work well for the simplest version if you decorate only the crossing points with buttons or gems and leave the arms plain.
How long does it take for a popsicle stick snowflake to dry?
Craft glue needs about twenty minutes to set enough to handle and overnight to be fully reliable. Hot glue grabs in seconds but is safest to leave for several hours before decorating. Paint adds another two to four hours per coat, and glitter brushed on with glue should be given overnight before you brush off the excess.
What can I use instead of craft sticks?
Jumbo kitchen stir sticks work well and make a larger ornament from the same pattern. Thin wooden skewers are risky on their own since they split and poke through fingers, but two laid side by side with glue between them act as a solid arm. Cardboard strips folded into narrow bars also work for a lighter, more rustic version.
How do I stop glitter from shedding all over the tree?
Let the paint dry fully, then brush on a coat of Mod Podge or clear sealant and let that dry before the ornament goes anywhere near a branch. Glitter applied to wet paint sheds far less than glitter glued on separately. Adding a few drops of clear glue to the glitter itself before you sprinkle it onto wet paint helps it lock down too.
Conclusion
Start by laying out all four craft sticks and checking the shape is symmetrical before any glue goes down. From there it’s glue, decorate, dry overnight, and add the loop. Once you get the first one right, the next four take half the time, and you have a winter’s worth of ornaments done.