
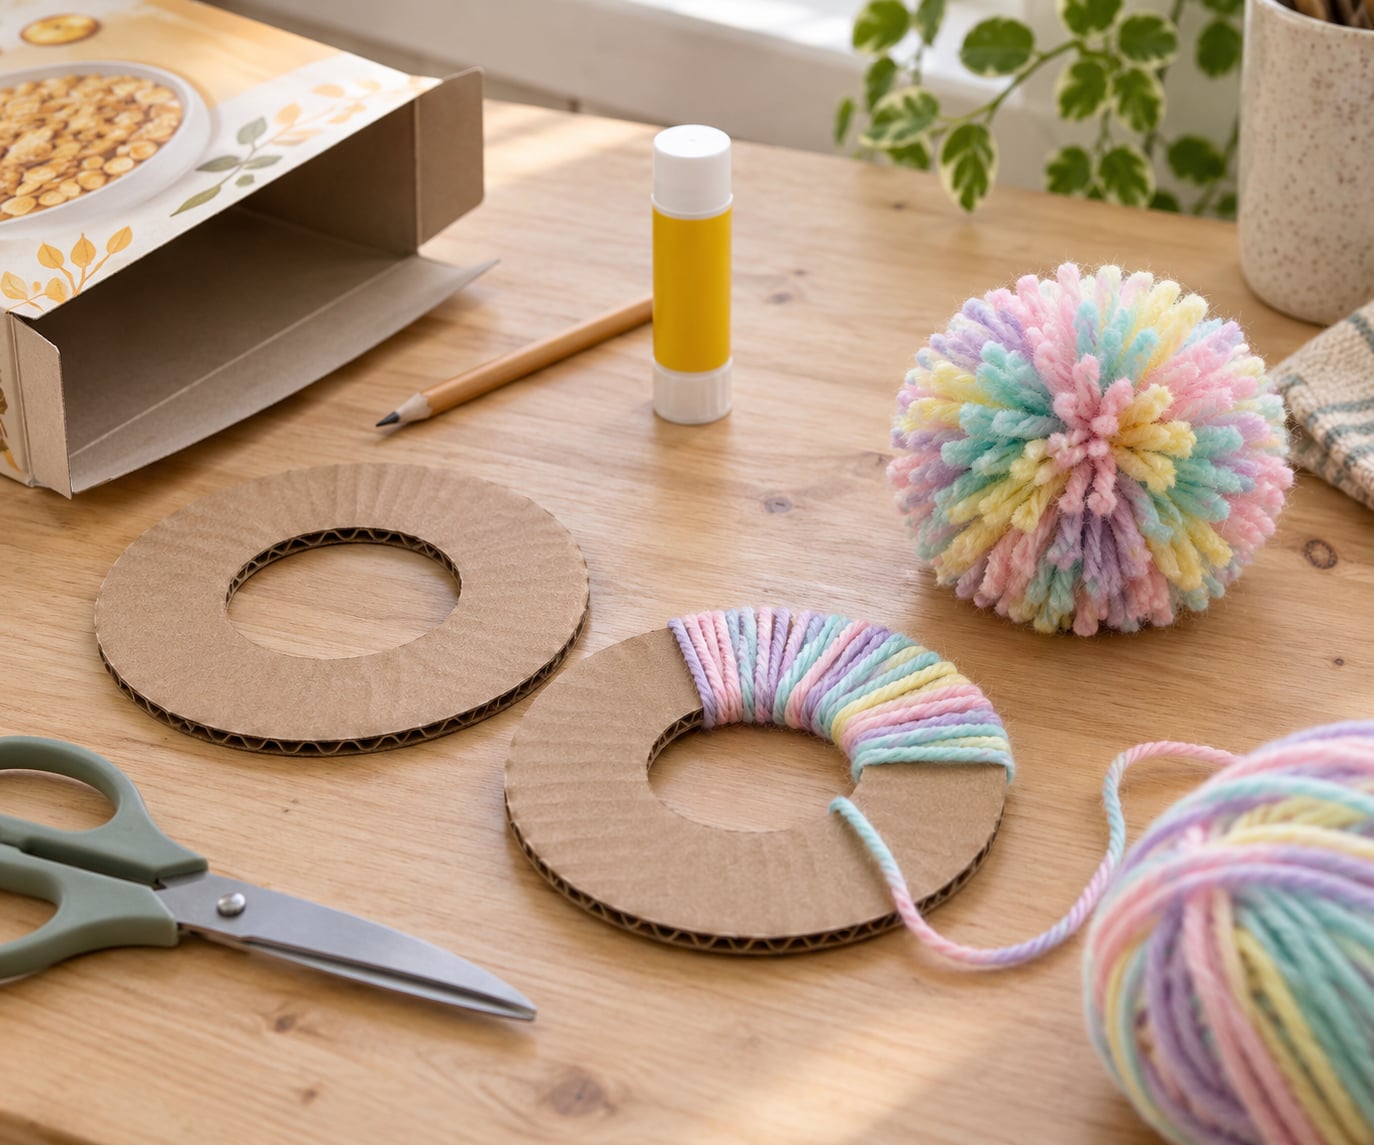
To make a pom pom with cardboard, cut two matching cardboard circles, cut a smaller circle out of the centre of each, slice from the outer edge to that hole so the discs open into a C, then wrap yarn between them until the layer is thick, snip the loops, tie the middle and pull the maker free.
That is the whole method, and it takes about 15 minutes per pom pom once your cardboard maker is built. The maker itself lasts for dozens of pom poms, so the second one is faster than the first.
It is also almost free. A cereal box, some leftover yarn and a pair of scissors cover everything, which makes this one of the easiest projects to run with a group of kids. An adult handles the cutting and snipping; the wrapping and fluffing are fair game for small hands.
Table of Contents
- 1What You Need
- 2Step-by-Step
- 3How to Make a Pom Pom with Cardboard
- 4Step 1: Make the Cardboard Template
- 5Step 2: Wind the Yarn
- 6Step 3: Cut and Secure the Yarn
- 7Step 4: Add Glue and Fluff
- 8How to Make It Fluffier and More Even
- 9Common Mistakes
- 10Frequently Asked Questions
- 11What size should I cut the cardboard for pom poms?
- 12What type of yarn is best for making pompoms?
- 13Why does my pom pom fall apart when I pull it off the maker?
- 14Can I really make pom poms out of leftover yarn scraps?
- 15Can I make a pom pom with a toilet paper roll instead?
- 16How old do kids need to be to make pom poms?
- 17Conclusion
What You Need
- Yarn. Any yarn works. Medium worsted weight gives a full pom pom fastest; chunky yarn gives a quicker, fluffier one that needs less wrapping. For a smooth ball, choose yarn with a tight twist, because loosely spun single-strand yarn frays when you cut the loops.
- Corrugated cardboard. A cereal box, pizza box or shipping box is ideal. The fluted middle holds its shape while you wind. Flat single-layer card stock works but tears more easily around the hole.
- Sharp scissors. Dull scissors crush the loops instead of cutting them, and pushing them between two cardboard discs needs a decent blade. This one tool decides how pleasant the project feels.
- A pencil and something round to trace. A glass, a mug, a saucer, a jar lid or a coin. Any circle roughly the size you want the pom pom to be.
- School glue. Optional. A drop in the centre tucks stray strands in so the middle looks neat.
- A long strand of yarn for tying. Cut one piece about 60 cm (24 inch) long before you start winding. Trying to find it afterwards, with twenty centimetres of yarn still wrapped, is annoying.
Everything on this list is a substitution-friendly list. Yarn offcuts work. A toilet paper roll becomes a tube maker rather than a ring maker. Last year’s holiday decorations work. You do not need to buy anything.
Step-by-Step
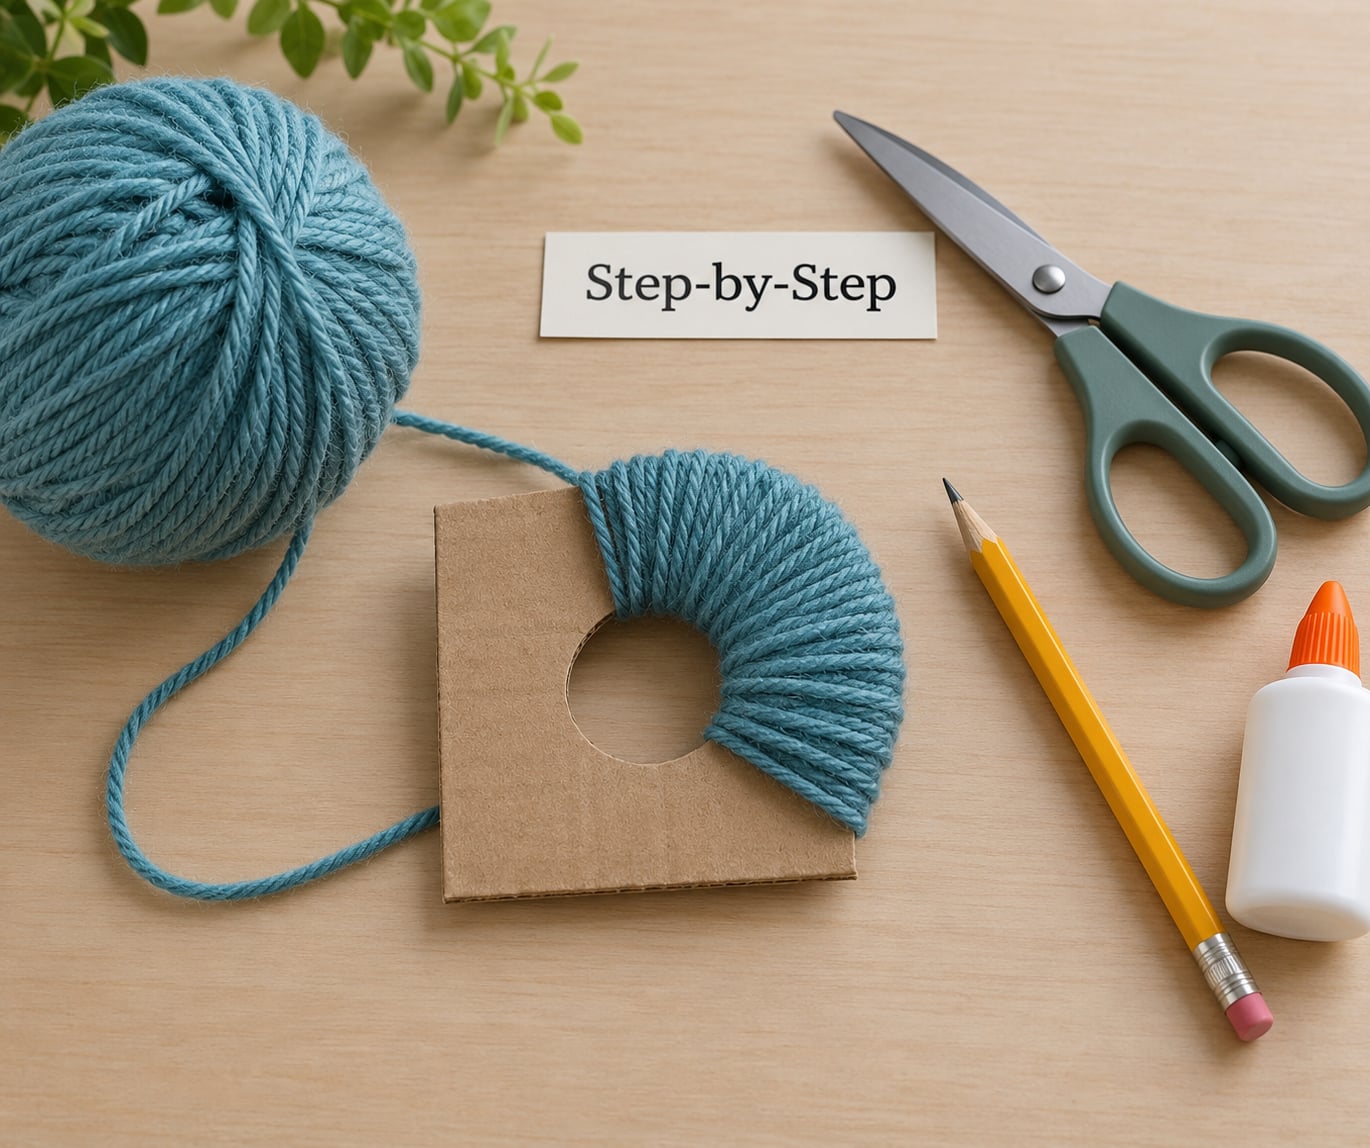
Build the maker first, then wind. Once the maker is made you can skip straight to Step 2 every time after that.
How to Make a Pom Pom with Cardboard
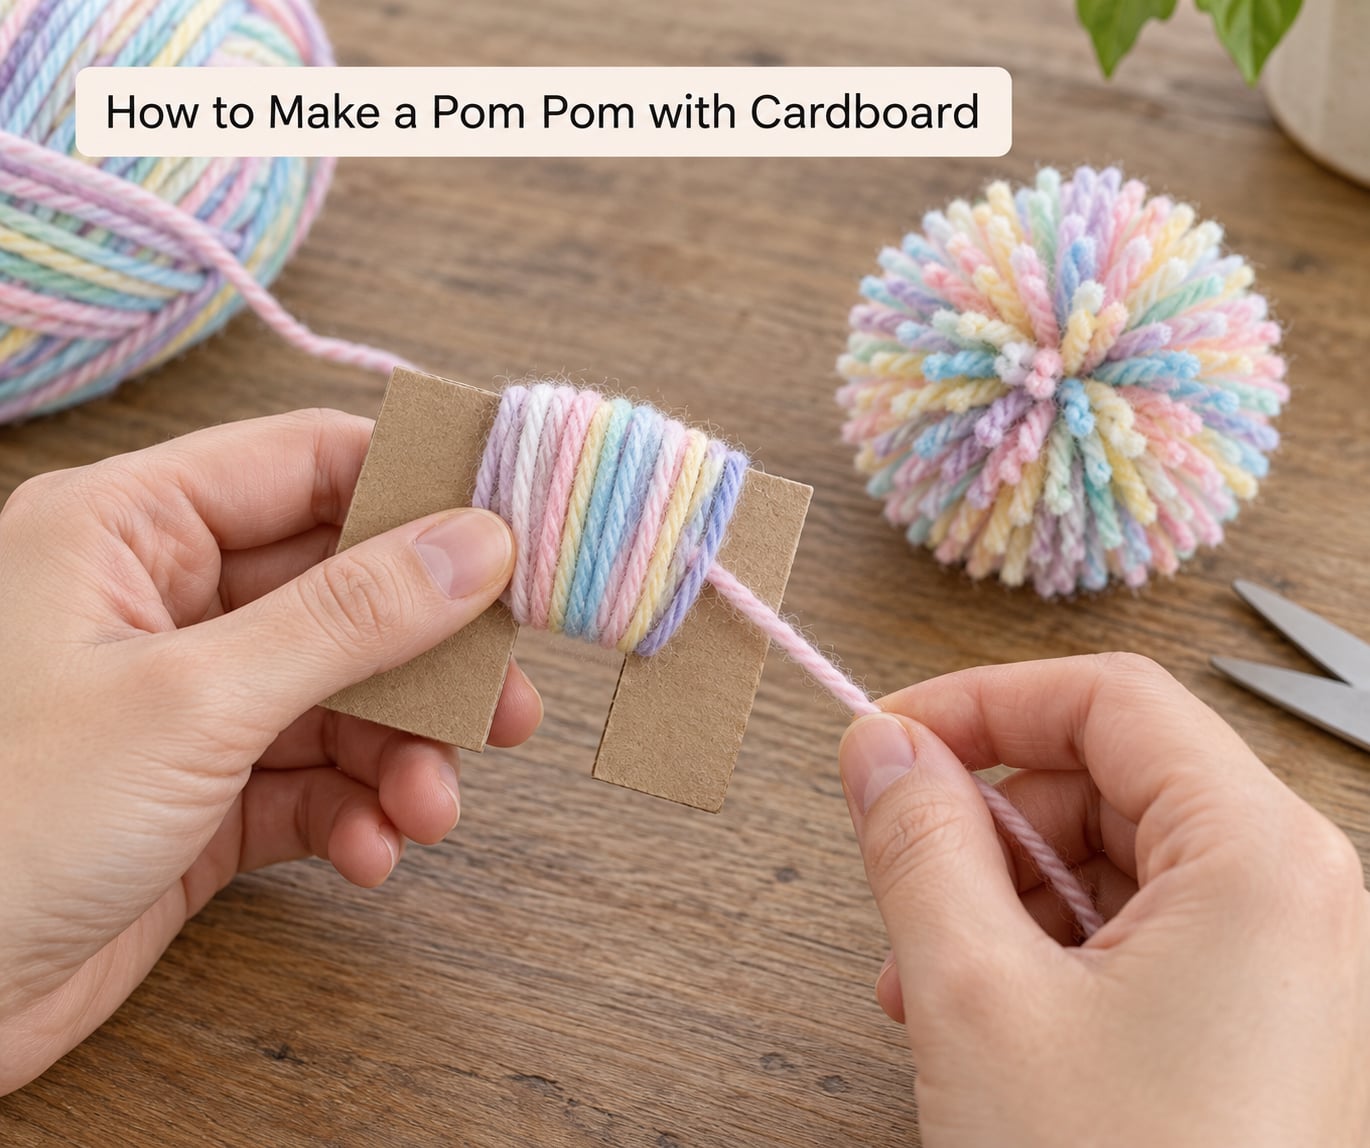
The winding is the part that decides whether the finished pom pom looks round or lopsided, so it is worth doing slowly. Hold the two discs together with one hand, wrap with the other, and keep the C shape centred over your fingers rather than letting it slide down them.
Wrap in one direction only. Mixing directions as you go creates a criss-cross that bunches up in places and leaves thin patches elsewhere. Overlap each pass by about the width of the yarn so no cardboard shows through.
Rotate the maker a few degrees as you fill it, the way you would wind a ball of string. That keeps the layer even instead of building a thick ridge on one side.
Step 1: Make the Cardboard Template
Trace two matching circles on your cardboard. For a pom pom roughly the size of a tennis ball, each outer circle should be about 10 cm (4 inch) across. Next, trace a much smaller circle in the centre of each — about 2.5 cm (1 inch) — and cut it out carefully so the ring does not tear.
Then cut a straight slit from the outer edge of each disc inward until the blade meets the hole. Do this on both discs. You now have two rings that open into a C shape.
You’ll know it worked when both discs bend easily and sit flush against each other with the opening facing the same way. Match the two slits and tape or staple the discs together if you like, though they usually hold on their own.
Step 2: Wind the Yarn
Lay the tie-off strand across the cardboard, with its ends hanging into the hole area so it stays put. Then start wrapping yarn between the two discs.
Build a solid even layer about 1 cm (half inch) thick all the way around before you start worrying about filling the hole. If you fill the hole first, the outside goes thin and the pom pom comes out lopsided.
Watch for short pieces dropping through the centre hole as you wrap. Tuck them back under the winding and keep going; dangling bits snag on the yarn and make the snipping step harder later.
The maker is full when the hole has almost closed over and you can just see cardboard in the very middle.
Step 3: Cut and Secure the Yarn
This is the fiddly bit. Insert the tips of your scissors between the discs along one straight edge and snip across the wound yarn, cutting the loops in one direction only. Rotate and repeat around the whole ring.
Cutting the loops on both edges leaves strands still threaded through the cardboard, and they snap off unevenly. Cut one side, and the loops come free cleanly.
Take your long tie-off strand and wrap it around the middle of the yarn bundle. Pull it tight, wrap it a second time, then tie a firm double knot. This is the step that keeps the pom pom from coming apart in your hands, so pull harder than feels necessary.
Slide the maker off. The pom pom should feel full, tight and heavier than you expect for its size. If it feels loose, tie the centre again before you fluff it.
Step 4: Add Glue and Fluff
Work a small amount of school glue into the centre if stray ends are sticking out. Not much is needed; you are securing a handful of strands, not gluing the whole ball.
Put the pom pom in your hands and roll it lightly, then tease the fibres apart with your fingers until it is round and even. Trim the longest strands with sharp scissors until the silhouette is a sphere rather than a hedgehog.
How to Make It Fluffier and More Even
Fluffiness comes down to two things: how much yarn you pack in, and how evenly you pack it. There is no trick beyond those.
- Want it bigger? Move the inner circle outward, widening the ring. The ring width is the single variable that sets the finished size.
- Want it denser? Add another full layer of yarn on top before you snip. Roughly a quarter more yarn turns a soft pom pom into one that holds its shape.
- Want it faster? Use chunky yarn, or fold the yarn in half and wind it double. One folded pass covers the same ground as two.
- Want it fluffier? Use a loosely spun, fluffy yarn such as mohair or a brushed acrylic. Fuzzy fibres snag and hide loose ends better than smooth, tightly twisted yarn.
- Made too many? The maker survives. Wipe the leftover strands off, wind another colour, and make a second one.
This chart covers the sizes people ask about most, in both units:
| Finished size | Outer circle | Inner hole | Yarn to start with |
|---|---|---|---|
| Mini, about 4 cm (1.5 inch) | 5 cm (2 inch) | 1 cm (0.4 inch) | About 2 m (7 ft) |
| Small, about 6 cm (2.5 inch) | 8 cm (3 inch) | 1.5 cm (0.6 inch) | About 5 m (16 ft) |
| Medium, about 10 cm (4 inch) | 12 cm (5 inch) | 2.5 cm (1 inch) | About 12 m (40 ft) |
| Large, about 15 cm (6 inch) | 18 cm (7 inch) | 3 cm (1.2 inch) | About 25 m (80 ft) |
These are starting points, not rules. Add yarn until the hole is nearly covered, and remember that the finished pom pom shrinks slightly once you trim the stray loops.
Common Mistakes
If your pom pom is flat or lopsided, the wrapping was uneven. Turn the maker as you wind rather than wrapping every strand in the same spot, and keep the opening centred on your fingers.
If your pom pom falls apart as you pull it off, the centre hole was too big. A wide hole leaves the tie-off with nothing to grip. Cut a smaller inner circle next time, and tie twice.
If you can see cardboard in the middle, you wrapped too thin. Keep going until the hole is nearly closed. Thin centres also make flat pom poms, so this is the same fix in two directions.
If yarn keeps falling out of the hole while you wrap, you are cutting scraps loose. Push them back under the winding each time. A hair clip or a bulldog clip over the hole works too.
If snipping between the discs feels awkward, cut from the slit side outward. Starting where the two discs separate gives you an opening, and short scissors are easier here than long ones.
Frequently Asked Questions
What size should I cut the cardboard for pom poms?
For a pom pom about 10 cm (4 inch) across, cut two outer circles of roughly 12 cm (5 inch) and a 2.5 cm (1 inch) hole in the middle of each. Keep the inner hole comfortably smaller than half the outer circle, because a wide hole gives the tie-off nothing to grip and the pom pom falls apart. The ring width between the two circles is what sets the finished size.
What type of yarn is best for making pompoms?
Medium worsted weight gives the best all-round result: full, round and quick to wind. Chunky yarn works well for a smaller, fluffier pom pom and needs far less wrapping. For the smoothest finish, pick yarn with a tight twist, since loosely spun single-strand yarn frays when you snip the loops. Fuzzy mohair and brushed acrylic hide stray ends nicely.
Why does my pom pom fall apart when I pull it off the maker?
Almost always one of two causes: the centre hole was cut too large, or the tie-off knot was not pulled tight enough. A big hole means there is little yarn above it for the knot to bind. Cut a smaller inner circle, wrap your long tie-off strand around the middle twice, and pull the knot hard before you slide the cardboard away.
Can I really make pom poms out of leftover yarn scraps?
Yes, and that is where this method shines. Short offcuts work well as long as each piece is longer than the width of the cardboard ring, roughly 2 cm (1 inch). Anything shorter drops through the hole and gets wasted. Thrift-store yarn, half-finished projects and frayed ends all wind up into perfectly good pom poms.
Can I make a pom pom with a toilet paper roll instead?
You can. Cut a 5 cm (2 inch) section off an empty toilet paper roll, slit it down one side and flatten it into a ring with a hole in the middle. Wind yarn around the ring exactly as you would with cardboard discs, snip the loops, tie the centre and slide the tube off. It makes one good pom pom before the roll collapses, so it suits a quick craft rather than a batch.
How old do kids need to be to make pom poms?
Winding and fluffing suit children from about five upwards, and they genuinely enjoy both. Cutting the cardboard and snipping between the discs should be done by an adult, since both need a sharp blade and a steady hand. The winding stage is where the satisfying part happens anyway, so there is plenty for a young child to do at the table with you.
Conclusion
Start by finding something round to trace and cutting two matching circles from a cereal box. That cardboard maker is the whole project setup, and once it exists you can turn out a pom pom every ten minutes for the rest of the week.
From there, string them onto thick thread for a garland, add one to a winter hat, glue clusters into a pom pom animal for a shelf, or make a crowd of mini ones as bag charms. Yarn and cardboard are genuinely enough.
Checked and updated for 2026.


