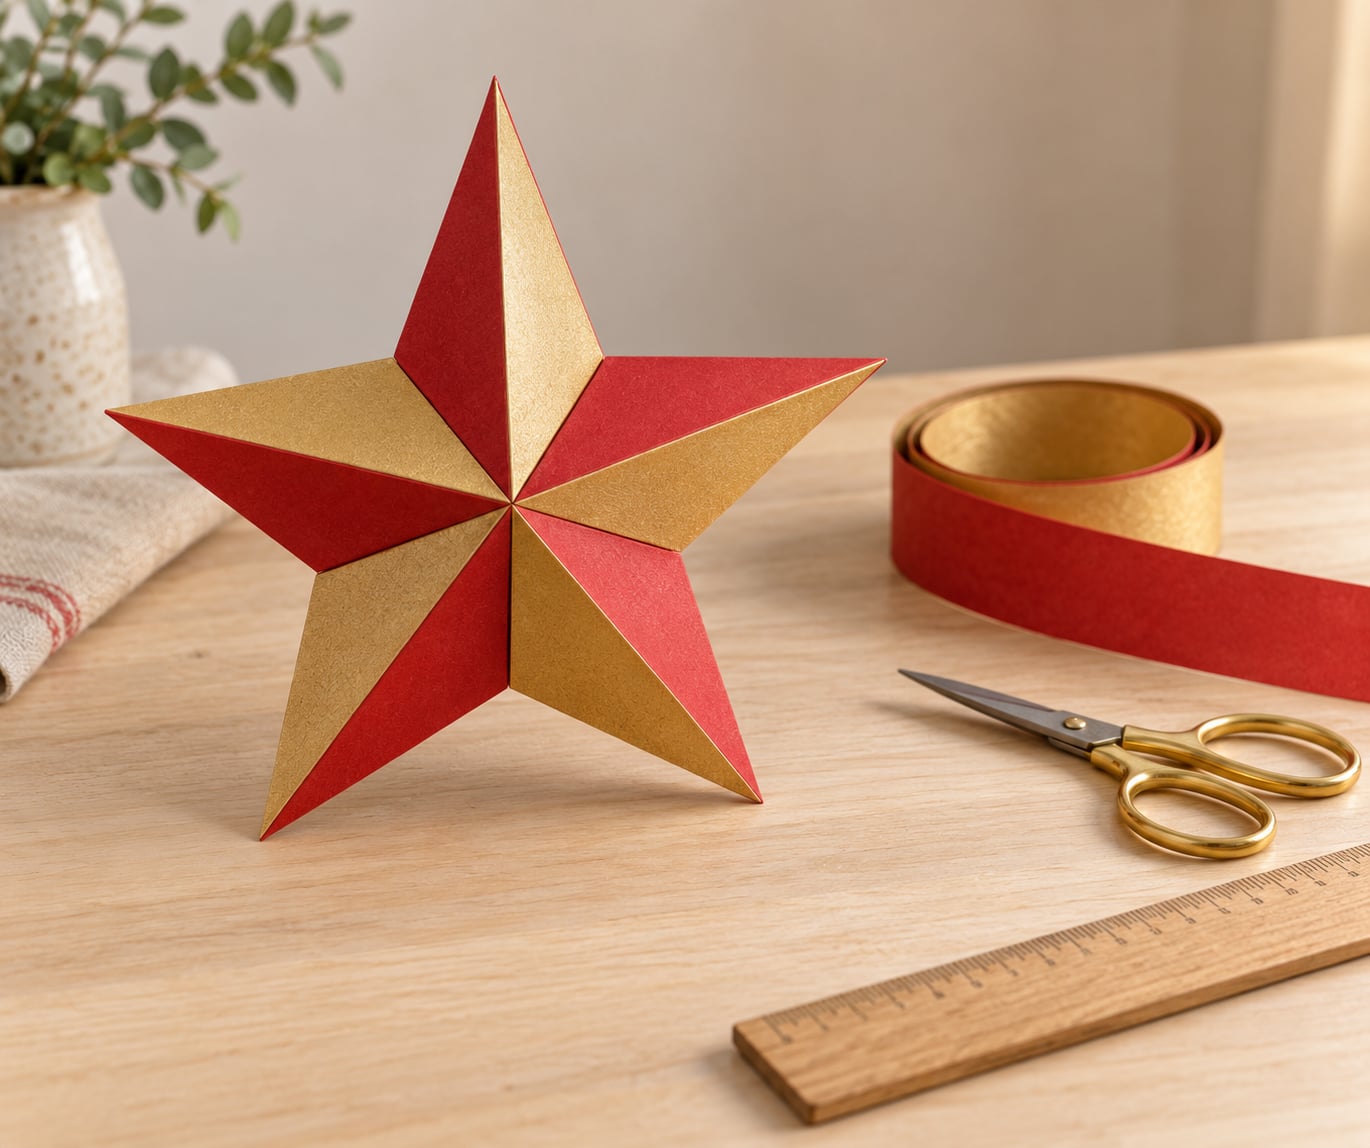
To make a 3D paper star, cut one long paper strip, tie it in a loop, wrap that loop around itself five times, then pull the points outward until the whole thing inflates. No glue, no staples, and nothing to buy. A child with an adult can finish one in about ten minutes.
The strip does all the work. Once it is wrapped, you have a flat little pentagon of paper, and the star appears in the last thirty seconds simply by pushing the five points out from underneath. That is why this craft suits young kids and impatient beginners: the hard part is over before most people realise they have done it.
This guide covers the classic lucky star folded from a single strip. It needs nothing but paper and scissors, and the same fold scales from a walnut-sized ornament to a plate-sized one, so a narrow strip and a wide strip both work.
Table of Contents
- 1What You Need
- 2How to Make a 3D Paper Star Step by Step
- 3How to Make a 3D Paper Star from a Paper Strip
- 4How to Make the Star Hold Its Shape
- 5Common Mistakes and How to Fix Them
- 6Easy Variations and Display Ideas
- 7Frequently Asked Questions
- 8How do I make a 3D star with paper step by step?
- 9What paper is best for a 3D paper star?
- 10Can you make a 3D paper star without glue?
- 11Why won’t my paper star puff up?
- 12How do I make paper stars easier for young children?
- 13What does it mean to fold 999 paper stars?
- 14Conclusion
What You Need
The whole craft costs one sheet of paper and about ten minutes of somebody’s attention. Everything else on the list is optional.
- Paper. Standard printer or copy paper, roughly 70 to 90 gsm, works best. Slightly heavier paper holds a crisper point but folds less easily, so it suits older hands rather than small ones.
- Scissors. One straight cut is all you need, for the strip itself. Nothing else in the project gets cut.
- A ruler or a pencil. Optional, but a marked line makes the strip an even width, and an even strip makes an even star.
- Glue. Optional. The paper grips itself. A small dot of glue helps only if you want the star to keep its shape on a tree or a mantlepiece.
- Thread or yarn. Optional, for hanging the star once it is finished.
- Markers, glue-stick glitter or a hole punch. Optional, if the star is a present or a classroom display piece.
Strip width decides star size, and this is the one piece of arithmetic worth knowing. A finished star measures roughly two and a half times the width of the strip it came from. A strip 1 cm wide makes a star about 2.5 cm across, which is the size of a walnut. A strip 4 cm wide makes one about 10 cm across, the size of a dinner plate.
Length matters just as much. Allow roughly 20 to 25 times as much length as width, so a 4 cm strip needs something close to a metre. Most home sheets are too short for a wide strip, so cut a narrow one from a single sheet or join two strips end to end with a little tape on the back before you start.
How to Make a 3D Paper Star Step by Step
Keep the printed side of the paper facing down through the whole fold. Flat markings and newsprint look better hidden, and the colour side ends up facing out when the star is puffed.
How to Make a 3D Paper Star from a Paper Strip
- Cut the strip. Cut one long, even strip of paper, about 1 cm wide, and as long as you can manage. Check it: the finished star will be roughly two and a half times the strip width, so keep proportions in mind before you commit.
- Checkpoint: the strip should be straight along its length, with no torn fibres along one edge. That edge becomes the outer rim of the star.
- Make the starting loop. Cross one end of the strip over the other, exactly as you would tie a very loose knot, then pull it tight until it forms a small ring of five flat loops. This ring is the skeleton of the finished star.
- Checkpoint: you should see five flat loops or fingers pointing up, sitting on top of a flat band. Count them. Five now means five points later.
- Wrap the long tail around your fingers. Fold the working end of the strip back on itself, lengthwise, so you have a band wide enough to wrap. Wrap that band around the flat point of the loop, then tuck the tip of the band into the pocket on the underside.
- Checkpoint: one wrap is done and the strip is still coming out of the pocket on the far side. The point of the star is now a flat pentagon rather than a set of loose fingers.
- Keep wrapping. Wrap again, tuck again, and keep going until you have made five wraps. Each wrap hides the loose end and thickens the pentagon. Count them out loud; five is the magic number, and a sixth wrap will not close cleanly.
- Checkpoint: after the fifth wrap, only a short tip of paper is still sticking out, and your shape should be a neat, flat five-sided pad. If you can still see more than a couple of centimetres of tail, wrap again.
- Tuck the last tip. Push that final tip down into the pocket under the last wrap. Pinch the point gently between finger and thumb so the paper grips itself and the strip stops shifting.
- Checkpoint: the star is now complete and completely flat. Nothing is 3D yet, and that is correct at this stage.
- Puff it open. Turn the star over, cradle it in one hand, and push down firmly in the centre with the other so the five points swing outward. Work from underneath, never squeezing from the top, and go around once so every point opens the same amount.
- Checkpoint: you should have a rounded star with five raised points and a hollow centre. If a point stays flat, find that specific inner flap with a fingernail and press it open from the back.
- Shape the points. Curve each point gently between your fingers until the star looks round rather than spiky, then set it down. It holds its shape on its own from here.
How to Make the Star Hold Its Shape
A finished strip star is stable but springy, which is exactly what you want in an ornament and slightly annoying in a card. These adjustments decide how the star behaves afterwards.
- Pinch the inner folds. Run a fingernail around the five inner corners where each point meets the ring. Sharpening those little folds is what makes the points sit at an even angle instead of slumping.
- Work from underneath. Every adjustment, including adding glue, happens with the star cradled in your palm and the fingers pushing up into the points. Pressing down from above flattens the shape you just built.
- Glue only where it grips. If a point keeps springing open, put a tiny dot of glue on the inner tab where it tucks into the pocket. Half a pea-sized amount holds a whole star. Glue across the flat back flattens the star permanently, so avoid it.
- Add a hanger. For an ornament, thread a loop of thin thread through one point before the glue sets, or tie it to the point afterwards. Punch a small hole in a point with a craft punch if the paper is too stiff to thread.
Kids usually notice the moment the star goes from flat to puffy, and that reaction is the whole reason for the craft. An adult can fold one in front of them, then hand them the strip for their own.
Common Mistakes and How to Fix Them
Almost every failed paper star fails at the same handful of points. None of them are fatal; all of them are fixable without starting again.
- The star will not puff up. Usually the creases are too soft. Crease every fold properly, working the paper with a thumbnail rather than a flat palm, and each step should be crisp enough to hold a shape on its own. Then push the centre down firmly while cradling the star underneath.
- The five points are uneven. The starting knot was tightened unevenly, or the wraps were pulled at different tensions. Undo nothing: hold the star face down and pull each point outward by hand, a few at a time, until they match. Even pressure fixes uneven pressure.
- The strip was too short. The last wrap has nothing left to tuck, so the star stays open at one corner. Next time, measure first: about 20 to 25 times the strip width. To rescue the short one, use the star as a flat decoration or add a small tab of tape at the gap.
- The strip was too stiff. Cardstock and chipboard fight the wrap and spring back. Swap to ordinary printer paper, or score a line along the middle of the strip first so the fold can take the bend instead of your fingers.
- Edges tear or the print flakes. Magazine and newspaper paper does both. Use solid-colour scrapbook paper, or cut the strip from the middle of the sheet so the printed border is thrown away.
- The star collapses when handled. It is being squeezed flat instead of supported. Add a small glue dot at the tucked tabs, or glue a cardboard ring behind the centre to hold the points apart. Never press the face of the star.
- The white back shows on the points. Single-sided paper flips colour as you puff. Turn the star so the printed side faces out, or use double-sided paper and stop worrying about it.
Easy Variations and Display Ideas
Once one star works, the same fold scales up, down and sideways.
- Big stars for a window or wall. Use a 4 cm or 5 cm strip. Join two strips with tape on the back for the length, then hang the finished star on a loop of thread. Three or five stars in graduated sizes look like a proper display.
- Mini stars for a garland. Narrow the strip to 1 cm or less, and the same steps take under five minutes. Thread them onto a long piece of yarn as you finish each one.
- Different paper for different seasons. Patterned wrapping paper for December, plain coloured paper for a classroom wall, sheet music or old greeting cards for something that looks handmade.
- Four points and six points. A strip folded four times around a square base makes a four-point star, and six wraps around a hexagon make a six-point star. The technique is identical; only the number of wraps changes.
- Personalise the star. Write a wish, a date or a name inside one of the points before puffing it, or decorate the back with markers and glitter once the shape is set.
- Gift topper. Flatten a star very gently, glue it face down on the wrapping paper, and it opens up into a small dimensional bow as the paper is pulled away.
- Jar of wishes. Fill a glass jar with folded stars. In parts of Germany, paper stars are made in quantity at Christmas, and a jar full of them is traditionally given as a wish for the year ahead.
- Classroom activity. A strip of paper per child, no glue, no scissors for anyone but the adult who prepares them, and one finished star per child. A jar of stars makes a good end-of-term display.
Folded paper stars have a longer history than most people expect. German families make them each December as ornaments, and the shape became widely recognised through a well-known 2014 pop song about a sky full of stars. Some traditions hold that a hundred stars make a wish. All of it is a good excuse to make a hundred strips.
Frequently Asked Questions
How do I make a 3D star with paper step by step?
Cut one long even strip of paper, cross the ends to tie a small loop of five flat fingers, then wrap the working end around the flat point and tuck it into the pocket underneath. Repeat that wrap five times, tuck the last tip, and pinch. Turn the star over and push the centre down from underneath so all five points swing outward. Curve each point gently and it is done.
What paper is best for a 3D paper star?
Ordinary printer or copy paper around 70 to 90 gsm folds the most easily and gives crisp points. Very light paper goes floppy and very stiff card refuses to wrap, so aim for the middle. Double-sided paper saves you from worrying about which way the printed side faces. Finished star size is roughly two and a half times the strip width.
Can you make a 3D paper star without glue?
Yes, and glue-free is the standard way. The strip tucks into its own pockets and the paper grips itself, so no adhesive is needed at any stage. Scissors are used only for the single cut that makes the strip. Add a small glue dot afterwards only if you want a star to keep its shape on a tree without springing open.
Why won’t my paper star puff up?
Soft creases are the usual reason. Every fold should be sharp enough to stand on its own, which means creasing with a thumbnail rather than a flat palm. When you do puff it, cradle the star in one hand and push the centre down from underneath, never from the top. A point that stays flat has an inner flap you can open with a fingernail.
How do I make paper stars easier for young children?
Make the strip wider, around 2.5 cm, so there is more paper to grab and less precision needed. Let an adult do the cut, then hand the child the loop, the wraps and the puffing. Fold a batch of strips up front so nobody has to wait mid-fold. Children from about six can do the whole wrap sequence with an adult sitting alongside.
What does it mean to fold 999 paper stars?
Paper stars are made in large numbers in some German and Scandinavian traditions, where a gift of stars is meant as a wish. Popular versions suggest one hundred stars equal a wish, while others hold that a gift is given only once someone has folded a thousand. It is folklore rather than rule, which is a fair description of most family traditions.
Conclusion
Start with a plain strip of ordinary printer paper, about 1 cm wide, and fold it end over end five times. That single fold sequence gives you the whole star; everything after it is shaping.
Once you can make one, you can make fifty. The finished stars suit a card front, a gift topper, a garland, a glass jar of wishes, or a tree, and a batch of them keeps a child quietly busy while you finish something else. Cut the strips in a batch first, and the making goes twice as fast.