To teach a child to sew by hand, start them on a blunt tapestry needle, thick thread and felt or Aida cloth, then work in short sessions of about 10 to 15 minutes. Teach three things first: threading the needle, tying a starting knot, and making even up-and-down running stitches along a drawn guide line. Add backstitch, whipstitch or blanket stitch only once the running stitch feels routine.
That is the whole method, and it works for a five-year-old as well as it does for a ten-year-old. The two things that decide whether a lesson goes well are the fabric you choose and how long you stay at the table.
Here is the sequence in short form:
- Set up a bright, uncluttered table where you can sit face to face with your child.
- Cut a small square of felt or Aida cloth and draw a straight guide line with a washable marker.
- Show how to thread the needle, then tie a starting knot in the thread end.
- Work the running stitch: poke the needle up, down, up, down, spacing each stitch evenly.
- Finish by backstitching three stitches over the last few holes, then trim the thread.
Everything below expands on those five moves so you can teach them without a pattern, a machine, or any sewing experience of your own.
Table of Contents
- 1What You Need
- 2Step-by-Step: How to Teach a Child to Sew by Hand
- 3Step 1: Set Up a Safe Sewing Space
- 4Step 2: Practice the Running Stitch
- 5Step 3: Teach Backstitching
- 6Step 4: Add Blanket or Whip Stitches
- 7Step 5: Sew a Small Felt Project
- 8Step 6: Finish the Thread Safely
- 9Common Mistakes and Easy Fixes
- 10Frequently Asked Questions
- 11At what age can a child start learning to sew by hand?
- 12What is the safest type of needle for a child who is sewing?
- 13How long should a beginner sewing lesson be?
- 14Which fabric is easiest for a child to sew?
- 15Should I teach my child to sew on a machine instead?
- 16How can I help a child who keeps pulling the thread too tightly?
What You Need
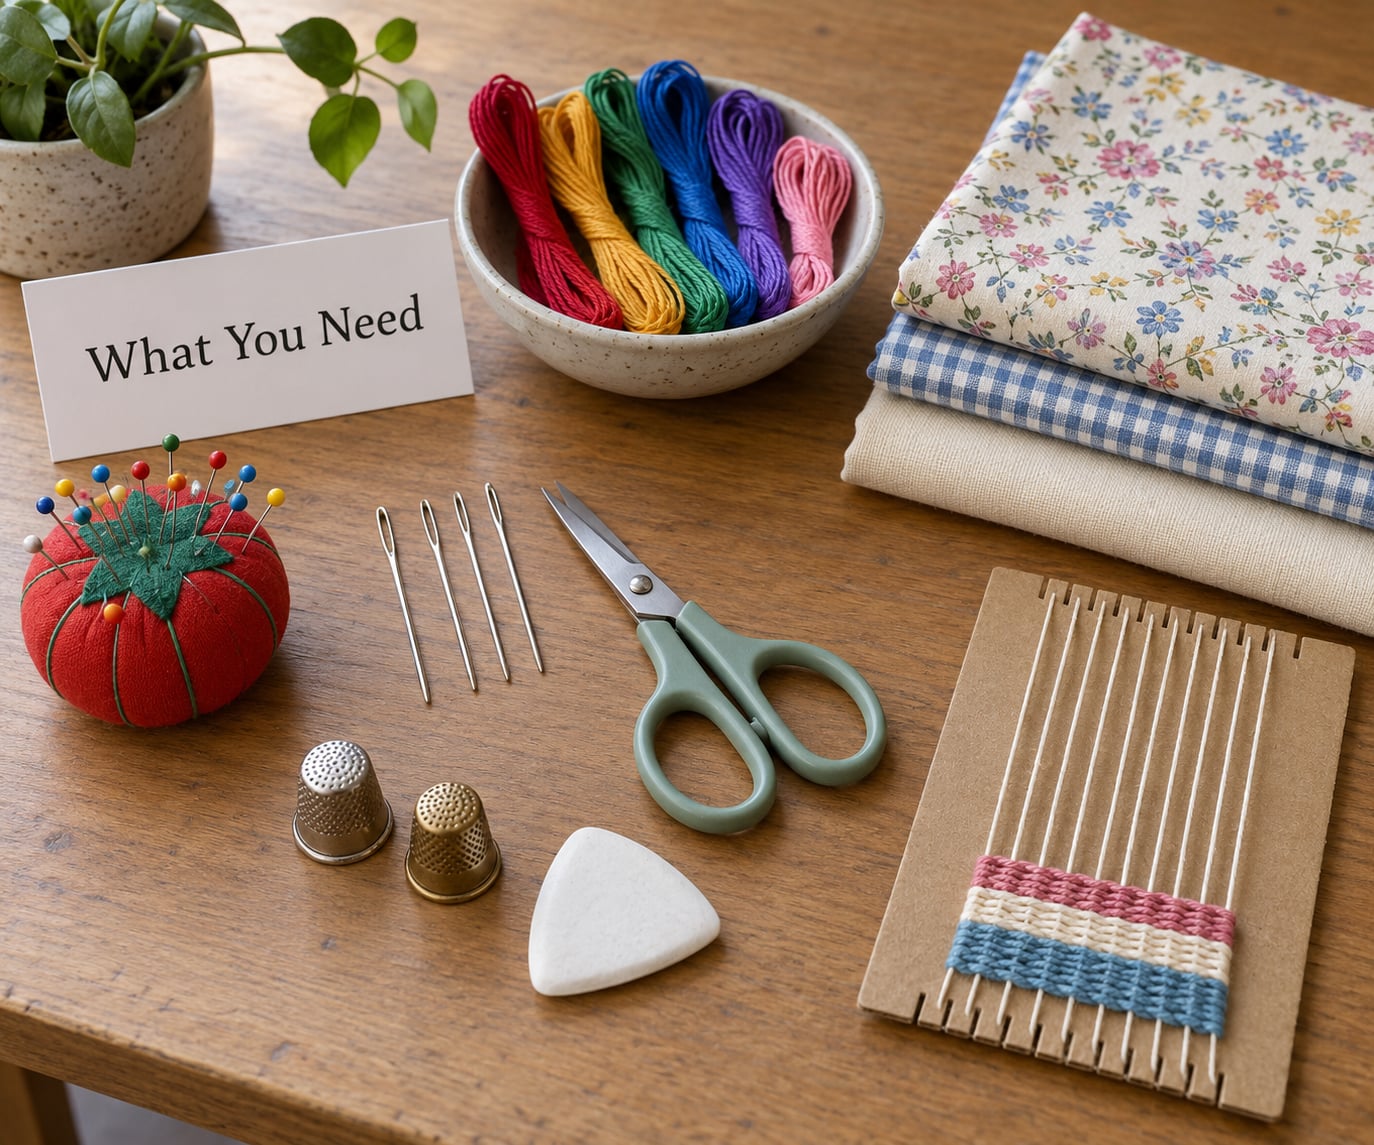
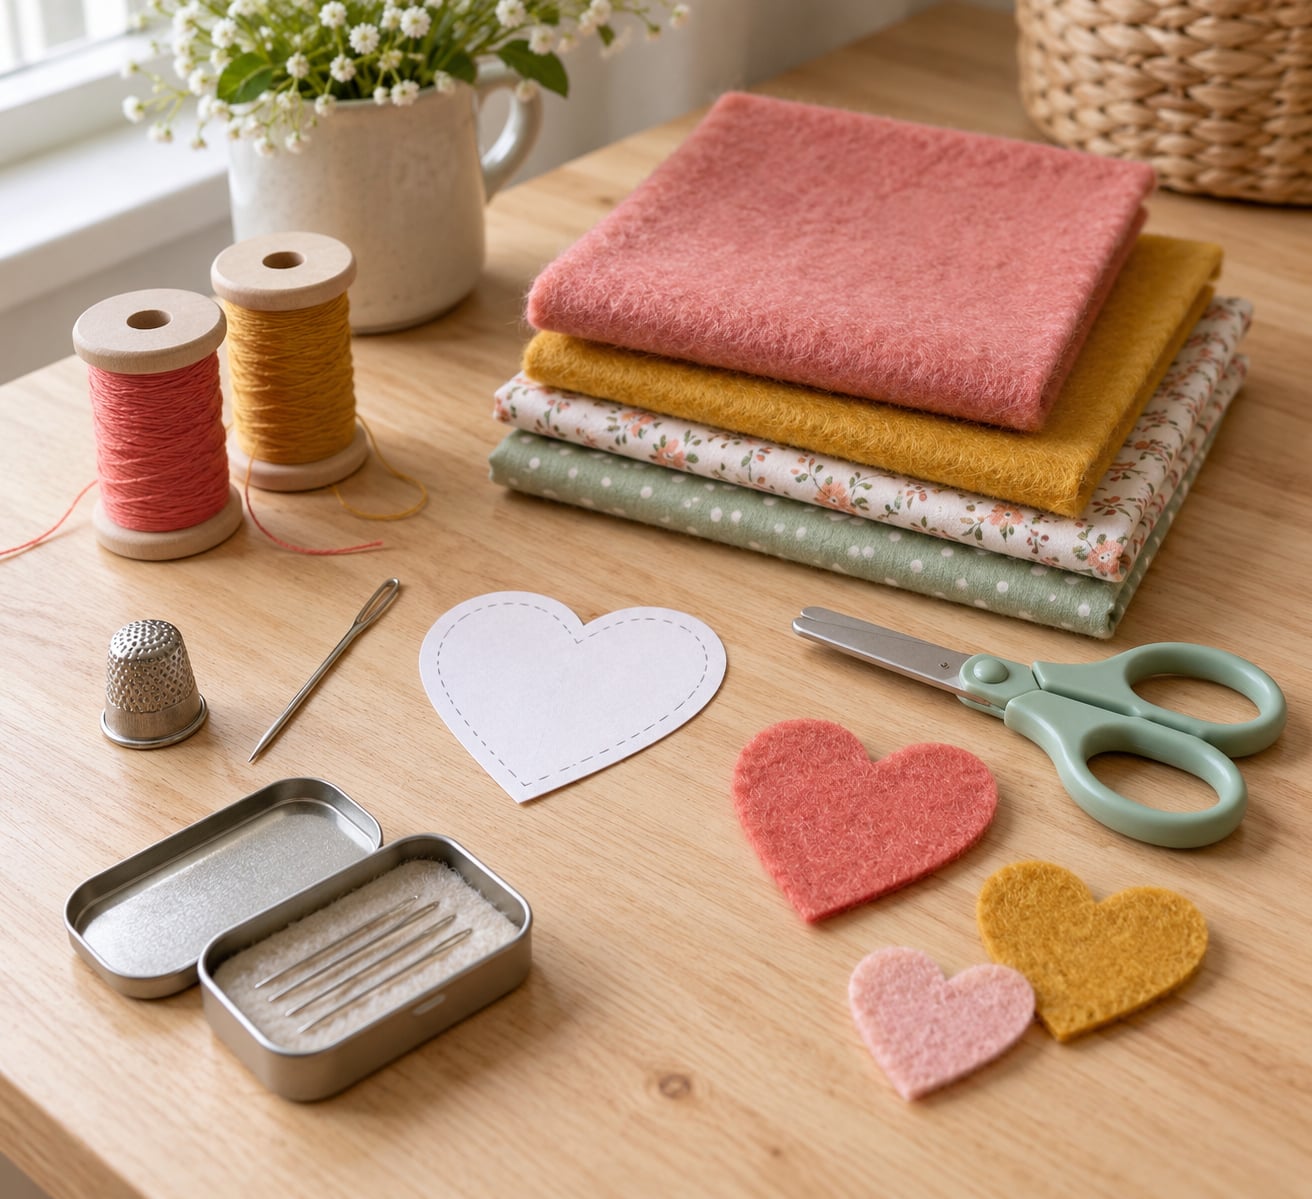
A good beginner kit fits in a shoebox, and you can assemble it entirely from scraps and old clothing. Nothing on this list is specialised or expensive.
- Needles. Start with blunt tapestry needles in a chunky size, roughly 13 to 16. A blunt needle will not bend when a child leans on it, and the wide eye is easy to thread. For a child under five, plastic lacing needles work too. Move to a sharp needle only after they sew a straight line without poking a finger.
- Thread. Pearl cotton thread or a single strand of embroidery floss is easier to see and less likely to snap than sewing thread on a spool. Cut it about 18 inches long; anything longer tangles in small hands.
- Fabric. Felt is the best first fabric because it does not fray and hides uneven stitches. Aida cloth, loose-weave burlap, craft foam and pre-punched plastic canvas are good next steps. Avoid stretchy jersey, silky polyester and anything sheer until the basics are solid.
- Scissors. Rounded-tip child-safe scissors for fabric, plus your own full-size pair for cutting shapes ahead of time. A heavy-duty hole punch is worth having for pre-punched felt.
- Guides and marking. A washable fabric marker or tailor’s chalk to draw lines, plus a small ruler so stitch spacing can be measured.
- A thimble. Optional, but it turns a pricked finger from an argument into a small lesson. Many sewists simply push the needle through a piece of cardboard instead.
- Extras. Poly fiber fill for stuffing, buttons, pre-punched felt puppet kits, a printed practice sheet, and a small magnetic needle case or dish so nothing rolls under the sofa.
Printed paper sewing sheets and lacing cards are free, searchable, and useful for a child who is not ready for a sharp point.
Step-by-Step: How to Teach a Child to Sew by Hand
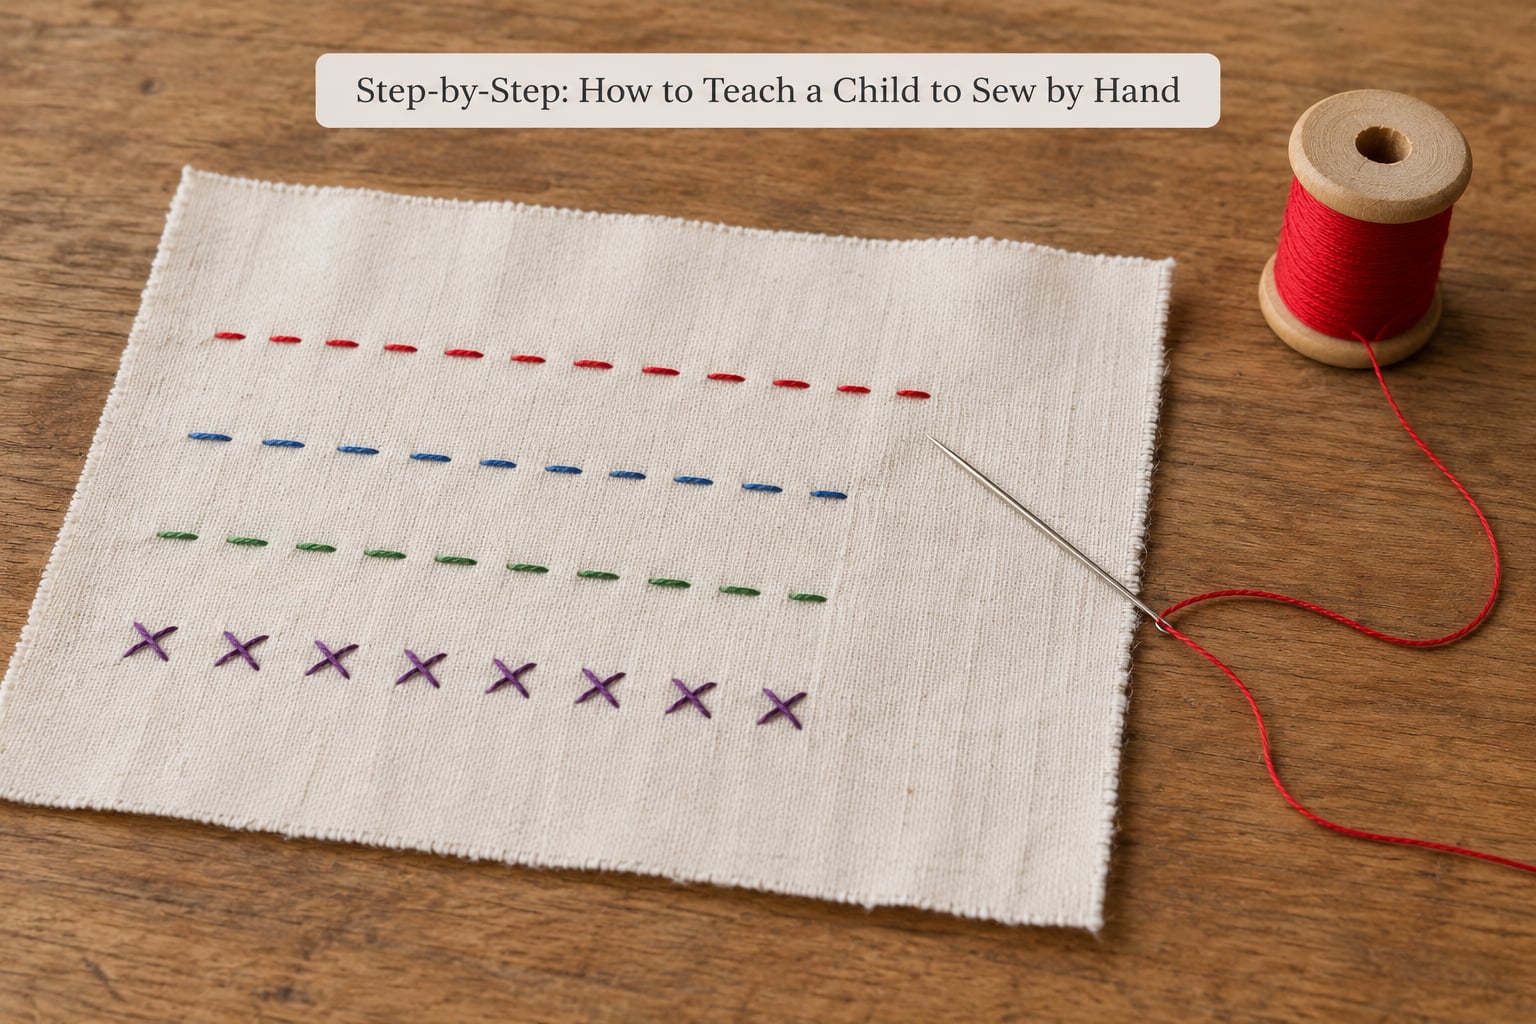
The method underneath every step is the same: demonstrate once on your own fabric, then let your child try immediately, and hold their hand over yours for the first few stitches. Parents report that guiding the hand works far better than talking someone through it, because a four-year-old cannot yet translate instructions into finger movements. Talk less, sew slower, and repeat.
Step 1: Set Up a Safe Sewing Space
Sit face to face or side by side so you can see where the needle is. Put a light-coloured sheet of paper on the table so a dropped needle is easy to spot, and keep the floor clear while sewing. Count the needles out before you start and count them in at the end. Children under six should sew with an adult within arm’s reach, and no child should be left alone with a sharp needle, even for a minute.
Cut the fabric roughly 6 by 6 inches. Anything smaller gives their hands nowhere to rest, and anything larger turns into a wrestling match. Draw three straight guide lines with a washable marker so there is always more to sew when one line is finished.
Step 2: Practice the Running Stitch
The running stitch is the first stitch to teach and the one they will use most. It is also the stitch most people picture when they think of how to teach a child to sew by hand, because it is simply a line of stitches with visible gaps.
- Cut the thread and tie a starting knot a half inch from the end. Lay the thread flat along the fabric, then poke the needle up through the fabric right next to the tail so the knot sits on top and cannot slip out.
- Push the needle from front to back about 5 mm along the guide line, then bring it back up a few millimetres further along.
- Repeat, pulling the thread through after each pass. Keep the stitch length the same every time by watching the marks on the thread rather than guessing.
- Have your child compare the finished line to the drawn line. The gap between the thread and the marker is the mistake to fix next time.
You can tell the stitch is ready to move on from when your child looks down between stitches instead of watching the needle. That is a sign the hands have taken over from the eyes.
Step 3: Teach Backstitching
Backstitching looks like a solid line of thread and is the strongest of the beginner stitches, which is why it is the one to use when something has to hold. Sew one stitch forward, then come back up through the hole just behind where you started, and repeat.
Give them two or three centimetres of line to work on. The tricky part is coming back up in the hole the thread just left, so slow down and point at the spot before they pull.
If you want the simplest possible way to keep a seam from pulling apart, backstitch is it. Whipstitch and blanket stitch join and finish, but neither holds a load the way backstitch does.
Step 4: Add Blanket or Whip Stitches
The whipstitch works on the edge of a shape rather than across it. Push the needle in at a slant, a few millimetres in from the edge, bring it out directly opposite, and repeat all the way around. Leave the last few stitches loose until the shape is closed, then tighten them.
The blanket stitch does two jobs: it joins two edges and it makes a firm border that stops felt from fraying. Sew straight down through both layers about 5 mm in from the edge, pass the needle under the previous stitch, and come back down through the same hole.
Teach one of these, not both, in a single sitting. A child who has just learned backstitch usually needs a few days before a new edge stitch makes sense.
Step 5: Sew a Small Felt Project
Pick something that finishes in one sitting and has no pattern to follow. A two-piece felt heart, a felt cookie, a simple puppet with pre-punched holes, or a small stuffed shape all work. Free play on a scrap of felt counts too, and some children do their best work with no project at all.
Cut the shapes yourself beforehand, or let your child cut them on marked lines while you hold the fabric steady. Fold the piece in half if it needs to be, pin it if the layers keep sliding, and sew from one marked point all the way around.
Stuff it about halfway and hand the rest to them. Children who over-stuff their own creations tend to end up frustrated, and a half-full seam is also easier to close.
When a child says the result does not look like the picture in their head, name what went well out loud. Expect a dozen wonky felt hearts before a pillow, and say so in advance so the wonkiness reads as progress rather than failure.
Step 6: Finish the Thread Safely
Finishing well is what stops a seam from coming apart in the wash, and it is the step adults usually rush. Turn the fabric over, take three small backstitches through the same hole at the end of the seam, then pull the thread until it sits snug.
Do not cut into the thread. Wind the leftover length around a finger two or three times, slide it off, and pull it under the stitches instead, so the tail disappears inside the seam. For a child who cannot manage that yet, a small dab of fabric glue on the knot is a fine stand-in.
Store the kit in a magnetic case or a closed tin, needle point down. End with the project and not with tidying, so the last thing your child remembers about the session is the thing they made.
Common Mistakes and Easy Fixes
Nearly every frustration in a first sewing session comes down to tension, thread length or fabric choice. These are the ones I would expect, with the fix for each.
Stitches come out uneven and the fabric puckers. The pull is usually too strong. Show your child to hold the fabric in the other hand and feed the thread through rather than yanking it, and mark the needle spacing on a ruler so the aim is visible rather than guessed.
The thread keeps tangling. Cut it shorter. 18 inches is plenty, and loops form fast when there is a long tail swinging around, so let the unused thread lie flat on the table instead of hanging.
The child pushes the needle with a thumb and pokes a finger. A blunt needle fixes this more reliably than any amount of instruction. If it keeps happening, the fabric is probably too stiff or too small, so switch to a larger piece of felt.
The fabric slides around and the layers come apart. Use two layers of felt, or hold the fabric taut in the non-sewing hand. A thimble or a scrap of stiff card under the needle also gives the point something solid to pass through.
Stitches get skipped or the thread breaks. The needle is probably being forced sideways through a woven fabric. Reposition the needle straight up and down each time, and check the thread for a nick on the scissors before blaming the material.
The knot at the end will not hold. Most children cannot tie a usable knot, so do the securing for them and teach it as a two-hand job next month. A doubled thread or a quick backstitch at the start helps more than extra pulling.
Frustration, and the session is finished. Stop sewing and switch to lacing, a plastic canvas card, or free stitching on paper. Attention spans with this age group run out somewhere around the 10 to 15 minute mark, so stopping while the child still wants to sew is the fastest route to them asking for the next one.
Two habits help more than any of the fixes. Sit down for the whole session so the child keeps your attention, and let them choose one variable, usually the fabric colour or the shape, so the project stays theirs.
Frequently Asked Questions
At what age can a child start learning to sew by hand?
Most children are ready around age four or five, once they can thread a large needle with help, hold a fabric square steady, and sit still for ten minutes. Younger children can start with lacing cards, plastic canvas and thick yarn, which build the same hand control without a metal point. There is no harm in waiting until seven or eight, and plenty of confident sewists started at nine.
What is the safest type of needle for a child who is sewing?
Begin with a blunt tapestry needle in a large size, or a plastic lacing needle for children under five. A blunt point will bend rather than spear a finger if a child leans on it, and the wide eye is much easier to thread. Count needles in before and after every session, keep them in a closed tin or magnetic case, and supervise continuously with anyone under six.
How long should a beginner sewing lesson be?
Ten to fifteen minutes is plenty for a four to six year old, twenty to thirty minutes for a seven to ten year old, and stop while they still want more rather than pushing to a tidy finish. Two short sessions a week build more skill than one long one. If your child asks to keep going, let them, and plan the next short session around the project they just finished.
Which fabric is easiest for a child to sew?
Felt is the easiest first fabric because it does not fray, is thick enough for a blunt needle, and hides uneven stitching. Aida cloth, loose-weave burlap, craft foam and pre-punched plastic canvas are good next steps because the grid or holes guide the needle. Avoid stretchy jersey, silky polyester and anything sheer, which slide and frustrate beginners more than the sewing itself does.
Should I teach my child to sew on a machine instead?
Hand sewing first, almost always. Children who can thread a needle, tie a starting knot and control thread tension move onto a machine in a few weeks, and they understand what the machine is doing for them. Machines also move too fast for a young child to react to, so most sewists suggest waiting until about eight to twelve for a pedal machine and going slower with it than they would alone.
How can I help a child who keeps pulling the thread too tightly?
Ask them to hold the fabric in the non-sewing hand and feed the thread through with the sewing hand, instead of yanking it away. Marking a target spacing on a ruler or a piece of tape gives them something concrete to aim at. You can also anchor the thread briefly under a finger of the holding hand, which lets them pull gently without the whole seam puckering behind them.
Start tomorrow with one square of felt, one blunt needle, and a marker. Draw a line, sit down together, and sew it in fifteen minutes. The skill compounds; the point of the first session is only to make them want the second one.