Learning how to thread a needle for kids is easier than most parents expect, and the fastest route is not the classic pinch-and-push method. Wet the cut end of the thread, hold the needle against a light background, and push the damp tip straight through the eye. It takes about two minutes and works from roughly age four upward.
Threading is the hardest fine-motor step in sewing, and it is where most first lessons stall. A child who can thread will keep sewing. One who cannot usually loses interest, drops the needle, and asks for a snack instead. That is why this skill is worth practising on its own for a week before any project begins.
Expect two or three attempts before it clicks. Most children need about a dozen goes at a lacing card or beads before the needle feels familiar, and that is a completely normal pace. We like to think of threading as a ten-minute skill rather than a first-project milestone, because putting it under pressure is what makes it hard.
Table of Contents
- 1What You Need
- 2Step-by-Step: How to Thread a Needle for Kids
- 31. Choose a needle that is easy to use
- 42. Cut and prepare the thread
- 53. Make the thread easier to see and control
- 64. Hold the needle steady
- 75. Guide the thread through the eye
- 86. Secure the thread and make the first stitch
- 97. Finish and repeat
- 10Common Mistakes
- 11Frequently Asked Questions
- 12Is there a trick for threading a needle?
- 13At what age can kids start threading a needle?
- 14Are sewing needles safe for kids to use?
- 15Can a 5 year old learn to sew?
- 16What age can kids start using safety scissors?
- 17How do I thread a needle when I have poor eyesight?
- 18Conclusion
What You Need
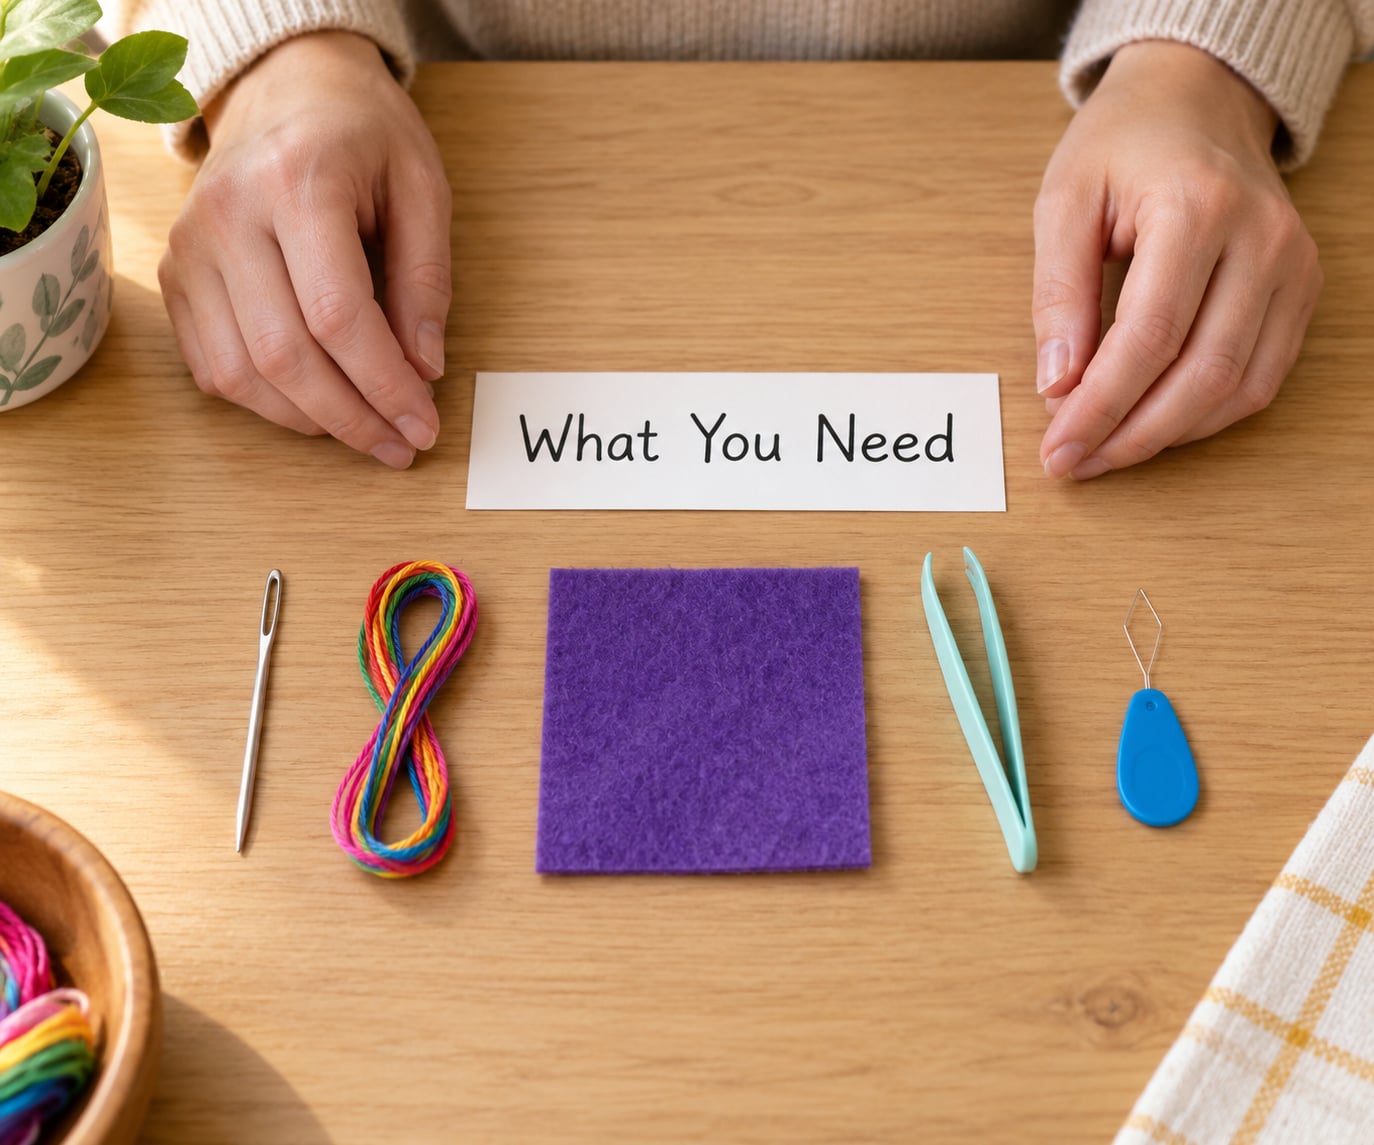
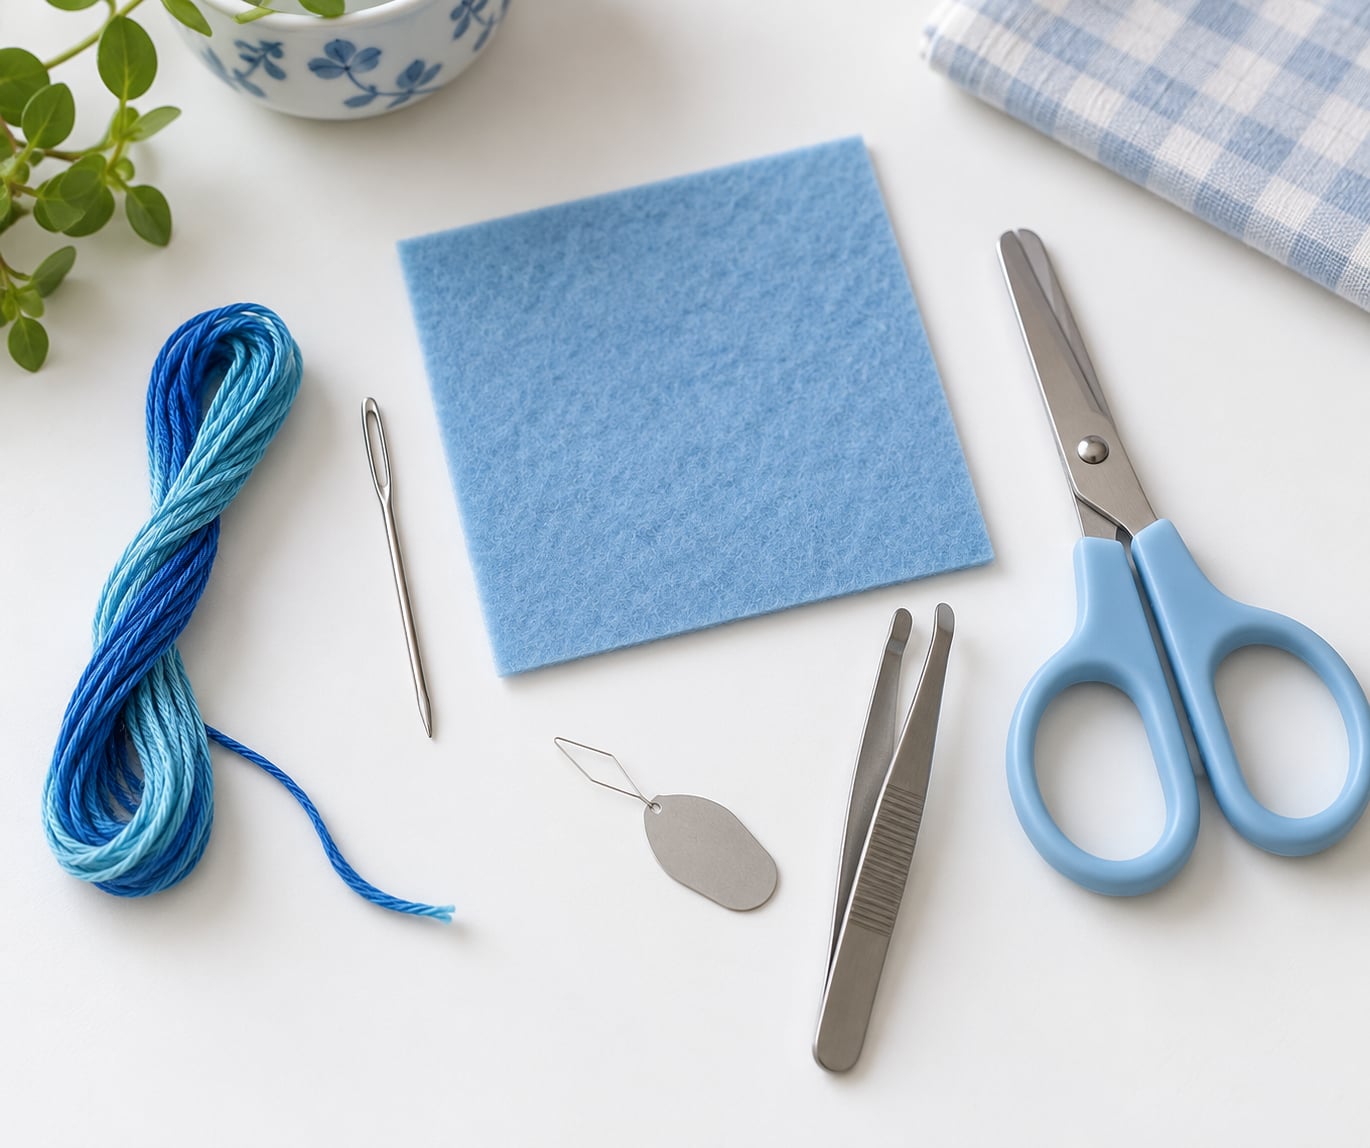
You need far less than a sewing kit implies. Grab these six things and you have everything required for a full lesson.
- A large-eye needle. The eye is the hole at the top where the thread goes. A wider eye makes the whole job quicker. Blunt or plastic needles remove the poke risk entirely, which is why most families start there.
- Embroidery floss or thick yarn. Floss is six strands you can hold together; thick yarn works well but tangles faster. Cut about 18 inches for a first attempt and less than 24 inches for a child who tends to lose control of the spool.
- A square of felt, fleece or burlap. These forgiving fabrics are recommended by experienced teachers because they barely show uneven stitching. Fleece and felt also need no hemming.
- A small pair of scissors. Rounded-tip kids’ scissors are appropriate once a child can hold them properly, usually around age four or five.
- A needle threader or blunt tweezers. Either one removes most of the difficulty. A needle threader is a tiny hook on a wire; tweezers grip the thread and push it through.
- A light background and a pin cushion. A sheet of white paper under the needle makes the eye visible, and a pincushion gives you a place to park the needle without losing it.
Add an embroidery hoop later, once stitching feels steady. For the threading lesson itself, felt held flat under one hand works better than a hoop.
Step-by-Step: How to Thread a Needle for Kids
1. Choose a needle that is easy to use
Let the child pick between two or three needles rather than handing them one. A large-eye blunt needle is the easiest, and it is the right first choice for most four to six year olds. Each needle is a separate decision, not a mistake.
2. Cut and prepare the thread
Cut the thread about the length of your arm, no longer. Wrap the cut end around a finger two or three times, then slide it off and pinch the wrapped section between your fingers. That twist keeps the loose strands from spreading apart, and it is the single biggest upgrade to a beginner’s thread end.
3. Make the thread easier to see and control
Dampen the twisted end with a few drops of water and roll it between your fingertips until it feels stiff and straight. Damp thread holds its shape and behaves like a tiny wire, so it will go through the eye instead of folding in half. A darker thread on light fabric, or a light thread on dark fabric, helps even more.
4. Hold the needle steady
Rest the needle on a sheet of white paper and have the child press a fingertip just behind the eye. Pinching the eye itself is the most common beginner mistake, because that is exactly where the thumb blocks the view. Resting the needle flat also keeps the point aimed away from fingers.
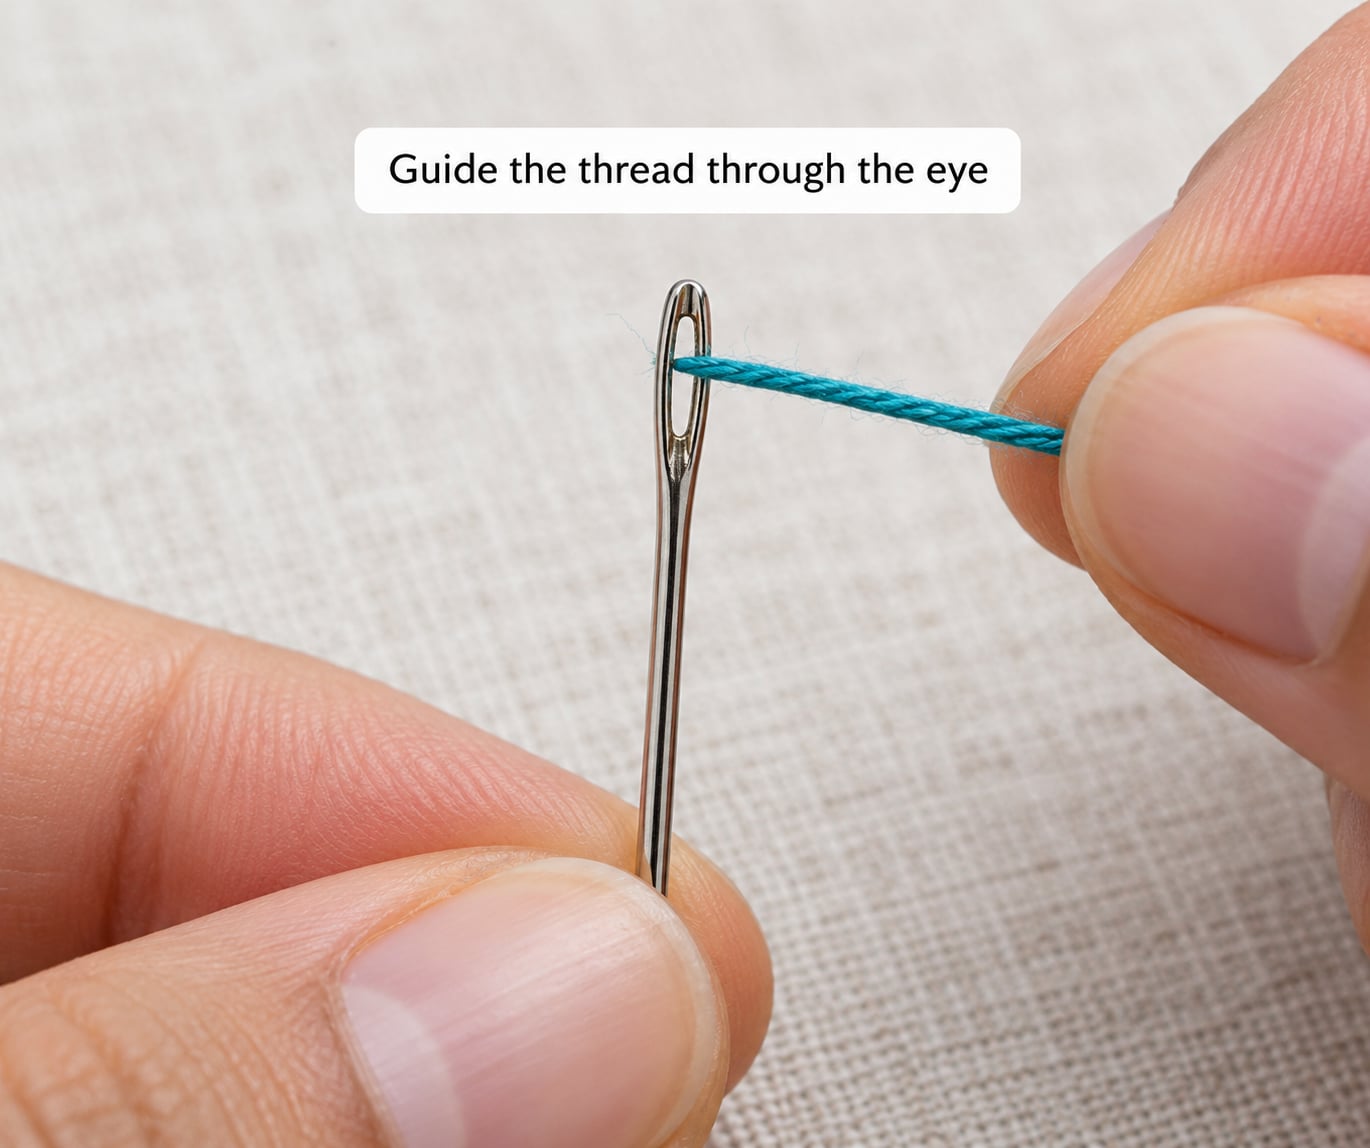
5. Guide the thread through the eye
Bring the stiff end to the eye and push it straight through, aiming away from you. Do not force it. If it catches, back off and try again with a fresh angle, and if it fails twice, switch to the needle threader or tweezers without comment. A child who never touches a metal needle is not behind; they are just doing the same skill differently.
Needle threader technique, once, for the adult: feed the wire loop through the eye from the front, put the thread end into the loop, pull the wire back down through the eye and the thread comes with it. It takes about five seconds and works with any thread thickness. Many parents keep one in a needle case permanently for their own sewing too.
6. Secure the thread and make the first stitch
Pull the thread through until both halves are about the same length, then twist the two strands together between the child’s fingers several times. Take the twisted loop and pass it over the standing strands, pull it tight, and repeat once. That is a simple secure knot and it will not slip mid-stitch.
Hold the fabric steady and push the needle up from the back, then down again about a quarter inch away. Tell the child to imagine drawing a dashed line rather than aiming for straightness. Wobbly stitches are a masterpiece, and saying so out loud prevents a lot of frustration.
7. Finish and repeat
To finish, tie a small knot at the end of the last stitch and tug gently, not hard. Then encourage the child to thread a second needle on their own while you talk about something else. The second attempt takes about fifteen seconds and that quick win is what makes the skill stick.
Common Mistakes
Almost every threading problem has a simple fix, and none of them mean the child is not ready.
- Frayed thread end. Twist the strands tight and wet them. A frayed end folds instead of entering the eye, so this fixes most attempts on its own.
- Thread too long. Long strands tangle faster than a child can pull them. Cut a fresh length of about 18 inches and knot the spool end to the spool.
- Cannot see the eye. Put white paper underneath and hold the needle flat against it. A magnifier or a bright lamp helps older children and adults with tired eyesight.
- Forcing the needle through fabric. If the needle will not pass, the fabric is too thick or the needle too large. Switch to felt, or use a slimmer needle. Pushing hard causes poking and tears.
- Thread slipping out mid-stitch. The knot was too loose or the eye is large. Pull the thread fully into the eye and wrap the two strands three times instead of once.
- Fabric bunching and distorting. Hold the fabric flat with the free hand, or pop the work into an embroidery hoop after a few rows.
One more worth naming: the thread coming off the needle and ending the session. When that happens, do not start over. Unwind about six inches, wet and twist the end again, and re-thread in fifteen seconds while the child holds the fabric. Parents on r/SewingForBeginners describe exactly this recovery as the difference between a child who keeps going and a child who quits.
On safety, stay within arm’s reach for the whole lesson, keep needles in the pincushion rather than loose on the table, and check fingers for small pokes at the end. Experienced teachers of twenty years plus keep sessions to ten or fifteen minutes, and stopping while the child still wants more is what builds the habit.
Frequently Asked Questions
Is there a trick for threading a needle?
Yes, the most reliable trick for kids is to dampen the cut end of the thread and roll it between your fingers until it feels stiff and straight. A stiffened end behaves like a tiny wire and goes through the eye instead of folding. A needle threader works even better mechanically, and either one removes most of the difficulty for small hands.
At what age can kids start threading a needle?
Most children are ready between four and six, once they have a controlled pincer grip and can thread beads or lace a card with big holes. Readiness matters more than age. Watch for a steady hand on a crayon, the ability to pick up one small item at a time, and enough patience to try twice without giving up.
Are sewing needles safe for kids to use?
Blunt plastic needles and large blunt needles are the safest starting point because there is no sharp point to poke a finger. If you use a sharp large-eye needle, stay within arm’s reach, keep the point moving away from the child, park needles in a pincushion, and check hands afterward. A poke is usually a small red dot that stops stinging quickly.
Can a 5 year old learn to sew?
Yes, and most do with help. Five year olds usually manage a straight running stitch if the holes are pre-poked or a line is pre-drawn on the fabric, and if the thread is thick enough to see. Expect a wobbly line, expect to re-thread once or twice, and stop while the session is still going well.
What age can kids start using safety scissors?
Most children handle blunt rounded-tip safety scissors around age four or five, once they can open and close them with one hand and hold paper steady with the other. Start with scrap paper and thick felt, which is easier to cut than paper, and supervise the whole time. Keep the blades closed when walking around.
How do I thread a needle when I have poor eyesight?
Use a self-threading needle, which has a V-shaped opening you press the thread into, or a large-eye needle. Sit on a white sheet of paper so the eye shows as a dark spot, and use bright thread against dark fabric or dark thread against light fabric. A magnifier and a needle threader make this much easier too.
Conclusion
Start with three things: a large-eye beginner needle, about 18 inches of embroidery floss, and a square of felt. Wet and twist the thread end, hold the needle against white paper, and push through in one go, keeping an adult close by the whole time. Two or three attempts in a single ten-minute session is a good first lesson. Once the second attempt lands on its own, the hard part is over and the fun projects can start.