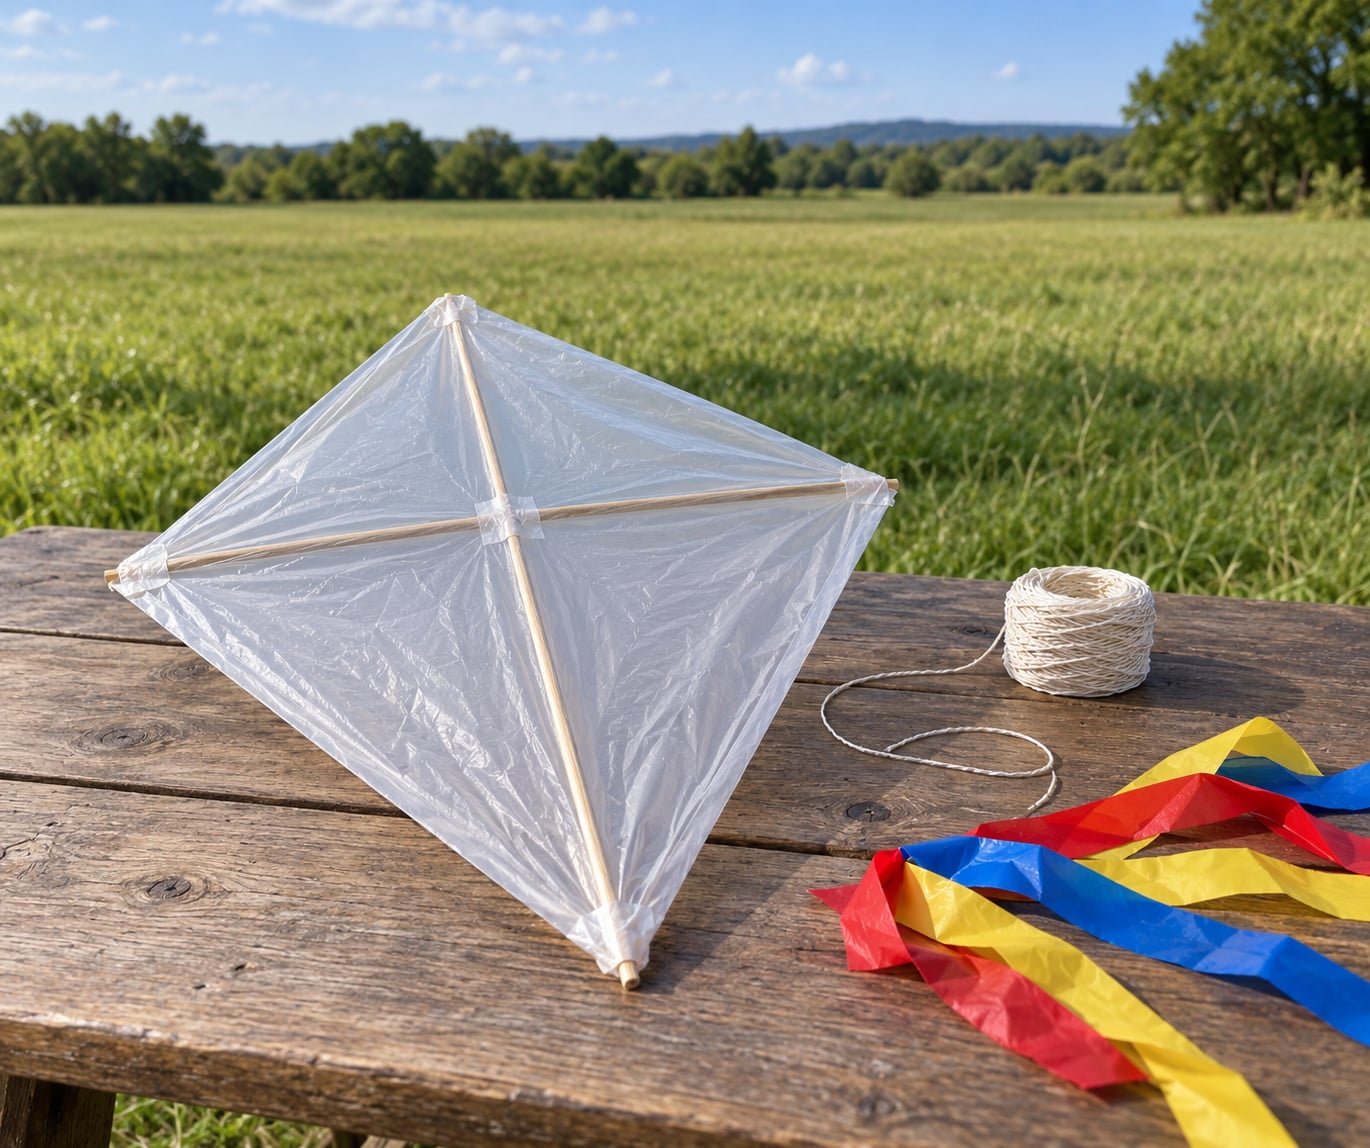
To make a kite from a trash bag, flatten a clean standard bag into a single sheet, tape it around a cross frame of two thin sticks, then tie a bridle string to the frame and add a ribbon tail. The whole build takes about 20 minutes and costs nothing, since every material is already in a kitchen drawer. The trick is bag choice: a thin standard bag flies well, supermarket carrier bags tear, and heavy industrial bags are too stiff for small hands.
I have built these with kids often enough to know where the frustration sits. It is almost never the assembly — it is the flying. Two minutes of setup attention at the bridle decides whether the kite climbs or spins like a leaf.
Table of Contents
- 1What You Need
- 2How to Make a Kite from a Trash Bag: Step-by-Step
- 31. Prepare a Clean, Lightweight Trash Bag
- 42. Cut the Diamond Shape
- 53. Build the Frame
- 64. Attach the Spars to the Bag
- 75. Add the Bridle and Tail
- 86. Test and Fly the Kite Safely
- 9Common Mistakes
- 10Frequently Asked Questions
- 11What kind of trash bag works best for a kite?
- 12What size trash bag should I use for a kite?
- 13How much wind is needed to fly a trash-bag kite?
- 14How do I stop the kite from diving or spinning?
- 15Is it safe for children to fly a kite made from a trash bag?
- 16Can I recycle a trash-bag kite after using it?
- 17Conclusion
What You Need
Here is the full supply list for one large diamond kite, with one line on why each item matters.
- One clean, thin trash bag — a standard 33 gallon kitchen bag works best. Skip the flimsy supermarket carrier bags and the heavy-duty industrial ones.
- Two lightweight sticks — bamboo, wooden dowels, garden sticks, or barbecue skewers. About 24 inch for the vertical spar and 18 inch for the horizontal.
- Strong string or cord — kite line, waxed cotton cord, or heavy twine. Cotton clothesline breaks too easily at the bridle.
- Tape — clear packing tape for the plastic, and either masking or duct tape for the frame joints.
- Scissors — a grown-up handles cutting the bag.
- Ribbon or plastic strips — cut from the bag itself or from old wrapping ribbon, for the tail.
- A marker — optional, for decorating before assembly.
The bag matters more than any other item on this list. A thin standard bag has just enough body to hold a shape and just enough give to fill with wind. Heavy-duty bags can be sluggish and difficult for a child to launch, and the very thin ones tear the moment a stick pushes through.
Have an adult do the cutting and knot-tying, and fly the finished kite outdoors with a child in tow. Everything here is safe material, but kite string near roads or trees is not.
How to Make a Kite from a Trash Bag: Step-by-Step
1. Prepare a Clean, Lightweight Trash Bag
Open the bag fully and spread it on the floor or a table, printed side down. Cut straight up one side seam and along the bottom seam so the bag opens into one flat rectangular sheet with no gussets folding into the middle.
Run your hand across the sheet and check for holes, split seams, and stiff printed coating. You want a continuous surface, because any tear sits exactly where a spar corner will pull hardest. Success check: the sheet lies flat with no pockets or ridges.
2. Cut the Diamond Shape
Mark the center of the sheet and cut a large symmetrical diamond around it, leaving roughly 2 inch of extra plastic past each corner. The extra material folds over the sticks and gives the tape something to grip.
Equal sides matter more than perfect straight lines. If one edge is noticeably longer or shorter, the kite will sit crooked in the air and pull to one side. Success check: with the point facing you, the left and right edges mirror each other and the center of the sheet sits in the middle of the diamond.
3. Build the Frame
Lay the 24 inch stick vertically, then tape the 18 inch stick across it about one third of the way down from the top so both sticks stick out roughly equal amounts on each side. Wrap tape around the joint on all four sides and pull it tight as you go.
Flat, rigid sticks beat round ones. A round dowel rolls under tension and slowly twists out of shape in flight, so press the joint flat against a table while the tape grips. Success check: the frame lies perfectly flat on the table with four evenly spaced arms and no wobble at the cross.
4. Attach the Spars to the Bag
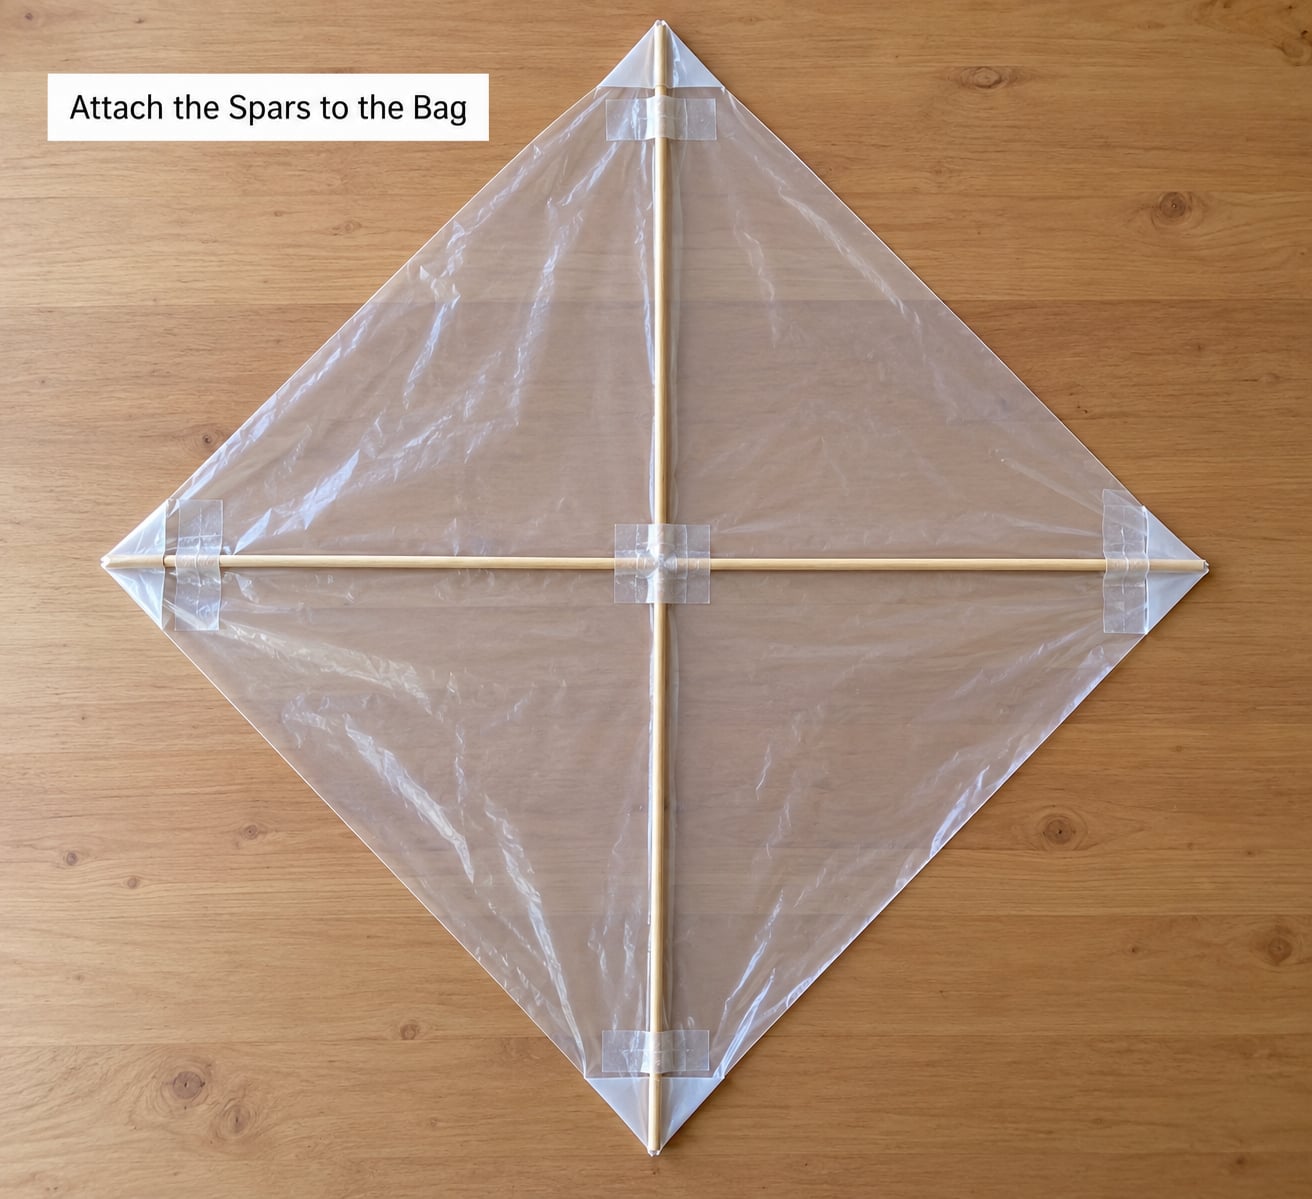
Wrap each of the four diamond corners around the end of a stick arm and tape it down flat on the plastic. Keep the two sticks at right angles to each other while you work, and pull the sail gently until it sits taut with no slack folds between the spars.
Tape fails on slick plastic more than on any other surface, so press each strip down firmly and run a fingernail along the edge. If a corner keeps lifting, add a second strip crossing the first at a right angle. Success check: the sail looks evenly tensioned and no gap remains that the wind could catch and flutter.
5. Add the Bridle and Tail
Cut a 24 inch length of string. Tie one end to the cross of the frame where the sticks meet, run it to the middle of the horizontal stick, and tie the other end there. That forms a bridle loop roughly a third of the way down from the top of the kite.
Now make a tail: cut two or three 3 foot strips from the leftover bag or use ribbon, tie them to the bottom corner of the sail, and knot the flying line to the bridle loop. Test it by holding the kite up by the line — the pull should pull into the wind, the kite should sit nose-up, and the tail should hang loose. A tail that twists into itself will mess up the flight just as badly as a missing one.
6. Test and Fly the Kite Safely
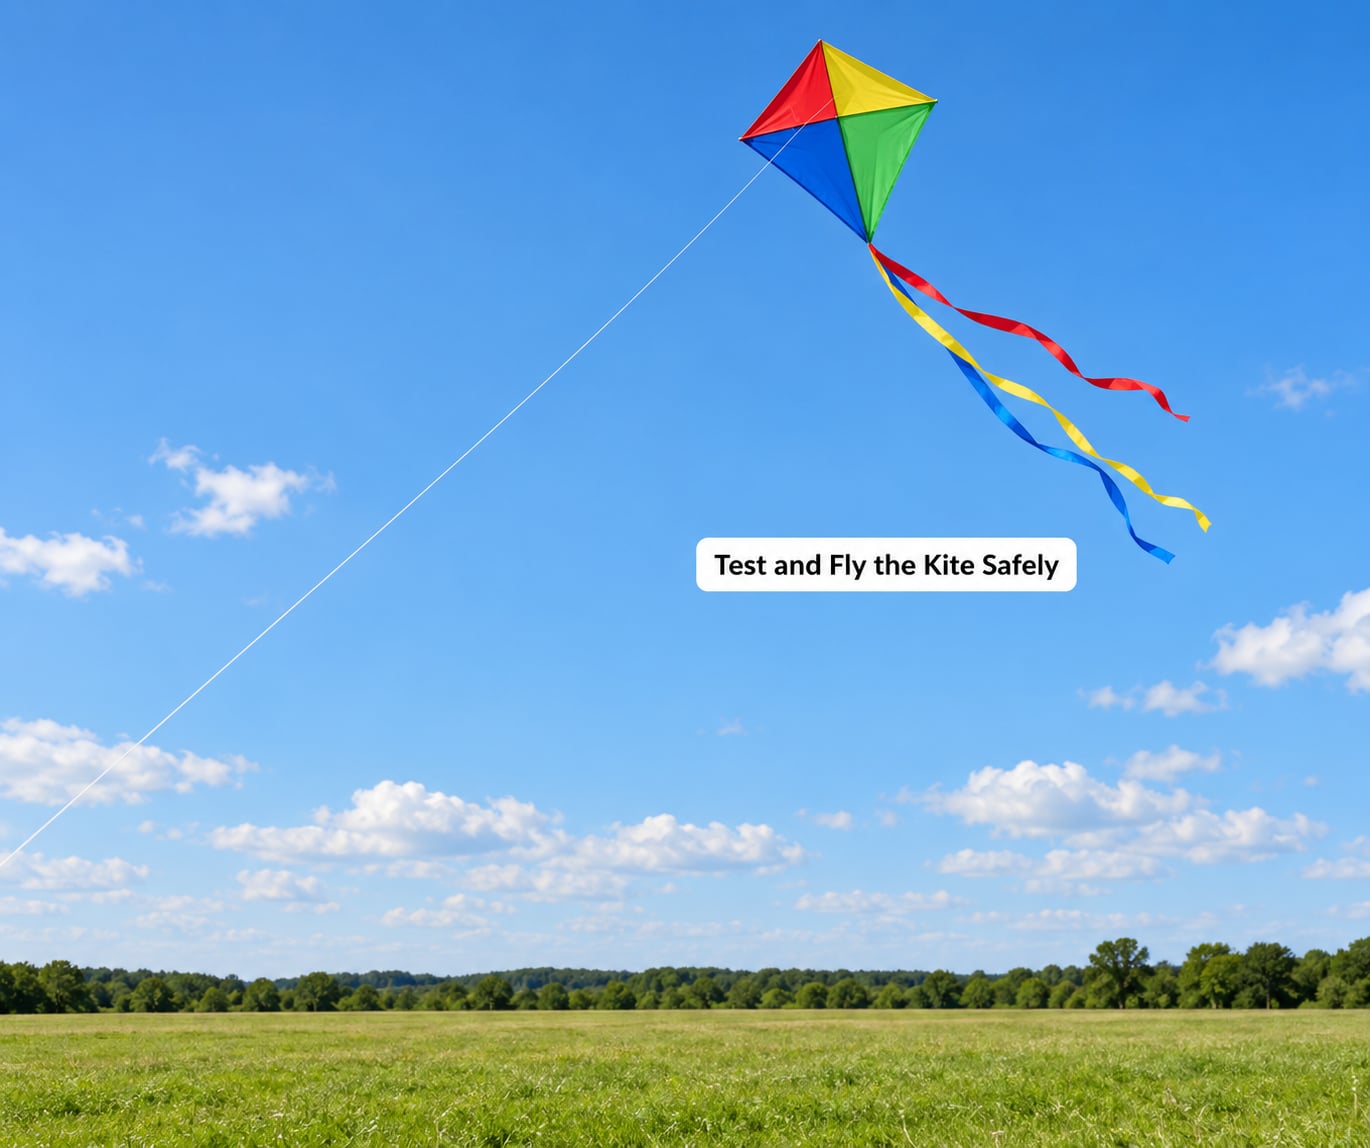
Pick a wide open space away from power lines, roads, trees and airports. Stand with your back to the wind, have a helper hold the kite up behind you, and let out line in small steps of about 10 feet at a time.
Release the kite upward, not forward, into a steady breeze. If it noses over, let line out a little more and tug gently to build speed. Keep the line at a comfortable angle above your head and never wrap it around your hands.
If the kite noses down, move the bridle tie point up the frame. If it stalls or noses up too steeply, move the tie point down. Small moves of half an inch change the angle of the sail against the wind, and that adjustment is the whole difference between a kite that climbs and one that flops.
Common Mistakes
Nearly every failed kite has one of these causes, and each has a quick fix.
An uneven diamond cut means the sail pulls to one side. Recut it rather than fighting it — a symmetrical diamond flies predictably on the first launch.
Crooked or weak spars twist under tension and ruin the shape. Use flat sticks, tape the cross on all four sides, and check the frame lies flat on a table before you tape the plastic on.
Insufficient tape on slick plastic lets a spar slip out mid-flight. Press each strip down hard with a fingernail and cross a second strip over the corner at a right angle.
A bridle tied too high or too low changes the angle of attack. Too high and the kite stalls, too low and it noses over. Slide the tie point a little at a time until it holds its own angle.
A tail that is too short or too light is the most common reason a kite spins endlessly. Lengthen the tail to three times the height of the kite and add more strips if it still turns circles.
Poor launching technique wastes a good kite. Face into the wind, release upward rather than forward, and let line out gradually instead of dumping it all at once.
Two habits help more than anything else. Use a fresh bag each time, because a bag stretched by one flight never holds tension the same way again. And when a windless afternoon ruins a launch, hang the kite in a hallway or garage and wave a sheet of paper at it to hear whether the frame and sail are pulling evenly before you head back outside.
Frequently Asked Questions
What kind of trash bag works best for a kite?
A standard thin kitchen bag, around 30 to 33 gallon, is the best choice. It holds a taut shape and fills with wind without being heavy. Very thin supermarket carrier bags tear as soon as a stick pushes through, and heavy-duty industrial bags are too stiff for a child to launch. Skip printed bags with a thick coating too, since the plastic will not flex.
What size trash bag should I use for a kite?
For a first kite, use one standard 33 gallon bag, which opens into a sheet roughly 36 by 30 inch once you cut the seams. That suits a 24 inch vertical spar and an 18 inch horizontal one. Younger children do well with a smaller 13 to 20 gallon bag and sticks around 16 and 12 inch. Anything bigger is for adults, because the launch needs a firm pull.
How much wind is needed to fly a trash-bag kite?
A light to steady breeze is right, roughly 5 to 12 miles per hour, the kind of day when leaves move and flags lift. Too calm and the kite has nothing to push against. Too strong and it pulls hard enough to strip tape off the corners or tangle the line. Wind between two open areas is usually steadier than wind near buildings or trees.
How do I stop the kite from diving or spinning?
Spinning almost always means the tail is too short or light, so lengthen it to three times the kite height and add another strip. Nosing over means the bridle sits too low, so tie it a little higher on the frame. If the kite stalls and drops backward, move the tie point down instead. Change one thing at a time and it will hold.
Is it safe for children to fly a kite made from a trash bag?
The materials themselves are harmless. An adult should handle the scissors and any hot glue, and children should be supervised the whole time. The real risk is the location and the line: never fly near power lines, roads, airports or trees, and never wrap kite line around fingers or hands. An open field with a steady breeze is the safe choice.
Can I recycle a trash-bag kite after using it?
Yes, and that is one of the nicer parts of the project. A plastic trash bag goes into household recycling once it is clean and dry, so remove the sticks, tape and string first and cut the plastic free. A paper bag kite is trickier, since it usually has to go in the compost or bin rather than the recycling. Check your local rules either way.
Conclusion
Start by cutting a symmetrical diamond with extra plastic at each corner, then tape all four spars down firmly so the sail sits taut with no loose folds. Test the balance in a light breeze before you try a long flight, and adjust the bridle tie point a fraction at a time until it holds its own angle.
Once it climbs, keep the modifications small: longer tail, wider-open space, fresher bag. That is the whole craft, and it costs nothing at all.