To make a tie dye shirt with food coloring, soak a white shirt in a 1:1 mix of white vinegar and water for 20 to 60 minutes, fold and tie it, soak the fabric in warm water with liquid food coloring, then seal it in a plastic bag for 6 to 8 hours. A short salt bath and a cold rinse lock the color in.
Budget about 20 minutes of hands-on work, plus an overnight wait. Kids can handle nearly all of it, since food coloring is non-toxic and you probably already have vinegar, salt and rubber bands in the house.
One honest warning before you start: food coloring gives a softer, paler result than a commercial tie dye kit, and it bonds best to protein fibers like wool and silk. On cotton the color is real but gentler, so expect soft pastel-to-medium tones rather than neon. Set your expectations and the shirt will not disappoint you.
The color also bleeds. Plan to wash it on its own, in cold water, for the first several washes.
Table of Contents
- 1What You Need
- 2Which Fabrics Take Food Coloring
- 3Step-by-Step
- 4How to Prepare and Fold the Shirt
- 5How to Mix and Apply Food Coloring Dye
- 6How to Set, Rinse, and Dry the Shirt
- 7Making the Color Last Longer
- 8Common Mistakes
- 9Frequently Asked Questions
- 10Can you really make a tie dye shirt with food coloring?
- 11How long should a food coloring tie dye shirt set before rinsing?
- 12Does food coloring work on polyester or other synthetic shirts?
- 13How do I keep food coloring from bleeding outside the design?
- 14Is a food coloring tie dye shirt safe to wear after it dries?
- 15Can I use food coloring on a shirt that is not white?
- 16Conclusion
What You Need
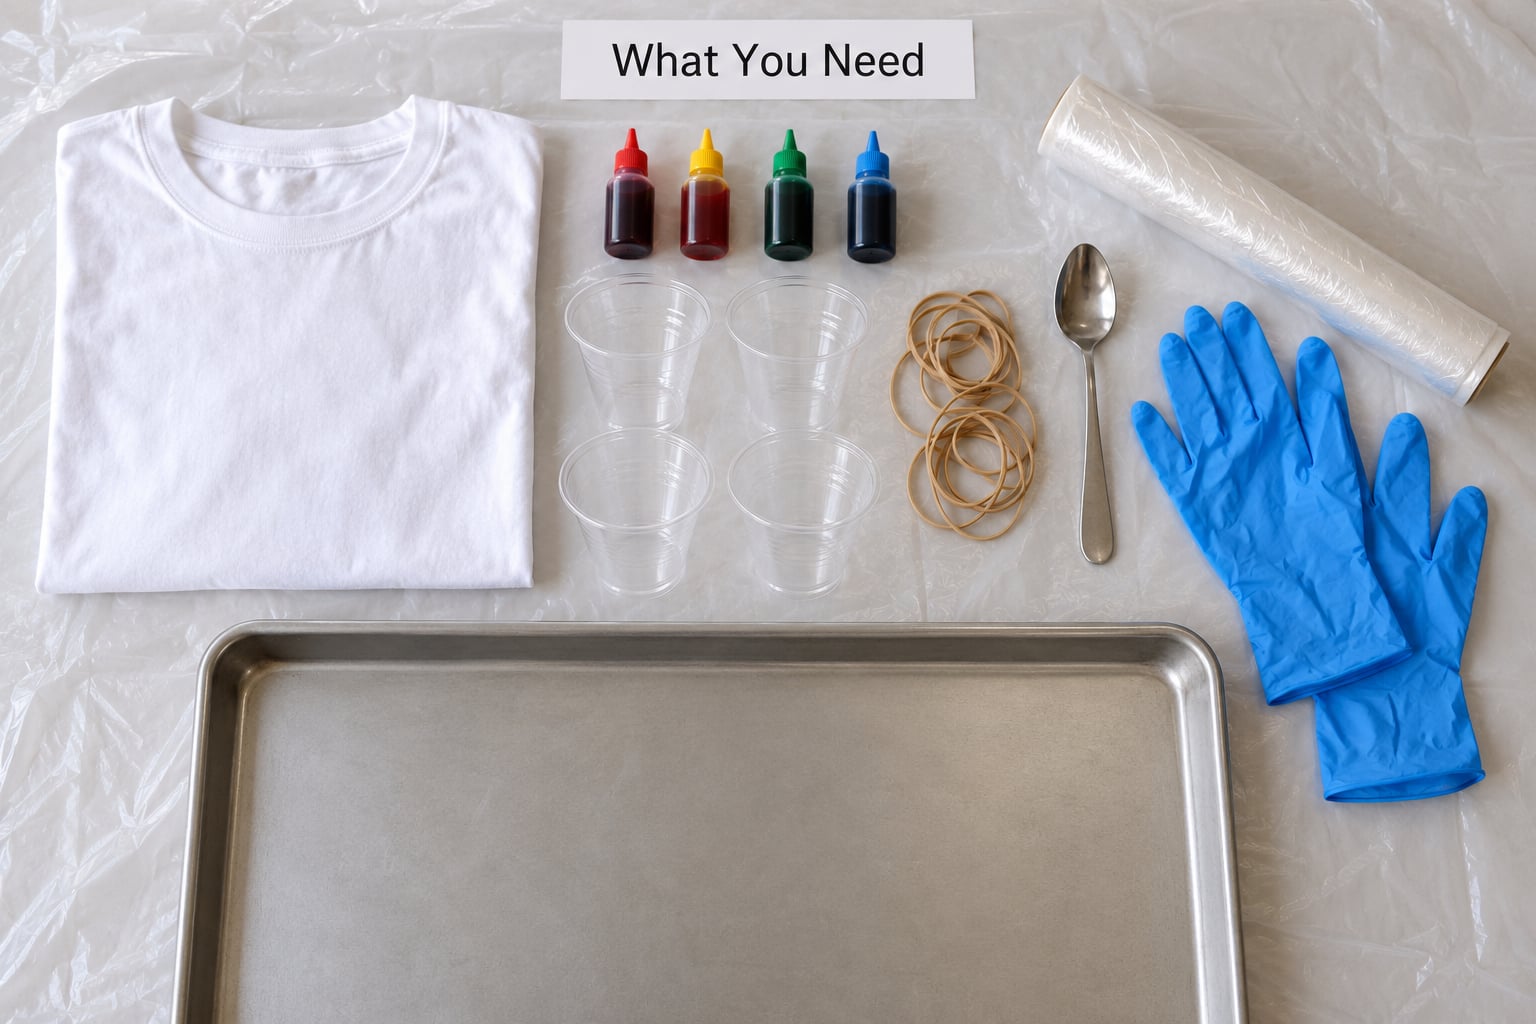
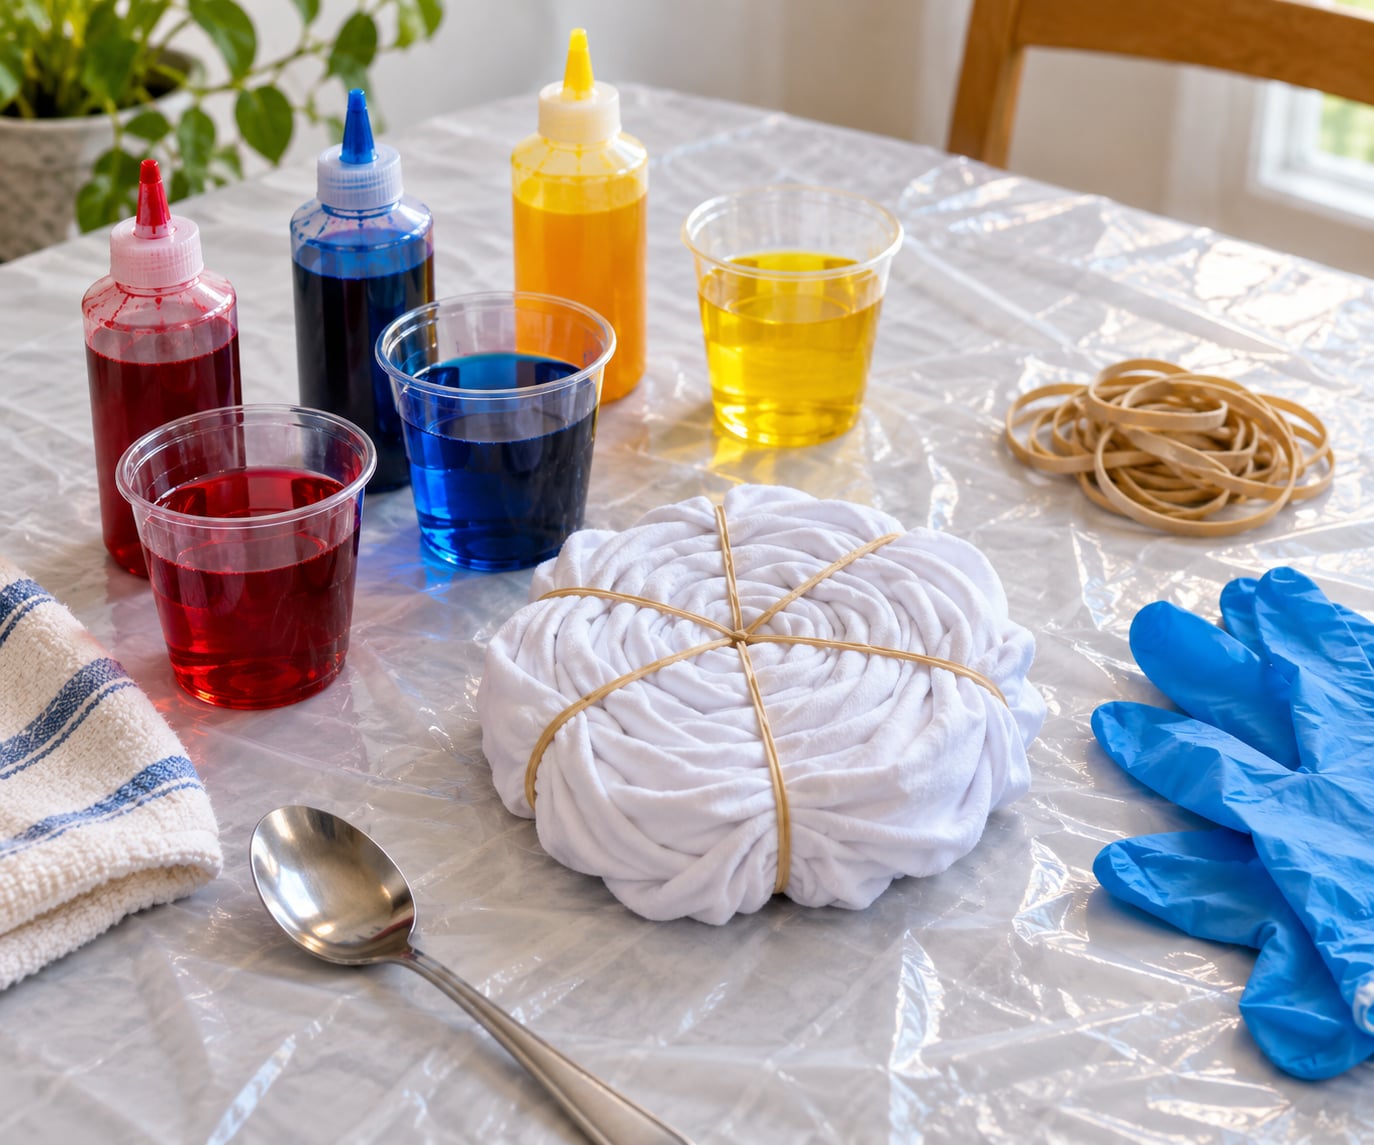
Gather everything before the shirt goes into the dye bath. Scrambling for a cup while you have dye on your hands is the fastest way to a streaky result.
- A plain white shirt, 100 percent cotton. A bleached or bright white one takes color best. Size does not matter much, since a larger shirt absorbs more dye and takes longer to rinse.
- Liquid food coloring. Standard 4 ounce bottles are plenty. Use liquid, not gel or paste. Gel coloring carries too much thickener and spreads poorly through wet fabric.
- White vinegar, about 2 cups. This is your mordant, the acidic pre-treatment that helps dye bind. Lemon juice or apple cider vinegar work as substitutes at the same ratio.
- Table salt, about 1 cup. Used later in the fix bath.
- Clear cups or bowls, 4 to 6 of them. One per color keeps the colors clean.
- A spoon or stir stick per cup. Wooden spoons or plastic spoons are fine, no metal.
- Rubber bands or twist ties. These are the resist. The number you use sets how many stripes you get and how white the protected areas stay.
- Heavy-duty garbage bags or a plastic tablecloth. For wrapping and lining your work surface.
- Rubber gloves and an old towel. Optional, but dye stains skin and countertops.
- A cooling rack and a baking sheet. For drying the shirt flat instead of letting it sit in a puddle of dye.
- Warm water, about 4 cups, plus access to a microwave, kettle or warm tap water. Dye spreads far better in warm water than cold.
As a rule of thumb, one 4 ounce bottle of food coloring handles two or three shirts comfortably. A single shirt uses roughly 8 to 15 drops per half cup of water, so a full bottle goes a long way.
Working with young children? An adult should handle the vinegar pre-soak and the final rinse, and you should keep the dye bath somewhere the kids cannot reach it. Food coloring is safe to eat, but the vinegar bath is not.
Which Fabrics Take Food Coloring
Here is the part most guides gloss over. Food coloring is an acid-based dye, and it grabs onto protein fibers far more readily than plant fibers. Checking your fabric before you start saves a ruined shirt.
| Fabric | How food coloring behaves | Verdict |
|---|---|---|
| Wool | Deep, even color that holds up well | Best result |
| Silk | Rich color, delicate handling needed | Excellent |
| Nylon | Bright, holds reasonably well | Very good |
| Rayon and viscose | Decent take, similar to cotton | Fair |
| Bamboo | Takes color, but softly | Fair |
| Cotton | Color sits on the surface and fades fastest | Use extra dye |
| Linen | Very pale, takes dye unevenly | Weak |
| Polyester and acrylic | Almost nothing bonds | Skip it |
A 100 percent cotton shirt still works, and most people have one on hand. The trick is more dye, less water and a longer soak, which is exactly what the steps below do.
Step-by-Step
Read the whole sequence once, then work through it. Each stage depends on the one before it, so skipping the acid pre-soak or rushing the set time is what turns a bright shirt into a pale one.
How to Prepare and Fold the Shirt
Wash and dry the shirt first, then soak it in the vinegar bath.
Mix 1 cup of white vinegar with 1 cup of water in a sink or large bowl. Submerge the shirt, weigh it down so it stays under the surface, and leave it 20 to 60 minutes. Longer soaking gives a more even acid treatment. Do not rinse it out. You want the fabric damp and slightly sour-smelling when you move on.
Lay the damp shirt flat and pick your pattern. Each one creates a different result, and all four work with rubber bands alone.
- Spiral: Twirl the shirt from the center outward into a rope, coil it flat, then band it every inch or two. You get a bullseye with a color gradient. Easiest pattern for a first attempt.
- Accordion stripes: Fold the shirt into a long strip, then fold that strip back and forth like a fan. Band across the folds. More bands means more, narrower stripes and whiter gaps.
- Crumple: Scrunch the whole shirt into a damp ball, band it in several places, and apply color to every surface. The result is mottled and random, with no white showing through.
- Starburst: Pull sections of fabric out from the center and band each one near its tip, like a star. Color lands on the tips, so this pattern shows off bright dye better than a spiral.
Fold tightly and band firmly. A loose fold lets dye seep into the layers you meant to protect, and that is the usual reason a stripe pattern turns into a blur.
How to Mix and Apply Food Coloring Dye
Put one color in each cup and dilute with warm water until the fabric drinks it up.
Fill 4 to 6 clear cups with half a cup of warm water each. The table below covers the drop counts that beginners actually use.
| Result you want | Liquid coloring per half cup | Best for |
|---|---|---|
| Pastel | 5 to 8 drops | Accent colors, first-timers |
| Medium | 10 to 15 drops | Most cotton shirts |
| Bold | 20 to 30 drops | Darker cotton, narrow stripes |
| Gel coloring | About half a teaspoon | Mix into warm water first |
Stir each cup until the color is even, then dunk the tied shirt into cup number one and work the dye into the folds with your hands. Squeeze the fabric gently so the color pushes into the creases rather than sitting on top. Rotate through the remaining cups, dumping the shirt from one to the next until every section has been dyed.
You are done when the fabric is saturated and no white shows. Dry spots in the bundle turn into pale patches you cannot fix later, so take two minutes to spread the shirt out and check before you wrap it.
For finer control, put the dye in squeeze bottles or plastic condiment bottles. A thumb tack works well to poke a nozzle in the cap of a flat water bottle, which gives you a thin stream for lines and spirals.
A word on color combinations. Color mixing here is additive, not subtractive: every drop adds pigment, so overlapping colors get darker and muddier rather than blending into something new. Blue and yellow together make green, which is one of the few combos that behaves the way people expect. Red and green, blue and orange, and brown with any other brown all go murky fast. Pick two or three colors that sit near each other on the color wheel, keep red out of green, and give each color its own clean cup.
How to Set, Rinse, and Dry the Shirt
Seal the dyed shirt in a bag and let warmth and time do the bonding.
Double-bag the bundled shirt, or push the bag neck into a second bag and tie it shut. Single bags leak during an 8 hour sit, and that leak lands on your floor, not in the shirt. Leave a little air in the bag so the dye solution can move, then set the bag in a warm spot. A sunny windowsill, a top-shelf laundry machine or a radiator works; warmth and time are what push the color deeper.
Give it 6 hours minimum, and 8 to 12 hours if you have the patience. This is the step people rush, and rushed shirts come out patchy every single time. Overnight works well if you start the evening.
Then run the salt fix. Mix half a cup of table salt into half a cup of water in the sink. Unwrap the shirt, slide the rubber bands off, and submerge it in the salt bath for 10 minutes. The salt pulls loose dye molecules toward the fiber and helps hold them there.
Rinse in cold water until the runoff runs clear. Hold the shirt under the tap and watch the stream, not the color of the water in the basin, since the basin always looks tinted. Expect a pale tint for several minutes. When it runs clear, the unfixed dye is gone.
Do not wring the shirt. Squeeze the water out, lay it flat on a cooling rack set over a baking sheet, and air dry away from direct sun. Hanging a wet dyed shirt lets a heavy fold sit in pooled dye and prints a dark stripe down the front.
Once dry, wash it alone in cold water with a little mild detergent. Many people skip detergent on the first wash and rinse in plain cold water instead, which keeps any remaining loose color from stripping. Either way, the first three to five washes should be solo loads, and you should expect color in the water for a while.
Making the Color Last Longer
Four habits make the difference between a shirt that still looks good in a year and one that looks washed out in a month.
- Use more dye than feels necessary. On cotton, 20 to 30 drops per half cup beats the timid 8 drops most recipes suggest.
- Add a fixative if you have one. A commercial dye binder used in the final rinse gives noticeably longer color. It works on food coloring as well as kit dye.
- Soda ash works too. One tablespoon of soda ash in your dye water raises the pH, which helps the color bond. A few readers use it in place of the vinegar soak, and report better saturation on cotton.
- Wash cold, inside out, and alone. Hot water and a crowded dryer are what fade a dyed shirt fastest.
Common Mistakes
Almost every disappointing tie dye shirt comes down to one of these. Each has a straightforward fix.
The color is pale and washed out. Usually too little dye or too much water. Add more drops, use less water, and extend the bag time to a full 12 hours. On cotton, a second dye session the next day deepens the color noticeably.
There are pale patches in the finished shirt. Those spots were dry when the dye went on. Keep the bundle damp the whole time, and after applying, run warm water over the outside of the bag and gently knead it so dye redistributes.
The colors look brown or murky. You layered complementary colors on top of each other. Rinse and start over, and this time keep colors in separate zones of the shirt.
Dye bled into areas you wanted white. Your folds were loose or your bands were too few. Fold tighter and add bands. Remember that more bands also means narrower, cleaner stripes.
The shirt feels rough and stiff after drying. You let the dye dry on the fabric instead of rinsing it out. Rinsing thoroughly in cold water, then drying flat, prevents the crust that food coloring leaves behind.
Dye transferred to the counter, floor or your clothes. Work on a plastic tablecloth outdoors or in the garage, wear gloves, and keep a damp towel nearby for hands. Any drop that misses the shirt is a stain waiting to happen.
The shirt is dyed but the design is hard to see. The dye needs contrast. On a white shirt, deep folds of one color show up better than pale multi-color combos. Also check that you did not apply so much water that the color diluted past visibility.
You want to skip the vinegar. You can. Lemon juice and apple cider vinegar substitute at the same 1:1 ratio, and soda ash works as an alkaline alternative. You will trade some saturation for the convenience, so add a few more drops of color to compensate.
Planning a group project, like a birthday party craft with several shirts? Dye budget scales linearly, but time does not. Set up stations, pre-soak everything in one big batch, and bag each shirt separately so one kid is not waiting on the other.
Frequently Asked Questions
Can you really make a tie dye shirt with food coloring?
Yes, and it is one of the easiest ways to teach a kid the craft. Soak the shirt in a 1:1 vinegar and water mix, tie it, dip it in diluted liquid food coloring, then bag it for 6 to 8 hours. The color is softer and less permanent than kit dye, but it lasts through many washes if you wash it alone in cold water.
How long should a food coloring tie dye shirt set before rinsing?
Give it 6 hours minimum and 8 to 12 hours for the strongest result. Keep the sealed bag in a warm spot, since heat and time together are what push the color into the fiber. Many people start in the evening and rinse the next morning. Rushing this step is the most common reason shirts come out patchy.
Does food coloring work on polyester or other synthetic shirts?
Barely. Food coloring is an acid-based dye that bonds well to protein fibers like wool, silk and nylon, and poorly to plant fibers like cotton and linen. Polyester and acrylic take almost nothing, so the shirt comes out looking stained rather than dyed. If you have a synthetic shirt in mind, use a commercial dye made for synthetics instead.
How do I keep food coloring from bleeding outside the design?
Wrap the shirt tightly and use plenty of rubber bands, since the folds are what block the dye. Keep dye cups separate so colors stay clean, and double-bag the shirt during the long set so a leak does not spread. Wash the finished shirt alone in cold water for the first three to five washes.
Is a food coloring tie dye shirt safe to wear after it dries?
Yes. Once the shirt has been rinsed until the water runs clear and dried, the dye is locked into the fiber and is just as safe as the food coloring it started as. Rinse it thoroughly, since any dye still sitting on the surface can transfer to skin or furniture. Note that the finished color will still fade over time.
Can I use food coloring on a shirt that is not white?
Technically yes, but expect mixed results. Food coloring mixes with the existing color, and red dye on a blue shirt turns a muddy purple that you cannot undo or rinse out. A dark or patterned shirt also hides pale patches, so you lose your main quality check. White or bleached fabric is the reliable choice if you want the result you pictured.
Conclusion
Start with a clean white shirt, cover your work surface, and mix 1 cup of vinegar with 1 cup of water for the pre-soak. While it sits, mix one color in a half cup of warm water using 10 to 15 drops, then try the spiral pattern first because it is the easiest fold and it shows color well.
Once that shirt dries, move on to stripes or crumple. Same dye, same vinegar, more fun.